How to: Perform a Mail Merge
- 7 minutes to read
This tutorial describes how to perform a mail merge in RichEditControl. The mail merge provides the capability to use the text retrieved from a data source for filling in the fields in a document template. This feature is useful for letters, catalogs, mailing labels and for personalizing any kind of document.
To perform a mail merge follow the steps below.
Step 1. Provide the Data Source
To perform a mail merge, you need a template and a data source. The template is a document containing fields (placeholders for the information that will be merged). The data source contains data that will be merged into the fields in the document template to create the merged documents. The data source can be any object that exposes the IList interface, such as a ArrayList or the DataTable. So, you can create a mail merge data source at runtime with ease or retrieve data from an external database via corresponding data adapters.
In this tutorial, we will use the Employees.xml file as the mail merge data source. To connect the RichEditControl to the data source follow the steps below.
- Open the WPF application with RichEditControl, which was created in the Lesson 3 of the current Getting Started section.
- Add a new folder under the Data name to the directory of your project and copy the Employees.xml file to the newly created folder. You can find this file in the Data folder of the sample project, which is available online in the DevExpress Code Central database at http://www.devexpress.com/example=E2593.
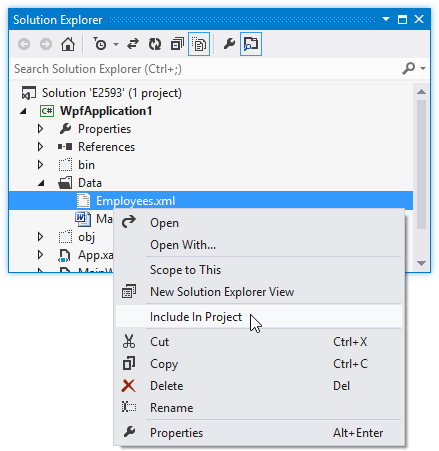
Include the Employees.xml file into the project:
Note
If the Employees.xml is not displayed in the Solution Explorer, select Show All Files from the Project menu or click Show All Files
 on the Solution Explorer toolbar.
- In the Properties window set the Build Action property of the included Employees.xml file to Embedded Resource.
To load data from the Employees.xml file into the Employee object, use the following code.
using System; using System.Windows; using System.Collections.Generic; using System.Xml.Serialization; // ... public class Employee { public int EmployeeID { get; set; } public string LastName { get; set; } public string FirstName { get; set; } public string TitleOfCourtesy { get; set; } public DateTime BirthDate { get; set; } public DateTime HireDate { get; set; } public string Address { get; set; } public string HomePhone { get; set; } } [XmlRoot("Employees")] public class Employees : List<Employee> { public static object DataSource { get { XmlSerializer s = new XmlSerializer(typeof(Employees)); return s.Deserialize(typeof(Employees).Assembly. GetManifestResourceStream(typeof(Employees).Namespace + ".Data.Employees.xml")); } } }The Employee class members define merge fields, which will be accessed in RichEditControl.
Subscribe to the Loaded event for RichEditControl:
<dxre:RichEditControl Name="richEditControl1"
                      HorizontalAlignment="Stretch" VerticalAlignment="Stretch"
                      BarManager="{Binding ElementName=barManager1, Mode=OneTime}"
                      Loaded="richEditControl1_Loaded"/>
To connect the RichEditControl to the data source, use the RichEditMailMergeOptions.DataSource property in the Loaded event handler of RichEditControl. This property is accessed via the RichEditControlOptionsBase.MailMerge property of the object returned by the RichEditControl.Options property.
Step 2. Create a Template for Mail Merge
Now you need to create a template for a mail merge. The template is an RTF document that can be created by any program supporting mail merge (for example, Microsoft® Word®). In this tutorial, RichEditControl will be used for creating a template.
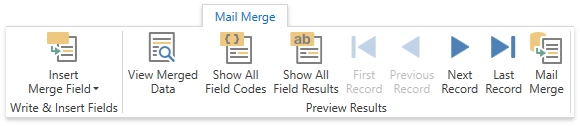
First, provide your application with the interface elements, which will allow end-users to use the mail merge. Since the application already provides the Ribbon interface, add the Mail Merge Ribbon page using the approach described in Lesson 3.
After this you can create a template for mail merge, e.g. invitation mail. The simplest way to do this is described below.
- Run the application.
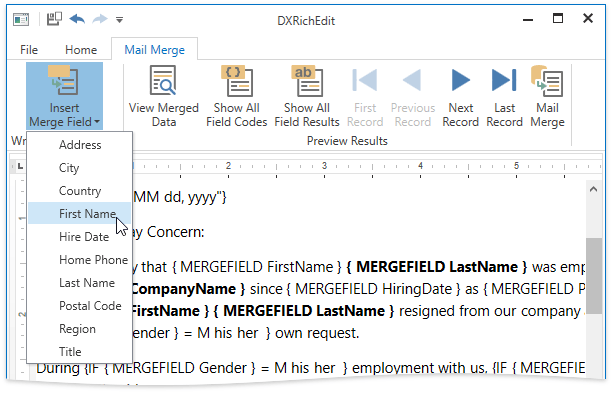
To create a template type the mail content and insert merge fields into a new document (to create a new document in RichEditControl, use the New button of the File Ribbon page). Select required fields from the drop-down list that is shown when clicking the Insert Merge Field button. The field is inserted at the cursor position.
- Save the document under the MailMerge.rtf name to the Data folder.
The Mail Merge tab also provides a number of buttons to preview results. The Show All Field Codes button displays field codes for all fields in the document, the Show All Field Results displays field placeholders if the View Merged Data button is switched off. If this button is switched on (the corresponding property RichEditMailMergeOptions.ViewMergedData is true), the current record of the data source is displayed in place of the field.
The merge field code looks like the following.
{MERGEFIELD “field name“ [* MERGEFORMAT]
The optional * MERGEFORMAT switch, which you can add manually, retains formatting applied to the field.
Note
The default Mailings tab can be used to insert the merge fields. To insert other fields, such as DATE or the conditional field IF, use the FieldCollection.Create method of the document’s collection of fields. For more information on the document fields, see the Field Codes article.
Step 3. Complete the Merge
To finalize the mail merge process, the current document should be merged and the result should be sent to the specified document. In the current example, this can be done via the Mail Merge button. A part of the merged document is represented below.

If you want to complete the merge programmatically (for example, to automate the mail merge process), you can use the Document.MailMerge method of the current Document and specify the target document, which can be another RichEditControl’s Document, a stream or a file. For example:
richEditControl1.Document.MailMerge(@"C:\MailMerge\result.rtf",
    DevExpress.XtraRichEdit.DocumentFormat.Rtf);
Note
To copy all styles contained in the template to the merged document, set the MailMergeOptions.CopyTemplateStyles property to true.