Add DevExpress Blazor Components to an Existing App
- 3 minutes to read
The DevExpress Template Kit is the fastest way to create new Blazor apps with DevExpress UI. However, the Template Kit cannot integrate DevExpress components into an existing Blazor project. This help topic explains how to install packages, register services and static resources, and add a DevExpress Blazor component to your app.
Create a Blank Blazor App
This tutorial uses the default JetBrains Rider Blazor Web App template as the starting project. You can use your own Blazor project and skip to the next section.
- Open Rider and click New Solution.
- Select Web project type.
Configure the project based on the Blazor Web App template. In this tutorial, we use an empty Blazor Server web application:
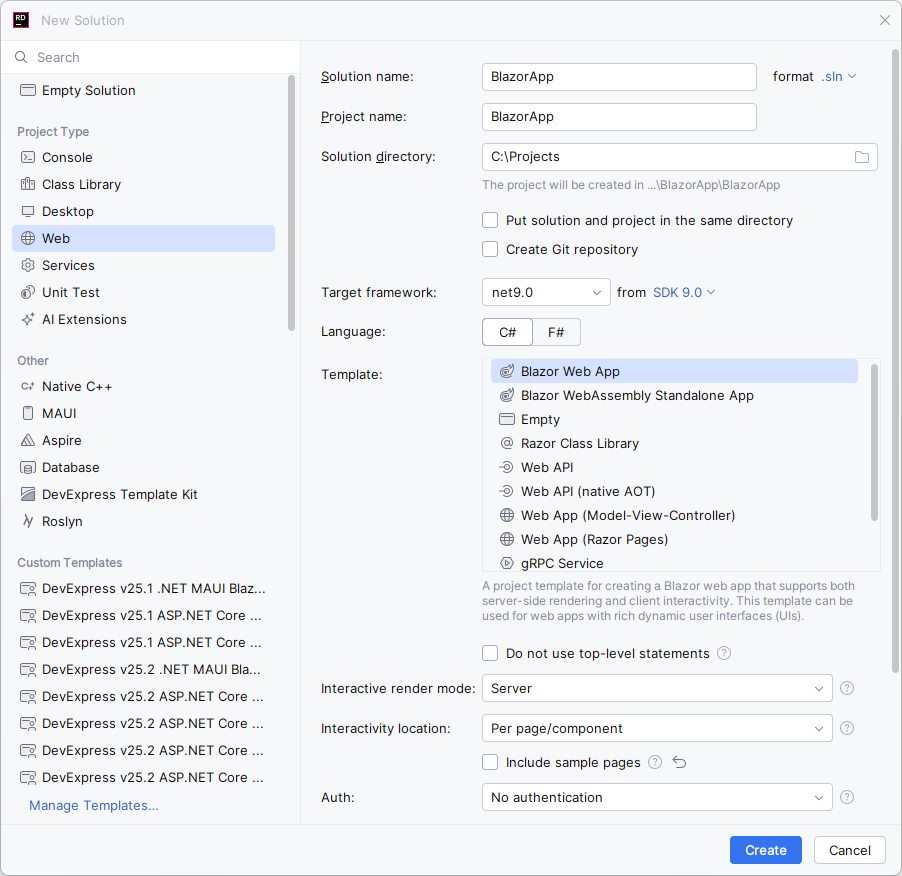
- Specify the solution name and directory.
- Select C# programming language.
- Select Blazor Web App template.
- Clear Include Sample Pages option.
Click the Create button.
Add DevExpress Blazor Package
- Register the DevExpress NuGet feed.
- Right-click the solution and select Manage NuGet Packages in the context menu.
Select the DevExpress NuGet feed.
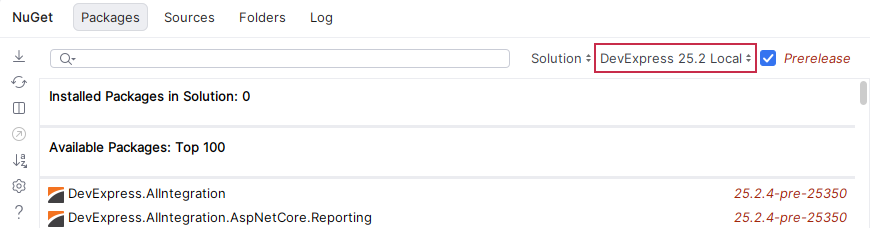
Search for
DevExpress.Blazor.- Install DevExpress.Blazor package.
Register DevExpress Blazor Resources
Register internal DevExpress Blazor services in the application’s startup file (Program.cs).
using BlazorApp.Components;

var builder = WebApplication.CreateBuilder(args);
builder.Services.AddRazorComponents()
    .AddInteractiveServerComponents();
builder.Services.AddDevExpressBlazor();
var app = builder.Build();
/* ... */
app.Run();
Register the
DevExpress.Blazornamespace in the Components/_Imports.razor file:@using System.Net.Http @using System.Net.Http.Json @using Microsoft.AspNetCore.Components.Forms @using Microsoft.AspNetCore.Components.Routing @using Microsoft.AspNetCore.Components.Web @using static Microsoft.AspNetCore.Components.Web.RenderMode @using Microsoft.AspNetCore.Components.Web.Virtualization @using Microsoft.JSInterop @using BlazorApp @using BlazorApp.Components @using DevExpress.BlazorApply the application-wide DevExpress Blazor theme and add client scripts to the Components/App.razor file.
<!DOCTYPE html>
<html lang="en">
<head>
    <meta charset="utf-8"/>
    <meta name="viewport" content="width=device-width, initial-scale=1.0"/>
    <base href="/"/>
    @DxResourceManager.RegisterTheme(Themes.Fluent)
    @DxResourceManager.RegisterScripts()
    <link rel="stylesheet" href="@Assets["app.css"]"/>
    <link rel="stylesheet" href="@Assets["BlazorApp.styles.css"]"/>
    <ImportMap/>
    <HeadOutlet/>
</head>
<body>
<Routes/>
<script src="_framework/blazor.web.js"></script>
</body>
</html>
Note
In a Blazor WebAssembly app, register the DevExpress Blazor theme in the
HeadContentblock ofApp.razor:<HeadContent> @DxResourceManager.RegisterTheme(Themes.Fluent) </HeadContent>
Add a DevExpress Blazor Component to the App
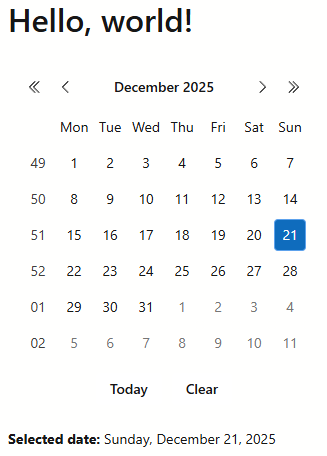
To get acquainted with the project structure, add a simple DevExpress Blazor component (Calendar) to the application’s home page and see it in action:
- Open the Components/Pages/Home.razor file.
Most DevExpress Blazor components do not support static render mode. Enable interactivity with the following directive:
@rendermode InteractiveServerTip
In a Blazor Web App that uses client-side interactivity, use the following directive instead:
@rendermode InteractiveWebAssemblyIn a standalone Blazor WebAssembly App, omit the
@rendermodedirective because components are interactive by default.Add the DxCalendar component to the page. Bind the component to the
SelectedDatevariable to test interactivity.<DxCalendar @bind-SelectedDate="@SelectedDate" /> <p><b>Selected date:</b> @SelectedDate.ToLongDateString()</p> @code { DateTime SelectedDate { get; set; } = DateTime.Now; }Press F5 to run your application.
Full code:
@page "/"
@rendermode InteractiveServer
<PageTitle>Home</PageTitle>
<h1>Hello, world!</h1>
<DxCalendar @bind-SelectedDate="@SelectedDate" />

<p><b>Selected date:</b> @SelectedDate.ToLongDateString()</p>

@code {
    DateTime SelectedDate { get; set; } = DateTime.Now;
}