Install UI Components & Templates
- 3 minutes to read
Install DevExpress Blazor components and templates to create and run Blazor projects in Visual Studio.
Install DevExpress Blazor Components
Choose one of the following approaches that best matches your workflow:
Unified Component Installer
The Unified Component Installer is the recommended installation option for Visual Studio. It is an all‑in‑one setup that fully configures your Windows environment for Blazor development. After you run it, no additional downloads, installations, or manual configuration are required. The Installer:
- Sets up a local DevExpress NuGet feed and configures package sources.
- Adds DevExpress Template Kit to Visual Studio.
- Registers DevExpress extensions and design‑time assets.
- Installs offline help and demo applications.
To install DevExpress Blazor components using the Unified Component Installer:
- Download and run the Unified Component Installer executable.
- Enter your DevExpress username (email) and password.
Select DevExpress products to install. At minimum, include Blazor Controls and Demo Applications.
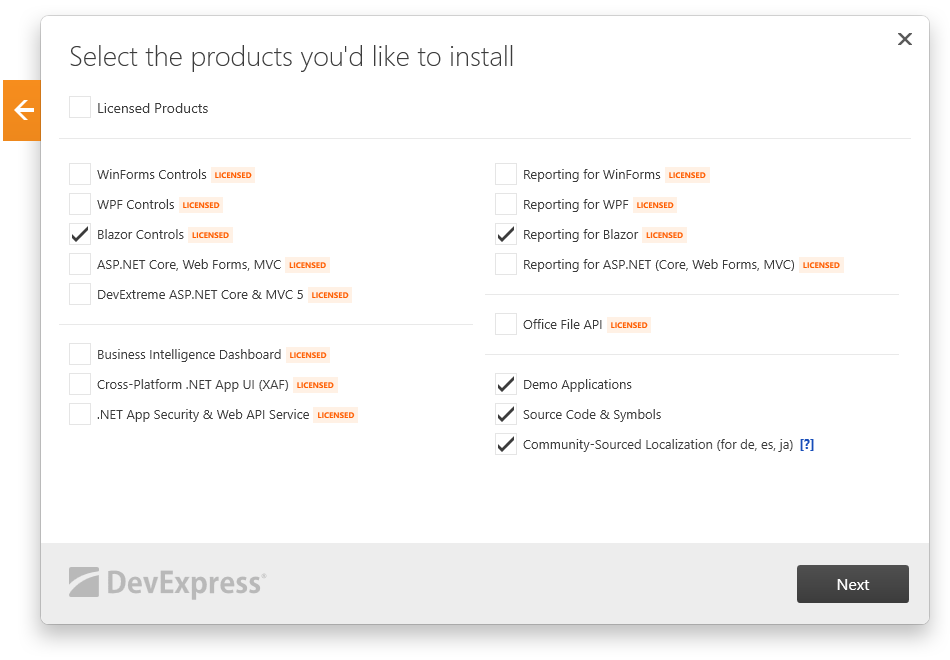
Choose the installation path and click the Accept & Continue button.
Refer to the following help topic for additional information: Run the Installation Wizard.
DevExpress.com Online NuGet Feed
Choose this option for project‑level dependency management. It keeps DevExpress packages in your solution, ensures consistent restore on any machine that opens the project, and enables updates through the Visual Studio NuGet Package Manager.
Note
DevExpress Template Kit, demos, and tools are not installed from the NuGet feed.
- Obtain DevExpress NuGet feed credentials.
Register the online NuGet feed in Visual Studio:
Open Visual Studio options and navigate to NuGet Package Manager → Package Sources.
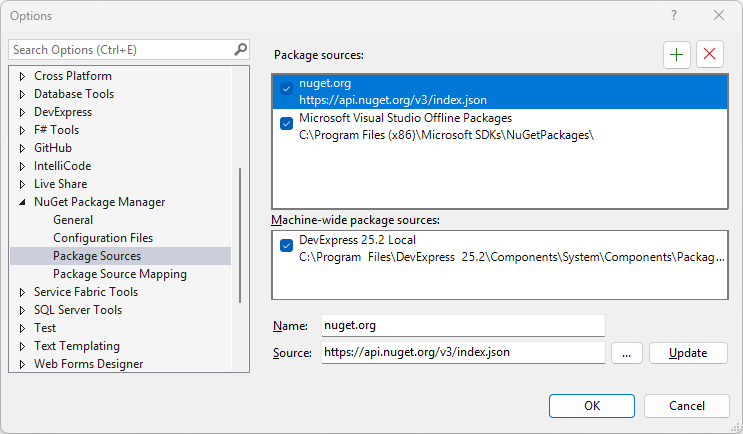
Click the plus button and configure the online DevExpress feed as the package source:
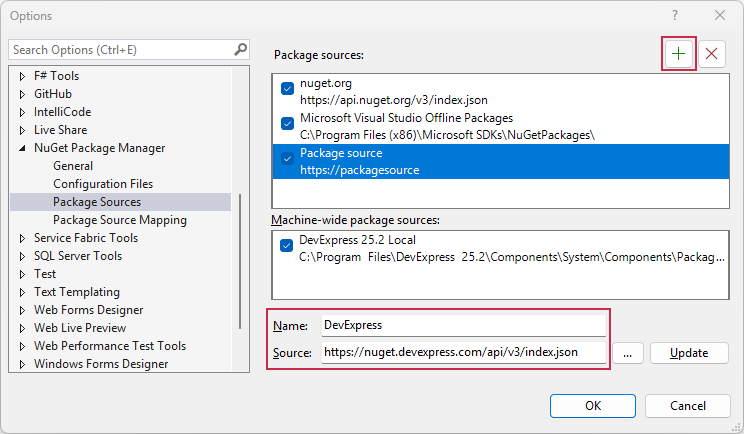
- If you use an authorization key, use
https://nuget.devexpress.com/api/v3/index.jsonas the package source. - If you use a NuGet Feed URL, specify it as the package source. The feed URL includes your authorization key:
https://nuget.devexpress.com/{your-feed-authorization-key}/api/v3/index.json
- If you use an authorization key, use
Click the Update button to refresh the feed information.
Verify that the
nuget.orgpackage source is also selected.- Click the OK button to save the changes.
Note
If you have registered the DevExpress NuGet feed with an authorization key, the login form is displayed when you invoke the NuGet Package Manager for the first time. Enter your credentials as follows:
- User name:
DevExpress - Password: your authorization key
Refer to the following help topic for additional information: Install NuGet Packages in IDE.
Install DevExpress Template Kit
The DevExpress Template Kit is the fastest way to create DevExpress Blazor projects in Visual Studio. It adds ready-made project templates with recommended settings and preconfigured DevExpress package references so you can start development immediately.
If you installed DevExpress Blazor components with the Unified Component Installer, the Template Kit is already available in Visual Studio project templates.

Otherwise, you can download the DevExpress Template Kit from the Visual Studio Marketplace or install it as an extension in the Visual Studio IDE:
- In Visual Studio, select Extensions → Manage Extensions….
Search for “DevExpress Template Kit for Visual Studio”.
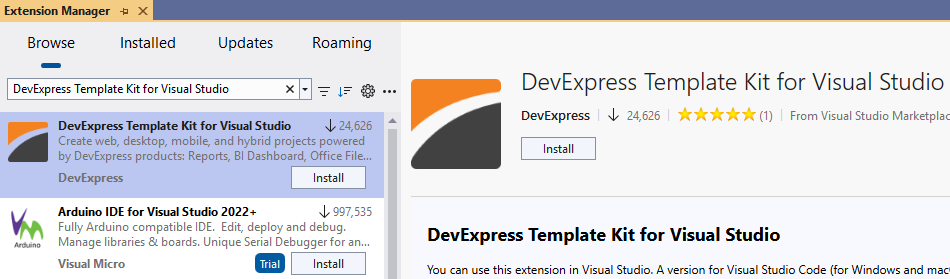
Click the Install button.