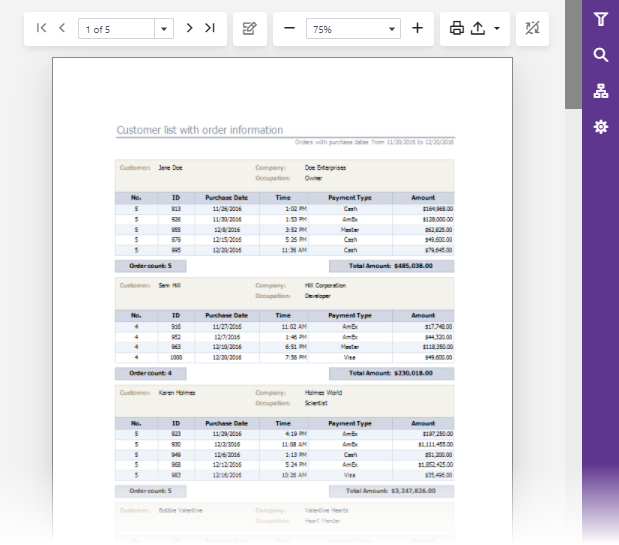
DxReportViewer Class
A document viewer component for reports.
Namespace: DevExpress.Blazor.Reporting
Assembly: DevExpress.Blazor.Reporting.v25.2.Viewer.dll
NuGet Package: DevExpress.Blazor.Reporting.Viewer
Declaration
Remarks
The DevExpress Report Viewer for Blazor (<DxReportViewer>) allows you to preview, print, and export reports.

Add the Report Viewer to a Project
Follow the steps below to add the Report Viewer component to an application:
- Use a DevExpress Project Template to create a new Blazor application. If you use a Microsoft project template or already have a Blazor project, configure your project to incorporate DevExpress Blazor components.
- Install the NuGet
DevExpress.Blazor.Reporting.Viewerpackage. - Add the
@using DevExpress.Blazor.Reportingdirective to the _Imports.razor page. Add the following code to the application startup file:
//...
var builder = WebApplication.CreateBuilder(args);

builder.Services.AddDevExpressServerSideBlazorReportViewer();

var app = builder.Build();
Add the
<DxReportViewer>…</DxReportViewer>markup to a Razor page.Enable interactivity for DevExpress components:
- Make sure the required interactive services are registered in the Program.cs file.
- Add the corresponding render mode attribute to a component’s page.
@page "/Viewer"
@rendermode InteractiveServer

@using DevExpress.Blazor.Reporting

<h3>Report Viewer</h3>

<DxReportViewer @ref="reportViewer">
</DxReportViewer>

@code {
    DxReportViewer? reportViewer;
}
Link stylesheets to the page:
<!-- For DevExpress Classic themes. -->
<link rel="stylesheet" href="_content/DevExpress.Blazor.Reporting.Viewer/css/dx-blazor-reporting-components.bs5.css">

<!-- For DevExpress Fluent themes. -->
<link rel="stylesheet" href="_content/DevExpress.Blazor.Reporting.Viewer/css/dx-blazor-reporting-components.fluent.css">
For more information on themes for DevExpress Blazor components, refer to the following topic: Themes.
Specify a report to open.
- Customize the Report Viewer’s elements (refer to the sections below).
For more information on how to add a Report Viewer component to a Blazor application, refer to the following topics:
- Add a Report Viewer to a Project (Blazor Server Application Created with a Visual Studio Template)
- Add a Report Viewer to a Project (Blazor Application Created with .NET CLI)
Specify a Report to Open
Use the Report property:
@using DevExpress.Blazor.Reporting
@using DevExpress.XtraReports;

<DxReportViewer @ref="reportViewer" Report="@Report">
</DxReportViewer>

@code {
    DxReportViewer reportViewer { get; set; }
    XtraReport Report = new TestReport();
}
Note
A report may contain the XRSubreport control with the report source specified by name (a string). In this situation, you should implement and register the IReportProvider or IReportProviderAsync service that converts a report name to a report instance.
Customize the Toolbar
Handle the OnCustomizeToolbar event to add a new toolbar item or hide the existing item. The following code adds a new toolbar button:
@page "/toolbar/"

@using DevExpress.Blazor.Reporting
@using DevExpress.XtraReports.UI
@using BlazorCustomization.PredefinedReports
@using DevExpress.Blazor.Reporting.Models

@inject IJSRuntime JsRuntime

<div @ref="viewerComponent" style="width: 100%; height: 1000px;">
    <DxReportViewer @ref="reportViewer"
                    OnCustomizeToolbar="OnCustomizeToolbar"
                    Report="Report" />
</div>

@code {
    DxReportViewer reportViewer;
    XtraReport Report = new TableReport();
    private ElementReference viewerComponent;

    void OnCustomizeToolbar(ToolbarModel toolbarModel)
    {
        toolbarModel.AllItems.Add(new ToolbarItem()
        {
            // Use Open Iconic's icon.
            IconCssClass = "oi oi-command",
            Text = "Full Screen",
            AdaptiveText = "Full Screen",
            AdaptivePriority = 1,
            Click = async (args) =>
            {
                await JsRuntime.InvokeVoidAsync("customApi.requestFullscreen", viewerComponent);
            }
        });
    }

}
The customized toolbar is shown in the image below.
