Report Layout in Razor Markup
- 4 minutes to read
Overview
Traditional methods allow you to edit the report layout in the Visual Report Designer or use the Reporting API to modify the report. DevExpress Blazor Reporting enables you to use markup language to include the report layout in a Razor page and preview the report in the Report Viewer component.
This technique assumes that the report is a Blazor component whose layout is defined in the Razor markup. When the page is prerendered on the server, the Blazor Report component (XReport) is transformed into an XtraReport instance which, in turn, is wrapped into the DxReportViewer component automatically, and added to the Blazor render tree.
Prerequisites
To develop an application that uses the report definition in the Razor markup technique, you need the following:
- .NET 5.0 or higher
- Visual Studio 2019 version 16.4+
- DevExpress.AspNetCore.Reporting NuGet package v21.2.4 or higher
- DevExpress.Blazor.Reporting.Viewer NuGet package v21.2.4 or higher
- DevExpress.XtraReports.RazorDefinitions NuGet package v1.0 or higher
Get Started
Create a Blazor reporting application with the Report Viewer (Native) as described in one of the following help topics:
- Create Blazor Report Viewer Application from DevExpress Template
- Create Blazor Report Viewer Application from Microsoft Template .NET 5
- Create Blazor Report Viewer Application Using CLI (.NET 5.0)
- Create Blazor Report Viewer Application Using CLI (.NET 6.0)
Follows the steps described in the topic until the section that instructs you to add a report to an application.
Install the following NuGet packages from the NuGet Gallery:
In this example we use the SQLite
nwind.dbdatabase that ships with the DevExpress installation. The default path to the database file is C:\Users\Public\Documents\DevExpress Demos 21.2\Components\Data\nwind.db. Copy the database to the Data folder and set the “Copy to output directory” property to Copy always.Add a connection string to the appsettings.json file:
"connectionStrings": {
    "DefaultConnection": "XpoProvider=SQLite;Data Source=Data/nwind.db"
}
Define a report in the Razor markup. Replace the content of the Viewer.razor file with the following code:
@page "/Viewer"

@using DevExpress.Blazor.Reporting.Designer.Components
@using DevExpress.DataAccess.Sql

<XReport DataSource="CreateDataSource()" DataMember="Employees" Margins="XMargins.From(100, 100, 105, 75)" ViewMode=ViewMode.Preview>
    <Bands>
        <XBandReportHeader Name="ReportHeader1" Height=50 FlexStyle="FlexStyle1">
            <XControlLabel Name="Label1" Text="Employees" Width="240" Style="Style1"></XControlLabel>
        </XBandReportHeader>
        <XBandDetail Name="Detail1" Height="30">
            <XControlLabel Name="Label2" X="10" Expression="[FirstName]" Width="120"></XControlLabel>
            <XControlLabel Name="Label3" Expression="[LastName]" X="125"></XControlLabel>
        </XBandDetail>
        <XBandBottomMargin Height="100">
            <XControlPageInfo PageInfo="XPageInfo.DateTime" Width="120"></XControlPageInfo>
            <XControlPageInfo X="325" FormatString="Page {0} of {1}"></XControlPageInfo>
        </XBandBottomMargin>
    </Bands>
    <Styles>
        <XStyle Name="Style1" TextAlignment="XTextAlignment.MiddleCenter" BackColor="XColor.From(109, 140, 89)" ForeColor="XColor.White">
            <XFont Name="@XFontNames.Tahoma" Size="20.25f"></XFont>
        </XStyle>
        <XFlexStyle Name="FlexStyle1" Direction="FlexDirection.Row" Justify="FlexJustify.Start" Align="FlexAlign.Start">
        </XFlexStyle>
    </Styles>
</XReport>

@code {
    object CreateDataSource() {
        var query = SelectQueryFluentBuilder.AddTable("Employees")
            .SelectAllColumns()
            .Build("Employees");

        var dataSource = new DevExpress.DataAccess.Sql.SqlDataSource("NWindConnectionString");
        dataSource.Queries.Add(query);
        return dataSource;
    }
}
Run the application.
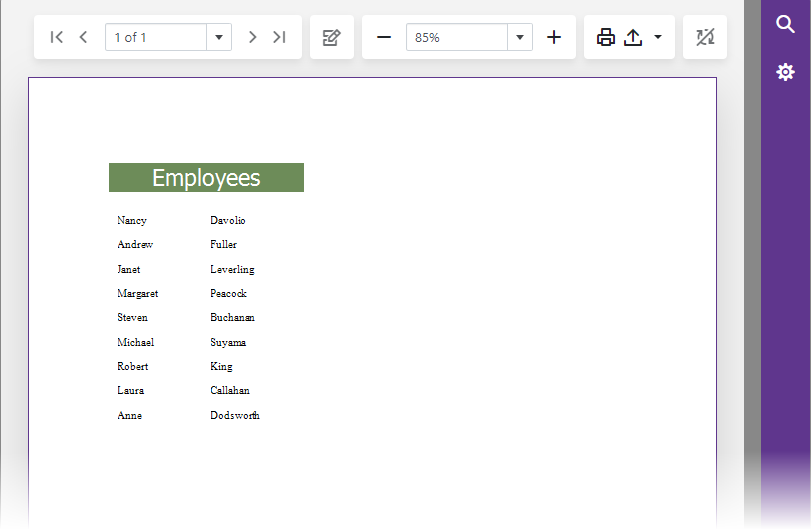
The report is bound to the Employees table of the Northwind database. The resulting page appears as follows:
Markup Elements
Markup tags are named after related bands and reporting controls: the “X” prefix is added to the band type name and the “XControl” prefix replaces the “XR” prefix in the report control type name.
Since Web developers have their own techniques for positioning elements, we offer two types of positioning - flex and absolute. You can use block positioning for report elements within the scope of a report. This technique works well regardless of the browser type, because the position of the elements will be the same in any browser.
Customization
The entire Visual Studio Report Designer functionality is quite extensive, and we do not attempt to implement all the features with the Razor markup syntax because we do not want to duplicate XML layout format. We’ll stick to the simplified version that contains only the most requested features. If you need something specific, you can use the Customize method:
<XReport>
    <Bands>
        <XBandDetail>
            <XControlLabel Customize="x=>CustomizeLabel(x)"></XControlLabel>
        </XBandDetail>
    </Bands>
</XReport>

@code {
    XRLabel CustomizeLabel(XRLabel label) {
        label.KeepTogether = true;
        return label;
    }
}
If you have a custom control, or if you wish to extend the control properties, you can make a descendant and implement the desired parameters. The following code samples show how to set the KeepTogether property in markup.
Create a XControlLabel class descendant:
public class XControlLabelEx : XControlLabel {
    [Parameter] public bool KeepTogether { get; set; } = false;
    protected override XRLabel CreateControl() {
        var label = base.CreateControl();
        label.KeepTogether = KeepTogether;
        return label;
    }
}
Use the new property in Razor markup:
<XReport>
    <Bands>
        <XBandDetail>
            <XControlLabelEx KeepTogether="true"></XControlLabelEx>
        </XBandDetail>
    </Bands>
</XReport>