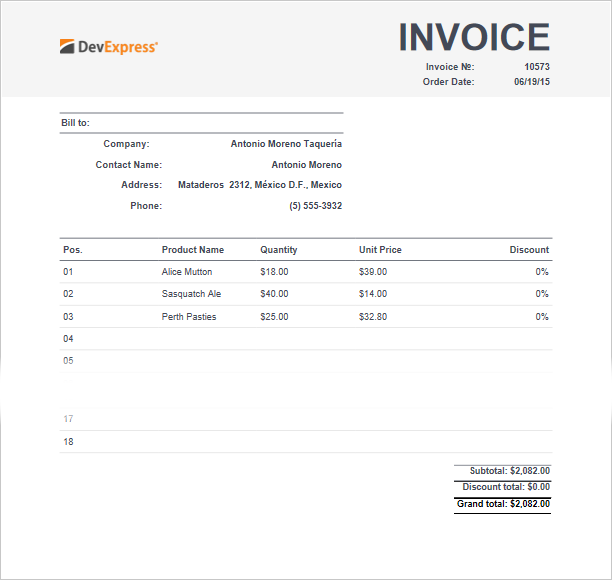
Create an Invoice in the Visual Studio Report Designer
- 9 minutes to read
This tutorial describes how to create a simple invoice report at design time.
Add Data to a Report
Specify a Data Source
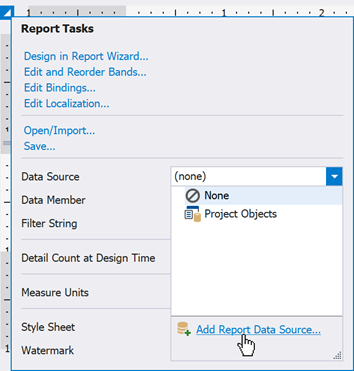
Add a new blank report to your application. Click the report’s smart tag, expand the Data Source property’s drop-down list, and click Add Report Data Source.
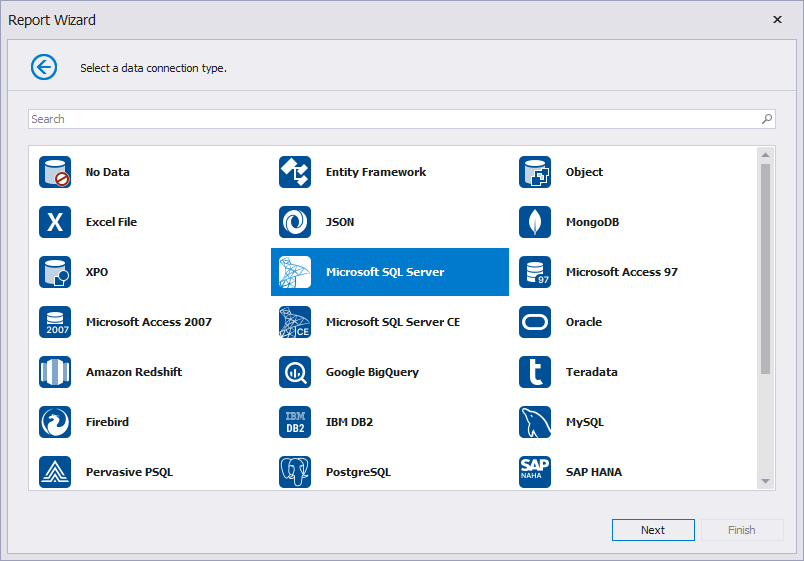
Select the Data Connection Type in the Data Source Wizard and click Next.
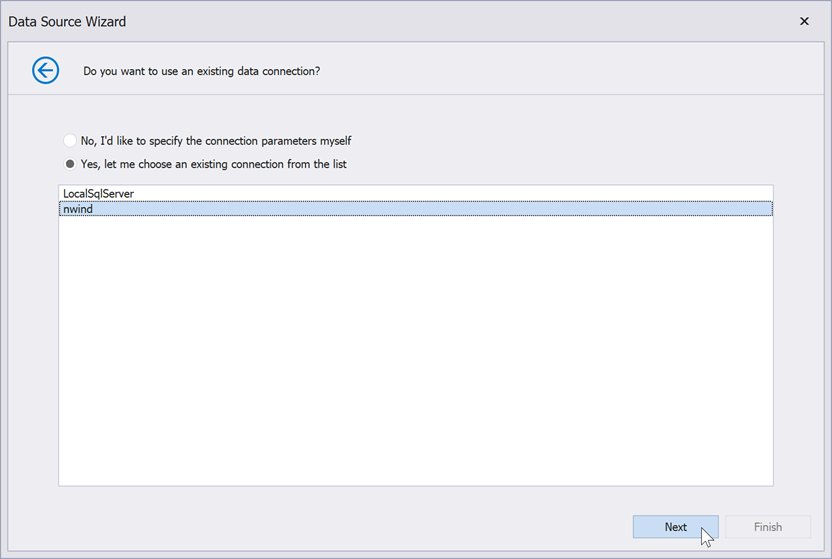
Select an available connection or specify new connection settings. Click Next to continue. This tutorial uses a connection to the sample Northwind database.
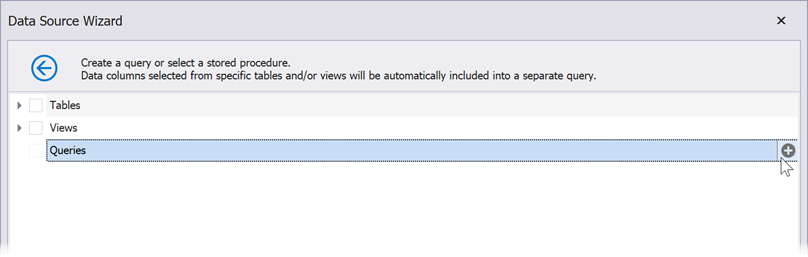
Select Tables, Views, or Stored Procedures
You can obtain data from two different tables to display customer and order data at the same hierarchical level. Click the Queries category’s Add button.
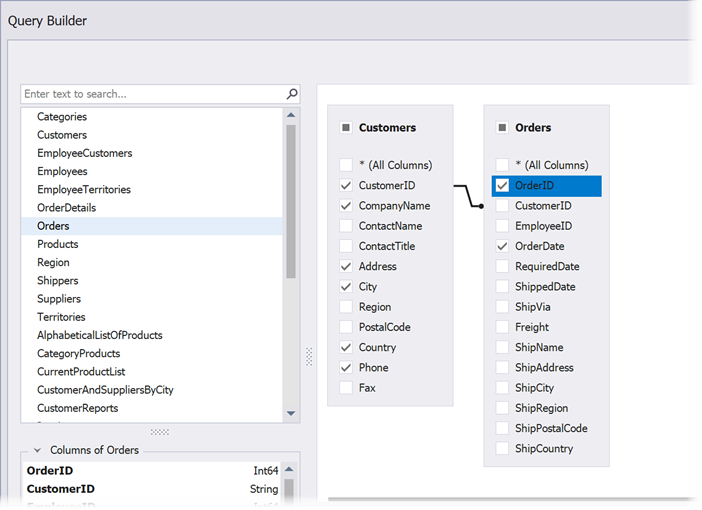
In the invoked Query Builder dialog, add the Customers and Orders tables to a query and join them based on a key column. Click OK to close the Query Builder.
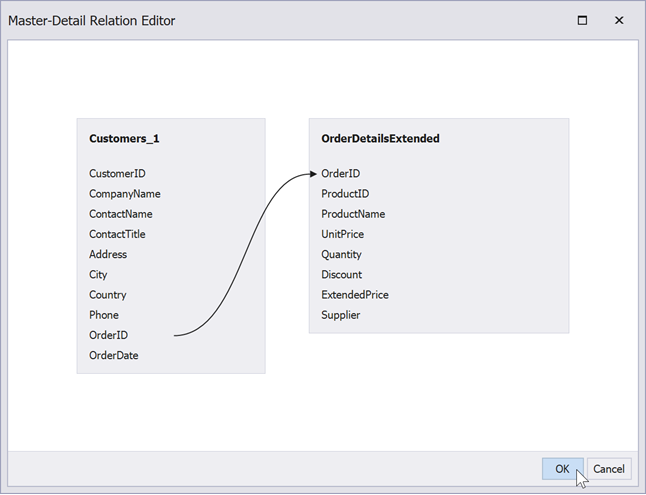
Select the view that contains order details (the OrderDetailsExtended view). Click the Manage Relations button to specify a master-detail relationship between the queries. Drag the key field from one query onto the other query’s key field in the invoked dialog and click OK.
Click Finish to complete the wizard.
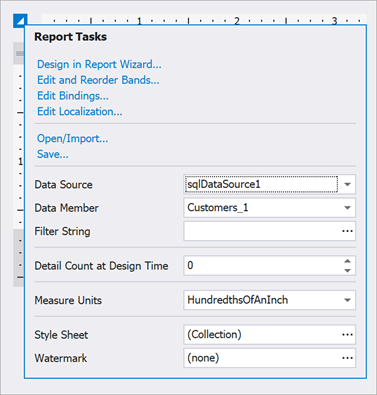
Ensure that the Customers data member is assigned to the report. Click the report’s smart tag and check the Data Source and Data Member properties.
Create the Master Report Layout
Add and Format a Table
Drop the XRTable item from the Toolbox onto the design surface.
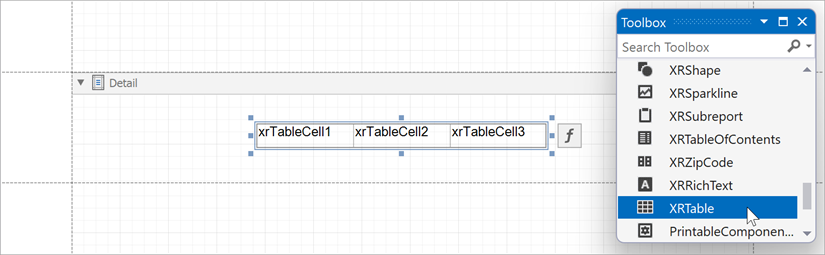
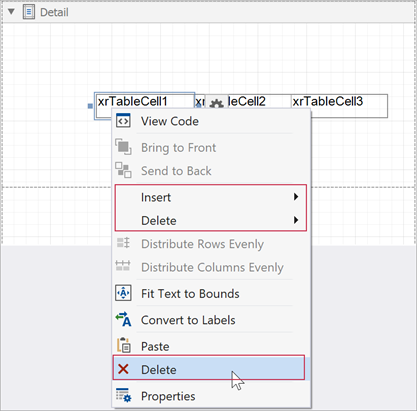
Manage the table’s rows and columns so that it contains the required number of cells. You can use the context menu to insert and delete columns, rows, or individual cells. When you delete a single cell, the nearest left cell spans to the next column.
Drag cell borders to adjust the table size. In this tutorial, the master table has the following parameters:
| Property | Value |
|---|---|
| Location | 65.62, 23.36 |
| Size | 396.92, 145 |
| Left Column Width | 145.5 |
| Right Column Width | 251.42 |
Add Data to the Table
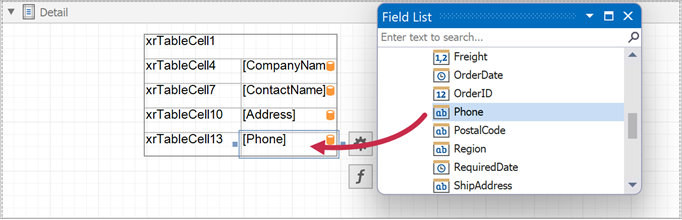
Add the customer’s contact information in the right column. Switch to the Field List and drop data fields onto the column cells.
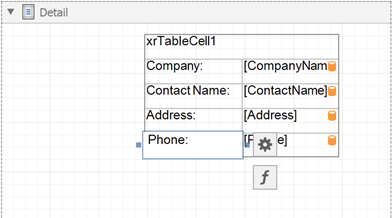
Add captions to the left column. Double-click a cell to open an in-place editor and enter the text.
Create the Detail Report Layout
Add a Detail Band
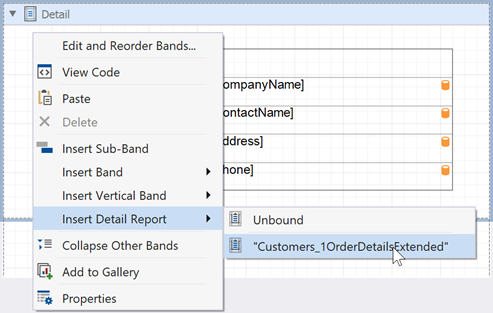
Right-click the design surface and select Insert Detail Report and the query relationship’s name from the context menu.
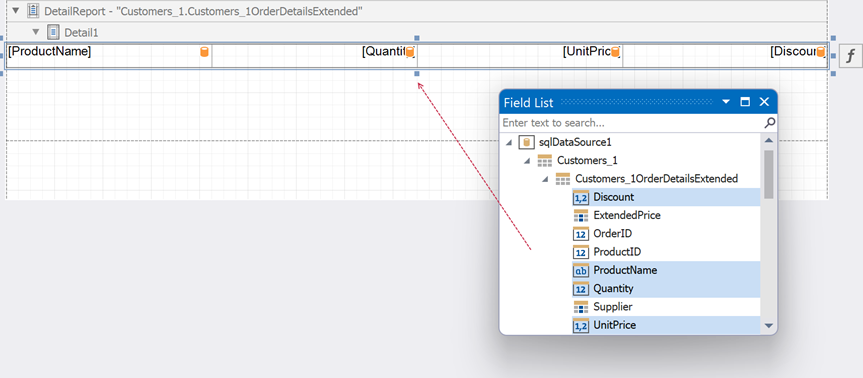
Place order details on the added band. Switch to the Field List and hold CTRL or SHIFT to select multiple fields. Drop the selected fields onto the band to create a table with cells bound to these fields.
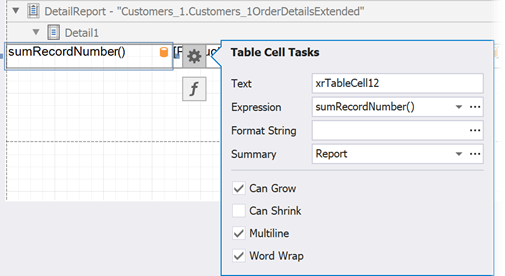
Add a top left cell to display a record number. To do that, right-click the existing top left cell and select Insert | Column to Left in the context menu.
Expand the cell’s smart tag and set the Summary property to Report to display the numbers within an entire detail report.
Drag table borders to adjust the table size and location. In this tutorial, the table has the following parameters:
| Property | Value |
|---|---|
| Location | 80.64, 0 |
| Size | 689.35, 32.29 |
| Padding | 5, 5, 5, 5 |
Add a Group Header with Column Titles
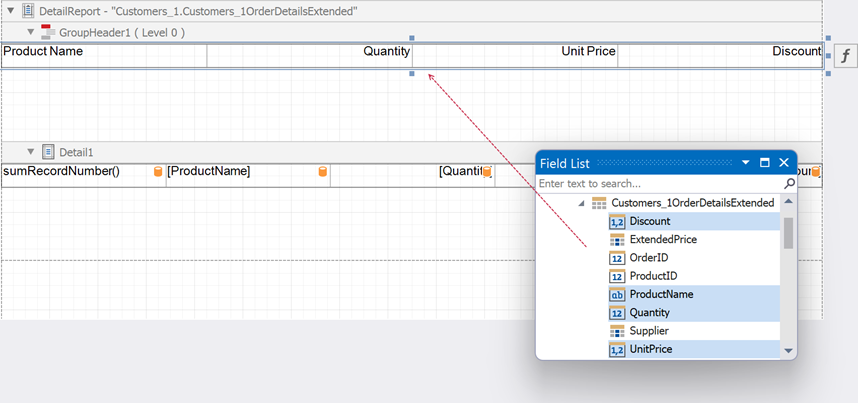
Right-click the detail report and select Insert Band | GroupHeader to add a Group Header band. This band displays column titles.

Switch to the Field List and select the fields for which you want to create column titles. Drag these fields onto the Group Header band with the right mouse button. This creates a table with field names. Add a new cell with a title to the record numbers.
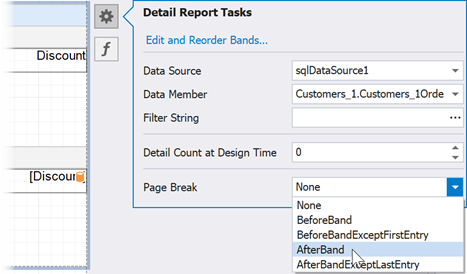
Expand the Detail Report band’s smart tag and set the Page Break property to AfterBand to print each invoice on a separate page.
Drag table borders to adjust the table size and location, and align this table with the table in the Detail band. In this tutorial, the table has the following parameters:
| Property | Value |
|---|---|
| Location | 80.64, 0 |
| Size | 689.35, 31.25 |
| Padding | 5, 5, 5, 5 |
Add a Group Footer with Summary Labels
Right-click the detail report and select Insert Band | GroupFooter to add a Group Footer band.
Drop the XRLabel control onto the added band. Expand the label’s smart tag and click the Summary property’s ellipsis button to invoke the Summary Editor.

In this tutorial, we create three summary labels, one below another, with the following parameters:
| Label | Summary running | Summary function | Argument expression |
|---|---|---|---|
| Subtotal | Report | Sum | [Quantity] * [UnitPrice] |
| Discount total | Report | Sum | [UnitPrice] * [Quantity] * [Discount] |
| Grand total | Report | Sum | [ExtendedPrice] |
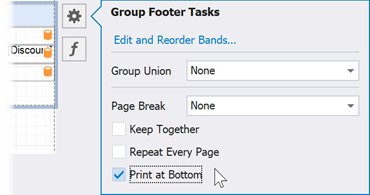
Expand the Group Footer band’s smart tag and enable the PrintAtBottom property to align totals to the page bottom.
Fill Empty Space Between Summary and Records
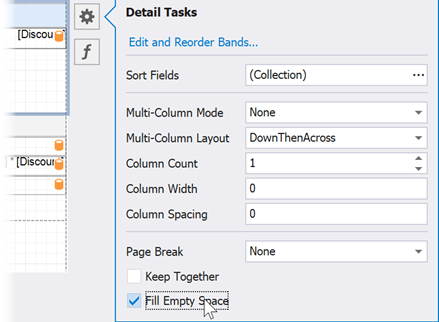
Expand the Detail band’s smart tag and enable the FillEmptySpace property to add empty lines between the Detail band’s data and the summary labels. The FillEmptySpace option becomes available only if the GroupFooterBand.PrintAtBottom property is enabled.
Note
The empty region below the Detail band is populated with copies of the band. These band copies retain the layout and display the cells’ Text property values instead of data. Clear each cell’s Text property to prevent this behavior and display empty lines.
Add an Invoice Header
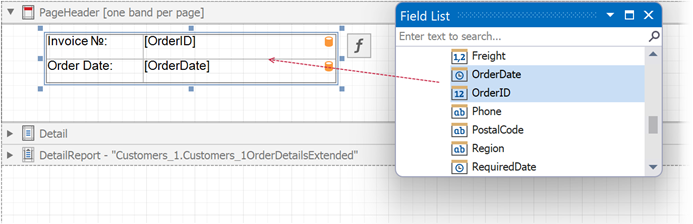
Add a Page Header band to the master report to display the order number and your company’s logo. Right-click the detail report and select Insert Band | Page Header.
Set the Print On property to AllPages to repeat the header on each page of the invoice.
Drop the XRPanel control onto the band to visually outline the header. Drag the panel’s borders to fit the entire Page Header band.
Add a Table with Order Information
Drop the XRTable control from the Toolbox onto the panel, and organize its rows and columns so it contains the required number of cells. Drop the fields from the Field List onto the right column. Add captions to the left column.
Adjust the table parameters as follows:
| Property | Value |
|---|---|
| Location | 608, 48.33 |
| Size | 218.01, 41.67 |
| Column Width | 112.86 |
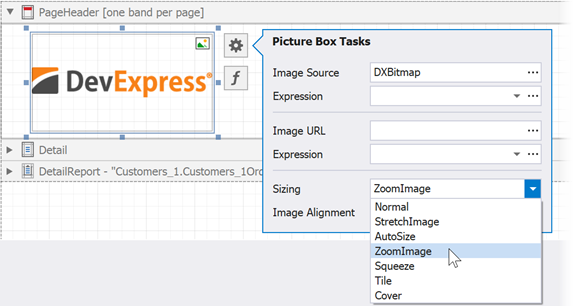
Add a Logo Image
Drop the XRPictureBox control onto the panel to display your company’s logo. Expand the control’s smart tag. Click the Image Source property’s ellipsis button and choose an image file in the invoked Open dialog.
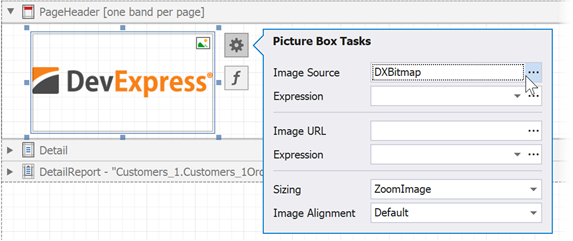
Set the Sizing property to ZoomImage to fit the image to the box.
Format Data
Specify Expressions
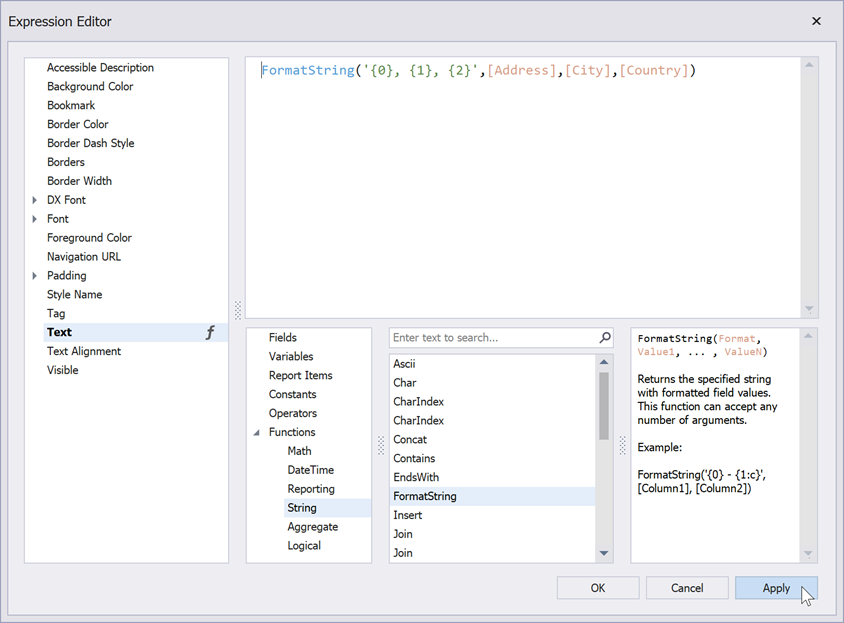
In the Detail band, specify the data format for the address field. Expand the cell’s smart tag and click the Expression property’s ellipsis button.
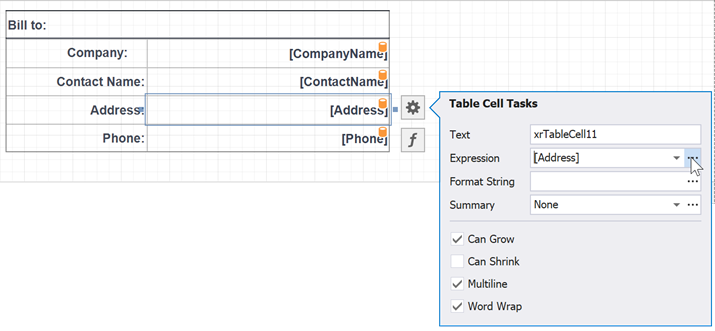
Specify a format string in the invoked Expression Editor and click OK.
Expand the record number cell’s smart tag and specify the SumRecordNumber() expression in the Expression property.
Specify Format Strings
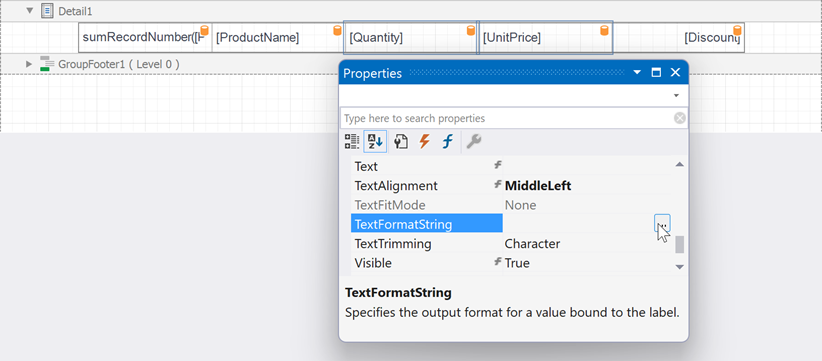
In the Detail Report band, hold CTRL or SHIFT and select cells with price fields. Switch to the Properties window and click the TextFormatString property’s ellipsis button.
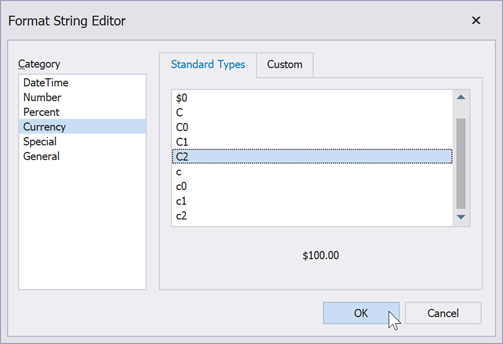
Select the Currency category in the invoked Format String Editor and click the required format.
Specify a date and time format string for the date cell in the invoice header. Expand the cell’s smart tag and set the Format String property to {0:MM/dd/yy}.
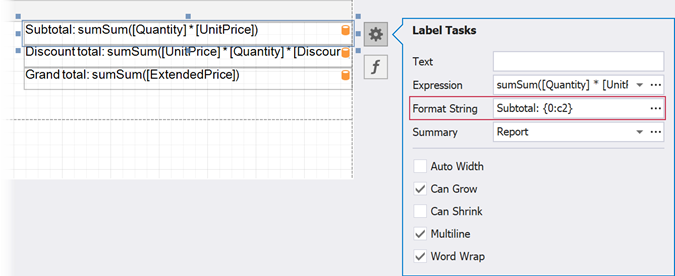
Set the summary labels’ Format String property to [Label Name]: {0:c2} (for example, Subtotal: {0:c2}).
Sort Data
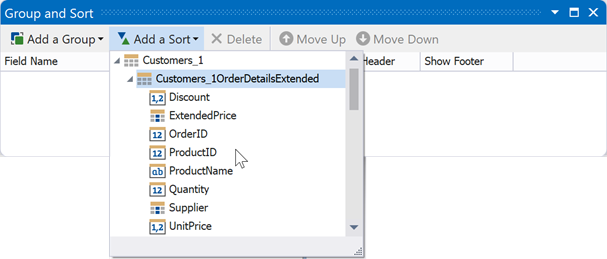
Select the detail report’s Detail band and switch to the Group and Sort panel. Click Add a Sort and select the required field from the drop-down list. Use the Sort Order property to change the sort order.
Customize the Invoice Appearance
Change Individual Parameters for Summary Labels
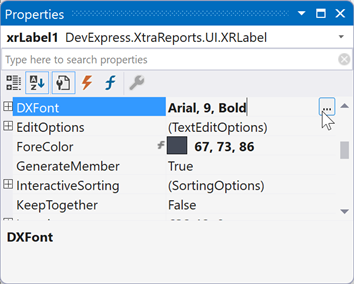
You can specify font parameters for an individual element (for instance, set the Bold property to true) in the Properties window.
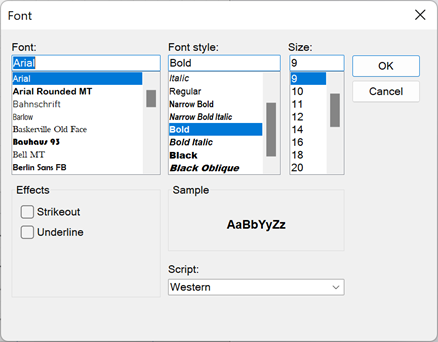
Click the Font property’s ellipsis button to invoke the Font dialog.
This dialog allows you to change multiple font parameters at once.
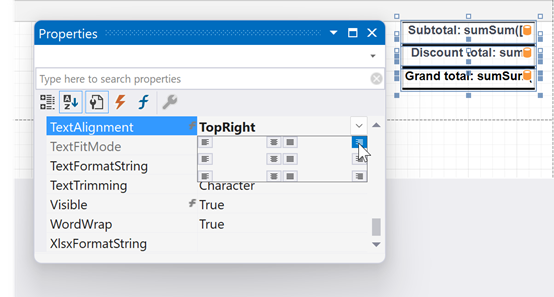
The TextAlignment property allows you to align text within an element. For instance, you can right-align text in the summary labels.
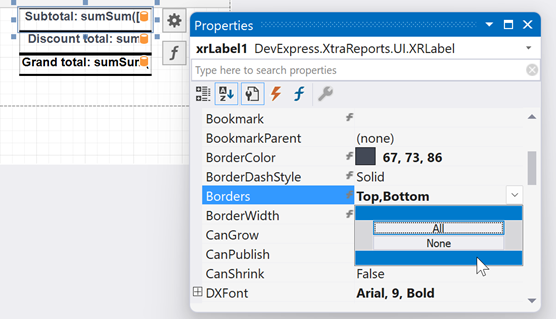
Specify borders for summary labels. Select a label and set its Borders property to Bottom. Specify the BorderColor property to change the border color.
Create a Visual Style
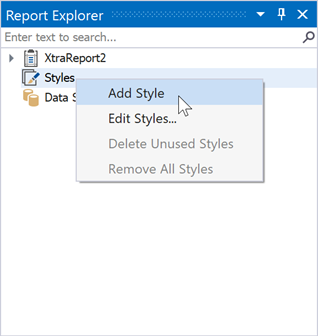
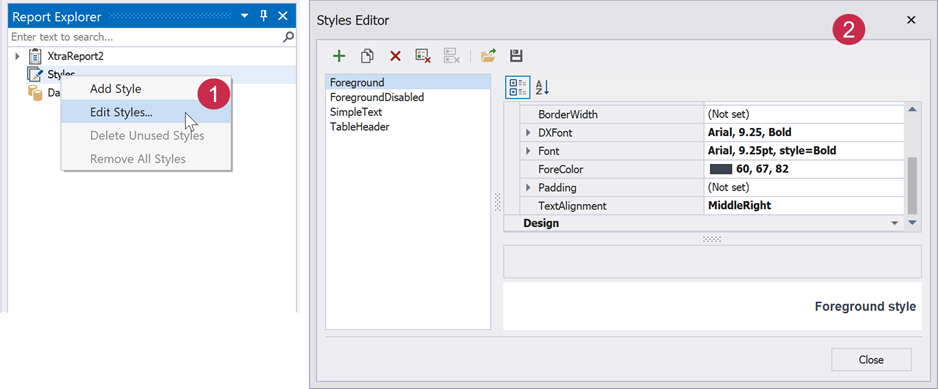
Create a visual style to apply it to multiple report elements. Right-click Styles in the Report Explorer and select Add Style.
Specify the style settings. You can use the Properties window or the Style Editor. To invoke the Style Editor, right-click the required style and select Edit Styles…
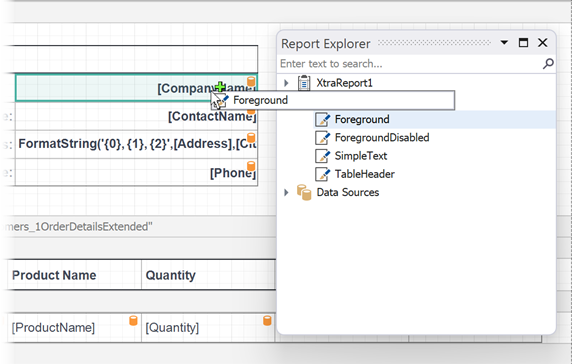
Drag the created style from the Report Explorer onto a report element to apply the style settings to this element.
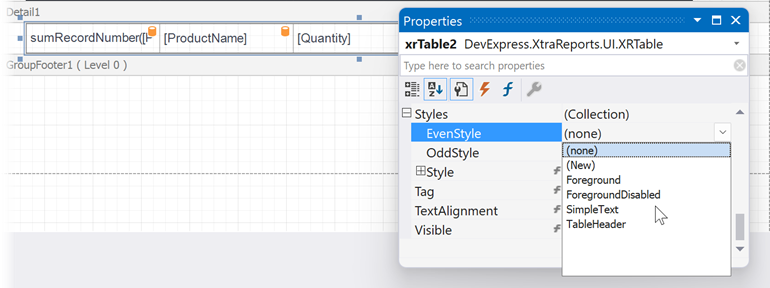
You can differentiate odd and even table rows. Select the table and expand the Styles property in the Properties window. Expand the EvenStyle property’s drop-down list and select New.
In this tutorial, the following styles are applied:
| Parameter | Foreground | ForegroundDisabled | SimpleText | TableHeader |
|---|---|---|---|---|
| Font | Arial, 9.25pt, style=Bold | Arial, 9.5pt, style=Bold | Arial, 9.25pt | Arial, 9.25, Bold |
| ForeColor | 60, 67, 82 | 128, 128, 128 | 67, 73, 86 | 67, 73, 86 |
| Borders | Not Set | Not Set | Bottom | Top,Bottom |
| BorderColor | Not Set | Not Set | 224, 224, 224 | 67, 73, 86 |
| TextAlignment | MiddleRight | MiddleRight | MiddleLeft | MiddleLeft |
Create Other Invoice Types
Refer to the following articles for information on how to create other available invoice types:
- Create an Invoice from Templates in the Visual Studio Report Designer
- Create a Swiss QR Bill
- Create a Report with Cross-Band Content and Populated Empty Space in the VS Report Designer
- Create a Report Merged with PDF in the Visual Studio Report Designer
Create an Invoice in the End-User Report Designer
Tutorials that explain how to create different reports in EUD Report Designers for WinForms and Web are included in the End-User Documentation online help section: