Lesson 1 - Connect to the Images Provider
- 4 minutes to read
This is the first tutorial in the Getting Started series for the WinForms Map control and guides you through the process of creating a simple map application that displays the map.
This tutorial consists of the following steps:
- Step 1. Add a Map Control
- Step 2. Connect to an Images Provider
- Step 3. Customize the Images Provider
- Step 4. Adding a Mini Map
- Result
Step 1. Add a Map Control
In this step, you are performing the common actions required to add a Map control to your application.
- Run MS Visual Studio.
- Create a new Windows Forms Application project by selecting File | New | Project… in the main menu of Visual Studio, and in the invoked New Project menu, select Windows Forms Application.
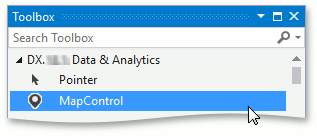
Add the MapControl component to your project.
To do this, locate the MapControl item in the Toolbox in the DX.21.2: Data & Analytics tab and drop it onto the form.
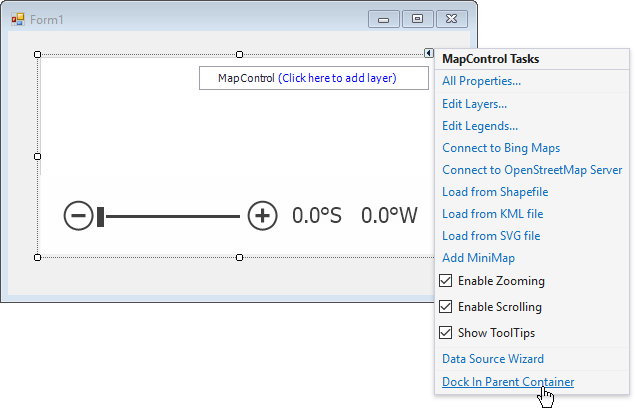
Click the Map control’s smart tag to invoke its actions list. In the Actions list, clicking the Dock in Parent Container link allows the Map control to occupy all of the available space on the form.
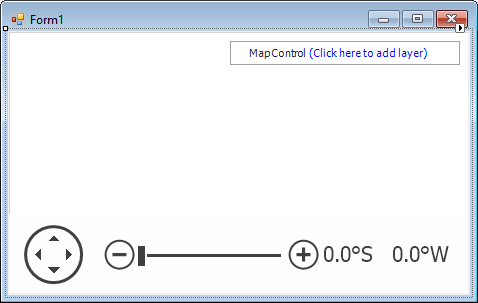
After docking the Map control, it appears as follows:
Sometimes, you may need to show a specific area on a map. To do this, set the required value to the MapControl.CenterPoint property.
For example, set the MapControl.CenterPoint property value to 45,18. When an image layer is added to a MapControl, Europe is in the center of the map.
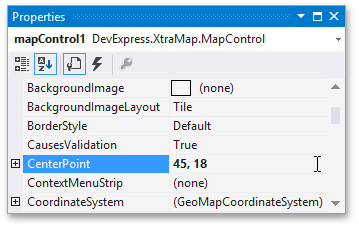
To specify the current zoom level for all map layers, use the MapControl.ZoomLevel property (set its value to 4).

You have now added a Map control to your application. In the next section, it describes how to connect this control to an image tiles data provider.
Step 2. Connect to an Images Provider
The Map control can display multiple layers to draw images or vector elements. To load images from a certain image provider, use the ImageLayer object. It is necessary to draw the map.
In this lesson, the Bing Maps image tiles provider is used.
Note
It is possible to use the OpenStreetMap image tiles provider, the WMS provider, or to load image tiles from the local directory. Refer to the following topics for more information:
The Map control provides two ways of connecting to the Bing Maps provider: manual and automatic. Here they are in greater detail:
Manually Connect to the Bing Maps Provider
You can add an image layer and bind it to the Bing Maps service by performing the following steps:
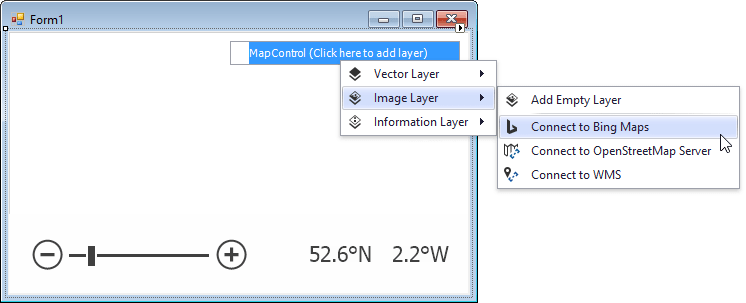
- Select the Click here to add layer link on the MapControl surface.
- Locate the Image Layer item in the invoked list.
Select the Connect to Bing Maps item to obtain map images from the Bing Maps service for the layer.
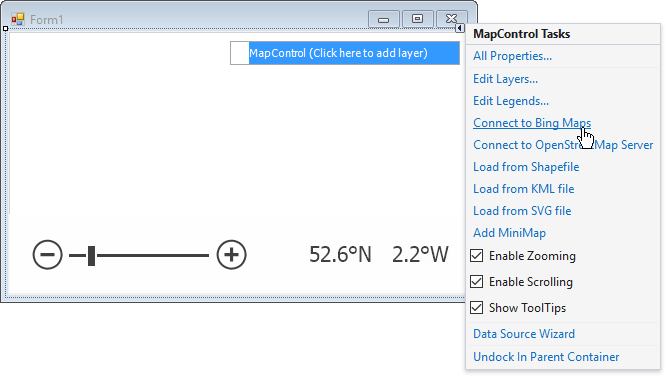
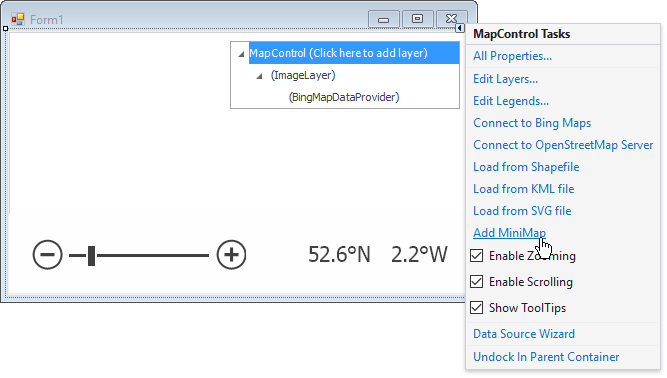
Automatically Connect to the Bing Maps Provider
Connect to the Bing Maps data provider using the Connect to Bing Maps link in the map’s smart tag tasks, as shown below. This allows you to connect to the map control automatically.
Note
Refer to How to: Get a Bing Maps Key if you run the application and see a window with the following error message: “The specified Bing Maps key is invalid. To create a developer account, refer to https://www.microsoft.com/en-us/maps/create-a-bing-maps-key“.
Step 3. Customize an Images Provider
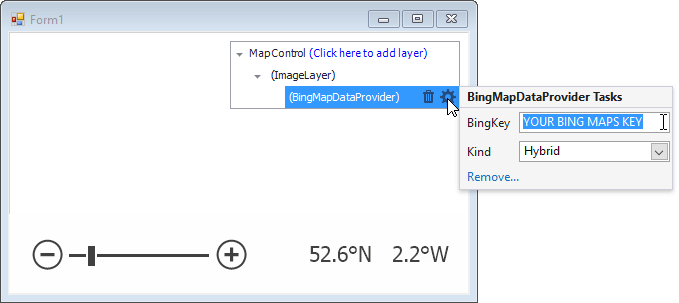
The BingMapDataProvider object should be configured before use by doing the following:
You need to specify your valid Bing Maps key by using the BingMapDataProvider.BingKey property to use map images in the Bing Maps format. Define the Bing Maps key using the BingMapDataProvider Tasks menu.
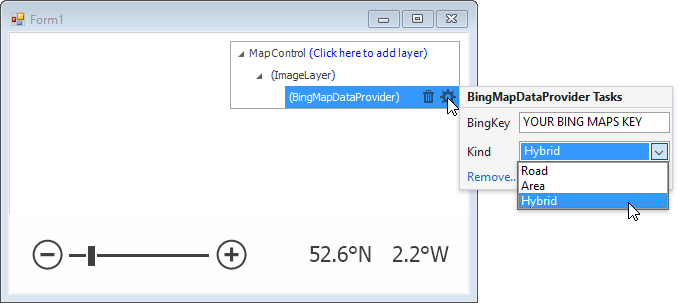
The BingMapDataProvider can show three kinds of map images: BingMapKind.Area, BingMapKind.Road and BingMapKind.Hybrid (the default value). To change the current map type, modify the BingMapDataProvider.Kind property value (or leave the Hybrid value). You can do this using the BingMapDataProvider Tasks menu.
Step 4. Adding a Mini Map
Sometimes, you may need to show a mini map. For this, do the following:
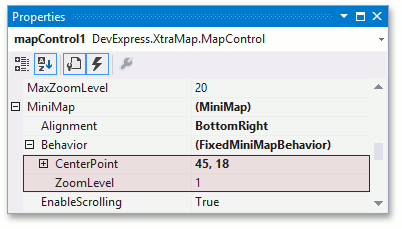
Click the Map control’s smart tag to invoke its actions list. In the Actions list, click the Add MiniMap link. This creates a mini map with the specified MiniMap.Layers collection.
Set the MiniMap.Alignment property to MiniMapAlignment.BottomRight, assign the FixedMiniMapBehavior object as the MiniMap.Behavior property and specify its FixedMiniMapBehavior.CenterPoint property as shown below.
Map control customization is complete.
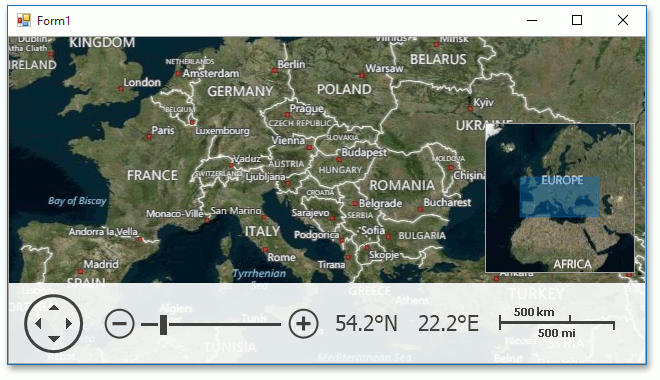
Result
Run the application to see the result.
Tip
A complete sample project is available in the DevExpress Code Examples database at https://supportcenter.devexpress.com/ticket/details/e5069/map-for-winforms-load-image-tiles-from-bing-maps.