How to: Create a Named Range of Cells
- 2 minutes to read
This example demonstrates how to create a named range of cells in a worksheet. You can do this in one of the following ways.
- Use the Worksheet.Range property to access a cell range (see the How to: Access a Range of Cells document for details). Then, specify the range name via the CellRange.Name property of the created CellRange object.
- Use the DefinedNameCollection.Add method to add a new defined name for the specified range to the worksheet’s collection of defined names (Worksheet.DefinedNames). Then, use the Worksheet.Range property and pass the DefinedName.Name property value of the previously created defined name object.
Note
When specifying a name for a cell or range of cells, follow the rules listed in the Defined Names document.
using DevExpress.Spreadsheet;
// ...

IWorkbook workbook = spreadsheetControl1.Document;
Worksheet worksheet = workbook.Worksheets[0];

// Create a range.
CellRange rangeA2A4 = worksheet.Range["A2:A4"];
// Specify the name for the created range.
rangeA2A4.Name = "rangeA2A4";

// Create a new defined name with the specifed range name and absolute reference.
DefinedName definedName = worksheet.DefinedNames.Add("rangeC2D3", "Sheet1!$C$2:$D$3");
// Create a range using the specified defined name.
CellRange rangeC2D3 = worksheet.Range[definedName.Name];
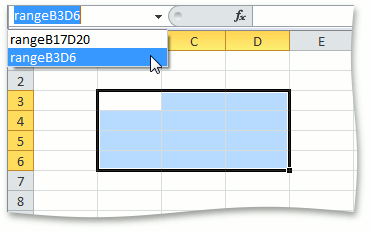
The image below shows the defined names of cell ranges in a worksheet (the workbook is opened in Microsoft® Excel®).

To learn how to use named ranges in formulas, see the How to: Use Names in Formulas document.
See Also