Use Office & PDF File API in .NET MAUI Applications (macOS, iOS, Android)
- 5 minutes to read
This topic describes how to create a .NET MAUI application that uses the PDF Document API to sign PDF files. An application opens a file picker so that user can select a file to sign. When the PDF is ready, the application shares this file with other applications.
The following platforms are available:
- Android
- iOS
- macOS
Prerequisites
- Visual Studio 2022 v17.3+
- The .NET Multi-platform App UI workload. Refer to the following article for information on how to install that workload: Installation.
1. Create a Project
Create a new project in Visual Studio and select the .NET MAUI App template.

Specify the project name and location in the next window.
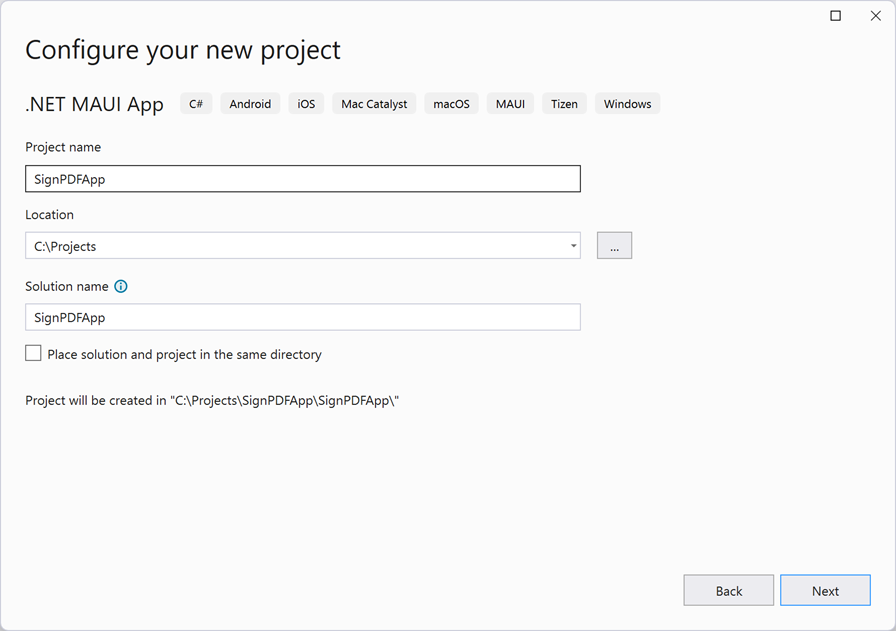
Select .NET 8 as the target framework and click Create.
2. Add DevExpress NuGet Packages
Install the following packages:
- DevExpress.Document.Processor
- This package includes the Spreadsheet Document API and other Office & PDF File API libraries. You need a license for the DevExpress Office & PDF File API Subscription or DevExpress Universal Subscription to use this package in production code.
- DevExpress.Drawing.Skia
- This package implements the drawing functionality based on the Skia Graphics Library.
- DevExpress.Pdf.SkiaRenderer
- This package implements the cross-platform PDF renderer based on the Skia Graphics Library.
If you are new to NuGet packages, see the following installation guide: Install DevExpress Packages Using NuGet Package Manager.
Add Additional Packages
If work with fonts or other graphics entities, make sure that you add the following packages to your project:
- Microsoft.Maui.Graphics
- SkiaSharp.Views.Maui.Controls
- SkiaSharp
- SkiaSharp.NativeAssets.Android (or SkiaSharp.NativeAssets.iOS)
- SkiaSharp.HarfBuzz
- HarfBuzzSharp.NativeAssets.Android (or HarfBuzzSharp.NativeAssets.iOS)
3. Register Fonts
Call the FontsMauiAppBuilderExtensions.ConfigureFonts method in the MauiProgram class and pass fonts used by your application:
public static MauiApp CreateMauiApp()
{
    DXDrawingEngine.ForceSkia();

    var builder = MauiApp.CreateBuilder();
    builder
        .UseMauiApp<App>()
        .ConfigureFonts(fonts =>
        {
            fonts.AddFont("OpenSans-Regular.ttf", "OpenSansRegular");
            fonts.AddFont("OpenSans-Semibold.ttf", "OpenSansSemibold");
        })
        .UseSkiaSharp();

#if DEBUG
    builder.Logging.AddDebug();
#endif

    return builder.Build();
}
Tip
If your application’s target platform is iOS, use the DevExpress.Drawing.DXFontRepository class to add fonts. Refer to the following article for more information: Use DXFontRepository to Add Custom Fonts.
4. Select the Target Device
.NET MAUI apps are designed to run on multiple operating systems and devices. While you develop the application, you can select a device/emulator for test and debug runs.
Select a Debug Target in the Visual Studio toolbar. This example uses an Android device.

5. Customize the App Shell
Customize application appearance as required. In this example, the application displays a single page with a logo and a button. Users should click the button to select and sign a PDF document.

<ContentPage xmlns="http://schemas.microsoft.com/dotnet/2021/maui"
             xmlns:x="http://schemas.microsoft.com/winfx/2009/xaml"
             x:Class="SignPdfExample.MainPage">

    <ScrollView>
        <VerticalStackLayout
            Spacing="15"
            VerticalOptions="Center">

                <Image x:Name="imageControl"
                    Source="logo.svg"
                    HeightRequest="500"
                    HorizontalOptions="Center" Aspect="AspectFit" />

            <Label
                Text="Sign PDF Files"
                SemanticProperties.HeadingLevel="Level1"
                FontSize="32"
                HorizontalOptions="Center" />

            <Label x:Name="labelDescription"
                Text="Use PDF Document API to sign a PDF File"
                FontSize="18"
                HorizontalOptions="Center" />

            <Button
                x:Name="CounterBtn"
                Text="Sign a File"
                SemanticProperties.Hint="Signs a PDF file"
                Clicked="OnOpenWebButtonClicked"
                HorizontalOptions="Center" />

        </VerticalStackLayout>
    </ScrollView>

</ContentPage>
6. Open, Sign, and Share a PDF Document
Handle the Button.Clicked event to select a PDF file, sign it, and share the result.
Select a File to Sign
Call the FilePicker.PickAsync method to allow users to pick a file. If the selected file has the .pdf extension, pass a stream with the file and the file name as the SignPDF method’s parameters.
private async void OnOpenWebButtonClicked(object sender, EventArgs e) {
    try
    {
        var result = await FilePicker.Default.PickAsync(PickOptions.Default);
        if (result != null)
        {
            if (result.FileName.EndsWith("pdf", StringComparison.OrdinalIgnoreCase))
            {
                var stream = await result.OpenReadAsync();
                SignPDF(stream, Path.GetFileNameWithoutExtension(result.FullPath));
            }
        }

    }
    catch (Exception ex)
    {
        // The user canceled or something went wrong
    }
}
Sign a File
The PdfDocumentSigner class allows you to sign a PDF file and save the result. Pass a document to the PdfDocumentSigner constructor.
Use the PdfSignatureFieldInfo instance to generate a signature form field. The PdfSignatureBuilder object allows you to build a signature. You can specify validation data (such as certificate, hash algorithm, or timestamp) and visual parameters (image and signer information). Call the PdfDocumentSigner.SaveDocument method to sign the file and save the result.
async void SignPDF(Stream inputStream, string fileName) {
    string resultFile =
        Path.Combine(FileSystem.Current.AppDataDirectory, fileName.TrimEnd() + "_Signed.pdf");

    // Load a document to be signed
    using (PdfDocumentSigner documentSigner = new PdfDocumentSigner(inputStream))
    {
        var fieldInfo = new PdfSignatureFieldInfo(1);
        fieldInfo.SignatureBounds = new PdfRectangle(394, 254, 482, 286);

         // Create a PKCS#7 signature
        string signaturePath =
            Path.Combine(FileSystem.Current.AppDataDirectory, "pfxCertificate.pfx");
        var signature =
            new Pkcs7Signer(signaturePath, "123", HashAlgorithmType.SHA256);

        // Apply a signature to the created form field
        PdfSignatureBuilder signature = new PdfSignatureBuilder(signature, fieldInfo);

        // Specify the signature's image and signer information:
        string imagePath = Path.Combine(FileSystem.Current.AppDataDirectory, "Faximile.emf");
        signature.SetImageData(System.IO.File.ReadAllBytes(imagePath));
        signature.Location = "USA";
        signature.ContactInfo = "Alex";
        signature.Reason = "Just a test";

        // Sign and save the document
        documentSigner.SaveDocument(resultFile, signature);
    }

    // Share the resulting file
    await ShareFile(resultFile);
}
Share the Signed PDF File
Call the Share.Default.RequestAsync method to share data with other applications on the device. Use the ShareFileRequest type to share a single file.
    public async Task ShareFile(string filename)
    {
        string file = Path.Combine(FileSystem.Current.AppDataDirectory, filename);

        await Share.Default.RequestAsync(new ShareFileRequest
        {
            Title = "Share PDF file",
            File = new ShareFile(file)
        });
    }
7. Run the Application
The application is now ready. Run the project to see the result.