Template Configuration
- 8 minutes to read
You can edit predefined code templates or add your own templates for any supported languages in the Templates options page.
Important
Visual Studio IntelliSense has priority over CodeRush templates. For information on how to prioritize a CodeRush template over Visual Studio IntelliSense, refer to the following topic section: Expand a Template Instead of Visual Studio IntelliSense.
Open Templates Page
Choose the CodeRush | Code Templates… menu item.
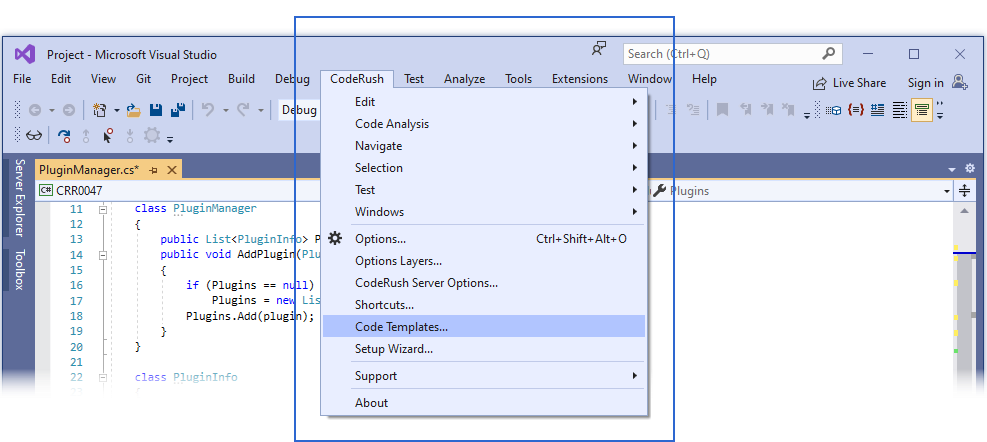
Note
In Visual Studio 2019, CodeRush menu is placed into a new location - in Visual Studio Extensions menu. You can reposition the CodeRush menu back to the top level of the Visual Studio menu bar in Visual Studio 2019 version 16.4 or later. See the following topic for more information: First Steps.
The Templates options page looks as follows:
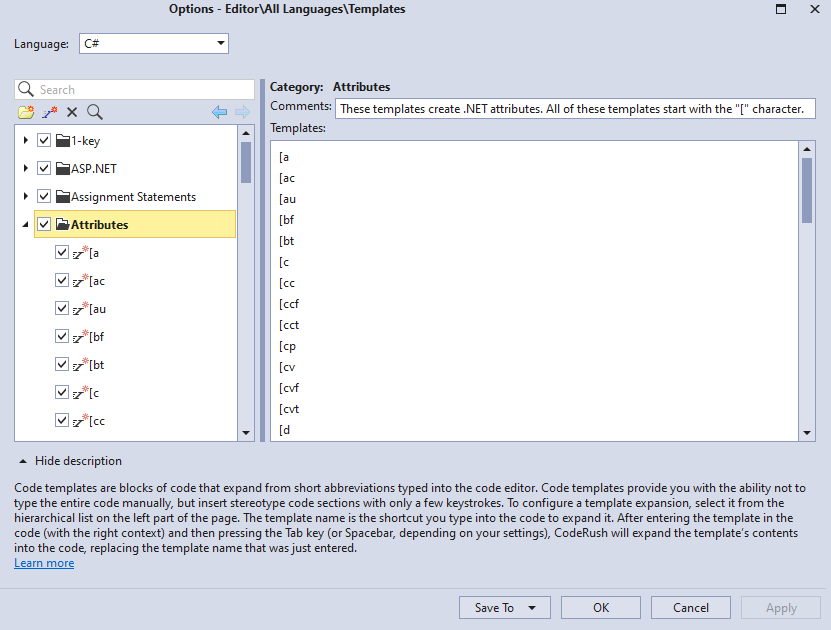
Settings
CodeRush supports a large library of code templates for different languages. You can choose the template language from the “Language” drop-down list. The default template language is the language of an active file that CodeRush sets for templates when it opens the Templates options page.

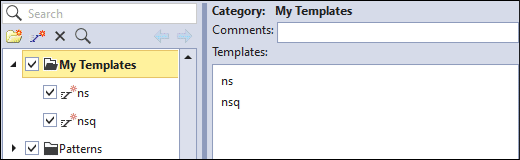
CodeRush stores templates in folders (categories). Use the template’s category checkbox to enable/disable folders with templates. This folder can contain nested folders to organize templates.
To access a template’s category settings, select the category in the template tree.

Template Toolbar
You can use the following tool buttons to perform operations with templates and categories:
“New Category” - opens the New Category dialog that allows you to create a new category.

“New Template” - opens the New Template dialog you can use to create a new template with the specified name.

Refer to the How to: Create a Template from Scratch example to see how to use these tool buttons to create a template.
“Delete” - opens the Confirm dialog for the selected template or template category.
The screenshot below shows the Confirm dialog that informs you that the Expressions category can be deleted.

Click Yes to remove the selected template category or No to cancel this action.
“Find text” - opens the Find Text dialog. In this dialog, type text and click OK to find a template by its content (expansion).

For example, type “lambda” to find the “.I” template:

You can also use the “Search” text box to find templates by mnemonics.

“Browse back” and “Browse forward” buttons allow you to navigate backwards and forwards by visited templates and folders.

Template Tree Context Menu
Right-click the template category to open its context menu.

In addition to the template creation and template deletion menu items, the context menu includes the following items:
Rename a category.
Open the context menu for a selected category and choose the Rename item. Then, type a new name and press Enter.

You can also rename a template category and template in the template tree:
Export/import code templates.
See the Export and Import Templates topic for more information.
The template’s context menu contains the following items specific to templates:

Create Alias - opens the New Template dialog where you can specify a new template that expands the selected template.
Create Duplicate - opens the New Template dialog that allows you to create the same template with another name. See the How to: Create a Template from an Existing One example for more information.
Create Alternative Expansion - adds an alternative template expansion to the template tree that can be used in different contexts. Refer to the Alternative Template Expansions topic for more information.
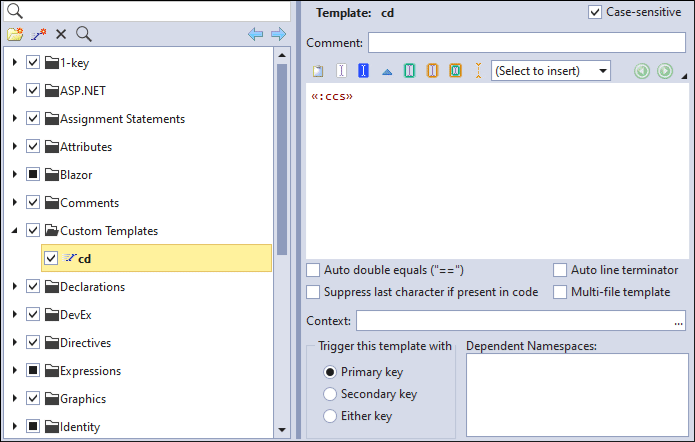
Template Options
Select a template in the tree to access its options. The template configuration page includes the following options:

Case-sensitive
Specifies whether the template name is case-sensitive. This option is initially disabled. In this case, you can type, for example, “c” or “C” and press Space or Tab key and CodeRush creates a class with default constructor.
Note
CodeRush expands uppercase letters to static members. Refer to the Members Declaration article for more information.
If you enable the “Case-sensitive” option, CodeRush expands the “c” template only when you type the “c” letter.
Expansions for a Template
Templates may have alternate expansions (mnemonics) - different versions of the template bound to the same character sequence. CodeRush marks these mnemonics by an icon in the template list (see the screenshot above). The alternate mnemonics are differentiated by their context. For example, the “c” template has two alternate mnemonics.
Comment
This text box allows you to describe a template. CodeRush shows the information about a template available for the caret’s current position in the Training Window.
Expansion Code
This text editor contains the template expansion code. The code can include text, aliases, text commands, and string providers. Use one of the following ways to add them to the expansion code:
1) The editor’s context menu.

The following “insert…” items are available:
Insert Text Command… - opens the Select Text Command dialog that allows you to find, choose a text command, and insert it into the template expansion code.

Insert String Provider… - opens the Select String Provider dialog that allows you to find, choose a string provider, and insert it into the template expansion code.

Insert Alias… - opens the Select Template dialog. This dialog allows you to find, choose, and insert a template into your template expansion code. CodeRush uses the inserted template as an alias.

You can press Ctrl + Click to navigate to the inserted alias.
2) The tool buttons allow you to access to general text commands (Caret, BlockAnchor, Marker, etc.) and string providers (Paste). You can also use the “(Select to insert)” combo box to see all commands.

The Templates options page also includes tool buttons that allow you to perform the following operations:
Navigate between alternate expansions of a template.
To do this, click “Show next/previous alternate expansion for this template” button.

Add/remove alternate expansions.
Increase/decrease alternate expansions priority. When you press the corresponding button, CodeRush moves an alternate expansion up or down.
Advanced Options
You can specify the following advanced options for a template:

“Auto double equals (“==”)” - if this option is enabled, CodeRush inserts an additional equals character (“=”) depending on the context where a template is expanded. For example, the following screencast shows that CodeRush inserts an additional character (“=”) when the “c=” template is expanded inside the “if” condition.

“Auto line terminator” - specifies whether to append a line terminator (a semicolon in C#) to the template expansion. For example, this option is initially enabled for the “ni” template. When you expand this template CodeRush adds the semicolon (;) at the end of the int type instance: “int _Int = 0;”
“Suppress formatting” - specifies whether to disable the automatic code formatting for this template to expand it “as is”.
“Suppress last character if present in code” - specifies whether to suppress the last character if the same character exists in code. For example, when you expand the “[a” template to create an assembly attribute ( [assembly: ]), Visual Studio adds the “]” character. Enable this option to allow CodeRush to remove the redundant “]” character.
“Multi-file template” - if this option is enabled, CodeRush adds a multi-file undo that processes multi-file operations. To expand a template into multiple files, you need to create your custom extension that contains the CodeRush text command. This extension must add the required files or the code into the existing file when you expand a code template. After that, you can use the text command in the template text.
Context - this setting specifies the conditions when a template is available and can be expanded. Click the ellipsis button to open the Select Context Provider dialog. This dialog allows you to choose a context provider and insert it to the expansion code.

“Trigger this template with” - allows you to configure the shortcut key used to expand the template.
You can choose one of the following options:
- Primary key - expands the template with the shortcut configured for the TemplateExpand command. This command is bound to the Space or Tab key depending on your selection in the Setup Wizard.
- Secondary key - expands the template with the shortcut configured for the TemplateSecondaryExpand command (Shift+Space by default).
- Either key - expands the template with Primary key and Secondary key.
“Dependent Namespaces” - allows you to add the list of namespace references (for example, System.Windows.Forms). This namespace reference is required for the types from the template expansion. CodeRush adds namespace references to the corresponding usings/Imports section of the file when a template is expanded. See the Referencing Namespaces topic for more information.