Microsoft Templates (Visual Studio)
- 4 minutes to read
Important
Ensure your system meets these requirements.
This topic describes how to:
- Use Microsoft templates to create a Blazor project
- Install the DevExpress.Blazor NuGet package that includes DevExpress components
- Add DevExpress components to a project
Note
These instructions are also available in the following videos:
1. Create a New Project
The steps below describe how to create a new Blazor project. If you want to add DevExpress Blazor components to an existing application, go to Step 2.
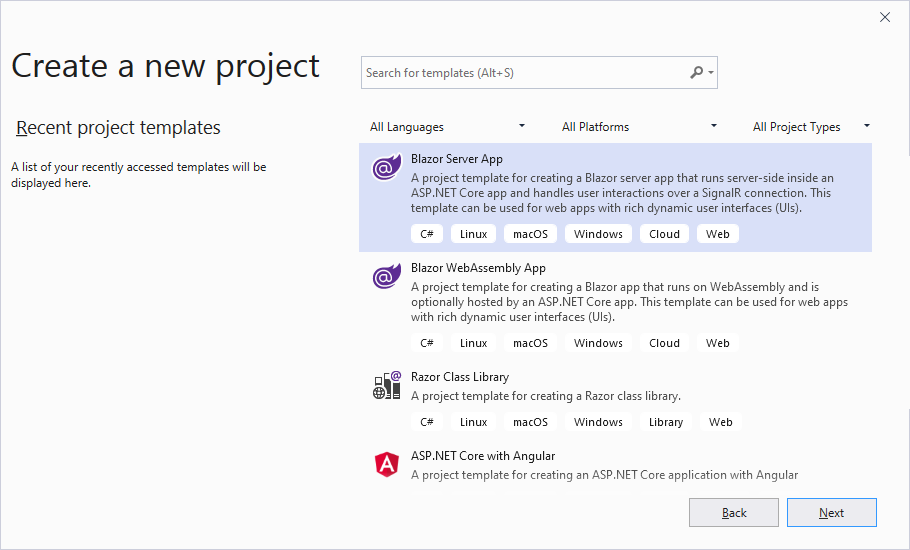
Click Create a new project on Visual Studio’s start page, select the Blazor Server App or Blazor WebAssembly App template, and click Next.
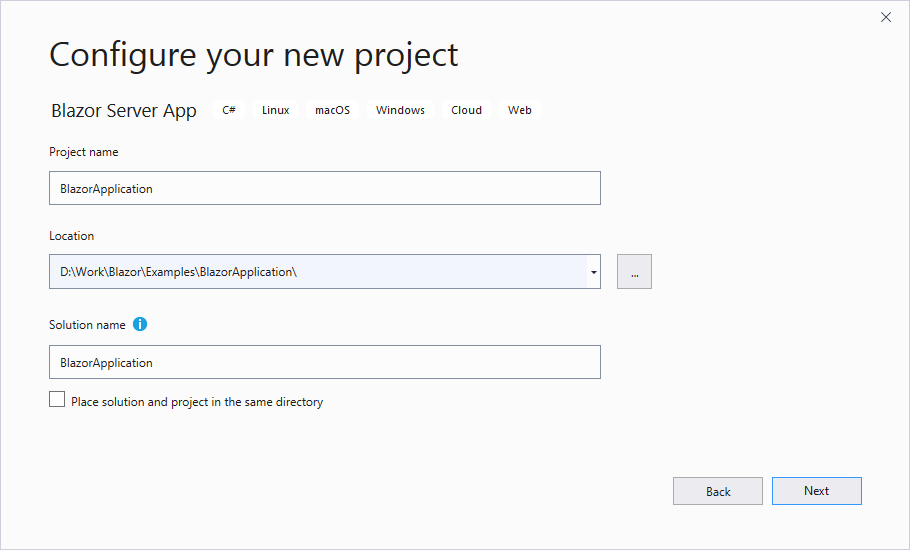
Specify the project name and location, and click Next.
Specify additional options, and click Create.
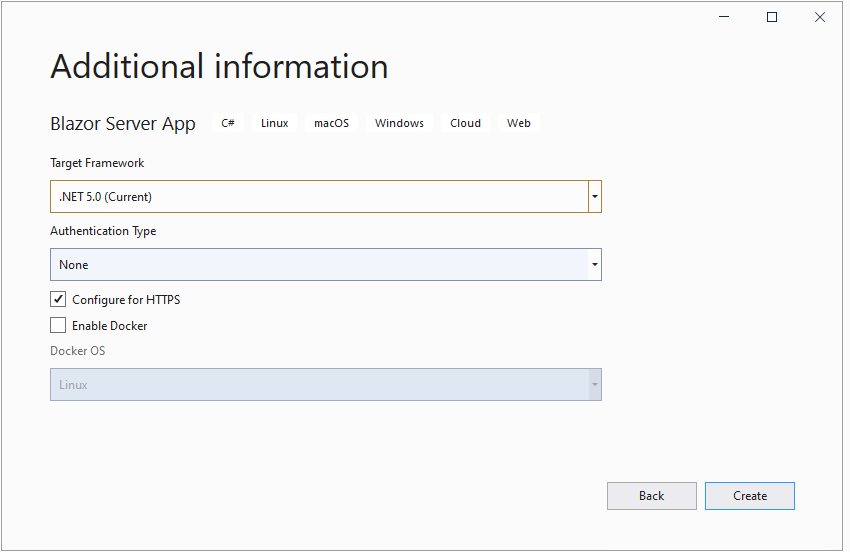
Blazor Server App
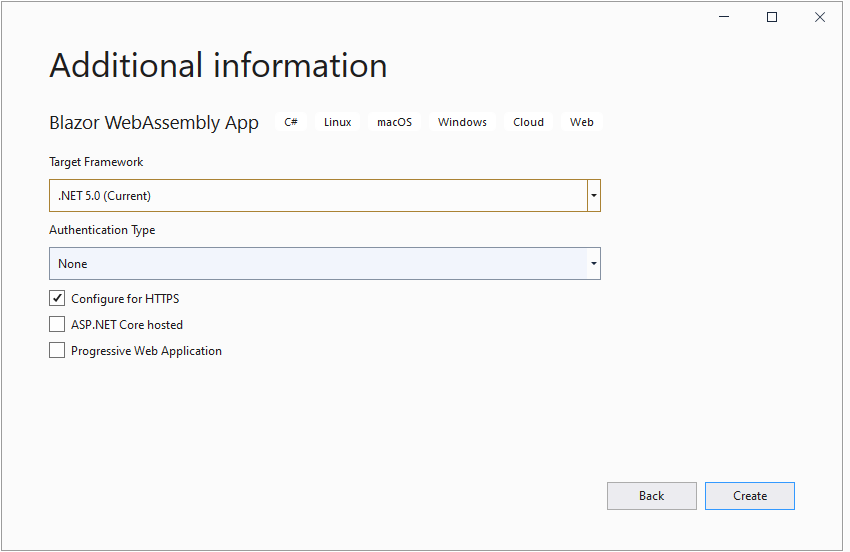
Blazor WebAssembly App
2. Obtain You NuGet Feed Credentials
You need to obtain your personal NuGet feed credentials to access the DevExpress.Blazor NuGet package from your project. You can use NuGet feed URL or feed authorization key to manage DevExpress packages.
Make sure your DevExpress.com account has access to Blazor UI Components. This product line is included in the Universal, DXperience, and ASP.NET subscriptions. Refer to the subscription comparison matrix for more information.
Use your DevExpress credentials to log into nuget.devexpress.com.
Obtain your NuGet feed credentials and copy them to the clipboard.
You can find the same URL in the Download Manager.
3. Install the DevExpress Blazor NuGet Package
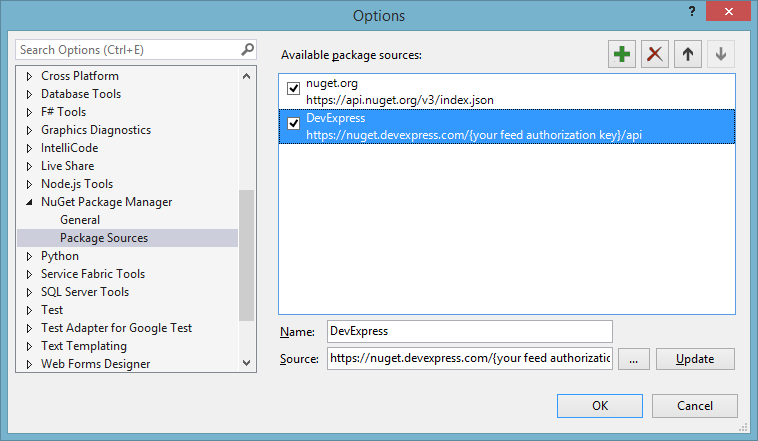
In Visual Studio, select Tools → NuGet Package Manager → Package Manager Settings.

Navigate to NuGet Package Manager → Package Sources. Click the plus sign at the top right corner to add a new NuGet package source. Use the following package settings:
Name:
DevExpressSource: DevExpress NuGet Gallery (
https://nuget.devexpress.com/api) if you use the feed key to authenticate. Otherwise, use the NuGet Feed URL (https://nuget.devexpress.com/{your feed authorization key}/api)
Click OK.
Note
Make sure the
nuget.orgpackage source is also enabled.Select Tools → NuGet Package Manager → Manage NuGet Packages for Solution.
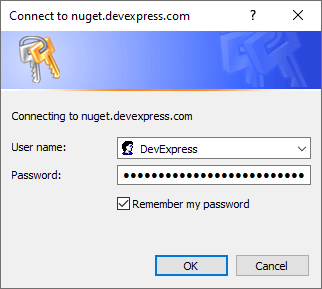
If you registered the DevExpress NuGet feed with an authorization key, the login form is displayed when you invoke the NuGet Package Manager window for the first time. Enter your credentials as follows:
- User name:
DevExpress Password: your authorization key
In the invoked dialog, open the Browse tab, and install the
DevExpress.BlazorNuGet package.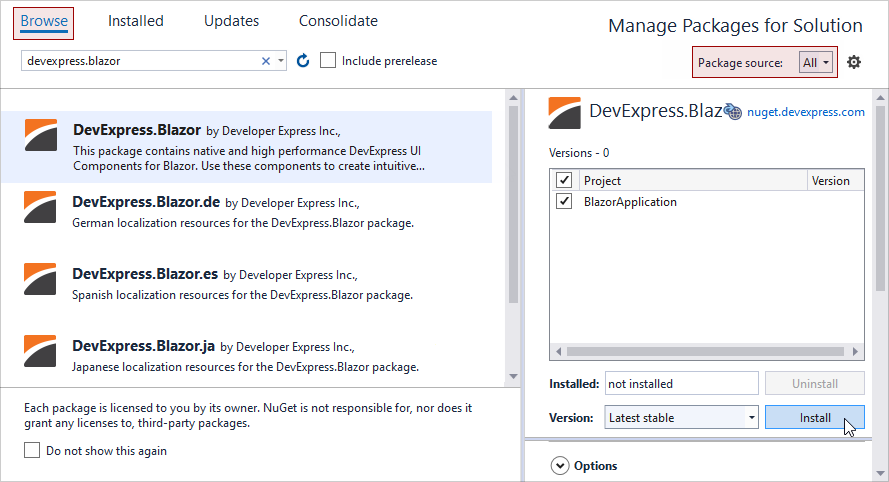
- User name:
Build the project.
Refer to the following topic for more information: Setup Visual Studio's NuGet Package Manager.
4. Register DevExpress Resources
Blazor Server
Add the following line to the
Pages/_Host.cshtmlfile’s HEAD section:<head> <!--...--> <link href="_content/DevExpress.Blazor/dx-blazor.css" rel="stylesheet" /> </head>Register the DevExpress.Blazor namespace in the
_Imports.razorfile:@using DevExpress.BlazorDevExpress Blazor components use an RCL (Razor class library) with static assets to share resources. Call the
UseStaticWebAssetsmethod on the host builder in theProgram.csfile to enable the application to load client-side resources.public class Program { // ... public static IHostBuilder CreateHostBuilder(string[] args) => Host.CreateDefaultBuilder(args) .ConfigureWebHostDefaults(webBuilder => { webBuilder.UseStartup<Startup>(); webBuilder.UseStaticWebAssets(); }); }Refer to the following topics for more information: Consume content from a referenced RCL and Troubleshooting: Failed to load resource.
(Optional) Apply a DevExpress Bootstrap theme. We use the DevExpress Blazing Berry theme in our demos and documentation.
Blazor WebAssembly
Add the following line to the
wwwroot/index.htmlfile’s HEAD section:<head> <!--...--> <link href="_content/DevExpress.Blazor/dx-blazor.css" rel="stylesheet" /> </head>Call the AddDevExpressBlazor(IServiceCollection, Action<GlobalOptions>) method from your project’s
Program.Main()method:using Microsoft.Extensions.DependencyInjection; public class Program { public static async Task Main(string[] args) { var builder = WebAssemblyHostBuilder.CreateDefault(args); // ... builder.Services.AddDevExpressBlazor(); await builder.Build().RunAsync(); } }Register the DevExpress.Blazor namespace in the
_Imports.razorfile:@using DevExpress.BlazorConfigure the linker as described in the following topic: Configure the Linker for ASP.NET Core Blazor.
Note
If you enabled the ASP.NET Core hosted option when you create the project, make sure that the server-side project is set as the solution’s startup project.
(Optional) Apply a DevExpress Bootstrap theme. We use the DevExpress Blazing Berry theme in our demos and documentation.
5. Add DevExpress Blazor Components
For instructions on how to add an individual DevExpress Blazor component to your application, refer to the documents below:
- Data Grid
- Grid
- Pivot Grid
- Chart
- Reports
- Scheduler
- Rich Text Editor
Data editors
- Button
Navigation and Layout components
- Upload