Create a Master-Detail Report with a Subreport in the VS Report Designer
- 7 minutes to read
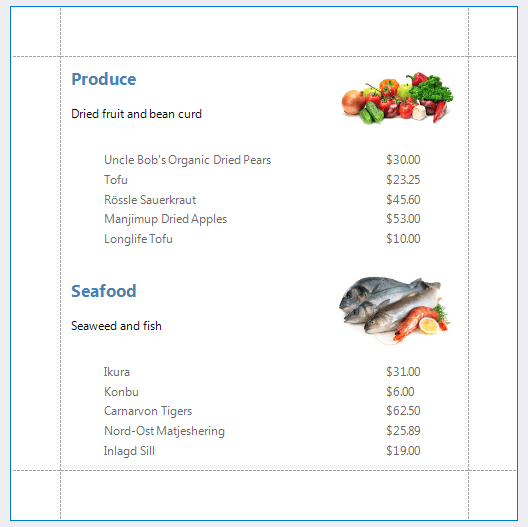
A Master-Detail report allows you to display related and hierarchical data, such as customers and their orders, or orders and their details.
This topic creates a master-detail report bound to an SQLite data source and uses the XRSubreport control to display related data from the Detail report. By incorporating a subreport, you can embed a Detail report into your main master report, enhancing the modularity and flexibility of your design. You can use this method if you cannot define a relationship in the data source, or if the master and detail reports are in separate files.
Note
If your report is bound to an object data source, review the following section before you begin: Object Data Source Specifics.
Prerequisites
To get started with this tutorial, open an existing reporting application or create a new application. You can review the following section that explains how to create a reporting application on different platforms: Add a Report to Your .NET Application.
Difference Between a Subreport and a Detail Band
You can create a Master-Detail report in two ways: with the help of a subreport or a detail band. Before you begin, review the following key points that help you select a suitable variant for your scenario:
- Subreport
- A Subreport is a separate report that is embedded into the master report. You can design and maintain it independently and reuse it in multiple master reports.
- A Subreport gets its data from a separate data source and uses parameters to connect with the master report. The master report passes a value (such as an ID or a key) to the Subreport, which uses that value to filter its data.
- A subreport offers more design possibilities. For example, you can use a subreport to create side-by-side reports.
- Detail Report Band
- A Detail Report Band is a section within the same master report that displays detailed data. This band requires relations in a data source and is connected to the data source within the master report’s structure.
- You can integrate parent and child data without having to manage separate reports.
- You can print a Detail Report Band only under the master band that fills the entire width of the report. For example, you cannot use it in side-by-side reports.
Create a Master Report
A Master Report is the main report that contains high-level data. It defines the overall structure and is typically used to display primary or parent-level information (for example, a list of orders, customers, or categories).
Follow the steps below to create a Master Report that displays categories:
Create a new blank report named
MasterReport.Connect the report to the sample Northwind database.
Bind the report to the
Categoriestable. See the following topic for reference: Bind a Report to a Database.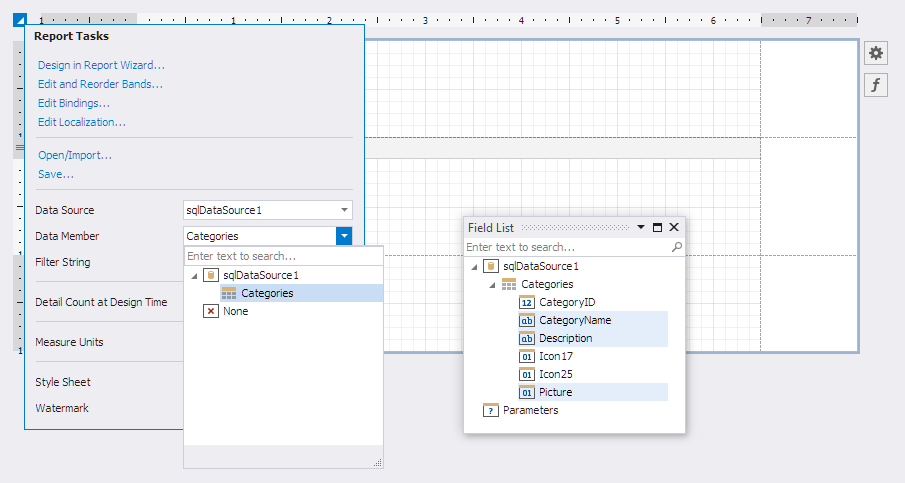
Drag data fields from the Field List window and drop them onto the report’s Detail band. The
CategoryNameandDescriptionfields become data-bound XRLabel controls, and the Picture field creates the XRPictureBox control when dropped onto the report band: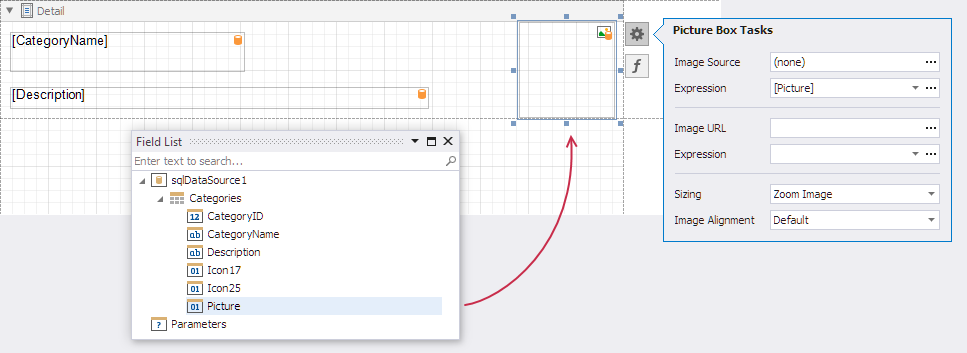
Create a Detail Report
A Detail Report displays child-level data (for example, purchases for each customer or products of each category), while a Master Report focuses on parent-level data (for example, a list of customers or categories). A Detail Report is nested within the Master Report and is generated for each entry in the Master Report’s dataset.
Follow these steps to create a Detail Report that displays product details.
Create a new blank report named
DetailReport.Connect the report to the sample Northwind database.
Bind the report to the
Productstable. See the following topic for reference: Bind a Report to a Database.In the Field List window, hold Ctrl and select the
ProductNameandUnitPricefields. Drag the fields and drop them onto the report’s Detail band. Multiple selected fields generate the XRTable control with cells bound to data: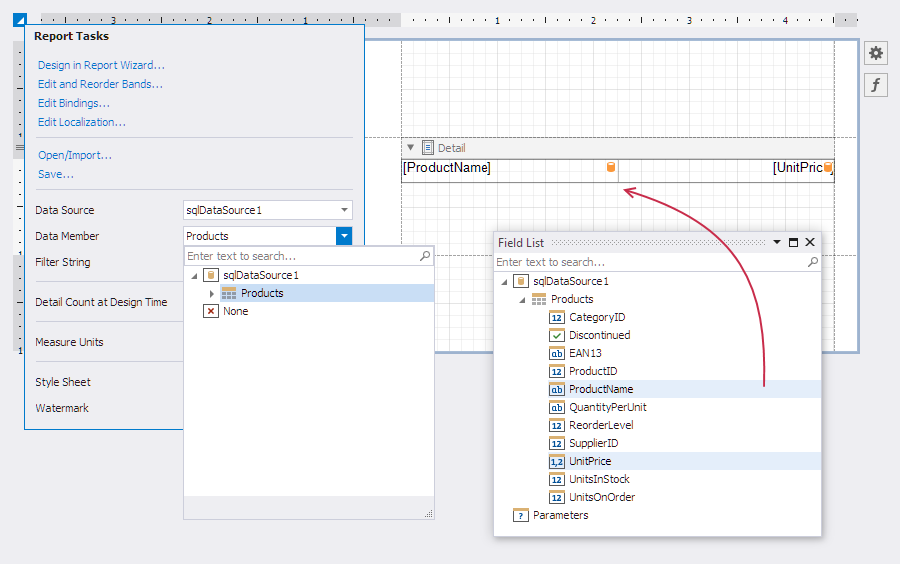
Configure Report Parameters and Filters
Create a report parameter. The Master Report passes this value to the Subreport, which uses that value to filter its data.
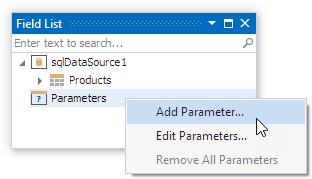
Right-click the Parameters section in the Field List and select Add Parameter:
Set the following properties:
- Parameter.Name is CatID
- Parameter.Visible is No
- Parameter.Type is Number (32 bit integer)
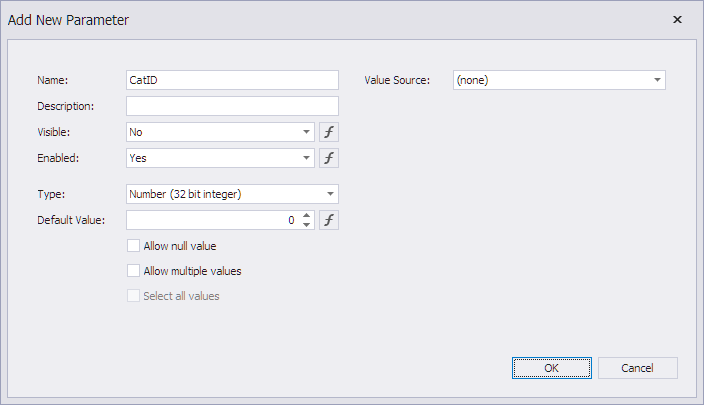
Click OK.
In the Detail Report’s smart tag, click the ellipsis button next to the FilterString property editor. In the invoked FilterString Editor, build an expression that compares the CategoryID data field to the CatID parameter. To do this, click the icon next to the equal sign until it turns into a question mark, and select the
CatIDparameter:[CategoryID] = ?CatID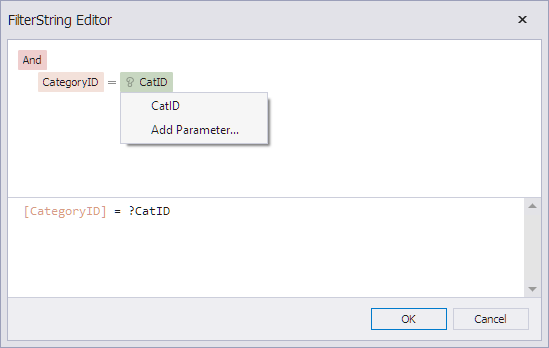
Add the Subreport
A Subreport is a separate report that is embedded within a parent report. It allows for reuse of reports across different parent reports or sections and can be useful for modular report designs.
Follow the steps below to add a subreport that displays the Detail Report data in the Master Report:
Build the project.
Open the MasterReport.cs report file in the Visual Studio Designer, and drop the XRSubreport control from the DX.25.2: Report Controls Toolbox tab onto the Detail band:
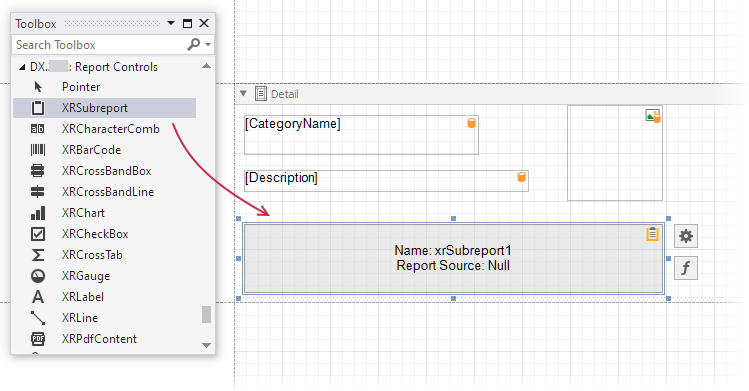
Set the ReportSource property of the
XRSubreportcontrol to DetailReport.
Create Subreport Parameter Binding
To display products in the subreport according to the category, you should bind the subreport’s CatID parameter to the main report’s data field.
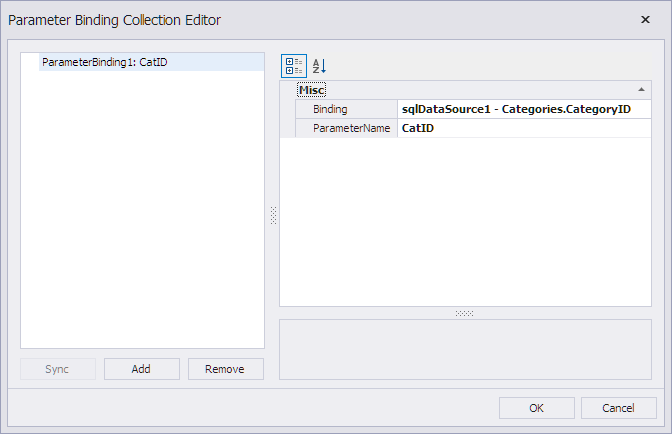
In the subreport’s smart tag, select Edit Parameter Bindings to invoke the Parameter Bindings Collection Editor:

In the Parameter Bindings Collection Editor, click Add to add a new binding. In the binding properties list, specify the data field to which you want to bind a subreport parameter, and the name of the parameter that you want to bind:
- Binding: sqlDataSource1 - Categories.CategoryID
- ParameterName: CatID
Remove Blank Space
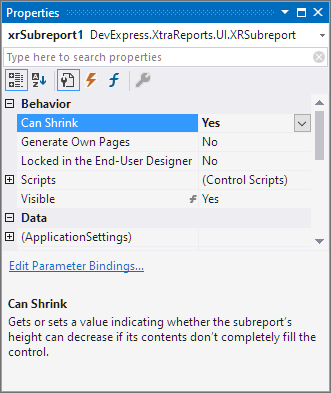
To remove blank space when the height of the subreport exceeds the height of its contents, enable the CanShrink setting:
Object Data Source Specifics
If your report is bound to an Object data source, skip the following steps:
Instead of these steps, handle the XRSubreport‘s BeforePrint event and specify the detail report’s data table as the data source, as the following code snippet shows:
private void xrSubreport1_BeforePrint(object sender, CancelEventArgs e) {
    var category = GetCurrentRow() as Category;
    ((XRSubreport)sender).ReportSource.DataSource = category.Products;
}
The full code is available in the same example:
Preview the Result
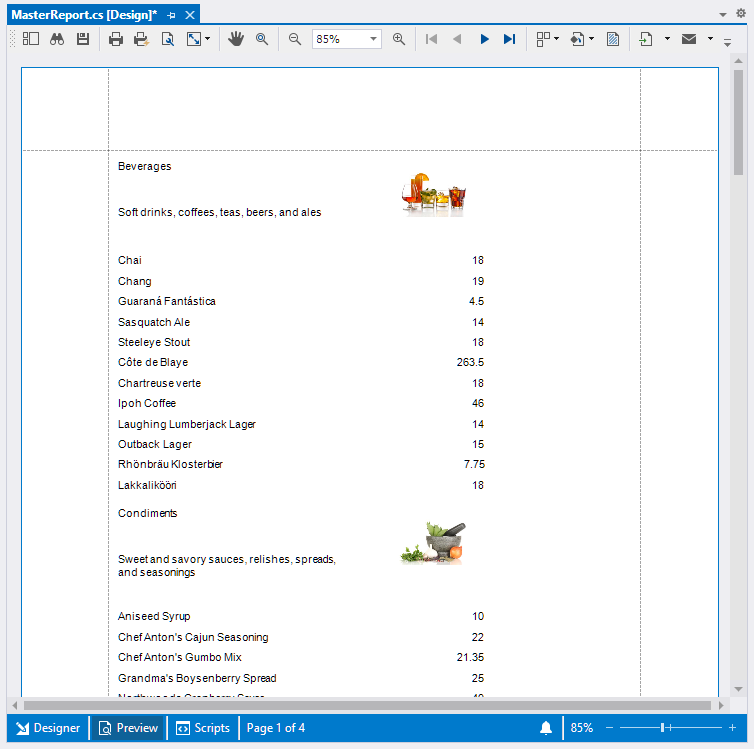
The report is ready. Switch to the Preview tab to preview the report:
You may want to customize the visual style and layout as an additional step.
For example, if you want to make the detail sections collapse or expand when you click them in Print Preview, review the following help topic: Create Drill-Down Reports.
Create a Master-Detail Report with a Subreport in Code
See the following example for information on how to work with XRSubreport in code: Create a Report with a Subreport (Runtime Sample).
Create a Master-Detail Report with a Subreport in the End-User Report Designer
Tutorials that explain how to create different reports in EUD Report Designers for WinForms and Web are included in the End-User Documentation online help section:
- Create a Master-Detail Report with a Subreport in the End-User Report Designer for Web
- Create a Master-Detail Report with a Subreport in the End-User Report Designer for WinForms