Create a Report with Embedded PDF Content in the Visual Studio Report Designer
- 4 minutes to read
This tutorial explains how to use the XRPdfContent control to do the following:
- Append PDF file pages to a report and make their paper kind the same as in the inital report.
- Add sequential page numbers to the report and PDF file pages.
- Include additional information in the embedded PDF file pages.
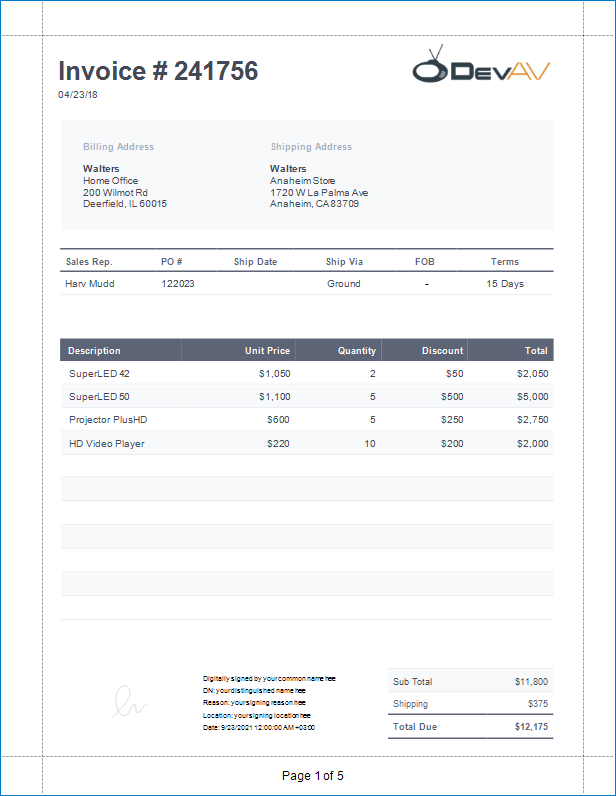
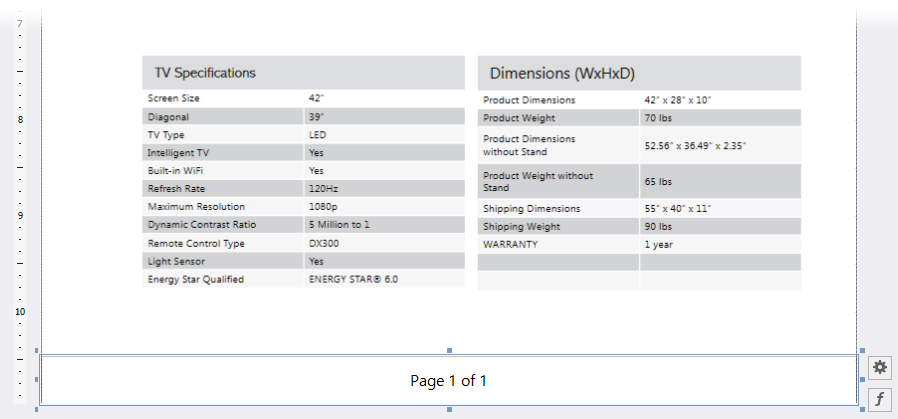
The image below shows an invoice report that contains information about order items.
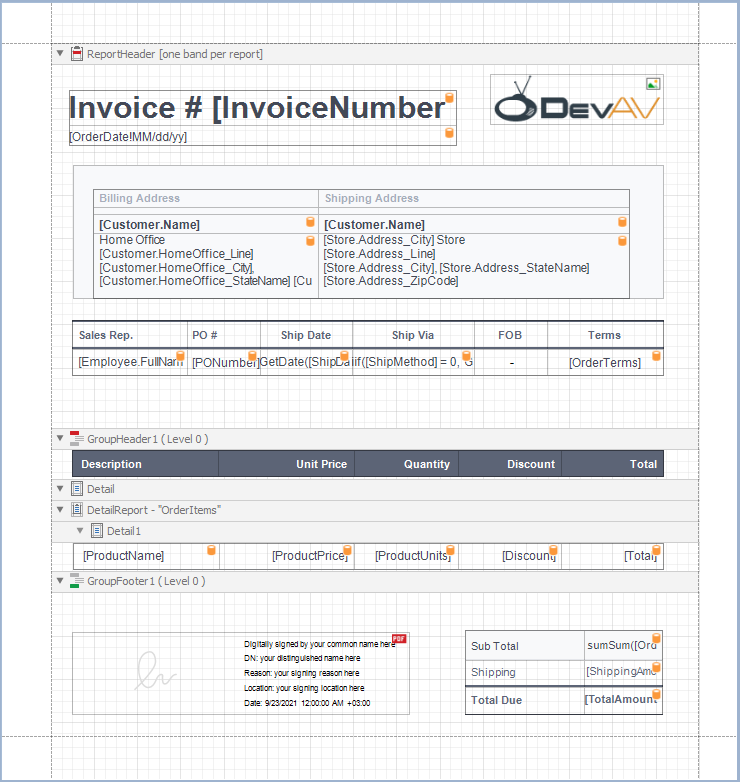
The following image illustrates the first PDF file page embedded to the invoice report. This page has the same paper kind as the initial report. Report controls are used to add item title, item price, line, logo image, and sequential page numbers to this page.

To create the above report with PDF content, follow the steps described in these sections:
- Create the Main Report
- Create a Report with PDF Content
- Add the Report with PDF content to the Main Report
Create the Main Report
- Create a new Visual Studio project and add a new blank report to it. Refer to the following topic for instructions: Create a Report in Visual Studio.
Design the report layout. In this tutorial, we create an invoice report that contains information about order items.
You can use the following REPX file to reproduce this report: InvoiceReport.repx.
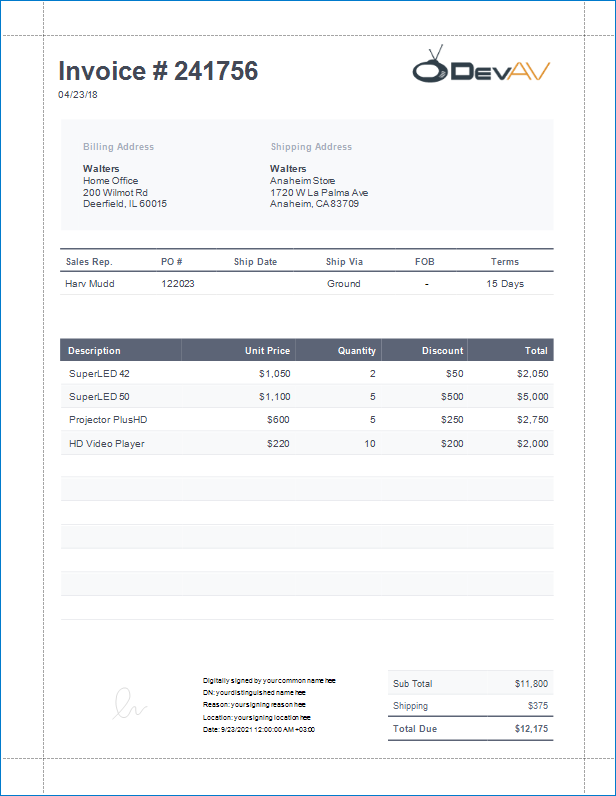
The following image illustrates the main report’s Preview:
Create a Report with PDF Content
Add a new blank report to your project. Remove the report’s margins.

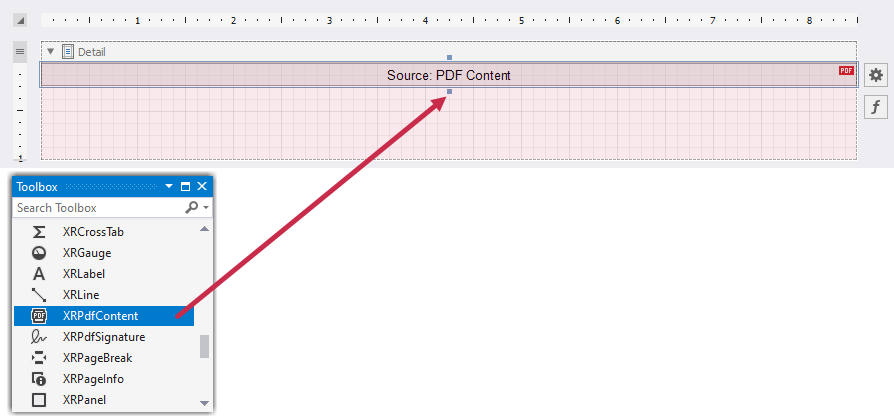
Drop the XRPdfContent control from the Toolbox onto the Detail band.
Expand the control’s smart tag, click the Source or SourceURL property’s ellipsis button, and select PDF file. In this demo, we use the following PDF specification: Specification.pdf.
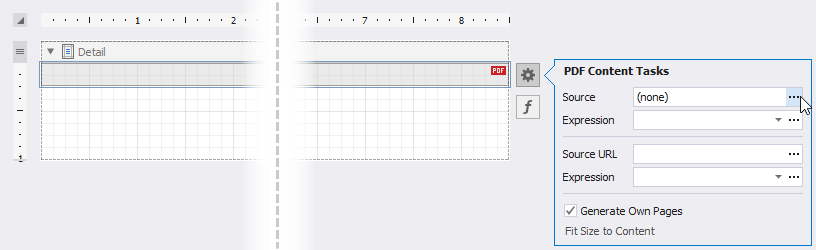
Disable the control’s Generate Own Pages property. Adjust the control size to make PDF content fit the entire Detail band. For this, set the Detail band’s Height to 1095 and the control’s Width and Height to 850 and 1095.

Disable the report’s DesignerOptions.ShowExportWarnings property. Bind the report to the JSON data below and set the report’s Data Member property to OrderItems.
Show JSON Data{ "InvoiceNumber": 241756, "OrderDate": "2018-04-23T18:25:43.511Z", "Customer": { "Name": "Walters", "HomeOffice_Line": "200 Wilmot Rd", "HomeOffice_City": "Deerfield", "HomeOffice_StateName": "IL", "HomeOffice_ZipCode": "60015" }, "Store": { "Address_City": "Anaheim", "Address_Line": "1720 W La Palma Ave", "Address_StateName": "CA", "Address_ZipCode": "83709" }, "Employee": { "FullName": "Harv Mudd" }, "PONumber": "122023", "ShipMethod": 0, "OrderTerms": "15 Days", "OrderItems": [ { "ProductName": "SuperLED 42", "ProductPrice": 1050, "ProductUnits": 2, "Discount": 50, "Total": 2050 }, { "ProductName": "SuperLED 50", "ProductPrice": 1100, "ProductUnits": 5, "Discount": 500, "Total": 5000 }, { "ProductName": "Projector PlusHD", "ProductPrice": 600, "ProductUnits": 5, "Discount": 250, "Total": 2750 }, { "ProductName": "HD Video Player", "ProductPrice": 220, "ProductUnits": 10, "Discount": 200, "Total": 2000 } ], "ShippingAmount": 375, "TotalAmount": 12175 }Place two labels, a line, and a picture box on the PDF page header as shown below:
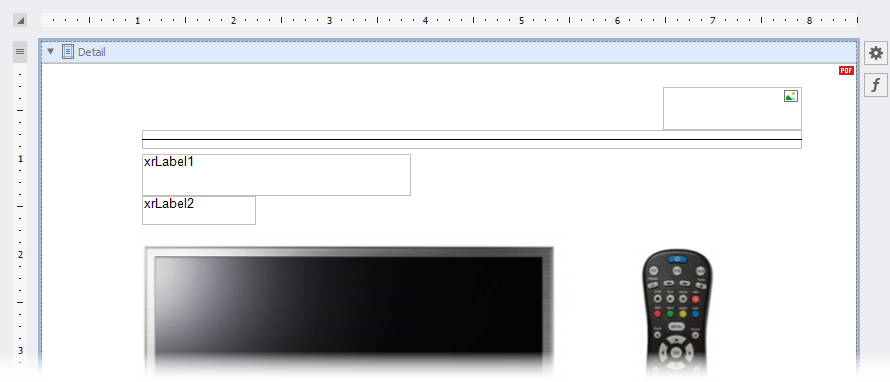
Use the following locations and sizes:
Control Name
Location
Size
xrLabel1
105, 94
280, 44
xrLabel2
105, 138
118, 30
xrLine1
105, 69
687, 20
xrPictureBox1
647, 24
145, 45
Set the line’s Width and Fore Color to 2 and Orange respectively. Assign the following image to the picture box’s Image Source property:

Make xrLabel1’s font bold. Set up label appearance as shown in the table below:
Control Name
Font
Font Size
Text Property’s Expression
Text Format String
xrLabel1
Segoe UI
21
ProductName
-
xrLabel2
Segoe UI
12
ProductPrice
{0:$0}
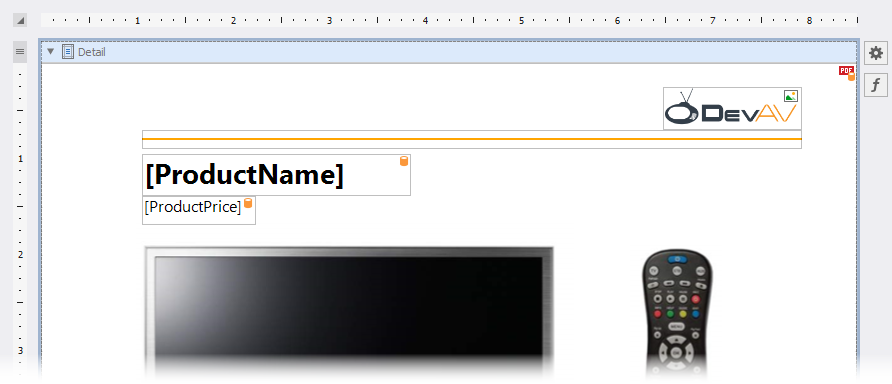
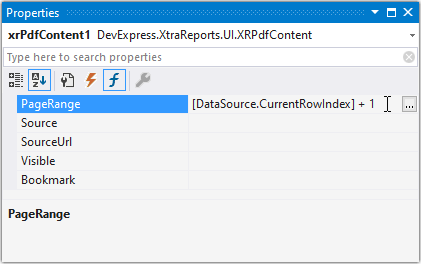
To display a product name and price of each order item on a corresponding PDF file page, set the XRPdfContent.PageRange property’s expression to [DataSource.CurrentRowIndex] + 1.
Add the XRPageInfo control to the PDF page footer. Use the following settings for this control:
Location
Size
Font
Font Size
Text Alignment
Text Format String
0, 1045
850, 50
Segoe UI
12
Middle Center
Page {0} of {1}
Open Preview to show the result. The image below shows the report’s first page:

Add the Report with PDF Content to the Main Report
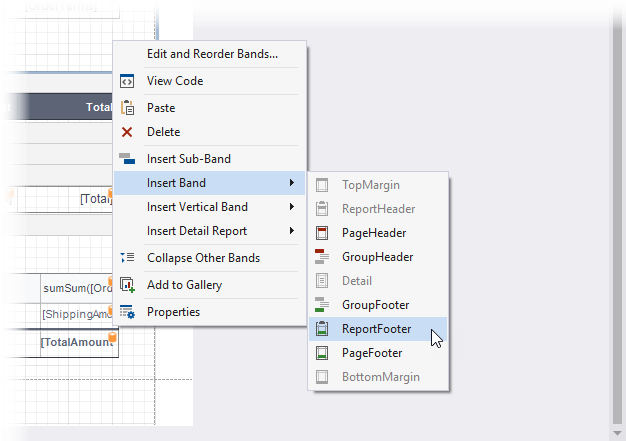
Add a footer to the main report. Right-click the design surface, choose Insert Band, and select ReportFooter.
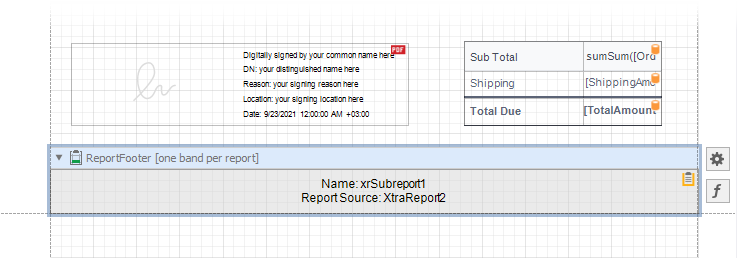
Add the XRSubreport control to the footer. Assign the report with PDF content to the control’s Report Source property. Enable the control’s Generate Own Pages property.
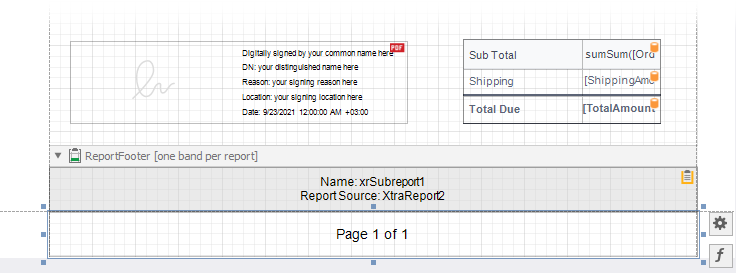
Add the XRPageInfo control to the report’s Bottom Margin band. Set the control’s Text Alignment to Middle Center and Text Format String to Page {0} of {1}.
Open Preview to show the result.
Create a Report with Embedded PDF Content in the End-User Report Designer
Tutorials that explain how to create different reports in EUD Report Designers for WinForms and Web are included in the End-User Documentation online help section: