Create an ASP.NET Core Application with a Report Designer
- 7 minutes to read
This tutorial describes how to use the DevExpress Template Gallery or .NET Core command line interface (CLI) to generate a basic ASP.NET Core application that contains the End-User Report Designer control.
Tip
See the following topic for information about DevExpress Reporting in ASP.NET Core applications: ASP.NET Core Reporting.
The following tutorial explains how to add a report to an ASP.NET Core application: Create a Report in Visual Studio.
Use the DevExpress Template Gallery
The DevExpress Template Gallery implements a step-by-step process that allows you to create an ASP.NET Core application with a Report Designer.
The created application implements the CustomReportStorageWebExtension class that saves the reports you change in the Report Designer to a SQLite database (reportsData.db) in the Data folder. This sample storage is intended for demonstration purposes only. Do not use it in production. Create a ReportStorageWebExtension class descendant instead and implement logic to save reports.
Follow the steps below to create an ASP.NET Core application in Visual Studio:
Ensure that Node.js 10.0 or later with the npm package manager is installed on your computer. Use the node -v and npm -v console commands on 64-bit Windows systems to check package versions. Check the PATH environment variable’s value if a package’s version does not match the version you installed, as there may be a conflict between an x86 and x64 package.
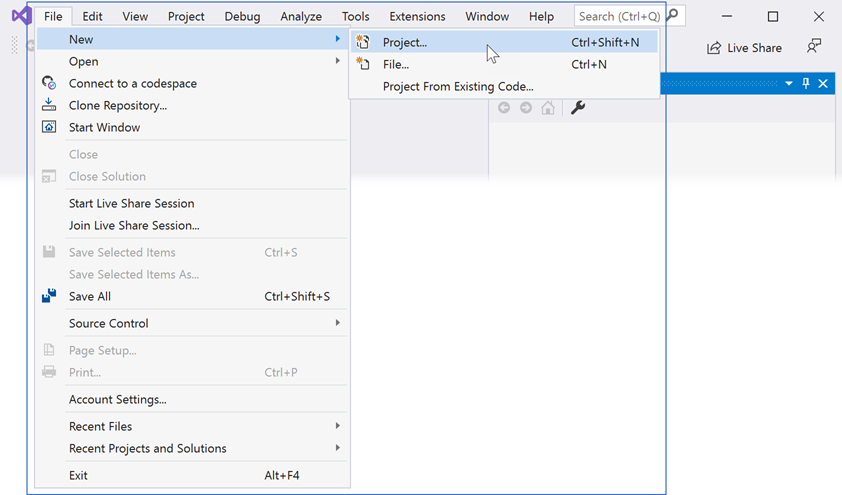
Select FILE | New | Project in the main menu or press CTRL+SHIFT+N to create a new project.
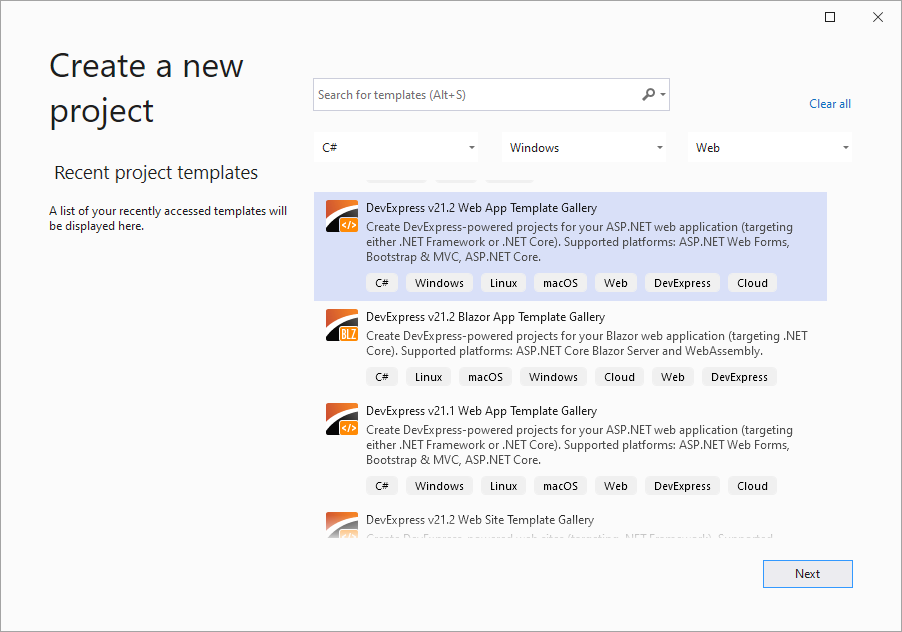
Select the DevExpress v21.2 Web App Template Gallery, and click Next:
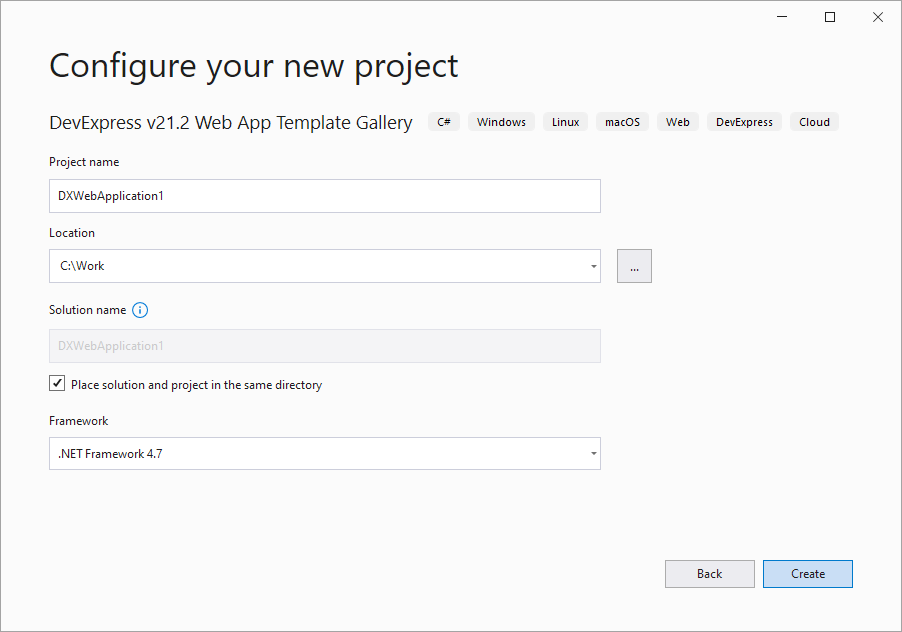
Specify a project name and location, and click Create:
Select Reporting Application from the NET Core category in the invoked DevExpress Template Gallery.
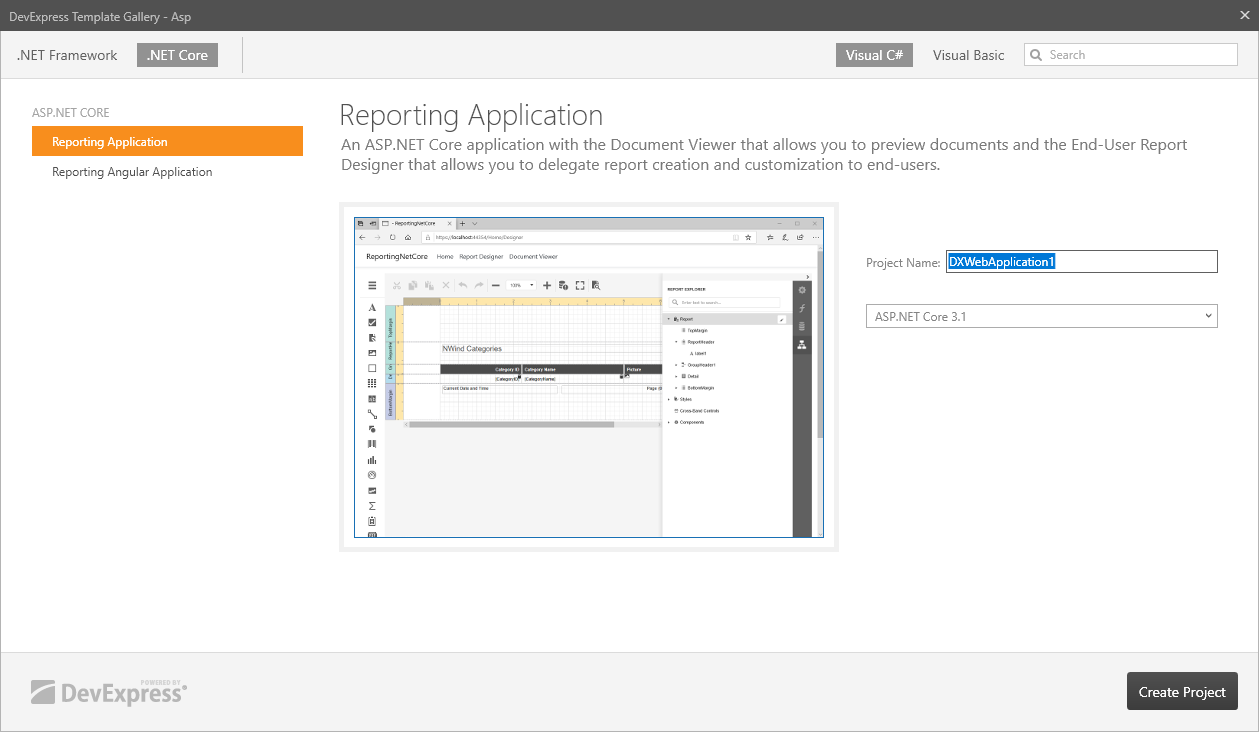
Select the framework version and click Create Project.
Set Add Designer Page to true to add the Report Designer (the
Designer.cshtmlview) to the web application. You can add a Web Document Viewer and a Report Designer to the application.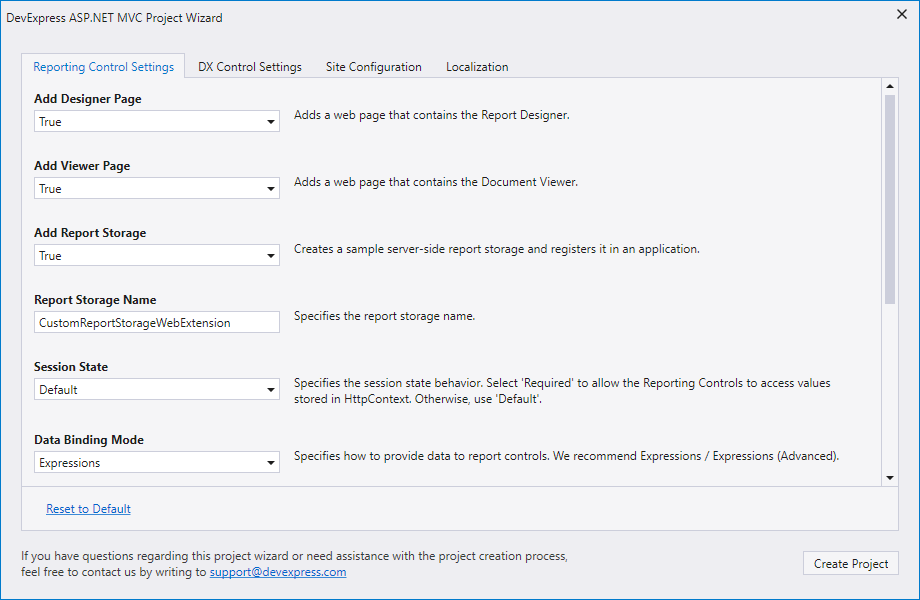
Use the following Report Designer settings:
- Report Storage Name
- Specifies the class name of a server-side report storage. This storage allows you to open report layout data from various sources. A storage service implemented in the template is based on the
reportsData.dbSQLite database in the Data folder. If you modify a report in the Web Report Designer, it is saved to the database in XML format. If you disable the Add Report Storage property, no report storage is created, but you can add a report storage at a later stage.Note
The template generates a sample storage (a ReportStorageWebExtension descendant) for demonstration purposes only. Create your own implementation for use in production.
- Data Binding Mode
- Specifies the data fetch mode for report controls. You can switch between legacy binding mode and expression bindings.
- Add Sample Database
- Specifies whether to create a sample connection string and register it in the Report Designer to create SQL Data Sources in the Report Wizard and Data Source Wizard. The connection string is also used to register a predefined data source.
- Add Sample JSON Data Connection Storage
- Specifies whether to create a storage and register it to create JSON Data Sources in the Report Wizard and Data Source Wizard.
Important
Install the Newtonsoft.Json package to work with a JSON data source.
- Add Sample Data Object
- Specifies whether to add a sample data object to an application and register this data object to create Object Data Sources in the Report Wizard and Data Source Wizard.
- Enable Rich Text Editor
- Specifies whether to add an in-line Rich Text Editor for the RichText control.
Click Create Project to apply these settings to the project.
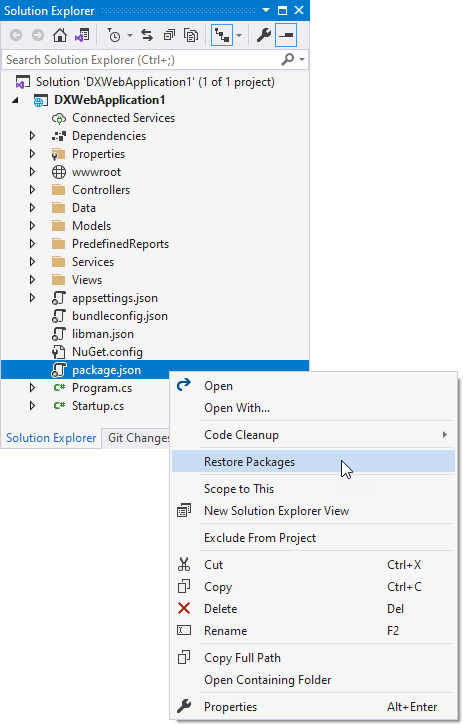
After Visual Studio has created the application, right-click the package.json file in Solution Explorer and choose Restore Packages.
(Optional) You can configure the Report Designer to load a report when the application starts. Navigate to the Views | Home | Designer.cshtml file and replace the built-in unique report name with your report’s name:
Note
If you implement a custom report that inherits from XtraReport and want to open it in the End-User Report Designer, add a constructor without parameters to this report.
@{
    var designerRender = Html.DevExpress().ReportDesigner("reportDesigner")
        .Height("1000px")
        .Bind("TestReport");
    @designerRender.RenderHtml()
}
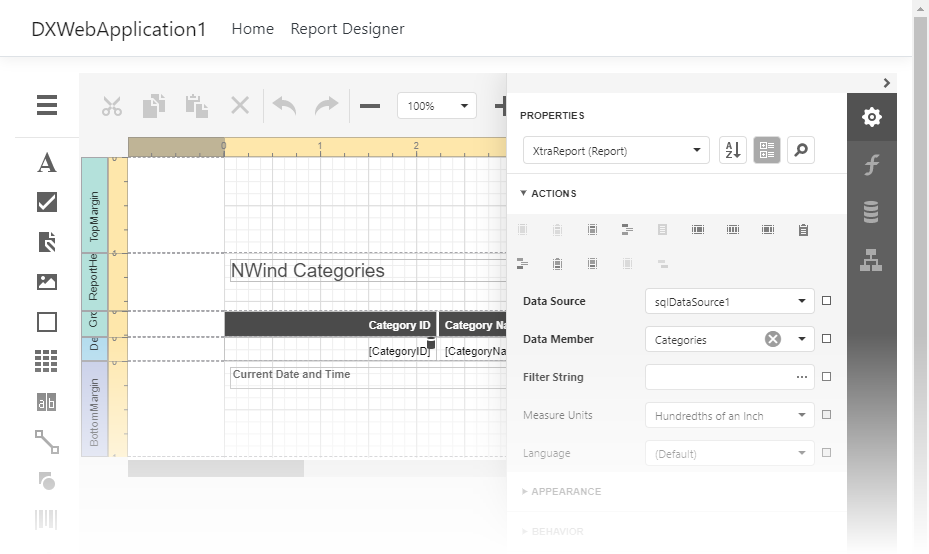
Run the project to see the result:
Use the Console
Use the .NET Core command line interface (CLI) to create an ASP.NET Core Reporting application from the console:
Open the console and type the following command to install DevExpress CLI templates:
dotnet new -i "DevExpress.DotNet.Web.ProjectTemplates"The console displays the list of templates installed on your machine after the package is installed.
Refer to the DevExpress NuGet Feed URL page and obtain the NuGet Feed URL. This URL includes your personal feed authorization key and is used to install NuGet packages for the Report Designer.
Use the command below to create a new project with a Report Designer connected to a sample data source. Pass the NuGet Feed URL as a parameter.
dotnet new dx.reporting --nuget-feed https://nuget.devexpress.com/{auth_key}/api --name ReportDesignerApp --add-designer true --add-data-source trueSpecify the following command line parameters to customize the project:
-nf | --nuget-feed(required)- Specifies your personal DevExpress NuGet Feed URL.
-f |--framework(optional)- Specifies the framework to target. Use values netcoreapp2.1, netcoreapp3.1, or net5.0. The default value is netcoreapp3.1.
-ad | --add-designer(optional)- Specifies whether to create a web page with the Report Designer. The default value is true.
-av | --add-viewer(optional)- Specifies whether to create a web page with a Document Viewer. The default value is true.
-ads | --add-data-source(optional)- Specifies whether to create a sample connection string and register it in the Report Designer to create SQL Data Sources in the Report Wizard and Data Source Wizard. The connection string is also used to register a predefined data source. The default value is false.
-ajs | --add-json-data-connection-storage(optional)- Specifies whether to create a storage and register it to create JSON Data Sources in the Report Wizard and Data Source Wizard. For the storage to work correctly, ensure that the Newtosoft.Json package is installed. The default value is false.
-ao | --add-data-object(optional)- Specifies whether to add a sample data object to an application and register this data object to create Object Data Sources in the Report Wizard and Data Source Wizard. The default value is false.
-rte | --enable-rich-text-editor(optional)- Specifies whether to add an in-line Rich Text Editor for the RichText control. The default value is false.
Navigate to the created application’s folder and download the client resources.
cd ReportDesignerApp
npm install
Ensure that Node.js 10.0 or later with the npm package manager is installed on your computer. Use the node -v and npm -v console commands on 64-bit Windows systems to check package versions. Check the PATH environment variable’s value if a package’s version does not match the version you installed, as there may be a conflict between an x86 and x64 package.
Restore dependencies, build the application, and get the application’s URL:
dotnet restore
dotnet run
The command output contains the application URL, which can be different on different hosts:
Now listening on: http://localhost:2009Open your browser and navigate to the URL to see the result.

Note
If you did not create a report storage, users cannot save and load reports, and use related features. Follow the instructions in the following topic to create and register a report storage in your application: Add Report Storage to ASP.NET Core Application.