How to: Create a Table of Contents
- 2 minutes to read
You can generate a table of contents automatically. To accomplish this task, follow the steps below.
Mark entries
by using built-in heading styles
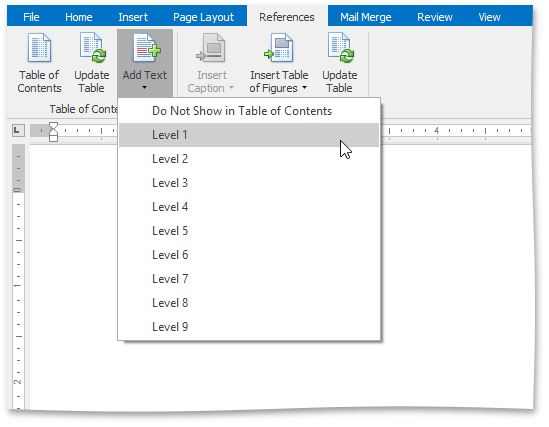
Click in the paragraph that you want to appear in the table of contents. On the References tab, in the Table of Contents group, click Add Text, and then select the desired outline level.
by specifying a paragraph outline level
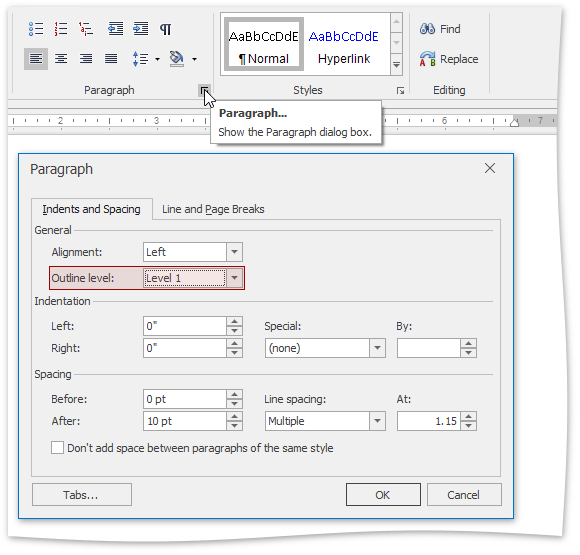
Click in the paragraph that you want to appear in the table of contents.
Invoke the Paragraph dialog box via the context menu or using Ribbon UI. If using Ribbon UI, on the Home tab, click the Paragraph Dialog Box Launcher and then use the Outline level combo box to specify the outline level.
Insert Table of Contents
Click where you want to insert the table of contents.
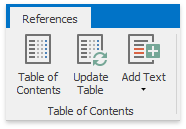
On the References tab, click Table of Contents in the Table of Contents group.
Update Table of Contents
If you have modified entries in your document, you can quickly update the table of contents.
On the References tab, click Update Table in the Table of Contents group.
Format Table of Contents
After the table of contents is created, the document is containing several styles named “TOC 1”, “TOC 2” etc., depending on how many levels the table of contents includes. You can modify these styles to change formatting applied to different levels.
Modify Table of Contents
You can use field switches to specify a separator between sequence and page numbers, the outline levels to be included and whether table entries should be hyperlinks or not.
To display and edit a TOC field, use the Update Field command in the context menu or click Show All Field Codes button in the Mail Merge group. Type in codes as described in the TOC field article.