Unbound Mode
- 3 minutes to read
This topic describes how to use the Vertical Grid Control (VGridControl) when it isn’t bound to any data source (unbound mode). For a list of all the data modes supported by the vertical grid controls, see the Data Modes Overview topic.
Unbound Mode Overview
A vertical grid control functions in Unbound Mode if it isn’t bound to any data source, this means that the VGridControl.DataSource property’s value is null.
Unbound mode is appropriate for displaying lists of label-value pairs which can be optionally categorized, as in the image below:

For instance, you can use unbound mode if you need to edit a number of option values, which may have different data types. If you need to display and edit properties of a specific object you can also consider using the PropertyGridControl.
Like in bound mode, in unbound mode you can assign editors to cells to provide a handy way to edit cell values. Any editor from the DevExpress Editors Library can be used. In addition you can organize rows into categories and create hierarchy structures.
Generally, implementing unbound mode involves the following steps:
- create the required rows and arrange them in a specific manner;
- associate editors with the created rows (row items);
- use the row’s RowProperties.Value property to set initial cell values.
An Example of Using Unbound Mode
This example will create two editor rows in a VGridControl which are united into a single category. The first row (‘Output Path‘) will use the text editor to edit its value. Another row (‘Generate Debugging Information‘) will use the check box.
Follow the steps below:
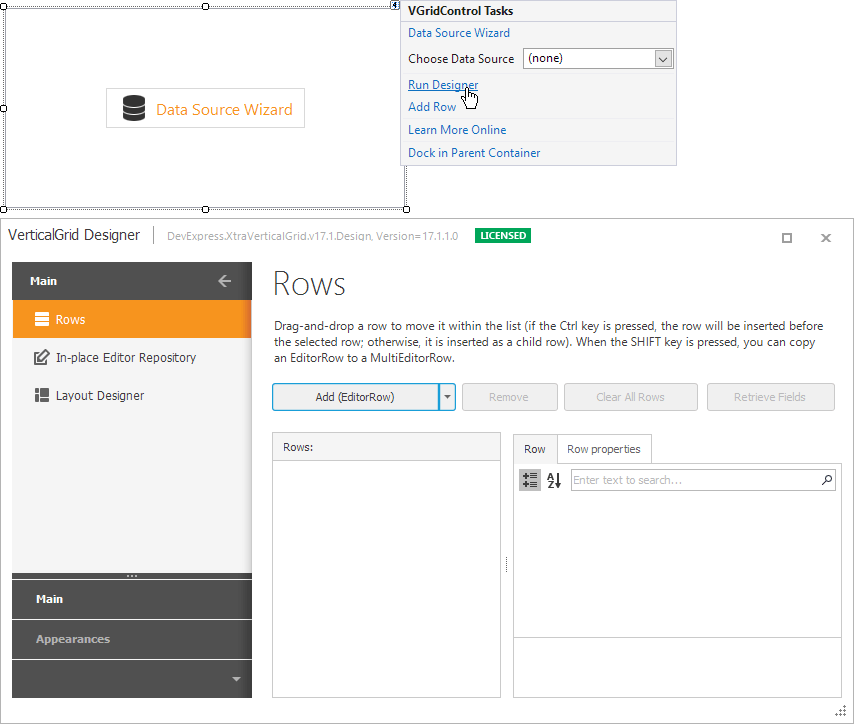
Run the control’s Designer. To do this, right-click on the control and choose the Run Designer item from its context menu.
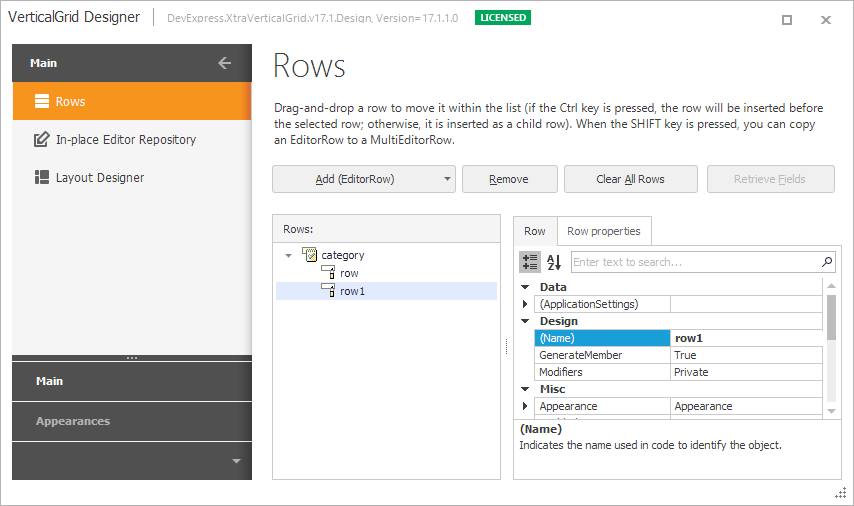
Ensure that the Rows Page is open. Use the down arrow button to invoke the dropdown window which lists the row types. Choose the CategoryRow item. This will add a category row to the vertical grid. Add two editor rows in a similar manner. Drag the editor rows to the category row to include them in that category.
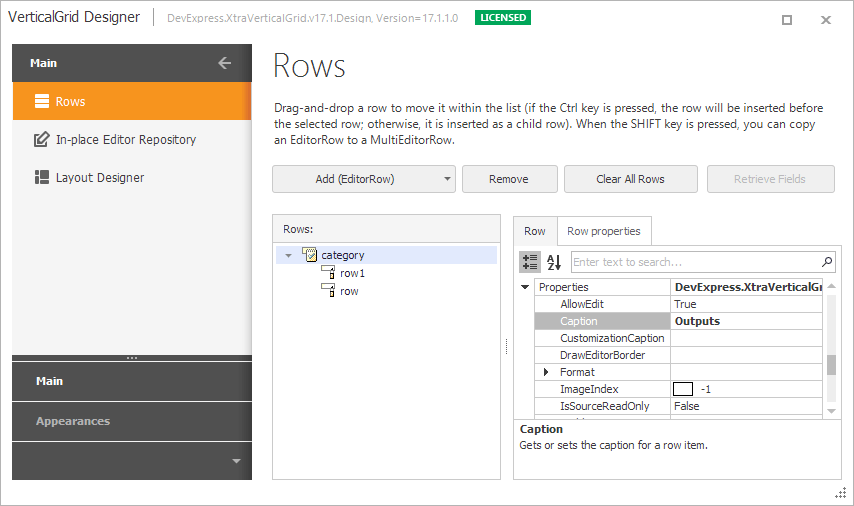
Select the category row. Set its RowProperties.Caption property to ‘Outputs‘. The image below demonstrates how to do this. In the same way specify the ‘Output Path‘ and ‘Generate Debugging Information‘ captions to the editor rows.
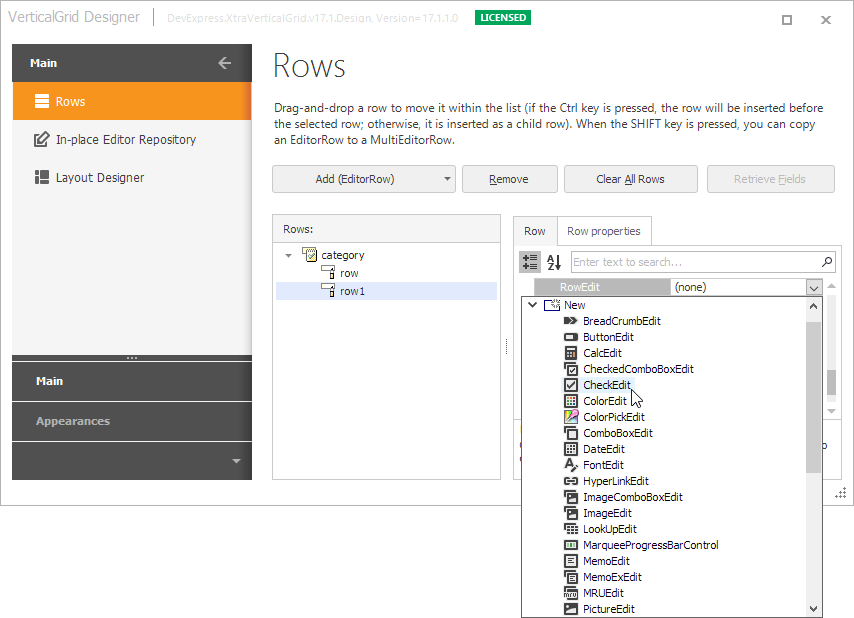
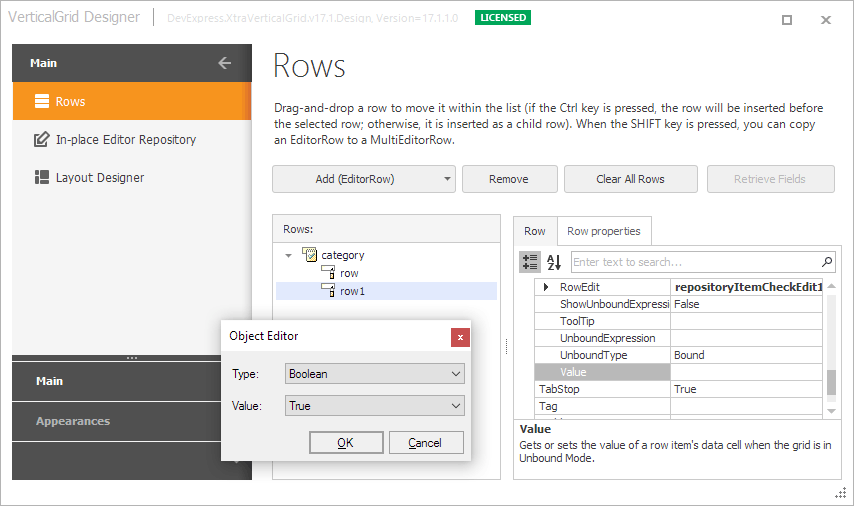
Select the ‘Generate Debugging Information‘ row and bind a check box editor to it. The image below demonstrates how to do this.
Specify a value for the ‘Generate Debugging Information‘ row’s value. This can be done using the Object Editor dialog which is invoked by clicking on the button which corresponds to the RowProperties.Value property.
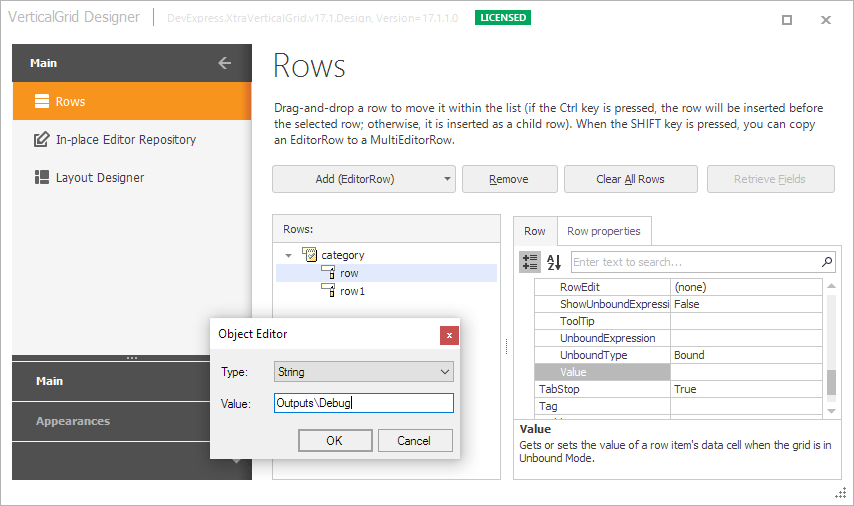
Set the ‘Output Path‘ row’s RowProperties.Value property to the ‘Outputs\Debug‘ string.
Close the VerticalGrid Designer and run the application. The image below shows the result.