Lesson 2 - Connect a Document to Data
- 6 minutes to read
This tutorial describes the steps required to connect a Snap document to data and provide a document data source with a master-detail relation. To start this tutorial, run the Snap application created in Lesson 1 - Create a Snap Application.
The tutorial consists of the following sections.
Connect to Data
This tutorial uses a connection to the sample Northwind database (the nwind.mdb file included in the product installation located by default at C:\Users\Public\Documents\DevExpress Demos 18.2\Components\Data).
To connect a Snap report to data, do the following.
Click Data | Add New Data Source on the Snap application’s ribbon toolbar.

Alternatively, right-click an empty area in the Data Explorer and click Add Data Source in the invoked menu.
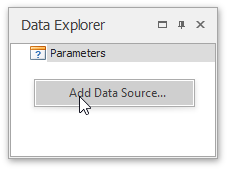
The Data Source Wizard is invoked. Proceed with the following steps in the wizard.
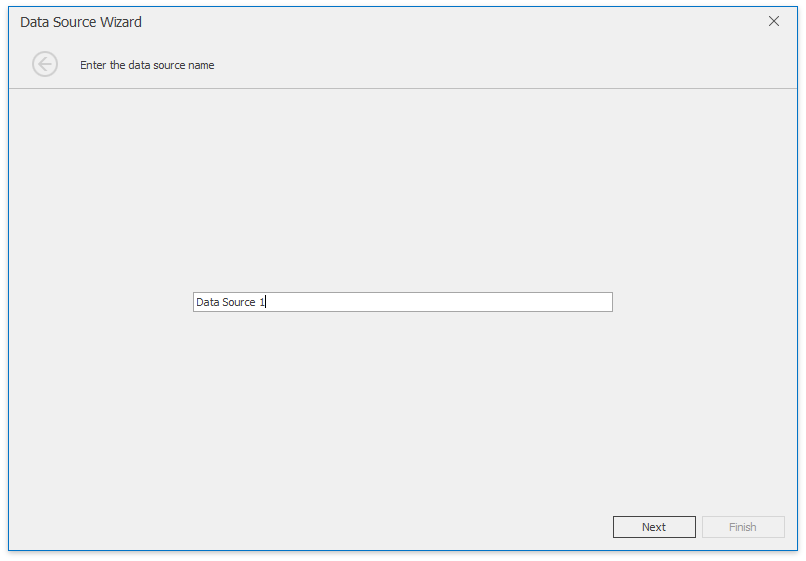
On the first page of the invoked Data Source wizard, specify a name for the new data source and click Next.
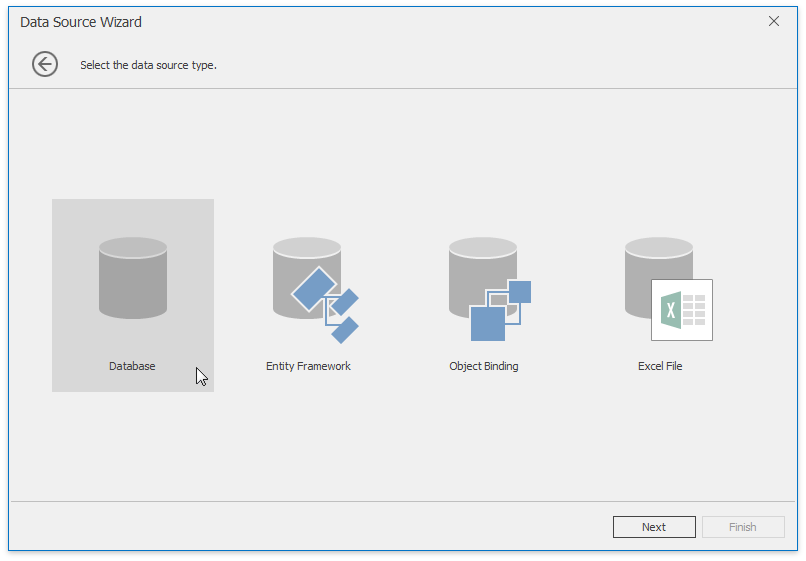
On the next page, select a data source type (Database) and click Next.
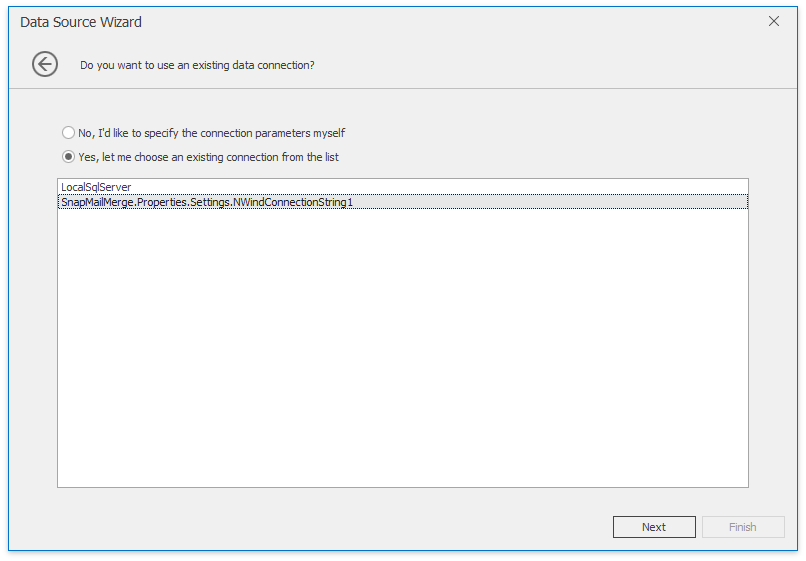
If a data connection has already been specified in the application, the next wizard page allows you to select whether to use one of the existing connections, or create a new one.
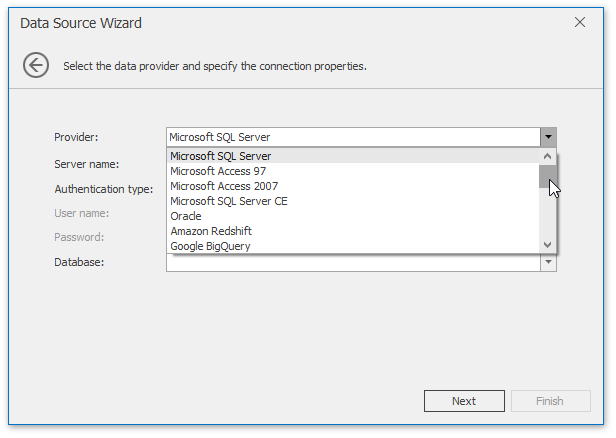
On the next page, select a data provider, specify the required connection settings and click Next.
Select from the following supported data source types.
Relational Database System
Supported Versions
.NET Framework Data Provider
.NET Standard 2.0 Data Provider
Microsoft SQL Server
2005 or higher
2005 Express or higher
Azure SQL Database
System.Data.dll (Included in .NET Framework)
Microsoft Access
Access 2000 or higher
Access 2007 or higher
System.Data.dll (Included in .NET Framework)
Microsoft SQL Server CE
3.5, 4.0
System.Data.SqlServerCe.dll (Included in .NET Framework)
Oracle Database
9i or higher
System.Data.OracleClient.dll
Oracle.DataAccess.dll
Amazon Redshift
n/a
Google BigQuery
Only legacy SQL functions and operations are supported
Teradata
13.0 or higher
SAP Sybase Advantage
Advantage Database Server 9.1 or higher
SAP Sybase ASE
Sybase Adaptive Server 12.0 or higher
SAP SQL Anywhere
11 or higher
IBM DB2
9.5 or higher
Firebird
1.5 or higher, Dialect 3
FirebirdSql.Data.FirebirdClient.dll
FirebirdSql.Data.Firebird.dll
MySQL
4.1 or higher
Pervasive PSQL
9.x or higher
PostgreSQL
7.x or higher
VistaDB
4, 5
SQLite
3.x
XML file
n/a
Built-in support
Built-in support
Depending on the selected data provider, it may be necessary to specify additional connection options (such as authentication type and database name) on this page.
Alternatively, you can select Custom connection string and specify the connection string.
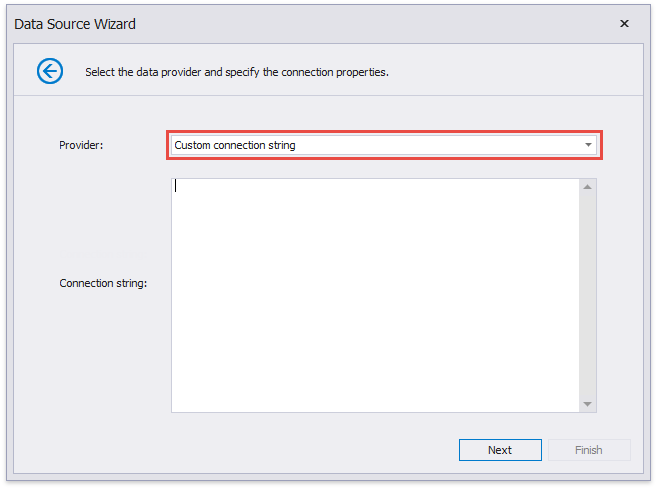
Use the XpoProvider parameter to identify a data source provider. See connection string examples in the table below.
Relational Database System
Connection String Sample See Note
Microsoft SQL Server *
XpoProvider=MSSqlServer;Data Source=(local);User ID=username;Password=password;Initial Catalog=database;Persist Security Info=true
*The MS SQL Server data provider is automatically specified if you set the “Initial Catalog” parameter and do not use the word “Provider” (for instance, the “XpoProvider” parameter) in the connection string.
Microsoft Access
XpoProvider=MSAccess;Provider=Microsoft.Jet.OLEDB.4.0;Data Source=C:\mydatabase.mdb;User Id=admin;Password=;
XpoProvider=MSAccess;Provider=Microsoft.ACE.OLEDB.12.0;Data Source=C:\mydatabase.accdb;User Id=admin;Password=;
Microsoft SQL Server CE
XpoProvider=MSSqlServerCE;Data Source=MyDatabase.sdf;Password=MyPassword
Oracle Database
XpoProvider=Oracle;Data Source=TORCL;User ID=MyUserName;Password=MyPassword
XpoProvider=ODP;Data Source=TORCL;User ID=MyUserName;Password=MyPassword
XpoProvider=ODPManaged;Data Source=TORCL;User ID=MyUserName;Password=MyPassword
Amazon Redshift
XpoProvider=Amazon Redshift;Server=127.0.0.1;User ID=MyUserName;Password=MyPassword;Database=MyDatabase;Encoding=UNICODE
Google BigQuery
XpoProvider=BigQuery;ProjectID=myProject;DataSetId=myDataSet;OAuthClientId=myClientId;OAuthClientSecret=mySecret;OAuthRefreshToken=myRefreshToken
XpoProvider=BigQuery;ProjectId=project;DatasetId=dataset;ServiceAccountEmail=example@gmail.com;PrivateKeyFileName=key.p12
Teradata
XpoProvider=Teradata;Data Source=myServerAddress;User ID=myUsername;Password=myPassword;
SAP Sybase Advantage
XpoProvider=Advantage;Data Source=\myserver\myvolume\mypat\mydd.add;ServerType=local;User ID=ASSSYS;TrimTrailingSpaces=true
SAP Sybase ASE
XpoProvider=Ase;Port=5000;Data Source=MyAseServer;User ID=MyUserName;Password=MyPassword;Initial Catalog=MyDatabase;Persist Security Info=true
SAP SQL Anywhere
XpoProvider=Asa;eng=server;uid=user;pwd=password;dbn=database;persist security info=true;
IBM DB2
XpoProvider=DB2;Server=server:port;Database=database;UID=user;PWD=password;
Firebird
XpoProvider=Firebird;DataSource=localhost;User=SYSDBA;Password=masterkey;Database=MyDatabase.fdb;ServerType=0;Charset=NONE
MySQL
XpoProvider=MySql;Server=MyServerAddress;User ID=MyUserName;Password=MyPassword;Database=MyDatabase;Persist Security Info= true;Charset=utf8
Pervasive PSQL
XpoProvider=Pervasive;Server=MyServerAddress;UID=MyUserName;PWD=MyPassword;ServerDSN=MyDatabase
PostgreSQL
XpoProvider=Postgres;Server=127.0.0.1;User ID=MyUserName;Password=MyPassword;Database=MyDatabase;Encoding=UNICODE
VistaDB
XpoProvider=VistaDB;Data Source=C:\mydatabase.vdb4
XpoProvider=VistaDB5;Data Source=C:\mydatabase.vdb5
SQLite
XpoProvider=SQLite;Data Source=filename
XML file
XpoProvider=InMemoryDataStore;data source=D:\Contacts.xml;read only=True
Note
The connection strings demonstrated above are examples. You can specify alternative variants.
To proceed to the next wizard page, click Next.
- On the next page, you are prompted to save the connection string including or excluding the user name and a password. Choose any option and click Next.
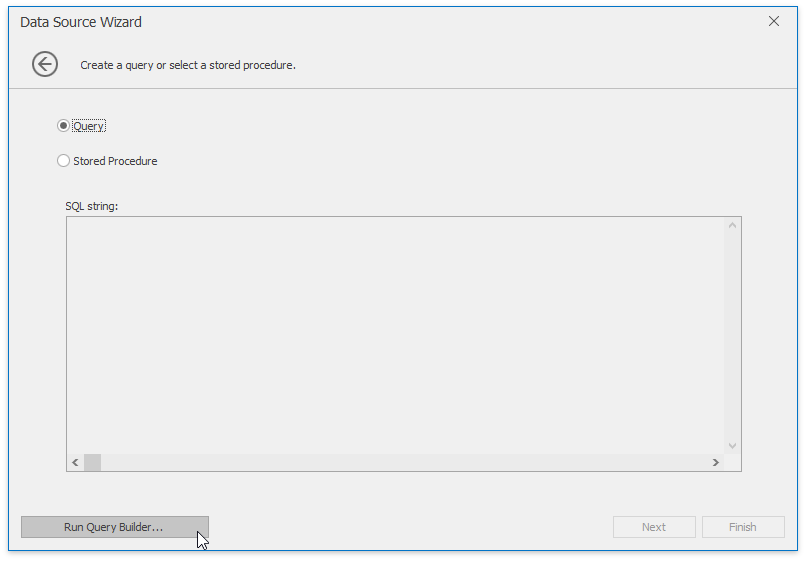
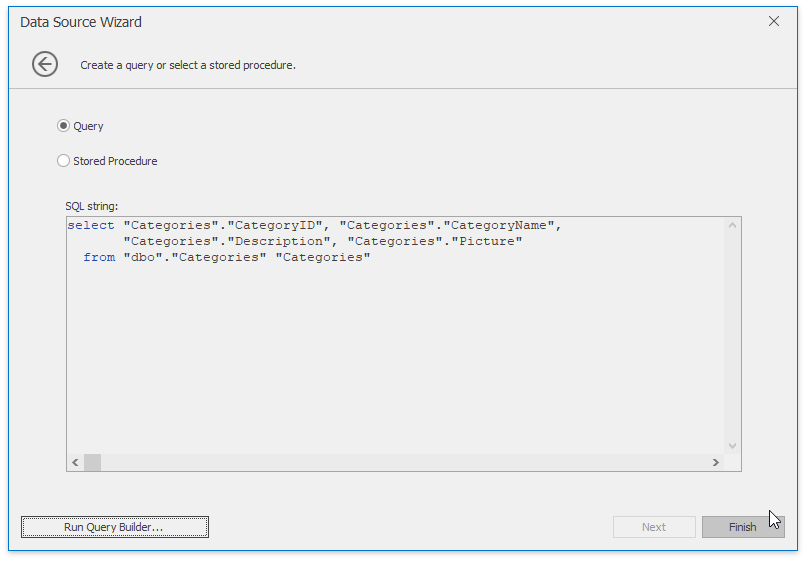
This page allows you to select a query or a stored procedure.
Click Run Query Builder… to invoke the Query Builder window.
Important
Manual SQL editing is not allowed by default. Enabling custom SQL queries may lead to inadvertent or unauthorized modifications to your data/database structure. Before you decide to allow manual SQL editing, we recommend you to follow best practices and implement the appropriate end-user read/write permissions at the database level.
If for some reason you have to enable custom SQL editing, set the SnapControl.Options.DataSourceWizardOptions.SqlWizardSettings.EnableCustomSql option to true.
Note that only SELECT statements are allowed in the text. To override this restriction, handle the SnapControl.ValidateCustomSql event.
In the invoked Query Builder window, double-click the Categories item in the list of available tables on the left to add it to the tables included into the query.
Enable the check box for the Categories table, to include all of its fields in the view.
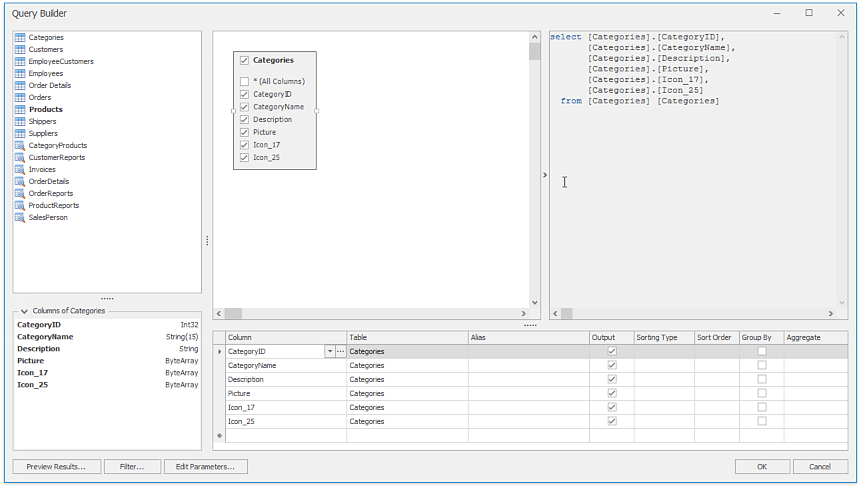
Click OK to close the Query Builder and return to the Data Source Wizard.
When the query is ready, click Finish to save it.
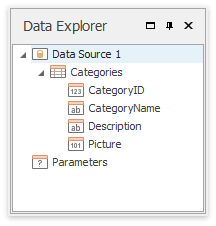
After the data source has been added to the report, its data members and data fields are displayed in the Data Explorer.
Create a Master-Detail Relation
This section of the tutorial illustrates how to add a master-detail relation to the document’s data source.
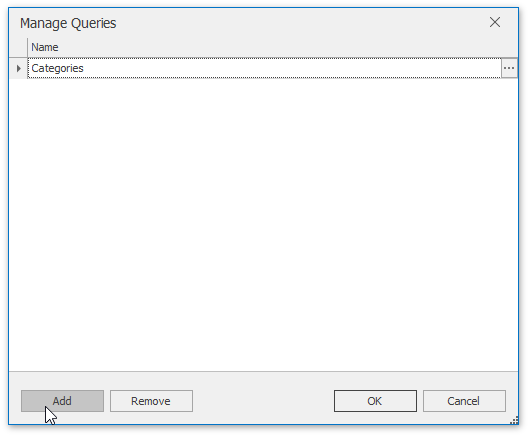
Right-click the NWind Data Source node in the Data Explorer window and select Manage Queries… in the invoked context menu.
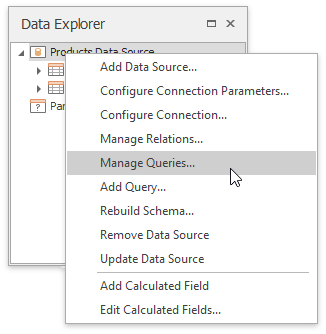
The Manage Queries dialog is displayed. It lists the available queries and allows you to edit them, delete or add a new query. Click the ellipsis to the right of the query name to invoke the Query Editor dialog for the selected query.
Click Run Query Builder.. to invoke the Query Builder window.
Double-click the Products item in the list of available tables on the left to include it in the list of data tables to be used.
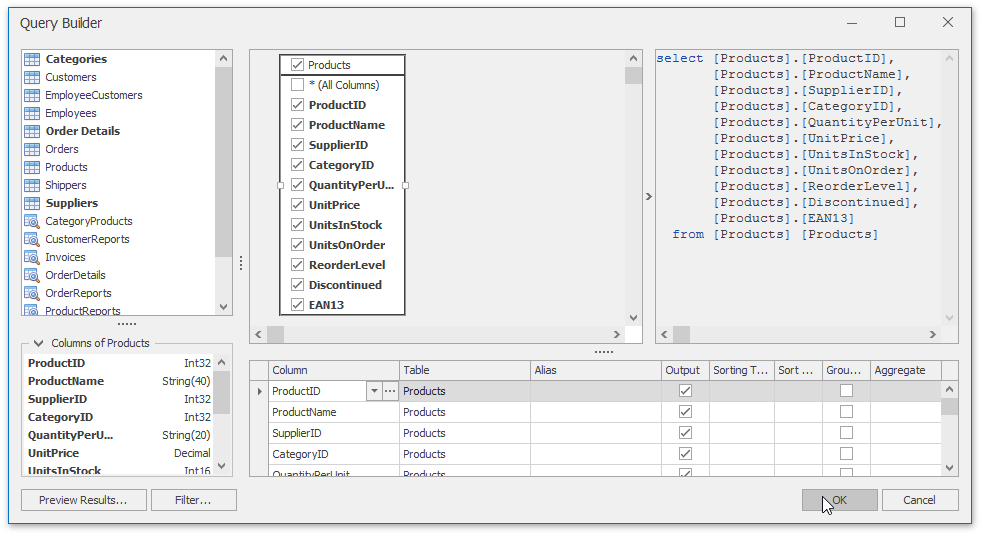
Enable the check box for the Products table, to include all of its fields in the view.
Click OK to close the Query Builder. Click Finish to close the Query Editor. Click OK to close the Manage Queries window which contains now two queries.
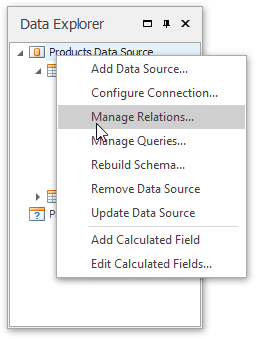
Right-click the NWind Data Source node in the Data Explorer window and select Manage Relations… in the invoked context menu.
In the invoked Master-Detail Relation Editor window select the CategoryID item in the Categories table and drag it to item of the same name in the Products table.
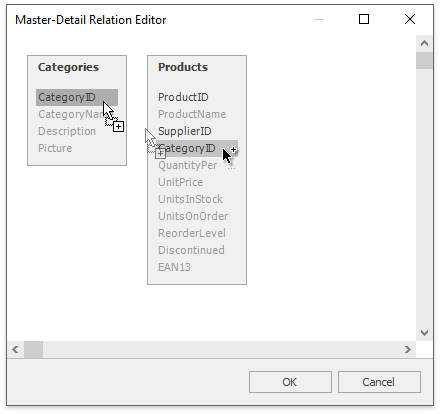
The relation is created as illustrated in the following image.
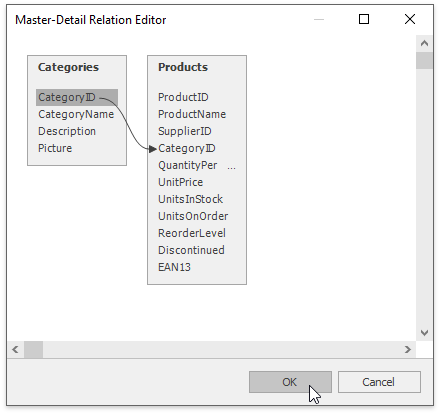
Next, click OK to apply changes to the data source and exit.
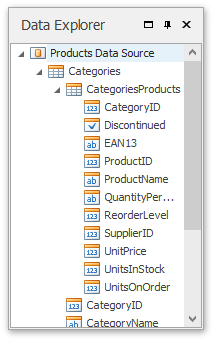
The content of the Data Explorer will be updated to reflect the new structure of the document data source.
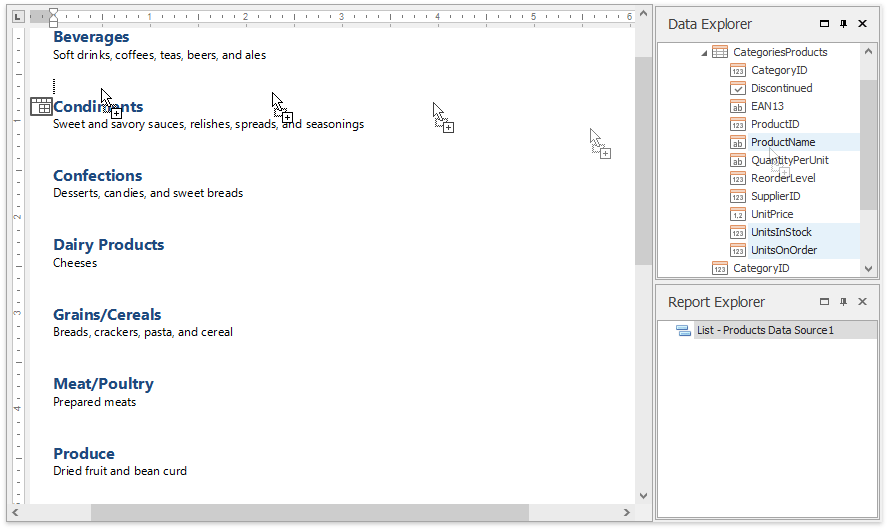
To create a detail report, drag-and-drop the ProductName, UnitPrice and UnitsOnOrder fields of the CategoriesProducts relation from the Data Explorer onto the document’s body, as shown in the image below.
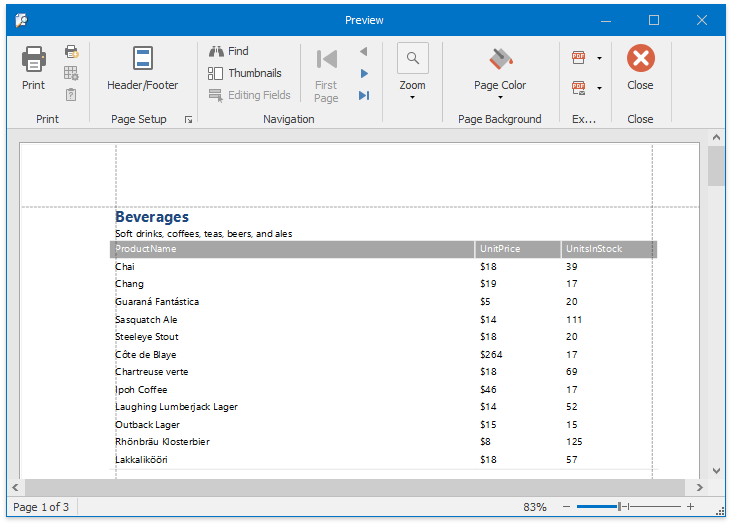
The master-detail report is now ready. Click the Print Preview button in the File tab of the ribbon menu to view the preview.