Lesson 4: Create Custom Labels
- 2 minutes to read
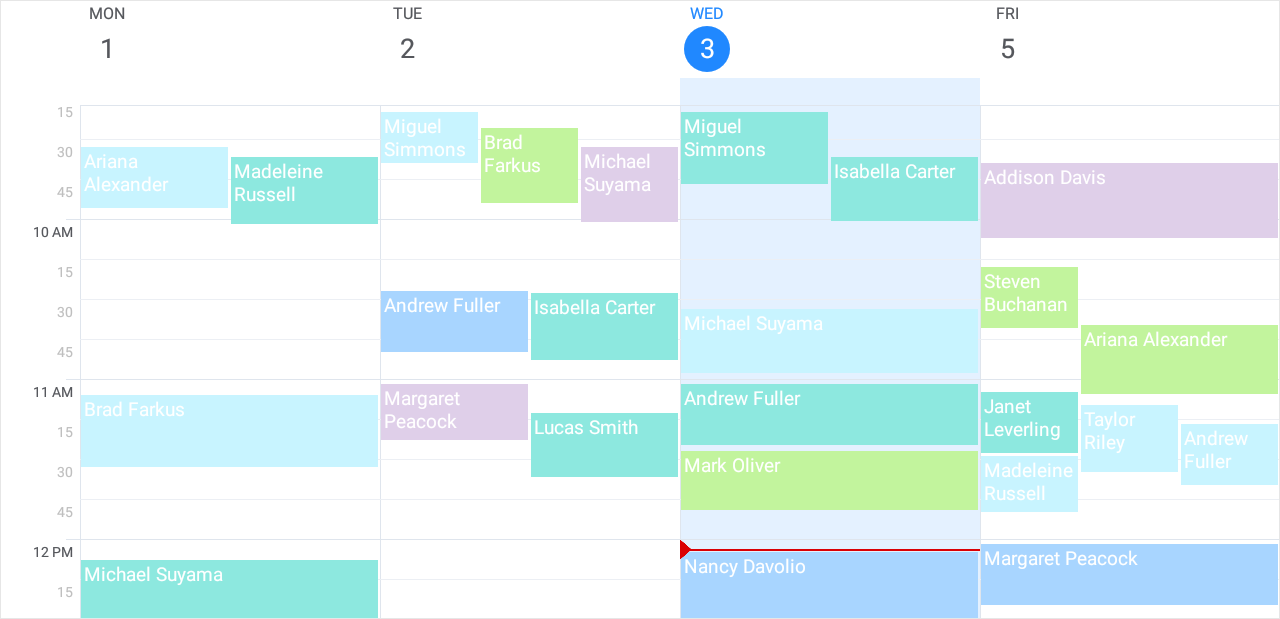
A label specifies the background color of an appointment’s rectangle. Users can assign labels to appointments to categorize and identify them. A scheduler view provides a set of predefined labels, but you can replace them with custom labels.
Open the solution created in Lesson 2 and follow the steps below to bind the scheduler to a collection of custom labels.
Prepare a Data Source
- Add the MedicalAppointmentType class that represents a custom label.
- Create an observable collection of custom label objects.
Use a custom label object to specify an appointment instance’s label.
using Xamarin.Forms;
// ...

namespace Scheduler_GettingStarted {
    // ...

    public class MedicalAppointmentType {
        public int Id { get; set; }
        public string Caption { get; set; }
        public Color Color { get; set; }
    }

    public class ReceptionDeskData {
        // ...

        public static string[] AppointmentTypes = { "Hospital", "Office",
                                                    "Phone Consultation",
                                                    "Home", "Hospice" };
        public static Color[] AppointmentTypeColors = { Color.FromHex("#dfcfe9"),
                                                        Color.FromHex("#c2f49d"),
                                                        Color.FromHex("#8de8df"),
                                                        Color.FromHex("#a8d5ff"),
                                                        Color.FromHex("#c8f4ff") };

        void CreateLabels() {
            ObservableCollection<MedicalAppointmentType> result =
                                                new ObservableCollection<MedicalAppointmentType>();
            int count = AppointmentTypes.Length;
            for (int i = 0; i < count; i++) {
                MedicalAppointmentType appointmentType = new MedicalAppointmentType();
                appointmentType.Id = i;
                appointmentType.Caption = AppointmentTypes[i];
                appointmentType.Color = AppointmentTypeColors[i];
                result.Add(appointmentType);
            }
            Labels = result;
        }

        // ...

        MedicalAppointment CreateMedicAppointment(int appointmentId, string patientName,
                                                    DateTime start, TimeSpan duration, int room) {
            MedicalAppointment medicalAppointment = new MedicalAppointment();
            medicalAppointment.Id = appointmentId;
            medicalAppointment.StartTime = start;
            medicalAppointment.EndTime = start.Add(duration);
            medicalAppointment.Subject = patientName;

            // Assign a custom label to an appointment
            medicalAppointment.LabelId = Labels[rnd.Next(0, 5)].Id;

            if (medicalAppointment.LabelId != 3)
                medicalAppointment.Location = String.Format("{0}", room);
            return medicalAppointment;
        }

        // ...
        public ObservableCollection<MedicalAppointmentType> Labels { get; private set; }

        public ReceptionDeskData() {
            CreateLabels();
            // ...
        }
    }
}
Add a property that returns the collection of appointment labels to a view model.
using System;
using System.Collections.Generic;
using System.ComponentModel;

namespace Scheduler_GettingStarted {
    public class ReceptionDeskViewModel : INotifyPropertyChanged {
        // ...
        public IReadOnlyList<MedicalAppointmentType> AppointmentTypes { get => data.Labels; }

        public ReceptionDeskViewModel() {
            data = new ReceptionDeskData();
        }
        // ...
    }
}
Bind Scheduler to Data
In the MainPage.xaml file:
- Bind the DataSource.AppointmentLabelsSource property to the view model’s AppointmentTypes property.
- Use the DataSource.AppointmentLabelMappings property to map appointment label properties to the MedicalAppointmentType class properties.
<ContentPage xmlns="http://xamarin.com/schemas/2014/forms"
            xmlns:x="http://schemas.microsoft.com/winfx/2009/xaml"
            xmlns:local="clr-namespace:Scheduler_GettingStarted"
            xmlns:dxsch="http://schemas.devexpress.com/xamarin/2014/forms/scheduler"
            x:Class="Scheduler_GettingStarted.MainPage">
    <ContentPage.BindingContext>
        <local:ReceptionDeskViewModel/>
    </ContentPage.BindingContext>
    <dxsch:WorkWeekView>
        <dxsch:WorkWeekView.DataStorage>
            <dxsch:SchedulerDataStorage x:Name="storage">
                <dxsch:SchedulerDataStorage.DataSource>
                    <dxsch:DataSource AppointmentsSource="{Binding MedicalAppointments}"
                                      AppointmentLabelsSource="{Binding AppointmentTypes}">
                        <!-- ... -->
                        <dxsch:DataSource.AppointmentLabelMappings>
                            <dxsch:AppointmentLabelMappings
                                Caption="Caption"
                                Color="Color"
                                Id="Id"/>
                        </dxsch:DataSource.AppointmentLabelMappings>
                    </dxsch:DataSource>
                </dxsch:SchedulerDataStorage.DataSource>
            </dxsch:SchedulerDataStorage>
        </dxsch:WorkWeekView.DataStorage>
    </dxsch:WorkWeekView>
</ContentPage>
The scheduler applies custom colors to appointments.
