Create a Dashboard
- 2 minutes to read
The Web dashboard control allows you to embed the user interface required to create dashboards at runtime after you prepare the control for launch.
You can create a dashboard in two ways:
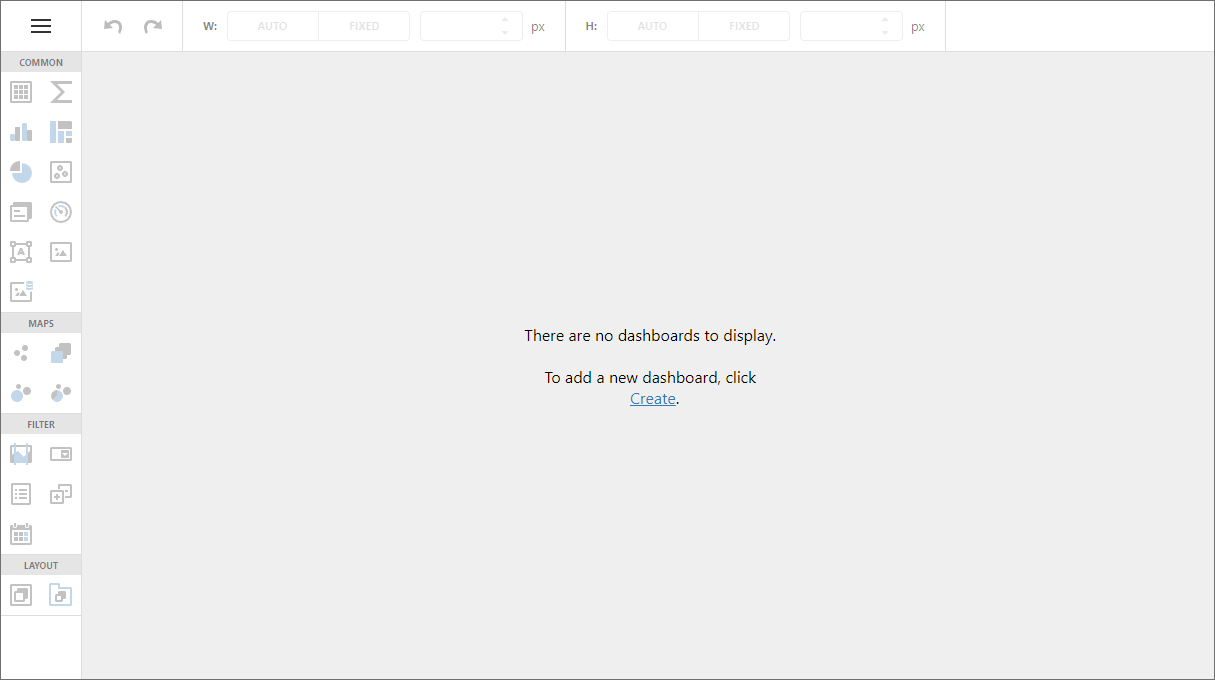
Click Create if your application does not have any dashboards.
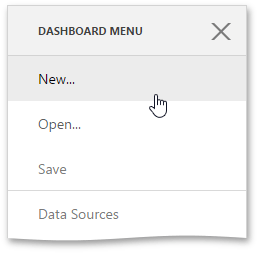
Click the New button in the dashboard menu.
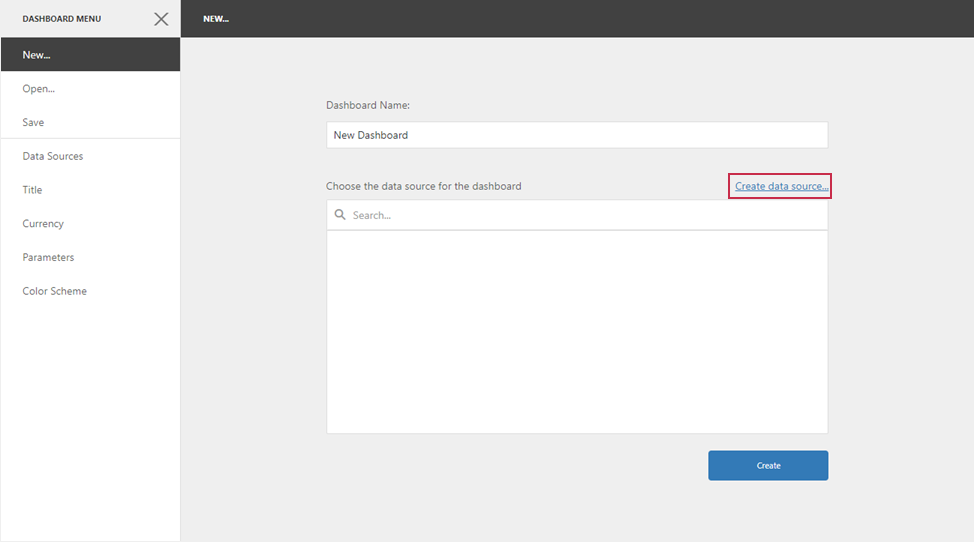
After that, the New… page is invoked. Here you can set a dashboard name, create a new data source or connect to an existing data source.
Refer to the following topic for more information on how to supply data for the dashboard: Provide Data.
Implement Custom Functionality
The CreateDashboardExtension adds the New… item to the dashboard menu and allows you to create a new dashboard. The CreateDashboardExtension has the following methods:
- showCreateNewDashboard
- Opens the “New…” dashboard menu page.
- performCreateDashboard(dashboardName, dashboardJson)
- Creates a new dashboard with a specified name and JSON model.
You can unregister the CreateDashboardExtension in your control and implement a custom extension to create dashboards according to custom logic.
The following code snippet implements a custom extension that creates an empty dashboard with a given name and no data connection:
class CreateNewDashboardExtension {
    toolbox;
    menuItem;
    dashboardControl;
    name = "dashboard-create-new";
    newName = ko.observable("New Dashboard Name");

    constructor(dashboardControl) {
        this.dashboardControl = dashboardControl;
        this.menuItem = {
            id: "dashboard-crete-new",
            title: "Create New...",
            template: "dx-create-new-form",
            selected: ko.observable(true),
            disabled: ko.computed(function () { return false; }),
            index: 105,
            data: this
        };
    }

    createNew() {
        if (this.isExtensionAvailable()) {
            this.toolbox.menuVisible(false);
            this.newDashboardExtension.performCreateDashboard(this.newName(), new DevExpress.Dashboard.Model.Dashboard({}));
        }
    }

    isExtensionAvailable() {
        return this.toolbox !== undefined && this.newDashboardExtension !== undefined;
    }

    start() {
        this.toolbox = this.dashboardControl.findExtension("toolbox");
        this.newDashboardExtension = this.dashboardControl.findExtension("createDashboard");

        if (this.isExtensionAvailable())
            this.toolbox.menuItems.push(this.menuItem);
    }
    stop() {
        if (this.isExtensionAvailable())
            this.toolbox.menuItems.remove(this.menuItem);
    }
}
Define the Create New extension template in your application:
<script type="text/html" id="dx-create-new-form">
    <div>Dashboard Name:</div>
    <div style="margin: 10px 0" data-bind="dxTextBox: { value: newName }"></div>
    <div data-bind="dxButton: { text: 'Create', onClick: createNew }"></div>
</script>
Register the created custom extension and unregister the CreateDashboardExtension extension in your application:
function onBeforeRender(dashboardControl) {
    dashboardControl.unregisterExtension('createDashboard');
    dashboardControl.registerExtension(new CreateNewDashboardExtension(dashboardControl));
}
For more information on client-side platform specifics, refer to the following topic: Client-Side Specifics.
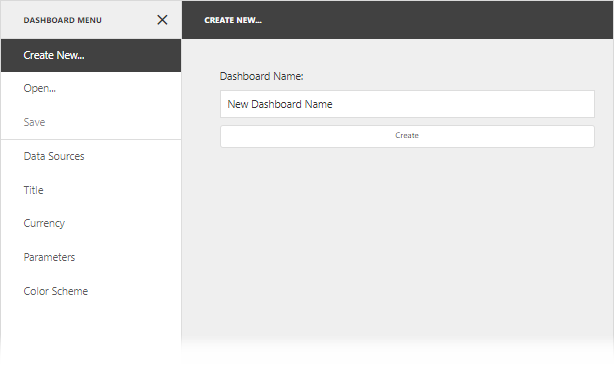
The Create New… page looks as follows:
Tip
For more information on what an extension is and how to access existing extensions, refer to the following topic: Extensions in the Web Dashboard.