Scaffolding
- 4 minutes to read
The DevExtreme Scaffolder for Visual Studio allows you to generate API controllers and views (or Razor pages) for DevExtreme-based controls.
Scaffold API Controllers
The Scaffolder allows you to create an API controller that uses an Entity Framework Core data model or XPO data model to access data. The scaffolded API controller contains REST actions that perform CRUD operations on entities from a selected database context or data model.
Entity Framework Core Data Model
You can scaffold a controller that uses an Entity Framework Core data model.
Note
Entity Framework requires a database context class to interact with a database. If your project does not contain this class, use the Create the Database Context walkthrough.
Follow the instructions below to scaffold a controller.
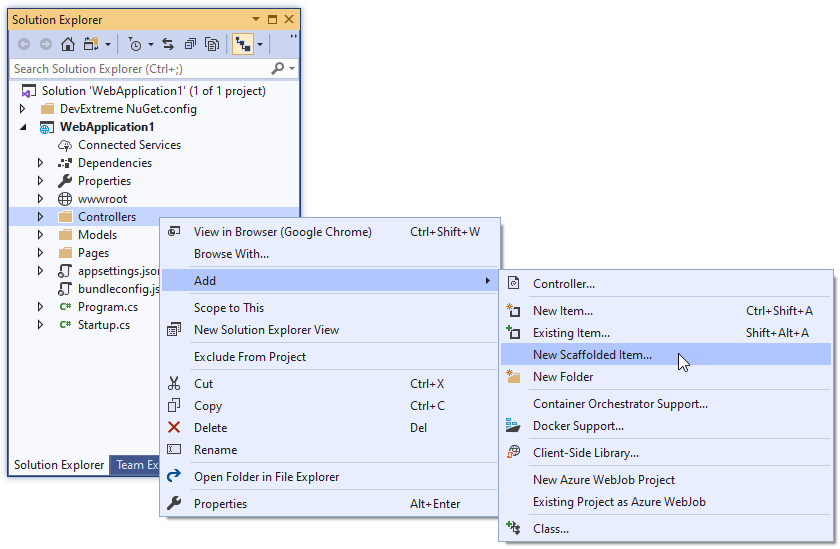
In Solution Explorer, right-click the Controllers folder. In the invoked menu, hover the pointer over Add and then click Controller or New Scaffolded Item.
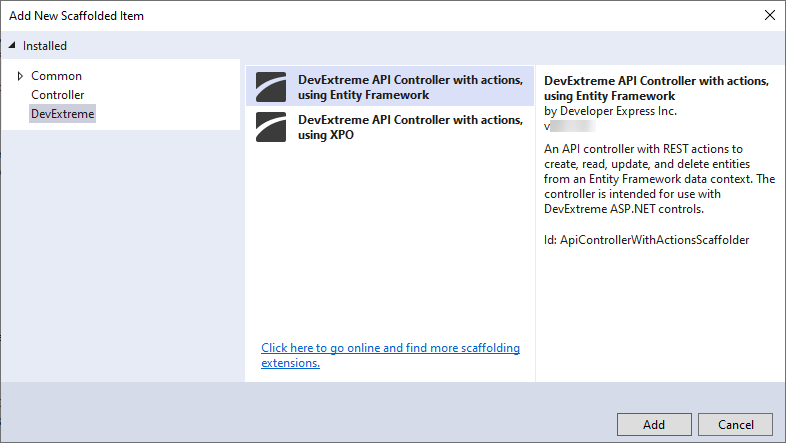
In the Add New Scaffolded Item window, choose DevExtreme API Controller with actions, using Entity Framework and click Add.
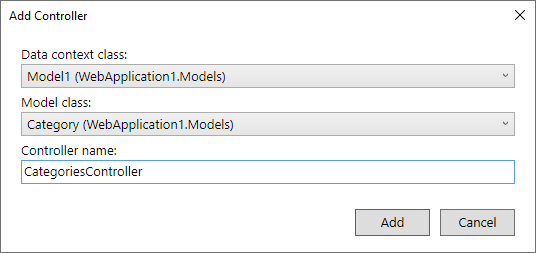
In the Add Controller window, select a data context and model for which to generate the controller, enter the controller’s name, and click Add.
After the controller is generated, you can scaffold a control and bind it to this controller.
XPO Data Model
You can scaffold a controller that uses an XPO data model created with the Data Model Wizard.
Note
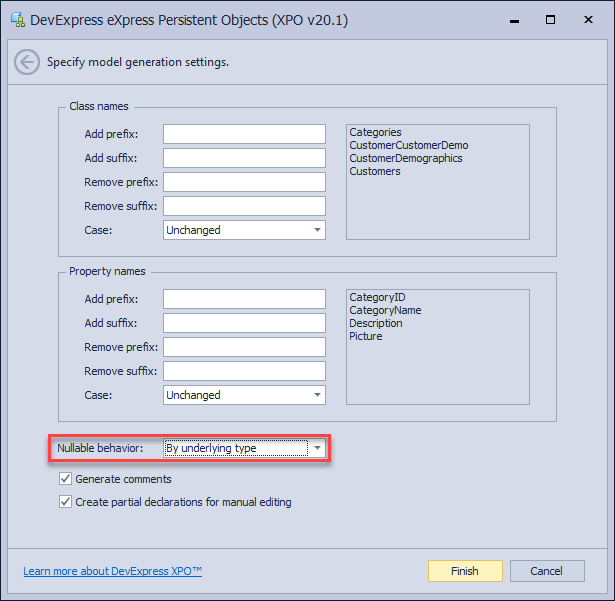
If you create an XPO data model for an existing database, we recommend that you set the Nullable behavior option to By underlying type (refer to Database First). In this case, the wizard generates nullable model properties for data columns with the NULL flag. This allows you to bind DevExtreme-based ASP.NET Core controls to these properties correctly and validate them. Refer to Required Attribute for more information.
Follow the instructions below to scaffold a controller.
In Solution Explorer, right-click the Controllers folder. In the invoked menu, hover the pointer over Add and then click Controller or New Scaffolded Item.
In the Add New Scaffolded Item window, choose DevExtreme API Controller with actions, using XPO and click Add.

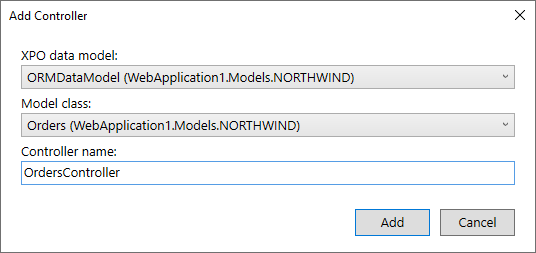
In the Add Controller window, select an XPO data model and class for which to generate the controller, enter the controller’s name, and click Add.
After the controller is generated, you can scaffold a control and bind it to this controller.
Scaffold Controls
The following data-bound controls can be scaffolded:
You can insert these controls into an existing view or create a new view.
Note
Only the listed controls support scaffolding. To add other controls to a view, refer to the Create a Control article.
Insert Into an Existing View
Follow the steps below to scaffold a DevExtreme control and insert it into an existing view (or a Razor page).
Open the view, right-click where the DevExtreme control’s configuration should be inserted, and select Insert a DevExtreme Control Here in the context menu.

This invokes the following wizard:
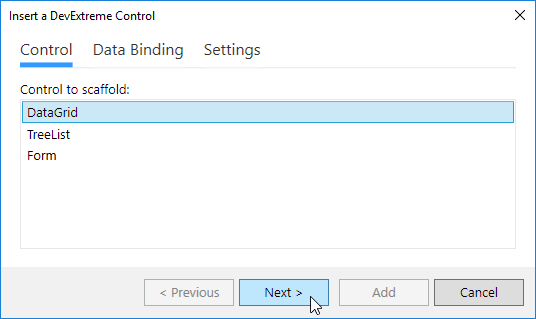
Follow the steps in the wizard:
- Choose a control to scaffold.
- Configure data binding: select a database context class, model class (required), and controller.
- Configure control settings.
- Click Add to finish scaffolding.
Create a New View
You can also create a new view (or a Razor page) with a scaffolded DevExtreme control on it.
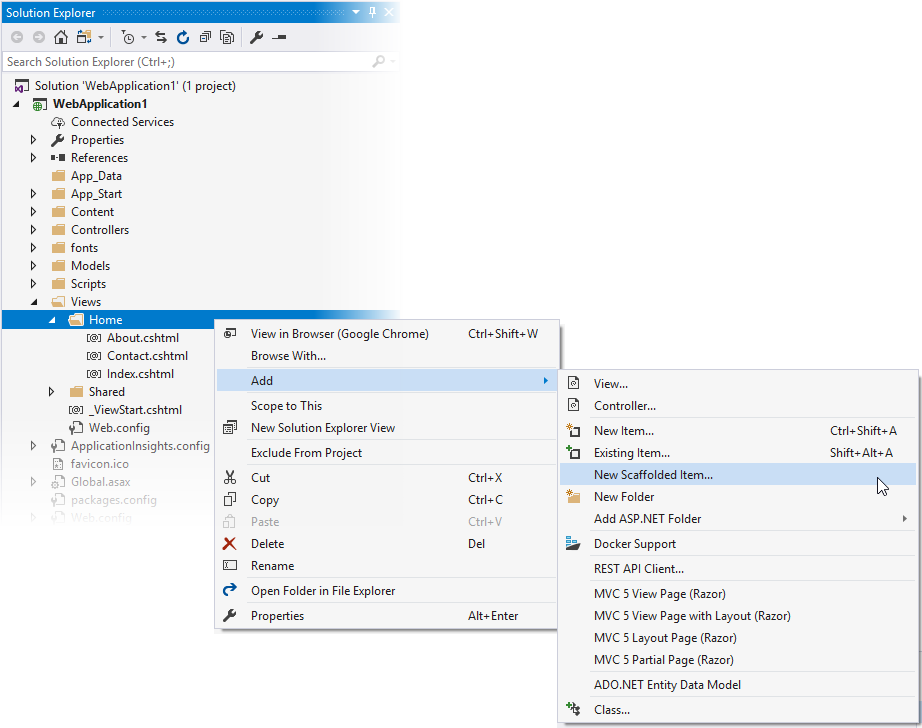
In Solution Explorer, right-click the folder where the view should be placed. In the invoked menu, move the cursor to Add and then click View…/Razor Page… or New Scaffolded Item….
In the Add Scaffold window, choose MVC View with a DevExtreme Control or Razor Page with a DevExtreme Control and click Add.
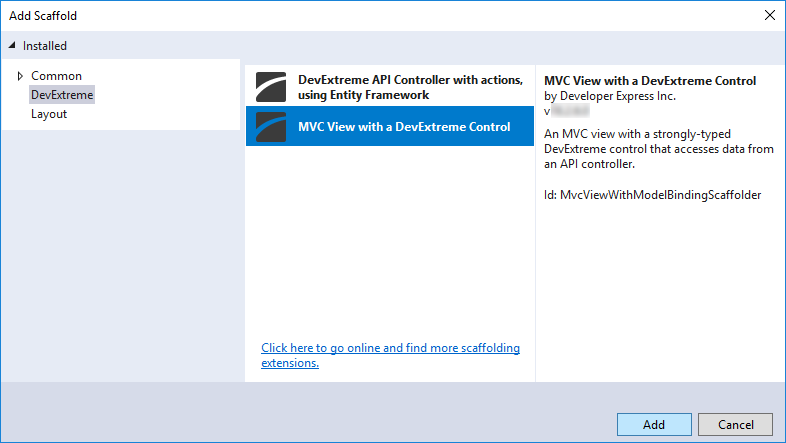
This invokes the following wizard:
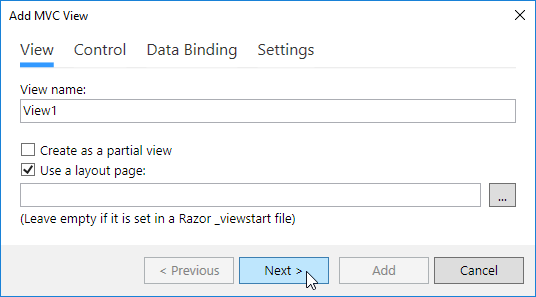
Follow the steps below in the wizard:
- Enter the view name (or Razor page name). You can also mark the view as a partial view and specify a layout.
- Choose a control to scaffold.
- Configure the data binding: select a database context class, model class (required), and controller.
- Configure control settings.
- Click Add to finish scaffolding.