Data Model Wizard
- 6 minutes to read
You can use the Data Model Wizard to create an XPO data model mapped to an existing or newly created database. The resulting model includes XPO classes and metadata, and can be modified in the Data Model Designer. This topic explains how to use the wizard and describes wizard pages.
Important
When the Wizard initializes the ADO.NET provider and establishes a database connection, it may display the following error messages: “Could not find assembly …“, “None of the following assemblies found: …“, “Could not load assembly …“, “Could not find type …“, and others. In this case, ensure that you have the required database provider installed, and that database provider assemblies are available. Assemblies required by XPO data store adapters are listed in the Database Systems Supported by XPO topic.
The Wizard requires assemblies built against the .NET Framework to work.
Place the required DLLs in a location where the Visual Studio process can find them. You can install .NET assemblies to the Global Assembly Cache (GAC) and copy the required native DLLs (if any) to %SystemRoot%\System32, to make them available globally. For details, see FAQ: ORM Data Model Designer and Wizard.
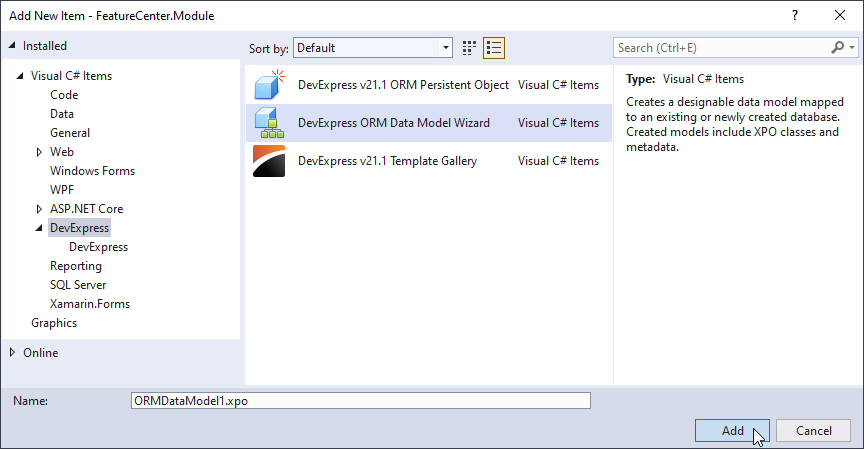
To invoke the wizard, use the DevExpress ORM Data Model Wizard‘s built-in project item template.
Choose “Database First” or “Model First”
The following page is displayed when the Data Model Wizard is invoked.

On this page, you can either choose to use the existing database (the Database First workflow) or create a new database (the Model First workflow).
| Option | Description |
|---|---|
| Map to an existing database | The wizard asks you to specify a connection to an existing database. The database structure will be reverse engineered and the data model will be generated automatically. |
| Create a new database | The wizard will ask you to specify the connection to the database that will be used in your application. You can point to a non-existent database - XPO can automatically create it later if you set AutoCreateOption to DatabaseAndSchema or SchemaOnly. |
| Do not connect to a database | The wizard will not configure a database connection. This option can be useful if you develop a persistent class library that is not bound to any database and can be used in different applications. In XAF applications, choose this option, because XAF manages the database connection itself. |
Select the desired option and click Next.
Specify the Database Connection
On the second page, you can specify database connection settings.

Choose the provider, and then specify provider-specific options. The image above illustrates how to set up a connection to a database hosted by a local instance of the Microsoft SQL Server and accessed using Windows Authentication.
The Import stored procedures option is available when you follow the Database First workflow. When checked, the wizard will generate auxiliary helper classes that allow you to directly call existing stored procedures and handle the results.
Database First
If you chose the Create a new database option on the first page, then the wizard will complete after specifying the database connection, and the empty Data Model Designer will be invoked. If you selected Map to an existing database, the following page is displayed instead:
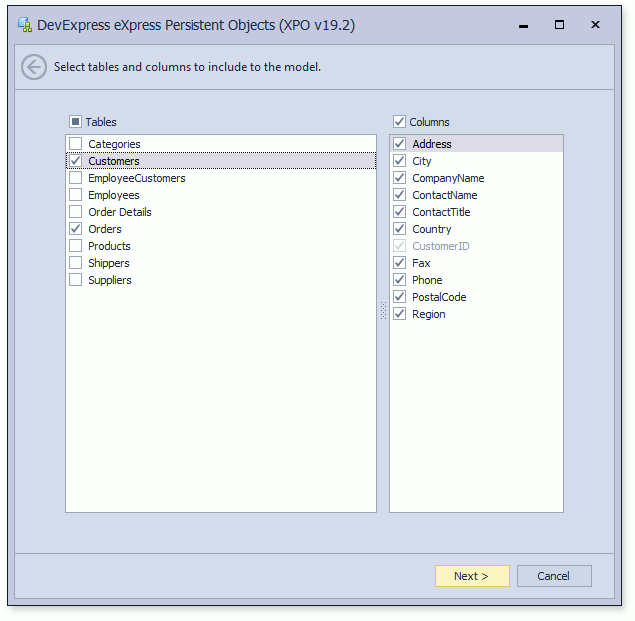
The wizard displays a list of tables that can be mapped to persistent classes. Select a table (or tables) to be mapped to a persistent object (or persistent objects), and for each table select the columns that will be mapped to the persistent object’s properties. Persistent properties will not be generated for unchecked columns.
Note
If a table or column is displayed in gray and cannot be selected, the wizard is unable to import it. Move the mouse pointer over the disabled item to see the reason for this in a tooltip.
On the next page, you can customize the data model settings.

Class and property names in the generated code are the same as their mapped table and column names. You can add/remove custom prefixes and suffixes, and change the case style of names (for example, capitalize names automatically). You can preview the resulting names immediately, and manually edit them later in the Data Model Designer. The correct mapping will be preserved as the PersistentAttribute with the PersistentAttribute.MapTo parameter automatically applied in the underlying code.
The “Nullable Behavior” Option
The Nullable behavior option specifies whether nullable fields should be generated for columns depending on their NULL (or NOT NULL) flag. The following table shows the IsNulllable property value of generated fields for different column types:
| Database column type | AlwaysAllowNulls | ByUnderlyingType |
|---|---|---|
| Primary key column | false | false |
| Foreign key column | false | false |
| Data column with NULL flag | false | true |
| Data column with NOT NULL flag | false | false |
The “Generate Comments” Option
The Generate comments option enables the addition of comments to the data model. If an issue occurs during model generation, a descriptive comment is automatically added to the problematic model element. Created comments can be viewed later in the Data Model Designer.
The “Create Partial Declarations for Manual Editing” Option
The Create partial declarations for manual editing option adds the partial keyword to the class declaration, and splits each class implementation into two files (for example, MyObject.cs and MyObject.Designer.cs). Files with the “Designer“ suffix are handled by the designer and should not be edited manually, as the designer will override your changes. Instead, your code should be placed in the file without the “designer” suffix. When the Create partial declarations for manual editing option is disabled, persistent class declarations are not split, and a single file is created for each class.
The generated data model is displayed in the Data Model Designer after you complete the wizard.
Use Generated Connection Helpers
The Data Model Wizard creates a static ConnectionHelper class. Use the ConnectionHelper.Connect method to connect the application to a data store.
The ConnectionHelper.Connect method accepts the following parameters:
- autoCreateOption – specifies whether XPO can create a new database. Refer to the AutoCreateOption enum description for more information.
- threadSafe – specifies whether to use SimpleDataLayer or ThreadSafeDataLayer. This parameter is optional. The Connect method creates SimpleDataLayer if you skip the threadSafe parameter. We recommend that you use ThreadSafeDataLayer in Web applications to allow multiple users to access data simultaneously.
Call the ConnectionHelper.Connect method in the application entry point.
- WinForms projects: the
Program.Mainmethod in the Program.cs (Program.vb) file. - WPF projects: the
App.OnStartupmethod in the App.xaml.cs (App.xaml.vb) file. - ASP.NET projects: the
Application_Startmethod in the Global.asax.cs (Global.asax.vb) file.
In ASP.NET Core projects, the Data Model Wizard creates extension methods for Dependency Injection and JSON Serialization. To initialize an XPO Data Layer in an ASP.NET Core project, run the following code on startup:
builder.Services.Add[YourXpoModelName]AsXpoDefaultUnitOfWork(false,
    options => options.UseConnectionStringFor[YourXpoModelName](Configuration));