Deploy an ASP.NET Core Blazor Server Application to IIS
- 5 minutes to read
This topic explains how to set up and publish an XAF Blazor Server application to an IIS server using the MS SQL database provider. For more information about other deployment approaches for ASP.NET Core and Blazor applications, refer to the Microsoft documentation.
Prerequisites
- A Windows Server that is configured with the Web Server (IIS) server role and has MS SQL Server installed.
An XAF Blazor Server application. This topic is based on the
MainDemo Blazor Serverdemo application that ships with XAF. You can find this demo in the following folder: %PUBLIC%\Documents\DevExpress Demos 23.2\Components\XAF\MainDemo.NET.EFCore\CS\MainDemo.Blazor.Server.In some cases, you may encounter build errors because file paths are too long. To solve this, we recommend that you copy the folder containing the demo application closer to the root of your drive.
If you do not have XAF installed, download our Universal Subscription installer from the Download Manager or start a 30-day trial now.
Deployment Instructions
Install the .NET Core Hosting Bundle
Install the .NET Core Hosting Bundle on an IIS server. The bundle includes .NET Core Runtime, .NET Core Library, and ASP.NET Core Module. These features enable you to run ASP.NET Core apps with IIS. You can download the installer from the following page: Download the .NET Core Hosting Bundle installer.
Create an IIS Site
Enable IIS in Windows Features.
Enable WebSockets in IIS.
Create a folder that should contain files of a published app (for example, c:\inetpub\wwwroot\maindemo).
Launch Internet Information Services (IIS) Manager. Right-click Sites and select Add Website.

In the Add Website dialog that appears, specify field values and click OK.
- Site name –
maindemo. - Physical path – c:\inetpub\wwwroot\maindemo.
Use the Type drop-down list to set up http and https binding configurations. Make sure to select a certificate for the
httpsbinding configuration (you can create a self-signed certificate for debugging purposes).It is not recommended to use top-level wildcard bindings in a production environment (for example,
http://*:80/andhttp://+:80). Refer the following links for more information: Publish an ASP.NET Core app to IIS and HTTP Semantics - Host and :authority.

- Site name –
Set Up a Connection String
Run Visual Studio with administrative privileges and open your Blazor project (the
MainDemo Blazor Serverdemo application is used in this example).Specify a connection string in the appsettings.json file. For example, you can use the following connection string for MSSQL Server (replace
YourServerNamewith the correct value):{ "ConnectionStrings": { "ConnectionString": "Integrated Security=SSPI;Pooling=false;MultipleActiveResultSets=true;Data Source=YourServerName;Initial Catalog=MainDemo.NET.EFCore_v23.2;ConnectRetryCount=0;", // ... }, // ... }In this case, an XAF application uses Windows Authentication to connect to the database.
Build your solution and make sure that the application runs correctly in development mode.
You may see the following error:
The certificate chain was issued by an authority that is not trusted. In this case, install a valid CA-signed SSL/TLS certificate on your SQL Server. For testing purposes, you can add aTrustServerCertificate=True;option to your connection string (replaceYourServerNamewith the correct value):{ "ConnectionStrings": { "ConnectionString": "Integrated Security=SSPI;Pooling=false;MultipleActiveResultSets=true;Data Source=YourServerName;Initial Catalog=MainDemo.NET.EFCore_v23.2;ConnectRetryCount=0;TrustServerCertificate=True;", // ... }, // ... }
Publish the Application
In Solution Explorer, right-click the project name and click Publish.

Select Folder and click Next.

In the Folder location box, specify a folder you have created (c:\inetpub\wwroot\maindemo) and click Finish.

Close the Publish wizard.
- Visual Studio creates a publishing profile for your project.
Click Publish next to the created profile.

The Publish page with a successful result indicates that the application has been published correctly.
Launch the Command Prompt and update a database.
cd C:\inetpub\wwwroot\maindemo
dotnet MainDemo.Blazor.Server.dll --updateDatabase --forceUpdate --silent
Add IIS AppPool Identities as SQL Server Logons
- Launch Microsoft SQL Server Management Studio.
Connect to your server and create a new login. For this purpose, right-click the Security -> Logins node in Object Explorer and select New Login from the ensuing context menu.

The Login - New dialog appears. On its General page, specify the login name (
IIS APPPOOL\maindemo).
On the Server Roles page, select roles for the created login. For example, you can check public and svsadmin boxes.

On the User Mapping page, select your database and set up mappings for it.

On the Securables page, click Search and add your SQL Server instance to the page.

Grant the Connect SQL permission to the added server and save the login.

Run the Published Application
Launch Internet Information Services (IIS) Manager. Expand the Sites node to ensure that the published application is running.

Click Browse to open the application in your browser.
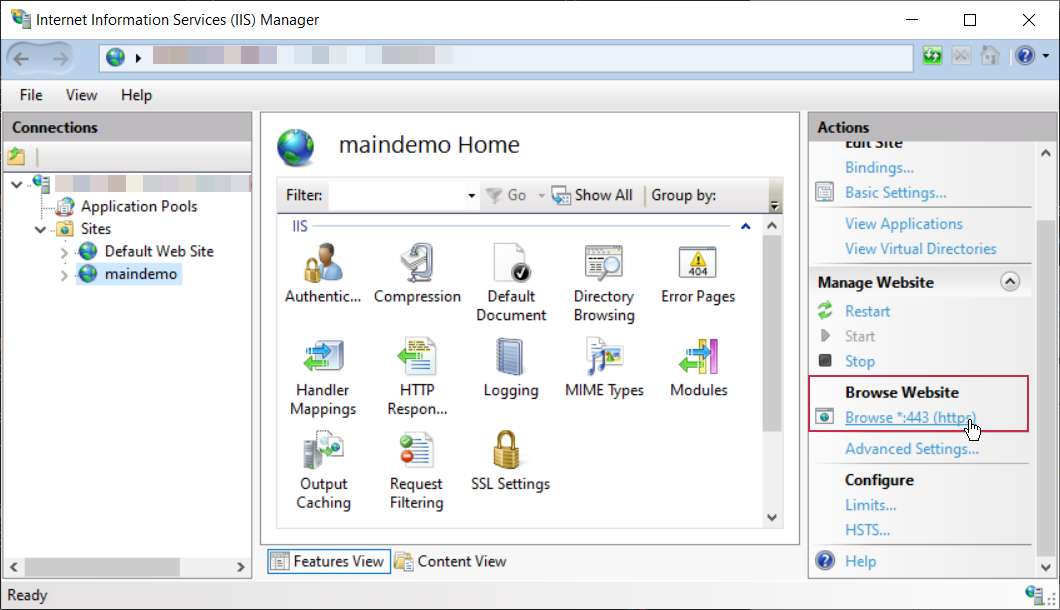
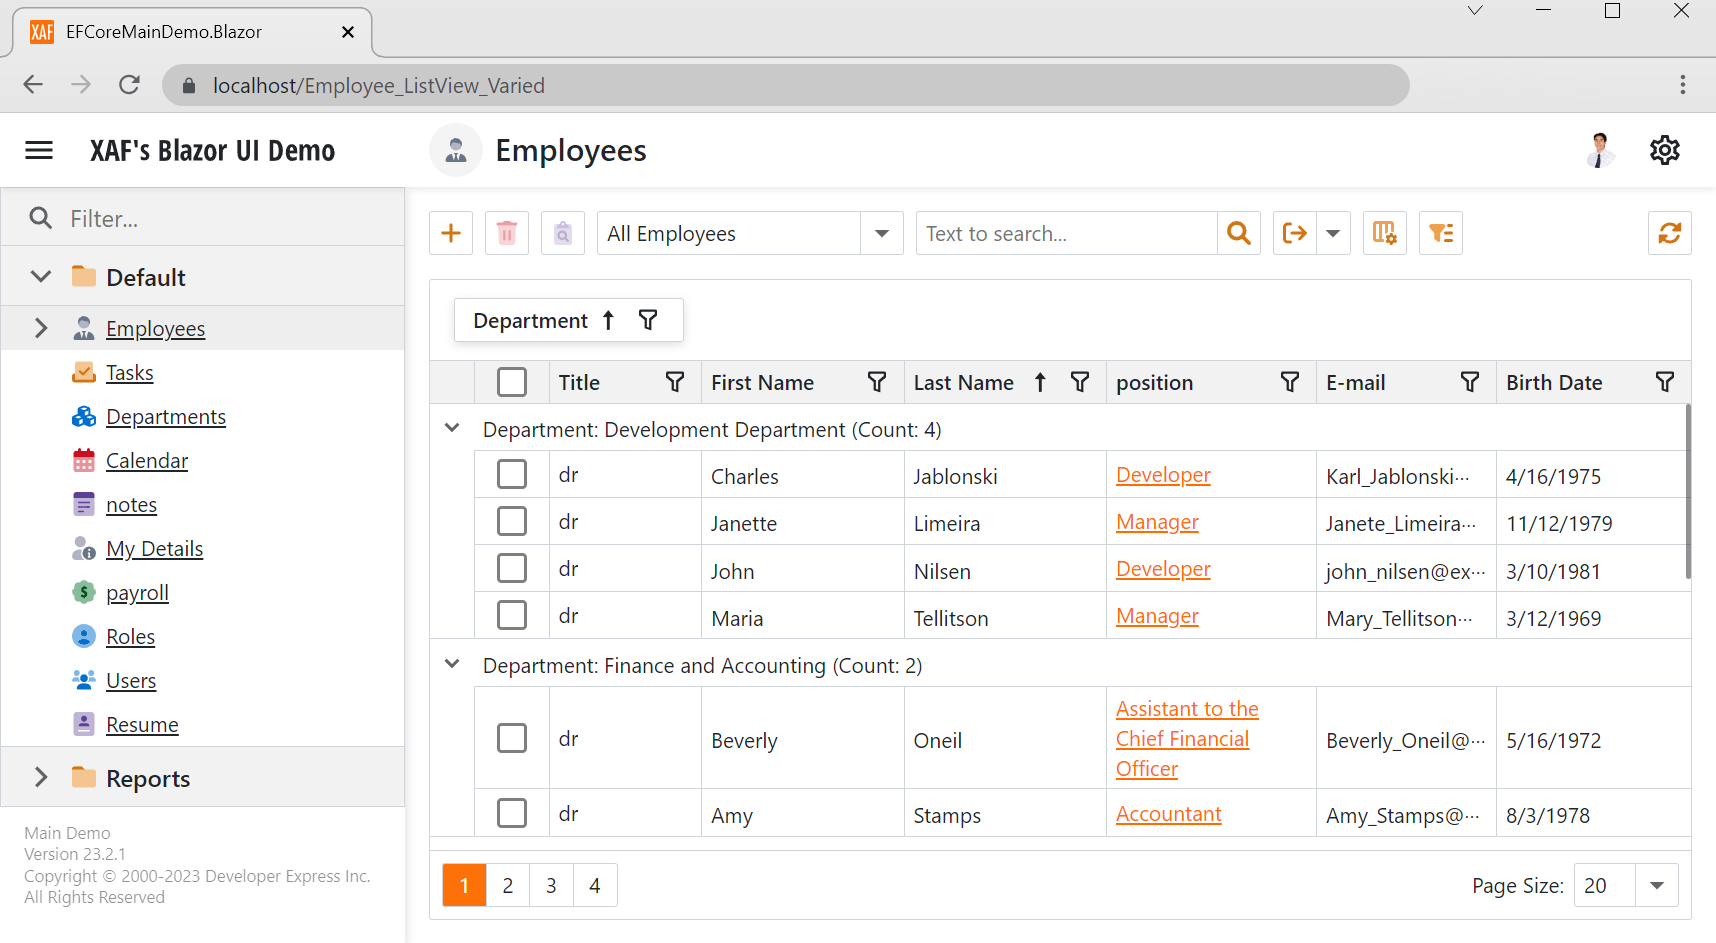
The application runs in your default browser.
Important Disclaimer
These deployment recommendations do not apply to all possible configurations and should not be considered comprehensive. We offer these instructions as a getting-started reference. Steps may vary depending on your operating system, installed software, and DevExpress versions. You, the developer, are responsible for the application, database, network, and other configurations based on your client, security, environment, and other requirements. We recommend that you review these settings with your database, network, and IT infrastructure administrators and consider their recommendations tailored to your case. We also recommend that you review Performance Optimization tips for deployed applications.
Troubleshooting
If you encounter problems, refer to the Deployment Troubleshooting Guide or explore logs and stack traces in Event Viewer.
Additional Resources
Refer to the Microsoft documentation for more information about deploying ASP.NET Core and Blazor applications: