Create a Custom Control Detail Item
- 4 minutes to read
This article describes how to add a custom control to a Detail View. Use this approach when you need to place a custom control near a particular editor in a Detail View and the Action Container View Item approach is inappropriate.
Note
ASP.NET Core Blazor applications do not support the approach described in this topic.
Tip
A complete sample project is available in the DevExpress Code Examples database at https://supportcenter.devexpress.com/ticket/details/t137193/how-to-create-a-custom-control-detail-item.
Invoke the platform-dependent Model Editor of MySolution.Module.Win or MySolution.Module.Web project and locate the required Views | DetailView node. Add a IModelControlDetailItem node using the context menu invoked for the Items child node.
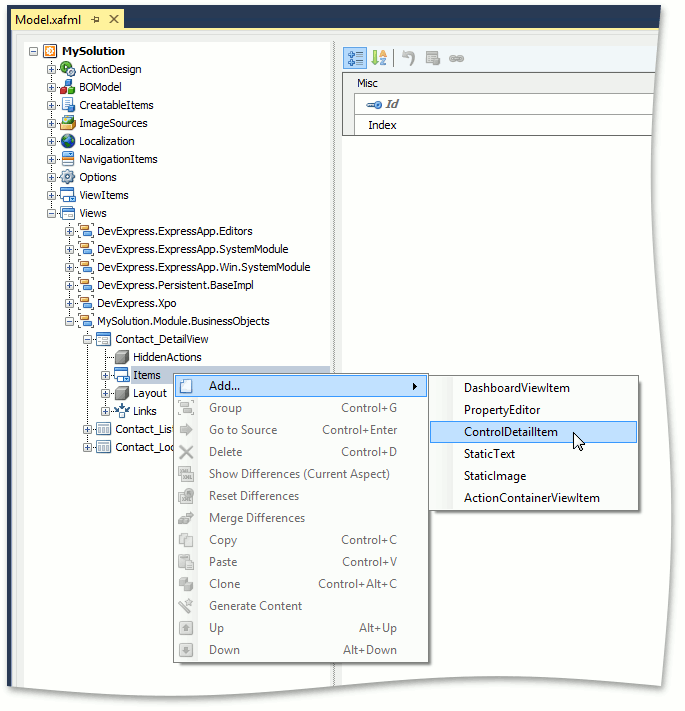
- In a WinForms application, set the IModelControlDetailItem.ControlTypeName property of the newly created node to “System.Windows.Forms.Button”. In an ASP.NET Web Forms application, set the ControlTypeName property of the newly created node to “DevExpress.Web.ASPxButton”. Set the Id property to “MyButton” and IModelViewItem.Caption - to “My Button”.
Focus the Views | DetailView | Layout node. Right-click on an empty space to invoke the layout customization dialog, then place the newly-created control in the required location. For details on how to change the layout, refer to the View Items Layout Customization topic.
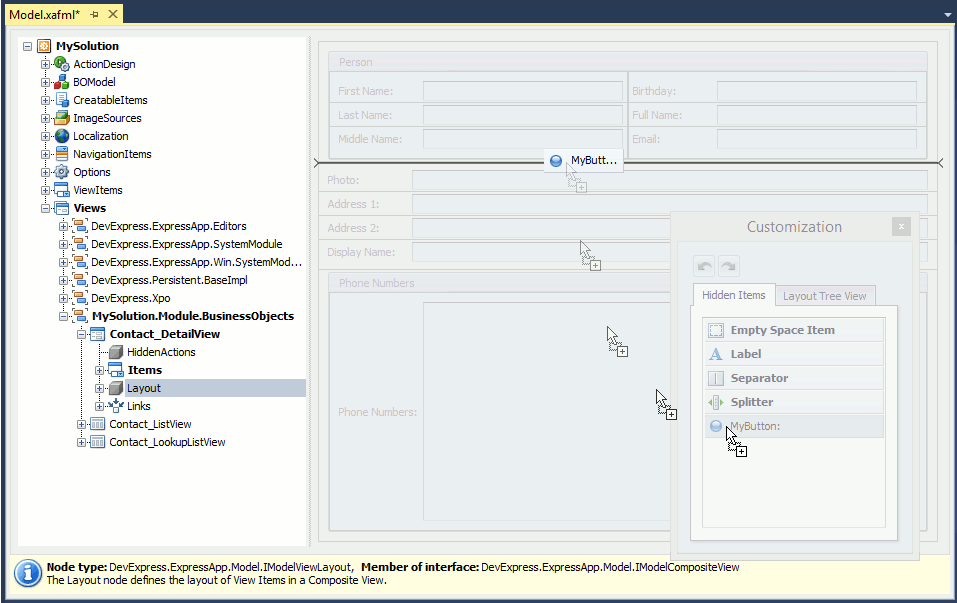
- Run the application to make sure that the button is added to the required Detail View.
Add a new View Controller to the WinForms or ASP.NET Web Forms module to handle the Click event of the button added in the Application Model. Subscribe to the ViewItem.ControlCreated event and replace the automatically generated code with the following.
WinForms (the MySolution.Module.Win project)
using DevExpress.ExpressApp; using DevExpress.ExpressApp.Layout; using DevExpress.ExpressApp.Win.Core; using System.Windows.Forms; // ... public class ControlViewItemControllerWin : ObjectViewController<DetailView, Contact> { protected override void OnActivated() { base.OnActivated(); ControlViewItem item = ((DetailView)View).FindItem("MyButton") as ControlViewItem; if (item != null) { item.ControlCreated += item_ControlCreated; } } void item_ControlCreated(object sender, EventArgs e) { (((ControlViewItem)sender).Control as Button).Text = "Click me!"; (((ControlViewItem)sender).Control as Button).Click += ButtonClickHandlingWinController_Click; } void ButtonClickHandlingWinController_Click(object sender, EventArgs e) { MessageBox.Show("Action from custom View Item was executed!"); } }ASP.NET Web Forms (the MySolution.Module.Web project)
using DevExpress.ExpressApp; using DevExpress.ExpressApp.Layout; using DevExpress.ExpressApp.Web; using DevExpress.Web; // ... public class ControlViewItemControllerWeb : ObjectViewController<DetailView, Contact> { protected override void OnActivated() { base.OnActivated(); ControlViewItem item = ((DetailView)View).FindItem("MyButton") as ControlViewItem; if (item != null) { item.ControlCreated += item_ControlCreated; } } private void item_ControlCreated(object sender, EventArgs e) { ASPxButton button = ((ControlViewItem)sender).Control as ASPxButton; if (button == null) return; button.ID = "MyButton"; button.Text = "Click me!"; button.Click += ButtonClickHandlingWebController_Click; } void ButtonClickHandlingWebController_Click(object sender, EventArgs e) { WebWindow.CurrentRequestWindow.RegisterClientScript( "ShowAlert", @"alert('Action from custom View Item was executed!');"); } }Run the application to make sure that the information window appears when you click the newly created button.