Include an Action in a Detail View Layout
- 4 minutes to read
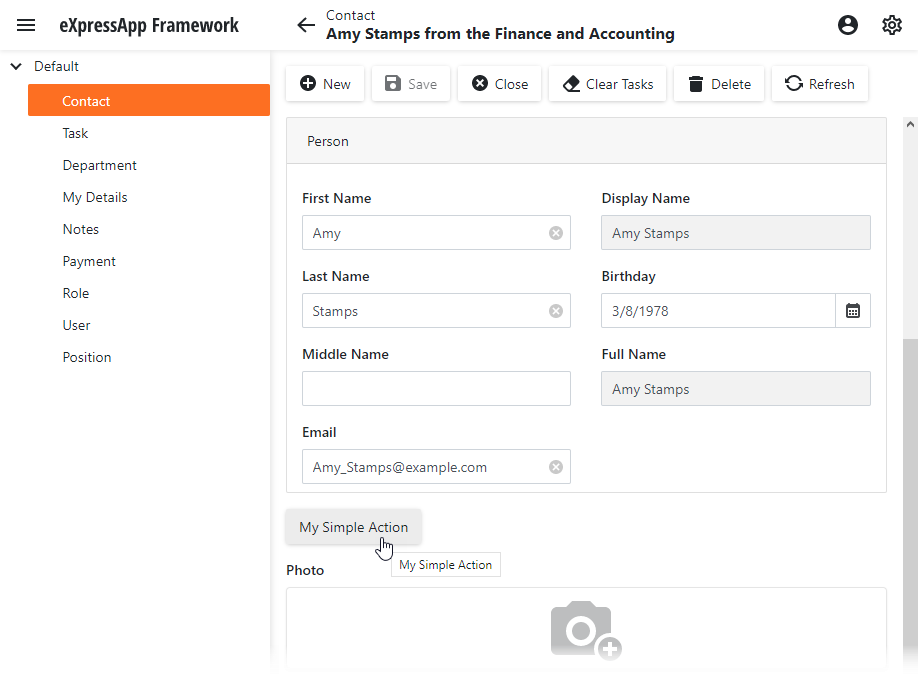
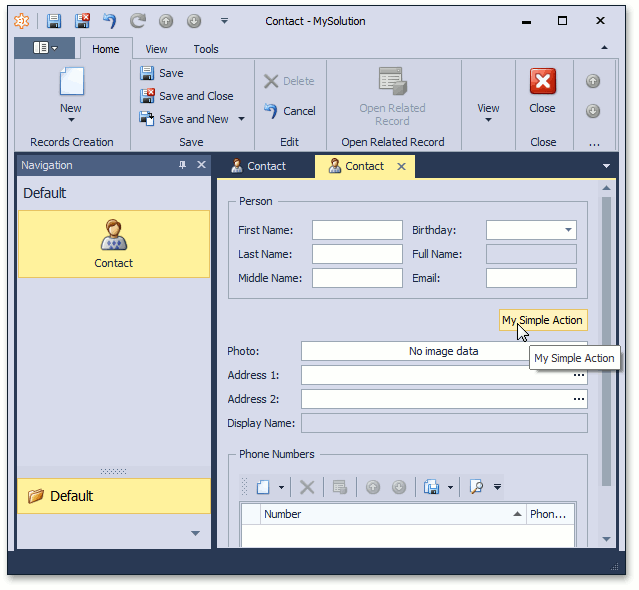
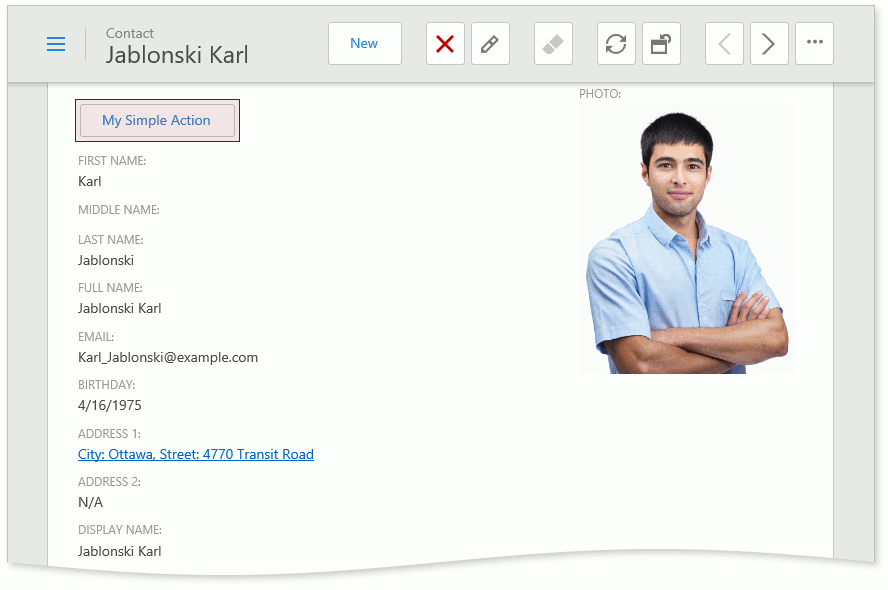
XAF allows you to place an Action in a View instead of a toolbar.
In the image below, the “My Simple Action” button is an Action displayed within a Detail View.
Follow the steps below to add an action button to a Detail View.
Tip
A complete sample project is available in the DevExpress Code Examples database at https://supportcenter.devexpress.com/ticket/details/e1847/how-to-include-an-action-to-a-detail-view-layout.
Step 1. Create a new Action
At Design Time
Create a Controller, add a Simple Action to it, and handle the Action’s Execute event. The Execute event occurs when a user clicks the action’s button.
For a step-by-step guide, refer to the Add a Simple Action tutorial:
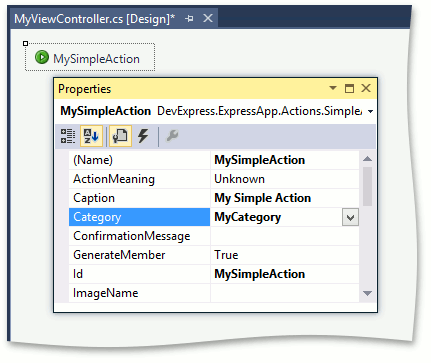
Create a new Action category. In the Properties window, select the text for the ActionBase.Category property and type a custom value. For example, you can set the Action’s category to “MyCategory” (see the image below). Rebuild your project.
In Code
In the {YourSolution}.Module project, add a new class to the Controllers folder. Replace its content with the following code:
using System;
using DevExpress.ExpressApp;
using DevExpress.ExpressApp.Actions;
using DevExpress.Persistent.Base;
using MySolution.Module.BusinessObjects;

namespace MySolution.Module.Controllers {
    public class MyViewController : ViewController {
        public MyViewController() {
            TargetViewType = ViewType.DetailView;
            TargetObjectType = typeof(Contact);

            SimpleAction mySimpleAction = new SimpleAction(this, "MySimpleAction", "MyCategory") {
                Caption = "My Simple Action",
                ConfirmationMessage = "My Simple Action Shows a Message",
            };
            mySimpleAction.Execute += MySimpleAction_Execute;
        }
        private void MySimpleAction_Execute(Object sender, SimpleActionExecuteEventArgs e) {
            // ...
        }

    }
}
Rebuild your project.
Step 2. Place a New Action in a Detail View
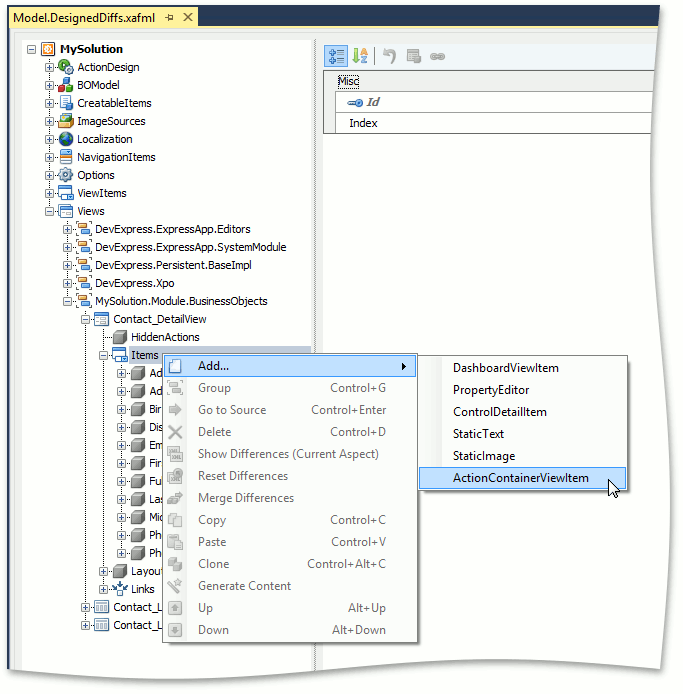
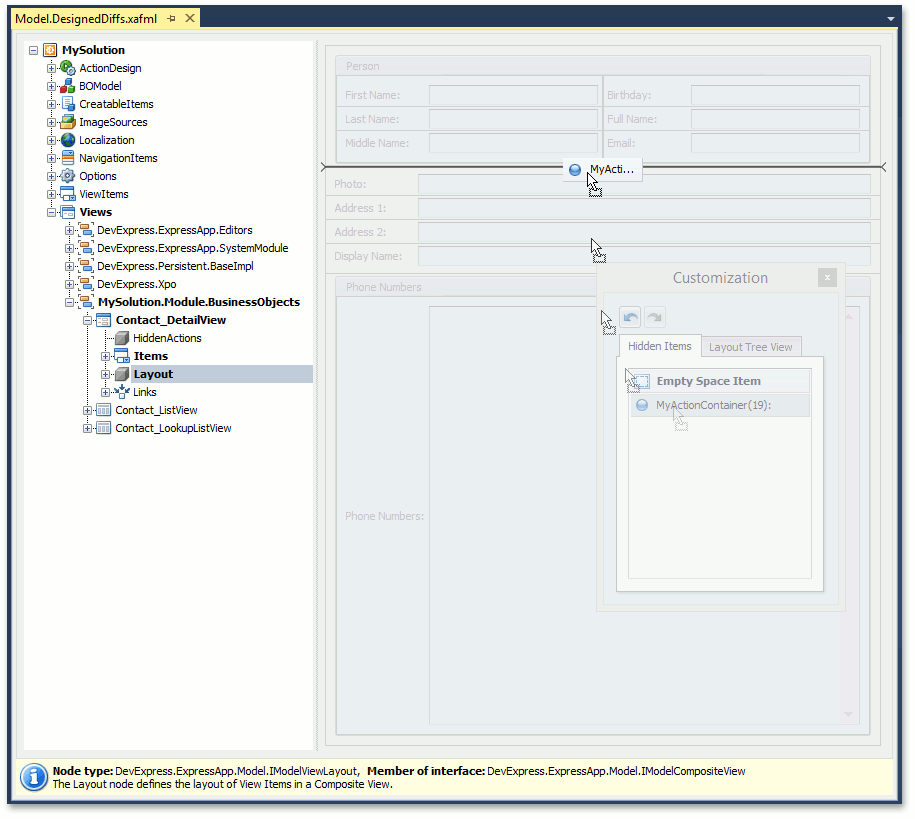
If the Model Editor is already opened, restart it. Invoke the Model Editor for your platform-independent Module project and navigate to the Views node. In this node, navigate to the Detail View in which you want to display an Action. Invoke the context menu to add a new ActionContainerViewItem child node to the Detail View’s Items node.
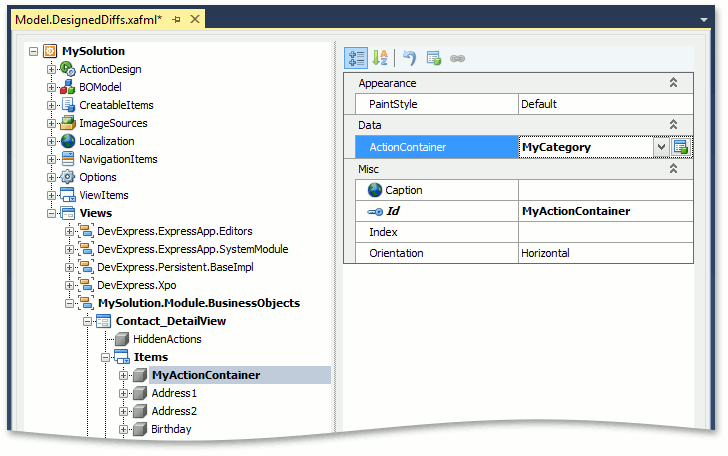
Set the newly created node’s Id property to “MyActionContainer” and the ActionContainer property to “MyCategory”.
Focus the Detail View’s Layout node. In the layout designer, right-click on an empty space and invoke the layout customization dialog. Place the newly-created control at the required location. For details on how to change the layout, refer to the following topic: View Items Layout Customization.
Run the application to make sure that the Action button is added to the required Detail View.
Step 3. Optional. Customize an Action in the Layout
Handle the Action.CustomizeControl event to customize Action controls.
The example below removes paddings and adjusts the button size to match the input text box size.
using DevExpress.ExpressApp;
using DevExpress.ExpressApp.Actions;
using DevExpress.XtraLayout;
using System.Windows.Forms;
namespace MySolution.Module.Win.Controllers {
    public class MyViewController : ObjectViewController<DetailView, MyObject> {
        public MyViewController() {
            var action = new SimpleAction(this, "Test", "My");
            action.CustomizeControl += Action_CustomizeControl;
        }
        private void Action_CustomizeControl(object sender, CustomizeControlEventArgs e) {
            Control control = (Control)e.Control;
            LayoutControl layoutControl = (LayoutControl)control.Parent;
            LayoutControlItem item = layoutControl.GetItemByControl(control);
            item.Padding = new DevExpress.XtraLayout.Utils.Padding(0);
            layoutControl.OptionsView.AutoSizeInLayoutControl = AutoSizeModes.UseMinSizeAndGrow;
        }
    }
}
Refer to the following topic for more information on layout item settings: Size and Alignment.
If you define an Action in the platform-independent module project, you can create a WinForms-specific descendant and handle the Action.CustomizeControl event in this descendant constructor.
Alternatively, create a new WinForms Controller. In the Controller’s OnActivated method, call the Frame.GetController method to get the platform independent Controller. Use the Controller.Actions property to get the Action and handle its Action.CustomizeControl event.
Note
XAF creates a ButtonsContainer class (a Layout Control descendant) for each ActionContainerViewItem and places the ButtonsContainer in a DetailView layout. All Action controls are located in this ButtonsContainer. If Action control customization does not meet your requirements, you can customize the ButtonsContainer.