How to Add an Unbound Control (Button) to the Form Layout in an XAF View (with a Built-in ControlViewItem)
- 5 minutes to read
This article describes how to add a custom control to a Detail View. Use this approach when you need to place a custom control near a particular editor in a Detail View and the Action Container View Item method is not suitable (this method does not allow data access from the current view object).
Implementation Considerations
This suggested implementation requires minimal coding. Use it when you want to add an existing or custom control to the client area of a Detail View or Dashboard View. This approach allows you to obtain data from the current View object if necessary. Your control can be unbound or can load data from external sources.
If you want to bind a control to a business class property and need to add the control to both List View and Detail View, then consider the custom Property Editor approach.
This approach also does not imply complex user interactions between the UI control and an XAF View. You can implement a custom ViewController if you require custom logic. A custom UI control may implement advanced user interaction.
ASP.NET Core Blazor
- Navigate to the ASP.NET Core Blazor application project (MainDemo.Blazor.Server) and create an Editors folder.
In the Editors folder, create a Razor component and name it ButtonComponent.razor.
Note
The component name and its file name should be the same. For more information on Razor component naming conventions, refer to the following topic: ASP.NET Core Razor Components.
In this component, configure the DxButton component:
- Use the cascading parameter to access the current
BlazorControlViewItem. - Implement the
ClickFromUI()method to specify a message that should appear when a user clicks the button in the UI.
File:
MySolution.Blazor.Server\Editors\ButtonComponent.razor@using DevExpress.Blazor @namespace MySolution.Module.Blazor <DxButton Text=@ComponentModel.Text Click=@(() => ComponentModel.ClickFromUI()) /> @code { [Parameter] public ButtonModel ComponentModel { get; set; } public static RenderFragment Create(ButtonModel componentModel) => @<ButtonRenderer ComponentModel=@componentModel />; }- Use the cascading parameter to access the current
Right-click the Razor file to access its properties and make sure that the
Build Actionproperty is set toContent.Add the component to a Detail View. Open the Model Editor and navigate to the Views | MySolution.Module.BusinessObjects | <Class> | <Class>_DetailView | Items node. Right-click the node and select ControlDetailItem from the Add context menu options.
Specify the Razor component’s full type name in the ControlTypeName property:
MainDemo.Blazor.Server.Editors.ButtonComponent: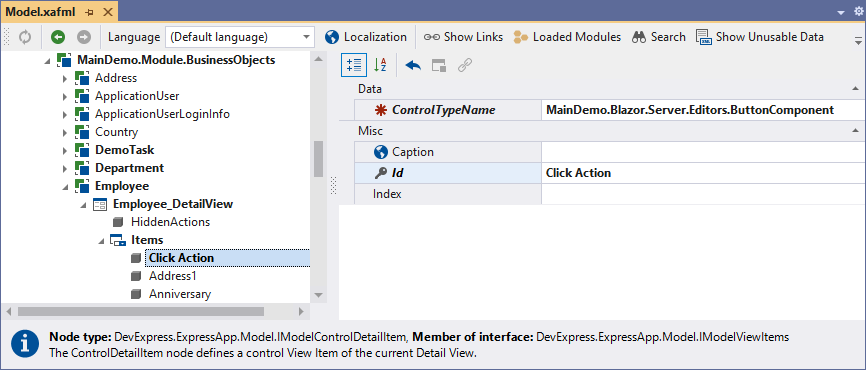
Navigate to the Views | MySolution.Module.BusinessObjects |<Class> | <Class>_DetailView | Layout node. Right-click the layout area and select the Customize Layout option from the context menu. Drag the new View Item from the Customization: <Class> window to the layout area.
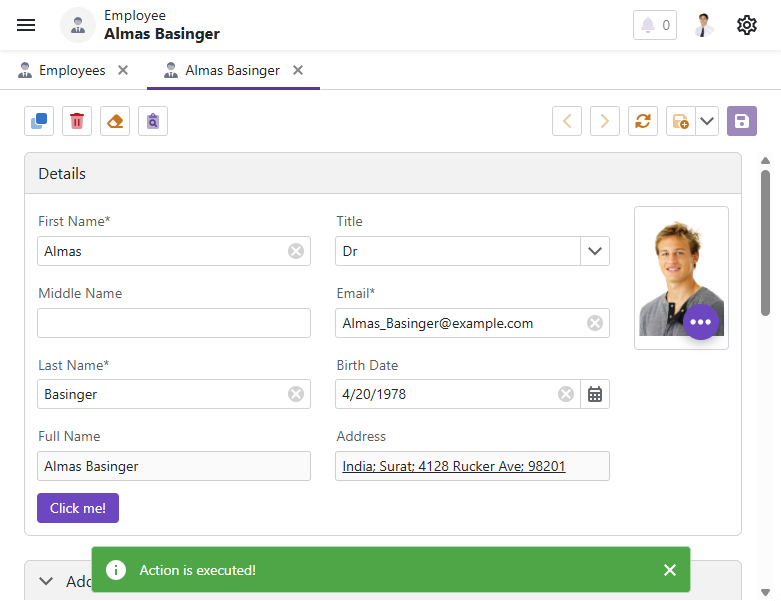
Run the application and navigate to the required Detail View. Click the Click Me! button. A toast notification should appear:
Windows Forms
Navigate to the MySolution.Win project and open the Model.xafml file. In the Model Editor, navigate to the Views | MySolution.Module.BusinessObjects | <Class> | <Class>_DetailView | Items node. Right-click the node and select ControlDetailItem from the Add context menu.
Set the IModelControlDetailItem.ControlTypeName property of the newly created node to
System.Windows.Forms.Button. Set theIdproperty toMyButtonand IModelViewItem.Caption toMy Button.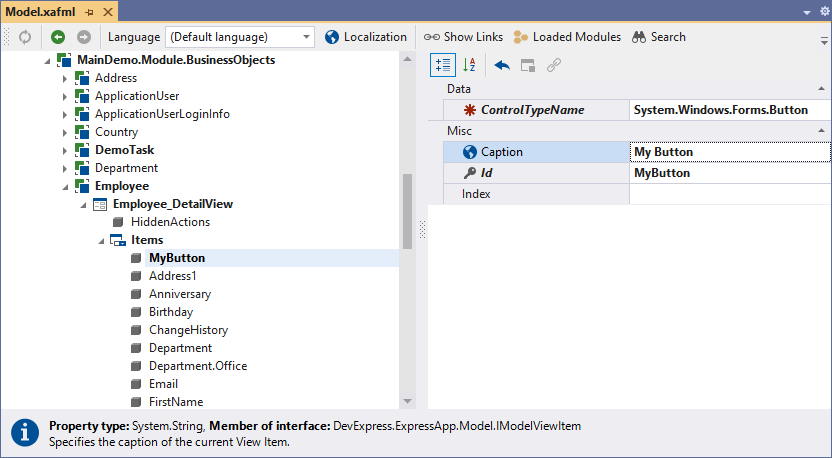
Navigate to the Views | MySolution.Module.BusinessObjects |<Class> | <Class>_DetailView | Layout node. Right-click the layout area and select the Customize Layout option from the context menu. Drag the new View Item from the Customization: <Class> window to the layout area.

For more information about layout customization, refer to the following topic: Detail View Layout Customization.
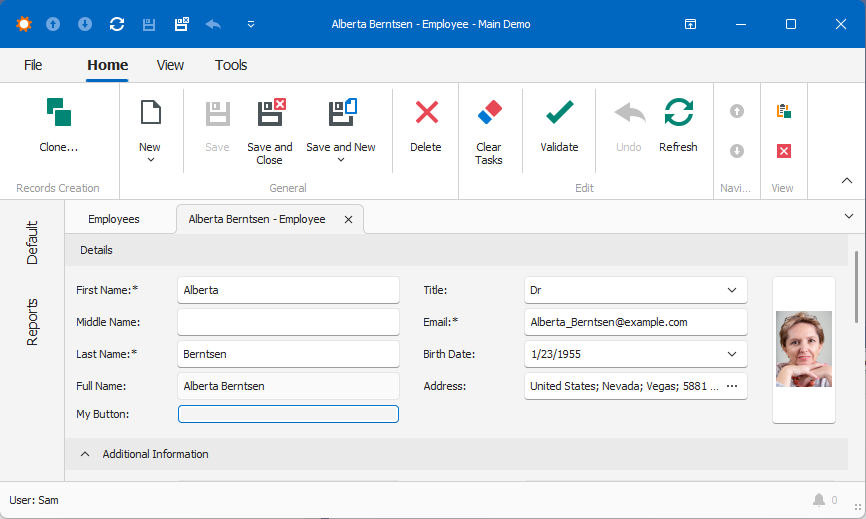
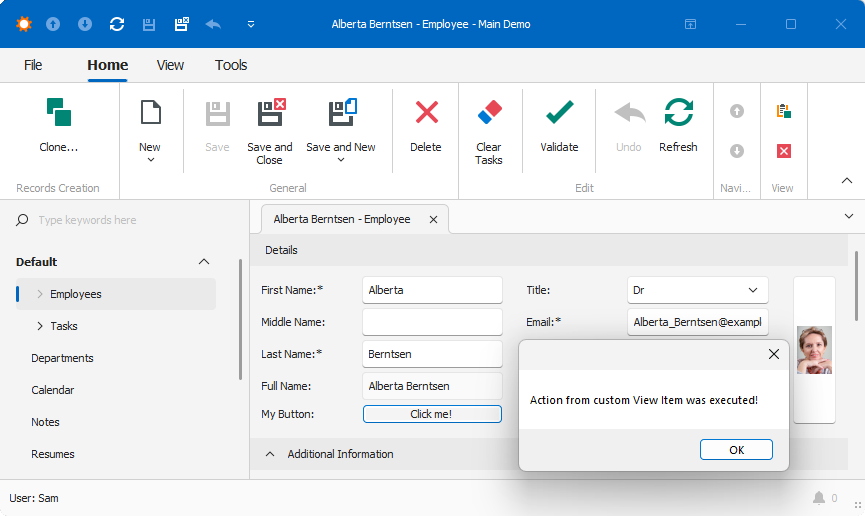
Run the application and navigate to the Detail View. The new Action should be available in the UI:
To handle the Action’s
Clickevent, add a new Controller to the MySolution.Win project and replace the automatically generated code:using DevExpress.ExpressApp; using MySolution.Module.BusinessObjects; namespace MySolution.Win.Controllers; public class ControlViewItemControllerWin : ObjectViewController<DetailView, Employee> { protected override void OnActivated() { base.OnActivated(); View.CustomizeViewItemControl(this, (viewItem) => { if (viewItem.Control is Button button) { button.Text = "Click me!"; button.Click += ButtonClickHandlingWinController_Click; } }); } void ButtonClickHandlingWinController_Click(object sender, EventArgs e) { MessageBox.Show("Action from custom View Item was executed!"); } }Run the application. Navigate to the required Detail View and click the button. The following message should appear:
ASP.NET Web Forms
- Navigate to the MySolution.Web project and open the Model.xafml file. In the Model Editor, navigate to the Views | MySolution.Module.BusinessObjects | <Class> | <Class>_DetailView | Items node. Right-click the node and select ControlDetailItem from the Add context menu.
- Set the IModelControlDetailItem.ControlTypeName property of the newly created node to
DevExpress.Web.ASPxButton. Set theIdproperty toMyButtonand IModelViewItem.Caption toMy Button. - Navigate to the Views | MySolution.Module.BusinessObjects |<Class> | <Class>_DetailView | Layout node. Right-click the layout area and select the Customize Layout option from the context menu. Drag the new View Item from the Customization: <Class> window to the layout area. For more information about layout customization, refer to the following topic: Detail View Layout Customization.
- Run the application and navigate to the required Detail View. The new Action should be available in the UI.
To handle the button’s
Clickevent, add a Controller to the MySolution.Module.Web project. Subscribe to the ViewItem.ControlCreated event and replace the automatically generated code with the following:using DevExpress.ExpressApp; using MySolution.Module.BusinessObjects; using System.Web.UI.WebControls; namespace MySolution.Module.Web.Controllers { public class ControlViewItemControllerWeb : ObjectViewController<DetailView, Employee> { protected override void OnActivated() { base.OnActivated(); CustomizeViewItemControl<Button>(this, (viewItem) => { if (viewItem.Control is Button button) { button.ID = "MyButton"; button.Text = "Click me!"; button.Click += ButtonClickHandlingWebController_Click; } }); } void ButtonClickHandlingWebController_Click(object sender, EventArgs e) { WebWindow.CurrentRequestWindow.RegisterClientScript( "ShowAlert", @"alert('Action from custom View Item was executed!');"); } } }Run the application. Navigate to the required Detail View and click the button. The specified message should appear.