Ways to Invoke the Model Editor
- 5 minutes to read
The Model Editor can be used:
- At design time (in Visual Studio by a developer)
- The Model Editor invoked at design time is a window pane in Visual Studio.
- At runtime (by application users and administrators)
- The Model Editor invoked by users and administrators is a form.
The elements and capabilities in both instances are primarily the same.
This topic describes how to invoke the Model Editor in different scenarios.
Invoke the Model Editor in Visual Studio at Design Time
In the Solution Explorer, double-click the Model.xafml or Model.DesignedDiffs.xafml file in the XAF solution’s project (module or application project).

Alternatively, you can right-click the project and choose Open Model Editor in the context menu.

Visual Studio invokes the Model Editor in a window pane.

The model editor pane contains the following elements:
- nodes tree
- property grid
- search pane (optional)
To switch focus between UI elements, press the TAB key.
You can see a description and type of a selected node/property at the bottom of the window pane.
The Model Editor displays different information for different projects. This information is collected from the modules that are added to the project for which you invoked the Model Editor. If the project is a module itself, the information about it is loaded as well.
Everything you change in the Model Editor is saved to the Model.xafml or Model.DesignedDiffs.xafml file, depending on whether the changes were made in an application project or in a module. Changes are displayed in bold in the Model Editor.
To view the underlying XML code, right-click the XAFML file and choose View code. These changes are superimposed on previous values loaded to the Application Model. Values specified in the Model Editor for the application project are the Application Model’s final values. They are used when starting the application.
For details, refer to the following topic: Application Model Basics.
Use Actions to Invoke the Model Editor At RunTime
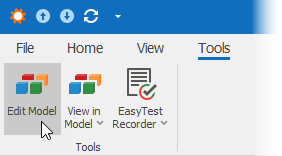
When the Edit Model or Administrative permission is granted to the current user, the Tools category of the WinForms application’s root window shows the EditModel and ViewInModel Actions. These Actions are available if the Security System is not enabled.
The Edit Model Action
Use the EditModel Action (or the Ctrl+Shift+F1 shortcut) to invoke the Model Editor window.

The View in Model Action
Use the ViewInModel Action (or the Ctrl+Shift+F2 shortcut) to invoke the Model Editor window with the selected View node item.


You can also utilize Action items to open the Model Editor with the selected Class or Validation nodes.

User Model Difference Storage
At runtime, the Model Editor contains complete information that includes recent changes made in the UI. When a user makes changes in the UI or in the Model Editor, they are saved to the Model.User.xafml file. This file is located in the folder with the application executable file. Set the UserModelDiffsLocation configuration key to CurrentUserApplicationDataFolder to place this file in a user’s ApplicationData folder.
File: MySolution.Win\App.config
<appSettings>
    <add key="UserModelDiffsLocation" value="CurrentUserApplicationDataFolder"/>
</appSettings>
You can also store user settings in the database. For additional information, refer to the following topic: Model Difference Storages.
Deploy and Run the Standalone Model Editor
The application administrator can run the Model Editor as a standalone utility on Windows. The administrator can edit a model of the deployed ASP.NET Core Blazor application or deployed Windows Forms application with the EditModel Action disabled.
On .NET
To use the standalone Model Editor:
- Copy the %PROGRAMFILES%\DevExpress 26.1\Components\Tools\eXpressAppFrameworkNetCore\Model Editor folder from the developer workstation to a workstation or a server where the XAF application is deployed.
- Copy all assemblies required by your XAF application (deployed together with the executable).
After you invoke the standalone Model Editor, use the Open Model dialog to specify the Application Model to edit. This dialog is initially open. To re-invoke it later, click the Open Model button on the toolbar.

Open and Edit Application Model
To edit the Application Model of the deployed application, you should specify:
- configuration file name (Windows Forms)
- MySolution.Blazor.Server.dll file (ASP.NET Core Blazor)
An option to choose an assembly file and model differences path allows you to edit the model of a specific module outside of Visual Studio.
You can also use command-line parameters to specify an Application Model to open. The standalone Model Editor has the following command-line syntax:
DevExpress.ExpressApp.ModelEditor.v26.1.exe appConfigFile | moduleAssemblyFile diffsPath | /?
Note
The Windows Forms application configuration file is:
- <Application_Name>.Win.dll.config
The ASP.NET Core Blazor application does not include a configuration file. Specify the moduleAssemblyFile and diffsPath parameters instead of appConfigFile.
Parameter | Description |
|---|---|
appConfigFile | Specifies an XAF application configuration file. Pass this parameter to edit the Application Model of a deployed XAF application (Windows Forms). Example:
|
moduleAssemblyFile | Specifies an XAF module’s assembly file (DLL). Pass this parameter followed by the diffsPath parameter to edit the Application Model of an XAF module. Example:
|
diffsPath | This parameter specifies a model differences folder, and is required when the first parameter specifies an assembly. Typically, you should pass a module project’s folder that contains a Model.DesignedDiffs.xafml file to modify. |
/? | Displays a help message on how to use the above parameters. |
The Model Editor will be displayed as a form.

Alternatively, you can right-click the configuration file in Windows Explorer and click the Open With… menu item to choose the Model Editor executable.
To edit the Application Model of an XAF module, type the Model Editor executable full path in the command prompt and pass the assembly file and the differences folder as parameters (see the table above).