Create a Blazor Reporting (JavaScript-Based) Application
- 8 minutes to read
This tutorial describes how to create a sample Blazor application that contains the Document Viewer and Report Designer controls.
Prerequisites
- Install the .NET 5.0 SDK.
- Install Visual Studio 2019 (latest version) with the ASP.NET and web development workload.
- Use the DevExpress .NET Product Installer to install DevExpress Blazor components.
When you use the DevExpress .NET Product Installer to install Blazor components, the DevExpress Template Gallery automatically appears in Visual Studio’s New Project menu. The Gallery contains DevExpress Blazor project templates.
Create a New Blazor Application
Perform the following steps to create a sample Blazor application in Visual Studio:
Click Create a new project on Visual Studio’s start page and select the DevExpress v21.2 Blazor App Template Gallery.
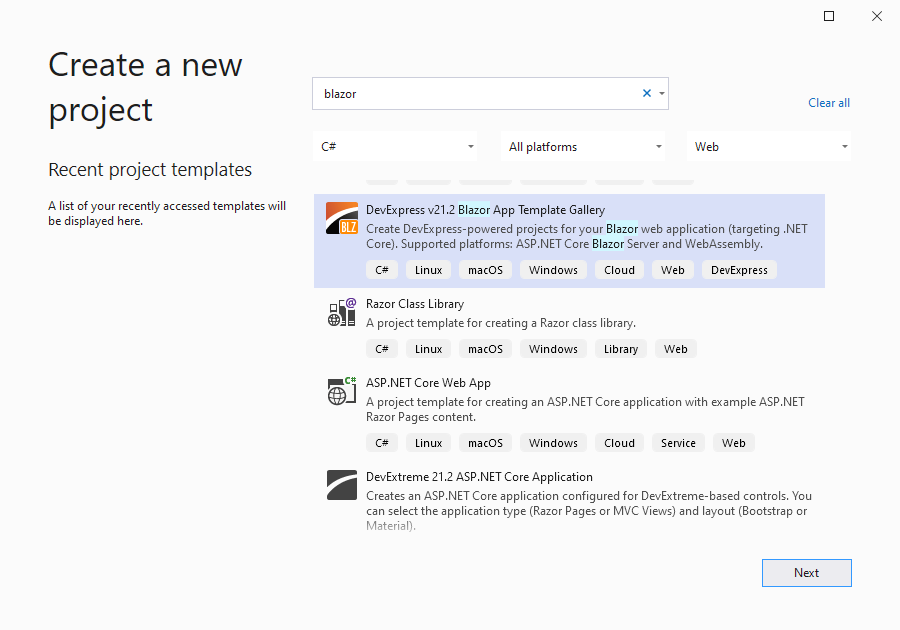
Click Next.
Specify the project name and location.
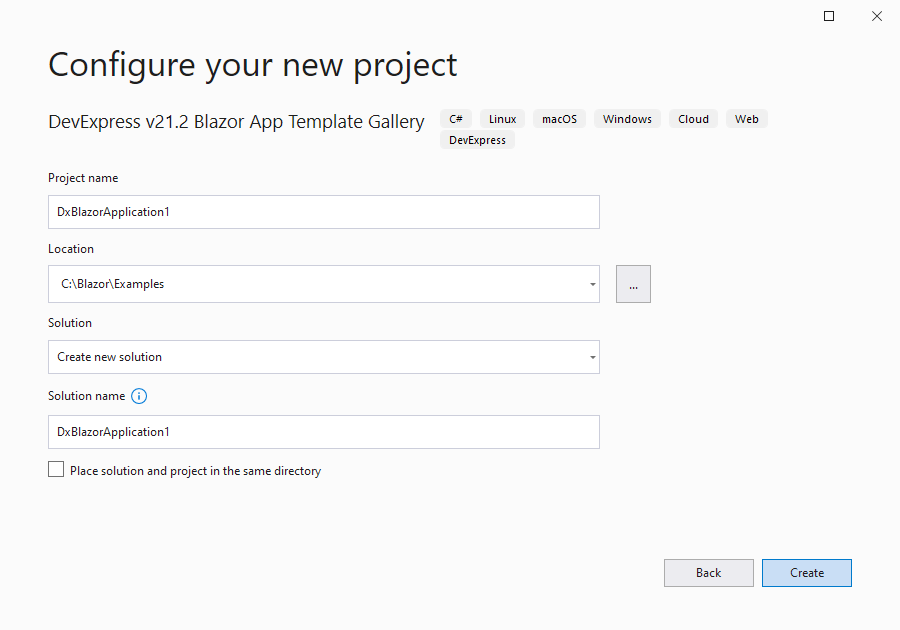
Click Create.
Select the Blazor Server Application.
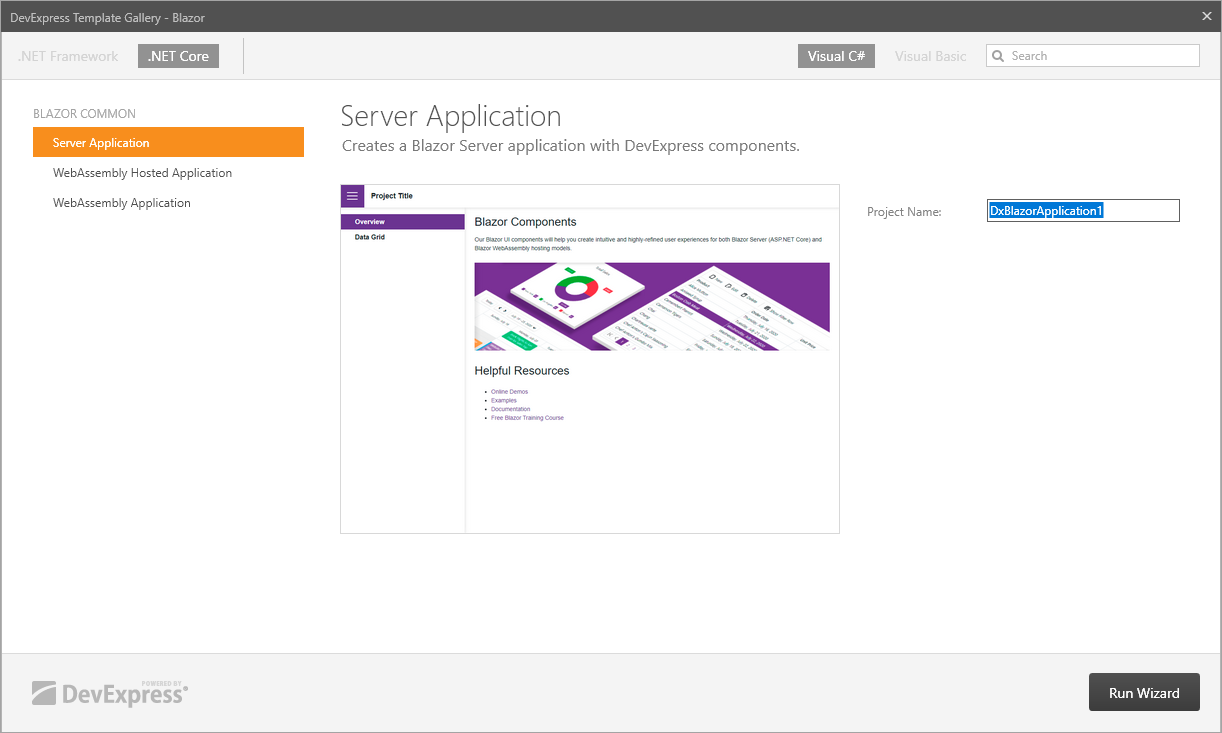
Click Run Wizard.
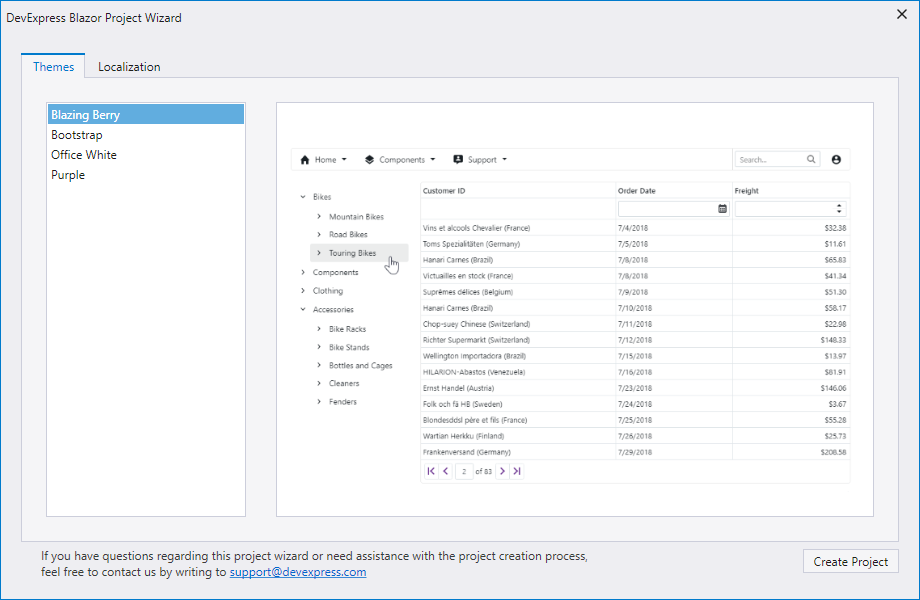
The DevExpress Blazor Project Wizard allows you to select a theme to change the appearance of all components, and specify the culture used to localize UI elements. Click Create Project.
The Server Application template creates a project that includes the following:
- References to the DevExpress Blazor NuGet package and DevExpress resources
- The DevExpress Blazing Berry theme
- Sidebar navigation based on the TreeView component
- The Data Grid component
Install the DevExpress Blazor Reporting NuGet Package
Right-click the Dependencies node in the Solution Explorer and select Manage NuGet Packages….
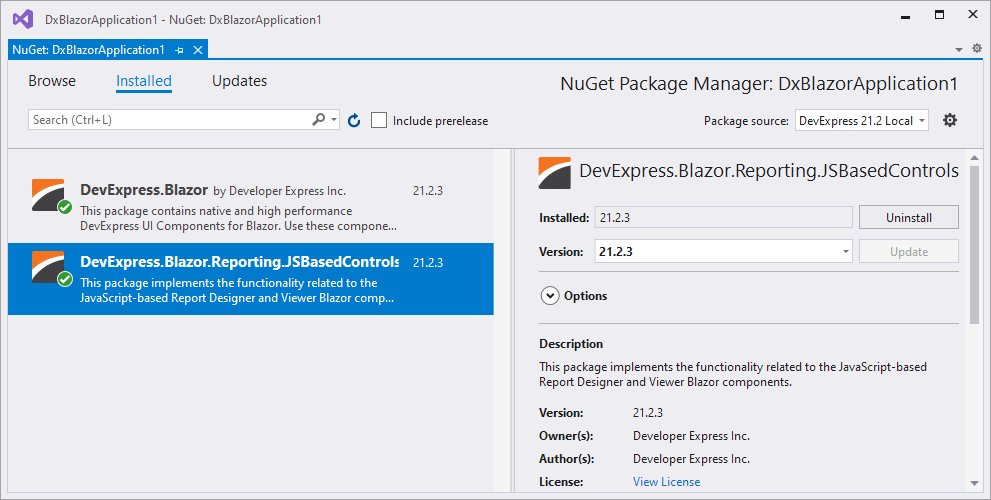
In the invoked dialog, click the Browse tab, select the DevExpress 21.2 Local package source, and install the
DevExpress.Blazor.Reporting.JSBasedControlsNuGet package.The DevExpress 21.2 Local package is automatically added as a package source to your NuGet configuration files if you use the DevExpress .NET Product Installer.
Note
The
DevExpress.Blazor.Reporting.ViewerNuGet package contains the Report Viewer native component for Blazor.The
DevExpress.Blazor.Reporting.JSBasedControlsNuGet package contains the Document Viewer and Report Designer JavaScript-based components.The
DevExpress.Blazor.ReportingNuGet package contains all Blazor Reporting components - the Report Viewer, Document Viewer, and Report Designer. This is a legacy package for Blazor Reporting apps. Please use one of the packages mentioned above for new projects.Build the project.
Add Dependencies
Modify the
Startup.csfile. Call the AddDevExpressBlazorReporting method that sets up the DevExpress control services and the UseDevExpressBlazorReporting method that registers DevExpress middleware components:using DevExpress.Blazor.Reporting; // ... public void ConfigureServices(IServiceCollection services) { services.AddDevExpressBlazorReporting(); // ... }using DevExpress.Blazor.Reporting; // ... public void Configure(IApplicationBuilder app, IWebHostEnvironment env) { app.UseDevExpressBlazorReporting(); // ... }Modify the
_Imports.razorfile to register the DevExpress.Blazor.Reporting namespace:@using DevExpress.Blazor.Reporting
Add the Report Storage
Implement the ReportStorageWebExtension descendant that saves and loads reports. The code below is a sample storage that uses the file system to store reports:
using System;
using Microsoft.AspNetCore.Hosting;
using System.Collections.Generic;
using System.IO;
using System.Linq;
using DevExpress.XtraReports.UI;
using DevExpress.XtraReports.Web.Extensions;

namespace BlazorApp1
{
    public class CustomReportStorageWebExtension : ReportStorageWebExtension
    {
        readonly string ReportDirectory;
        const string FileExtension = ".repx";
        public CustomReportStorageWebExtension(IWebHostEnvironment env)
        {
            ReportDirectory = Path.Combine(env.ContentRootPath, "Reports");
            if (!Directory.Exists(ReportDirectory))
            {
                Directory.CreateDirectory(ReportDirectory);
            }
        }

        private bool IsWithinReportsFolder(string url, string folder)
        {
            var rootDirectory = new DirectoryInfo(folder);
            var fileInfo = new FileInfo(Path.Combine(folder, url));
            return fileInfo.Directory.FullName.ToLower().StartsWith(rootDirectory.FullName.ToLower());
        }

        public override bool CanSetData(string url)
        {
            // Determines whether it is possible to store a report by a given URL.
            // For instance, make the CanSetData method return false for reports
            // that should be read-only in your storage.
            // This method is called only for valid URLs
            // (if the IsValidUrl method returns true) before calling the SetData method.

            return true;
        }

        public override bool IsValidUrl(string url)
        {
            // Determines whether the URL passed to the current Report Storage is valid.
            // For instance, implement your own logic to prohibit URLs that contain white spaces
            // or other special characters.
            // This method is called before the CanSetData and GetData methods.

            return Path.GetFileName(url) == url;
        }

        public override byte[] GetData(string url)
        {
            // Returns report layout data stored in a Report Storage using the specified URL.
            // This method is called only for valid URLs after the IsValidUrl method is called.
            try
            {
                if (Directory.EnumerateFiles(ReportDirectory)
                    .Select(Path.GetFileNameWithoutExtension).Contains(url))
                {
                    return File.ReadAllBytes(Path.Combine(ReportDirectory, url + FileExtension));
                }
            }
            catch (Exception ex)
            {
                throw new DevExpress.XtraReports.Web.ClientControls.FaultException(
                    "Could not get report data.", ex);
            }
            throw new DevExpress.XtraReports.Web.ClientControls.FaultException(
                string.Format("Could not find report '{0}'.", url));
        }

        public override Dictionary<string, string> GetUrls()
        {
            // Returns a dictionary of the existing report URLs and display names.
            // This method is called when running the Report Designer,
            // before the Open Report and Save Report dialogs are shown
            // and after a new report is saved to storage.

            return Directory.GetFiles(ReportDirectory, "*" + FileExtension)
                                    .Select(Path.GetFileNameWithoutExtension)
                                    .ToDictionary<string, string>(x => x);
        }

        public override void SetData(XtraReport report, string url)
        {
            // Stores the specified report to a Report Storage using the specified URL.
            // This method is called only after the IsValidUrl and CanSetData methods are called.
            if (!IsWithinReportsFolder(url, ReportDirectory))
                throw new DevExpress.XtraReports.Web.ClientControls.FaultException(
                    "Invalid report name.");
            report.SaveLayoutToXml(Path.Combine(ReportDirectory, url + FileExtension));
        }

        public override string SetNewData(XtraReport report, string defaultUrl)
        {
            // Stores the specified report using a new URL.
            // The IsValidUrl and CanSetData methods are never called before this method.
            // You can validate and correct the specified URL directly
            // in the SetNewData method implementation
            // and return the resulting URL used to save a report in your storage.
            SetData(report, defaultUrl);
            return defaultUrl;
        }
    }
}
Modify the
Startup.csfile and add the code that registers the CustomReportStorageWebExtension:using DevExpress.XtraReports.Web.Extensions; // ... public void ConfigureServices(IServiceCollection services) { services.AddDevExpressBlazorReporting(); // Register the storage after the AddDevExpressBlazorReporting method call. services.AddScoped<ReportStorageWebExtension, CustomReportStorageWebExtension>(); // ... }Important
Register the ReportStorageWebExtension after the AddDevExpressBlazorReporting method.
- Add a new Reports folder to a project.
Tip
The name Reports is specified in the ReportStorageWebExtension implementation.
Create a Sample Report
Note
To perform this step, you should install DevExpress Reporting on your machine. Refer to the following topic for more information: Install All DevExpress .NET Framework and .NET 5+ Products.
Select Project -> Add New Item… to invoke the Add New Item dialog. Navigate to the Reporting node and select the DevExpress v.21.2 Report item template.
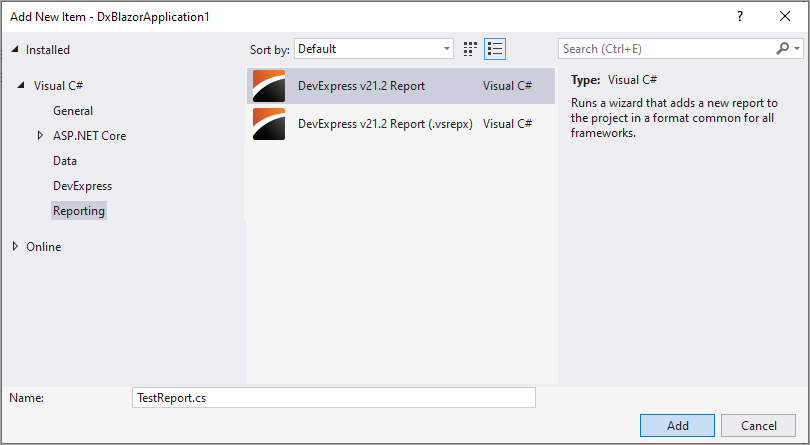
Name the report
TestReport.csand click Add.Select Blank In the invoked Report Wizard page and click Finish. The newly created report is loaded in the Visual Studio Report Designer.
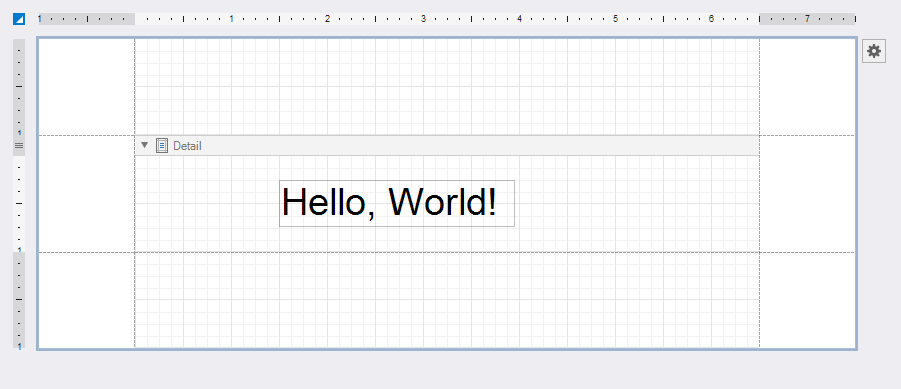
Modify a newly created report in Visual Studio Report Designer. Add a label and type in the Hello, World! text:
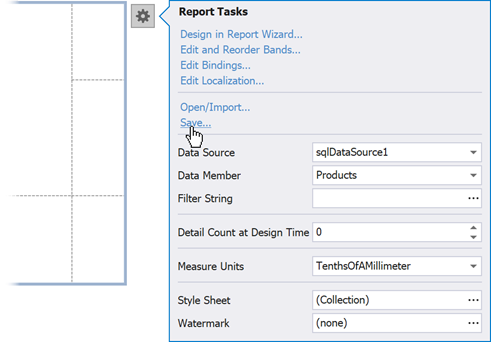
Click the report’s smart tag (a button in the upper left corner of the Designer window) and select Save…:
In the invoked Save As dialog, specify the Reports project folder, Report XML Files (.repx) file type and the TestReport.repx file name.
Create Routing to Controller Actions
Modify the Startup.cs file. Add the following code to map requests to controller actions:
    public void Configure(IApplicationBuilder app, IWebHostEnvironment env)
    {
        // ...
        app.UseEndpoints(endpoints =>
            {
            endpoints.MapControllers();
            // ...
            });
    }
Implement Default Controllers
- In Visual Studio, create a new
Controllersfolder. Add a new class file (
ReportingControllers.cs) with the following content:using DevExpress.AspNetCore.Reporting.QueryBuilder; using DevExpress.AspNetCore.Reporting.QueryBuilder.Native.Services; using DevExpress.AspNetCore.Reporting.ReportDesigner; using DevExpress.AspNetCore.Reporting.ReportDesigner.Native.Services; using DevExpress.AspNetCore.Reporting.WebDocumentViewer; using DevExpress.AspNetCore.Reporting.WebDocumentViewer.Native.Services; // ... public class CustomWebDocumentViewerController : WebDocumentViewerController { public CustomWebDocumentViewerController(IWebDocumentViewerMvcControllerService controllerService) : base(controllerService) { } } public class CustomReportDesignerController : ReportDesignerController { public CustomReportDesignerController(IReportDesignerMvcControllerService controllerService) : base(controllerService) { } } public class CustomQueryBuilderController : QueryBuilderController { public CustomQueryBuilderController(IQueryBuilderMvcControllerService controllerService) : base(controllerService) { } }
Add Document Viewer to a Page
Create a new Razor component (select Project -> Add New Item.. -> Razor Component). Save it as the DocumentVIewer.razor file, and open and overwrite its content with the following:
@page "/documentviewer"

<DxDocumentViewer ReportName="TestReport" Height="1000px" Width="100%">
        <DxDocumentViewerTabPanelSettings Width="340" />
</DxDocumentViewer>
The DxDocumentViewer component invokes the default WebDocumentViewerController that processes requests from the Document Viewer and loads the TestReport report to create a document.
Add Report Designer to a Page
Create a new Razor component (select Project -> Add New Item.. -> Razor Component). Save it as the ReportDesigner.razor file, and open and overwrite its content with the following:
@page "/reportdesigner"

    <DxReportDesigner ReportName="TestReport" Height="1000px" Width="100%" AllowMDI="true">
        <DxReportDesignerWizardSettings UseFullscreenWizard="true" />
    </DxReportDesigner>
The DxReportDesigner loads the TestReport report.
Note
If you implement a custom report that inherits from XtraReport and want to open it in the End-User Report Designer, add a constructor without parameters to this report.
Add Navigation Links
Modify the NavMenu.razor file to include links to the newly created pages:
Run the Project
Run the project. The Document Viewer and Report Designer components load the TestReport.repx report:
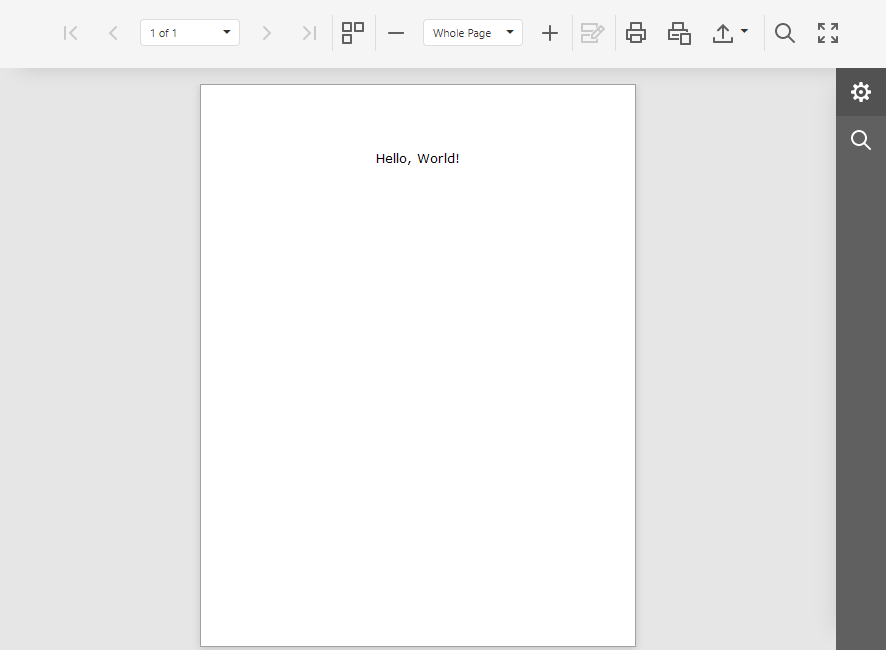
Document Viewer
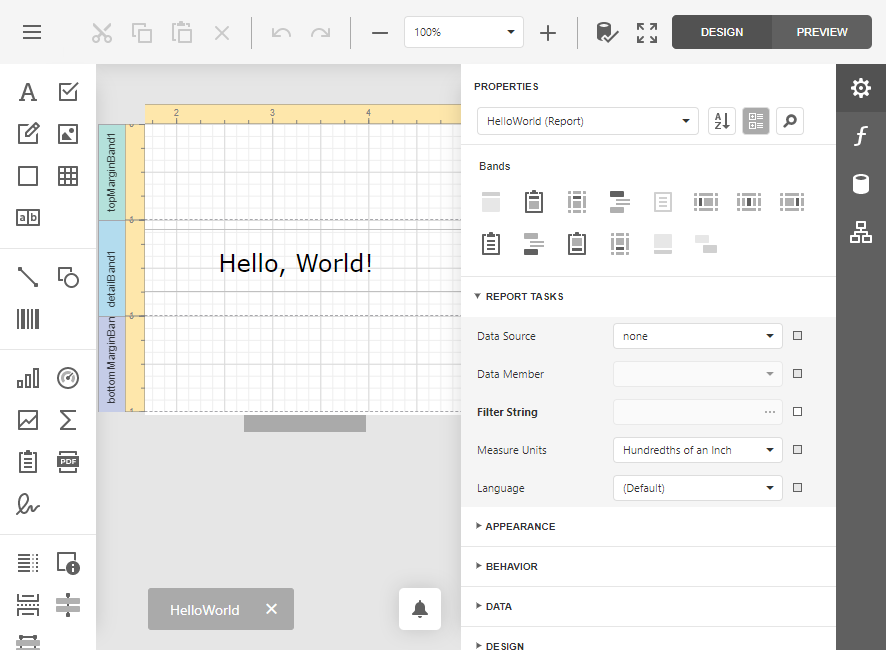
Report Designer