Add Items to the Report Designer's Ribbon Toolbar
- 2 minutes to read
This tutorial illustrates how to customize a Report Designer’s ribbon toolbar by adding a new button to it.
Important
Customization options described in this help topic are available to owners of DevExpress WinForms, DXperience, and Universal subscriptions (subscriptions that include DevExpress WinForms UI Controls). The DevExpress Reporting Subscription does not support UI customization in Report Viewer or End-User Report Designer. You can use ReportPrintTool and ReportDesignTool classes to display Print Preview and End-User Report Designer in their default configurations.
Refer to the following help topic for information on subscription options: Installation - Subscriptions that Include Reporting Components.
Tip
See the following tutorial to learn how to add a Report Designer to a WinForms application: Create a Custom End-User Report Designer.
Do the following to customize the toolbar of a ribbon-based designer form:
Click the
 button and add a new RibbonPageGroup to the toolbar.
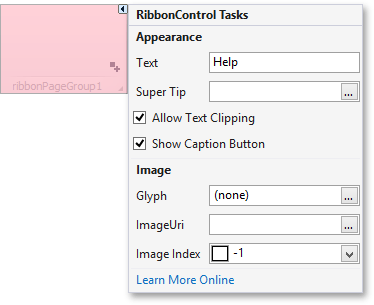
Click the smart tag of the created page group and set its RibbonPageGroup.Text property to Help.
Click the
 button in the created group and select Add Button in the invoked context menu.
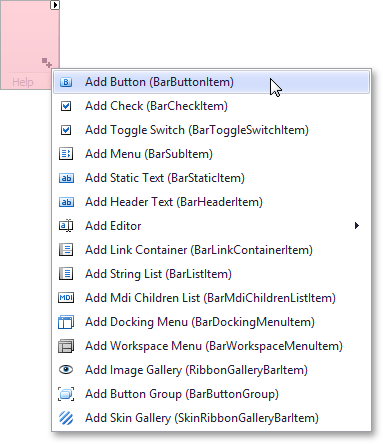
- Set the button’s BarButtonItem.Caption property to About.
Handle the newly added button’s BarItem.ItemClick event:
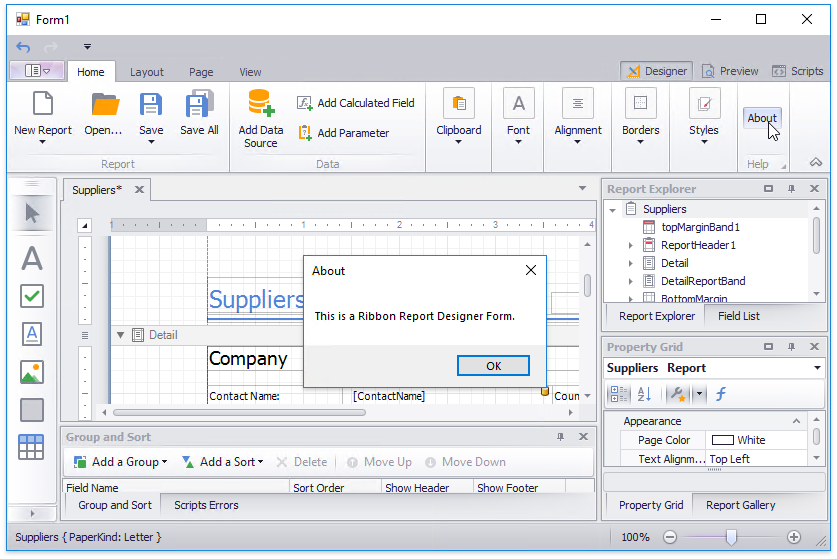
The following image illustrates the result: