Toast Notification Manager
- 10 minutes to read
The Toast Notification Manager component shows toast notifications - a Windows 10 version of alert windows.
Note
- Toast notifications can only be displayed in Windows 8.0 or higher. For older Windows versions, use alert windows instead.
- Windows displays toast notifications only for those apps that are pinned to the Start menu.
An application can display multiple notifications simultaneously, or one notification multiple times at once. The ToastNotification object has nine content templates, and can play a sound.
- Create Notifications
- Manage End-User Interactions
- Customize Notifications with the “Generic” Template
- Buttons
- User Input
- Notes
Create Notifications
Follow the steps below to create toast notifications.
Locate the ToastNotificationManager component in Visual Studio’s toolbox and drop it onto the form.
Windows displays toast notifications only for those apps that are pinned to the Start menu, so make sure your application has a valid shortcut with an Application User Model ID. For debugging purposes, invoke the component’s smart tag and click the “Create Application Shortcut” link.
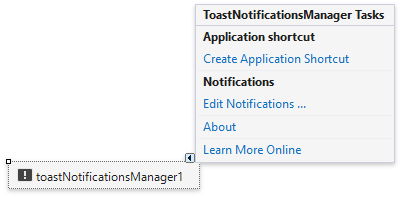
Invoke the manager’s smart-tag and click the Edit Notifications… link.
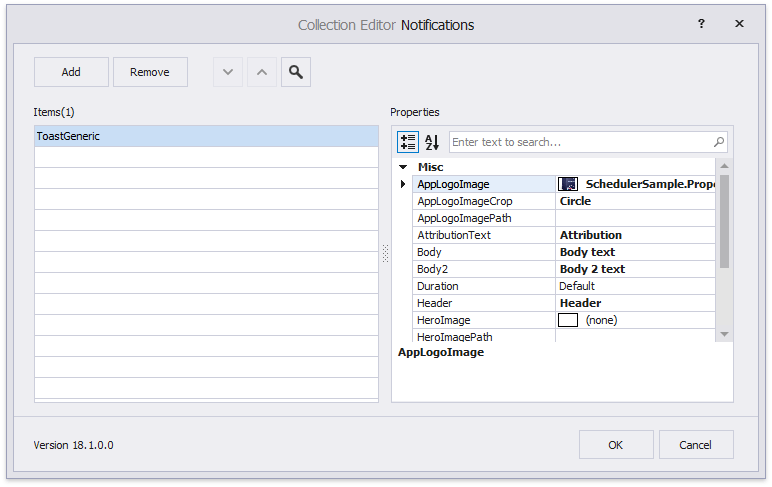
In the Collection Editor dialog, click Add to add a notification. This creates new ToastNotification objects and adds them to the manager’s ToastNotificationsManager.Notifications collection. You can customize the notification settings in the property grid.
- ToastNotification.Body and IToastNotificationProperties.Body2 - two regular text strings that represent the main notification text. The Body2 line can be disabled, depending on the selected template (see below).
- ToastNotification.Duration - gets or sets how long the notification is visible if an end user does not close it.
- ToastNotification.Header - a bold text string displayed in the notification header. The header string can occupy one or two lines, depending on the notification template.
- ToastNotification.ID - a read-only property that stores a unique notification ID.
- ToastNotification.Image - gets or sets the notification image.
- ToastNotification.Sound - allows you to specify a sound that is played when this notification is shown.
ToastNotification.Template - gets or sets the notification template. The table below illustrates different notification types.
Template
Description
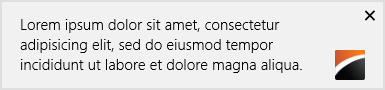
Text01
A IToastNotificationProperties.Body string that occupies a maximum of three lines.
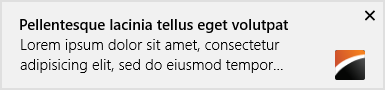
Text02
A bold IToastNotificationProperties.Header text string on the first line and a IToastNotificationProperties.Body text string wrapped across the second and third lines.
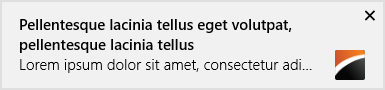
Text03
One string of bold IToastNotificationProperties.Header text that occupies the first and second lines, and a IToastNotificationProperties.Body text on the third line.
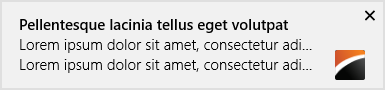
Text04
Bold IToastNotificationProperties.Header text on the first line, a IToastNotificationProperties.Body string on the second line, and a IToastNotificationProperties.Body2 string on the third line.
ImageAndText01
The Text01 template and an image.

ImageAndText02
The Text02 template and an image.

ImageAndText03
The Text03 template and an image.

ImageAndText04
The Text04 template plus an image.

Generic
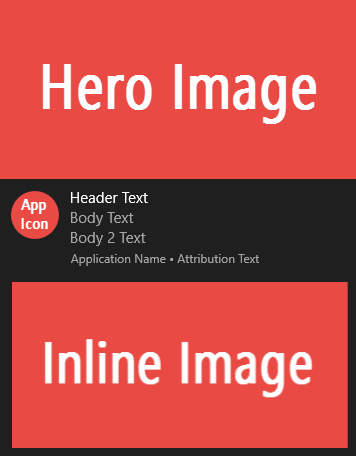
A Windows 10-style notification. The following properties provide its content:
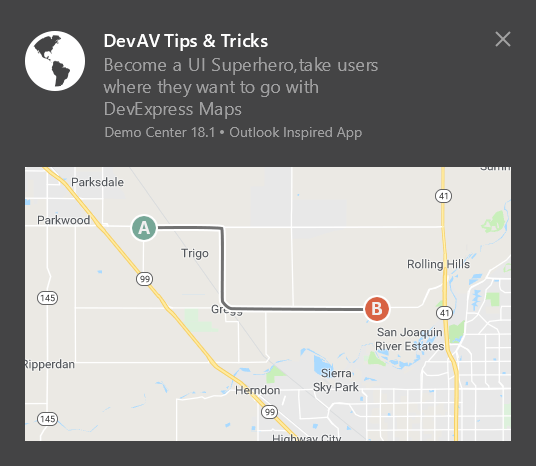
- ToastNotification.AppLogoImage (48x48 pixels at 100% scaling). Cropped according to the ToastNotification.AppLogoImageCrop property value
- ToastNotification.AttributionText
- ToastNotification.Body and IToastNotificationProperties.Body2
- ToastNotification.Header
- ToastNotification.HeroImage (364x180 pixels)
- ToastNotification.Image (332x180 pixels)
To display a specific notification, use the ToastNotificationsManager.ShowNotification method.
Manage End-User Interactions
Depending on end user actions, the following events occur.
ToastNotificationsManager.Activated - occurs if an end user clicks this notification. Handle this event to check which notification was clicked, and perform actions depending on the result. The code below illustrates an example.
private void toastNotificationsManager1_Activated(object sender, DevExpress.XtraBars.ToastNotifications.ToastNotificationEventArgs e) { switch (e.NotificationID.ToString()) { case "3b7fcd8b-a1e0-4ff5-83ce-023cdf6be24b": MessageBox.Show("Notification #1 Clicked"); break; case "66501f90-ac6b-440d-bf73-483c5ab22143": MessageBox.Show("Notification #2 Clicked"); break; } }- ToastNotificationsManager.UserCancelled - occurs if an end user closes the notification.
ToastNotificationsManager.TimedOut - occurs when an end user does not respond to the notification and the notification is hidden after a certain period. The code below re-sends timed out notifications.
- ToastNotificationsManager.Hidden - occurs when a toast notification is hidden via the ToastNotificationsManager.HideNotification or ToastNotificationsManager.HideNotifications method.
- ToastNotificationsManager.Dropped - fires when a notification is canceled due to end user’s system settings.
Customize Notifications with the “Generic” Template
The following XML markup is a sample toast notification’s content layout:
<toast displayTimestamp="2018-01-05T13:35:00Z">
  <visual>
    <binding template="ToastGeneric">
      <text id="1">Header Text</text>
      <text id="2">Body Text</text>
      <text id="3">Body 2 Text</text>
      <text placement="attribution">Attribution Text</text>
      <image src="file:///C:/Users/John.Doe/AppData/Local/Temp/tmpBC2C.tmp4e9214ef-f478-4cea-972a-3fdd6c3acac0.png" placement="appLogoOverride" hint-crop="circle" />
      <image src="file:///C:/Users/John.Doe/AppData/Local/Temp/tmpBC2D.tmpeb4a5986-fd2a-4d7d-a69d-a78f0061d754.png" placement="hero" />
      <image src="file:///C:/Users/John.Doe/AppData/Local/Temp/tmpBC1B.tmp43598461-7e59-4600-a95c-88edbc57b2ec.png" />
    </binding>
  </visual>
</toast>
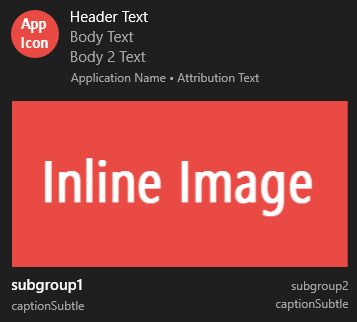
You can handle the ToastNotificationsManager.UpdateToastContent event to modify this template using the System.XML namespace’s API. For instance, the following code adds a group with two subgroups to the notification layout. Each subgroup displays two additional text blocks, arranged vertically.
using System.Xml;

 public Form1() {
     InitializeComponent();
     //. . .
     toastNotificationsManager1.UpdateToastContent += ToastNotificationsManager1_UpdateToastContent;
 }

 private void ToastNotificationsManager1_UpdateToastContent(object sender, DevExpress.XtraBars.ToastNotifications.UpdateToastContentEventArgs e) {
     XmlDocument content = e.ToastContent;
     XmlNode bindingNode = content.GetElementsByTagName("binding").FirstOrDefault();
     XmlElement group = content.CreateElement("group");
     bindingNode.AppendChild(group);

     XmlElement subGroup = content.CreateElement("subgroup");
     group.AppendChild(subGroup);

     XmlElement text = content.CreateElement("text");
     subGroup.AppendChild(text);
     text.SetAttribute("hint-style", "base");
     text.InnerText = "subgroup1";

     text = content.CreateElement("text");
     subGroup.AppendChild(text);
     text.SetAttribute("hint-style", "captionSubtle");
     text.InnerText = "captionSubtle";

     subGroup = content.CreateElement("subgroup");
     group.AppendChild(subGroup);

     text = content.CreateElement("text");
     subGroup.AppendChild(text);
     text.SetAttribute("hint-style", "captionSubtle");
     text.SetAttribute("hint-align", "right");
     text.InnerText = "subgroup2";

     text = content.CreateElement("text");
     subGroup.AppendChild(text);
     text.SetAttribute("hint-style", "captionSubtle");
     text.SetAttribute("hint-align", "right");
     text.InnerText = "captionSubtle";
     //save the toast markup as an XML file for debugging purposes
     content.Save(@"D:\Toast.xml");
 }
Buttons
Handle the following events to display a button in a notification:
- ToastNotificationsManager.UpdateToastContent — to add a button to the notification. Use the Arguments attribute to pass data to the application (see Toast Content Schema for more information);
- ToastNotificationsManager.Activated — to handle clicks on the button. Cast event arguments to the ToastNotificationActivatedEventArgs type. Read the Arguments event parameter to get data from the notification.
The code below shows sample handlers.
using DevExpress.XtraBars.ToastNotifications;
using System.Xml;
//Add the "Show Details" button.
private void toastNotificationsManager1_UpdateToastContent(object sender, DevExpress.XtraBars.ToastNotifications.UpdateToastContentEventArgs e) {
    XmlDocument content = e.ToastContent;
    XmlElement toastElement = content.GetElementsByTagName("toast").OfType<XmlElement>().FirstOrDefault();

    XmlElement actions = content.CreateElement("actions");
    toastElement.AppendChild(actions);

    XmlElement action = content.CreateElement("action");
    actions.AppendChild(action);
    action.SetAttribute("content", "Show details");
    action.SetAttribute("arguments", "viewdetails");
}
//Handle button clicks.
private void toastNotificationsManager1_Activated(object sender, DevExpress.XtraBars.ToastNotifications.ToastNotificationEventArgs e) {
    ToastNotificationActivatedEventArgs args = e as ToastNotificationActivatedEventArgs;
    MessageBox.Show(string.Format("The {0} button is clicked", args.Arguments));
}
User Input
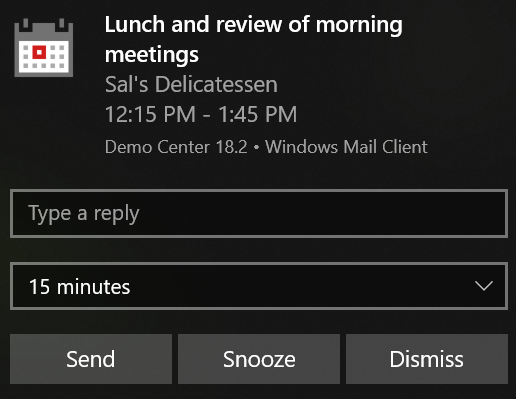
The Generic toast template allows you to add input boxes and selection menus to notifications.
private void toastNotificationsManager1_UpdateToastContent(object sender, DevExpress.XtraBars.ToastNotifications.UpdateToastContentEventArgs e) {
    XmlDocument content = e.ToastContent;
    XmlElement toastElement = content.GetElementsByTagName("toast").OfType<XmlElement>().FirstOrDefault();
    toastElement.SetAttribute("launch", "performAction");
    XmlElement actions = content.CreateElement("actions");
    toastElement.AppendChild(actions);
    XmlElement text = content.CreateElement("input");
    //Input Box
    actions.AppendChild(text);
    text.SetAttribute("id", "textBox");
    text.SetAttribute("type", "text");
    text.SetAttribute("placeHolderContent", "Type a reply");

    //Time selector
    XmlElement input = content.CreateElement("input");
    actions.AppendChild(input);
    input.SetAttribute("id", "time");
    input.SetAttribute("type", "selection");
    input.SetAttribute("defaultInput", "15min");
    XmlElement selection = content.CreateElement("selection");
    input.AppendChild(selection);
    selection.SetAttribute("id", "15min");
    selection.SetAttribute("content", "15 minutes");
    selection = content.CreateElement("selection");
    input.AppendChild(selection);
    selection.SetAttribute("id", "30min");
    selection.SetAttribute("content", "30 minutes");

    XmlElement action = content.CreateElement("action");
    //Send button
    actions.AppendChild(action);
    action.SetAttribute("content", "Send");
    action.SetAttribute("arguments", "Send");
    //Snooze button
    action = content.CreateElement("action");
    actions.AppendChild(action);
    action.SetAttribute("content", "Snooze");
    action.SetAttribute("arguments", "snooze");
    //Dissmiss button
    action = content.CreateElement("action");
    actions.AppendChild(action);
    action.SetAttribute("content", "Dismiss");
    action.SetAttribute("arguments", "dismiss");
}
To handle end-user interactions with these elements, an Activator is required. The latter is a descendant of the DevExpress.XtraBars.ToastNotifications.ToastNotificationActivator class. Mark this descendant with the ComVisible and Guid attributes to allow the Component Object Model (COM) to create and access instances of this class. In the sample below, a message box shows which notification button a user has pressed, what text the user entered, and which time interval this user selected. Change the OnActivate method override to implement your own functionality.
[Guid("-type-your-GUID-here-"), ComVisible(true)]
public class ToastNotificationActivatorCustom : DevExpress.XtraBars.ToastNotifications.ToastNotificationActivator {

    public override void OnActivate(string arguments, Dictionary<string, string> data) {
        StringBuilder sb = new StringBuilder();
        sb.AppendLine(arguments);
        foreach (string key in data.Keys) {
            sb.AppendLine(string.Format("{0} = {1}", key, data[key]));
        }
        MessageBox.Show(sb.ToString());
    }
}
Tip
You can use on-line GUID generators to randomly generate a valid GUID. Note that all GUIDs must be unique.
Important
- If you have clicked the “Create Application Shortcut” link in the Toast Notification Manager’s smart-tag to debug notifications, click the “Update Application Shortcut” link every time you change the Activator class. Otherwise, notifications will not reflect your changes.
- Component Object Model invokes the OnActivate method in a worker thread. Make sure all calls to controls and components from this method are performed in a thread-safe way.
To assign this custom Activator to the Toast Notification Manager, specify the ToastNotificationsManager.ApplicationActivator property at design time…
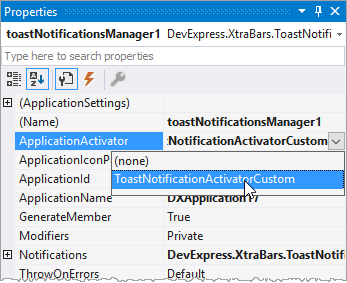
…or call RegisterApplicationActivator/UnregisterApplicationActivator methods in code (hidden from IntelliSense).
public XtraForm1() {
    InitializeComponent();
    toastNotificationsManager1.RegisterApplicationActivator(typeof(ToastNotificationActivatorCustom));
    this.FormClosed += XtraForm1_FormClosed;
}

private void XtraForm1_FormClosed(object sender, FormClosedEventArgs e) {
    toastNotificationsManager1.UnregisterApplicationActivator();
}
Important
The Custom Activator requires that the application shortcut contains a unique application ID (ToastNotificationsManager.ApplicationId) and a CLSID that points to your COM class (a GUID passed to the Guid attribute). Additionally, the application must be registered as a local COM server that can be invoked when users interact with toasts. To do that, create the following registry key when deploying the application:
- Key: HKEY_CURRENT_USER\SOFTWARE\Classes\CLSID{–your-GUID-here–}\LocalServer32
- Value: C:\Users\Sample\Desktop\YourApplication.exe (specify an actual path to an executable)
Notes
- The notification’s background color is chosen automatically by the operating system, you cannot modify it manually.
- The operating system displays notifications. They can remain visible after an end user closes the application.
- Windows 8-style notifications automatically display a shortcut icon in the bottom-right corner. This icon cannot be removed.
- The number of notifications that a visible simultaneously depends on the end user’s system settings.
- Windows 10 Anniversary Update (Redstone 1, build 1607) and newer versions support the Generic notification template.