Manipulate Gauges
- 3 minutes to read
This topic describes how to add or remove gauges and gauge elements, and resize and move gauges.
Add/Remove Gauges to/from Gauge Control
When you add a Gauge Control (ASPxGaugeControl) to a web form, the Preset Manager is automatically invoked. The Preset Manager loads a preset gauge to the control. If a preset contains multiple gauges, it adds all gauges in the preset to the control.
Use one of the following techniques to display multiple gauges within a web form.
- Add multiple ASPxGaugeControl controls to the web form, each of which displays a specific gauge. This technique allows you to load a preset from the Preset Manager to each GaugeControl.
- Manually add multiple gauges to a single GaugeControl and then customize their paint styles according to your needs. The Preset Manager doesn’t allow a preset to be loaded into a specific gauge. It only allows you to load a preset into a GaugeControl, which overrides all existing gauges.
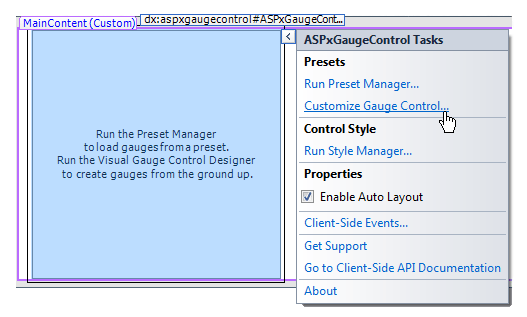
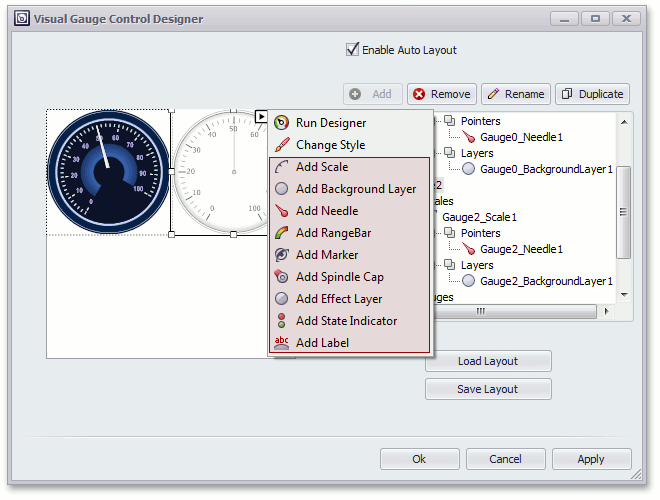
To manually add a gauge to a gauge control, click the control’s smart tag and select Customize Gauge Control… in the invoked menu as shown below.
In the invoked Visual Gauge Control Designer, select the gauge you wish to add to the gauge control on the right side of the designer, and click Add.
The following image illustrates how to add circular, linear and digital gauges to the gauge control.
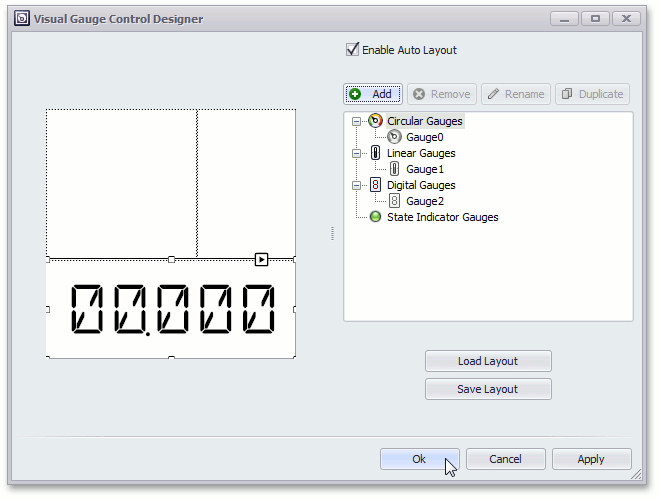
To remove a gauge, select it in the Visual Gauge Control Designer, click Remove and then OK (see the image above).
Add/Remove Elements to/from Gauges
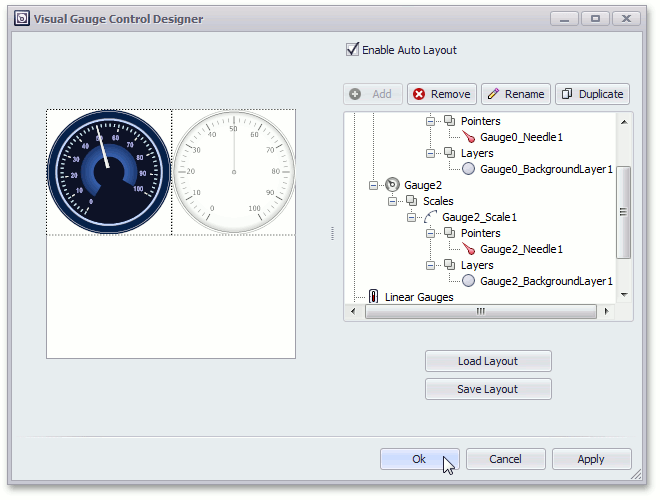
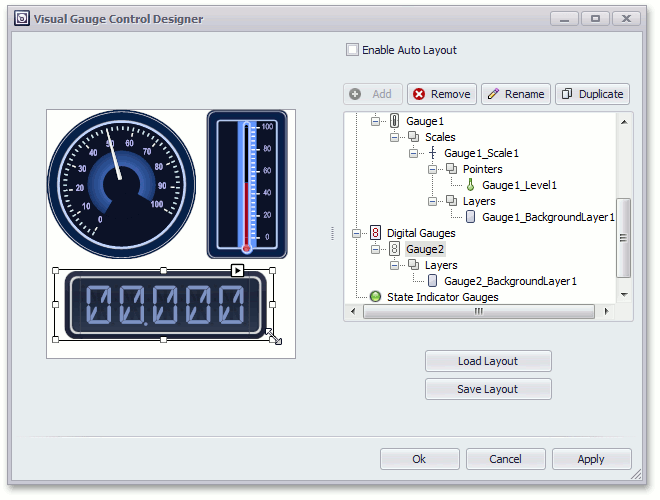
If a gauge is created manually, you need to manually add elements (scales, markers, needles, and so forth) to it. A gauge created from a preset already contains all elements that are present in the preset. However, it is possible to use the Gauge Designer to add new elements and delete existing ones.
If a gauge is empty, you can add default elements to it. To do this, click the gauge’s smart tag and select Add Default Elements in the Visual Gauge Control Designer.
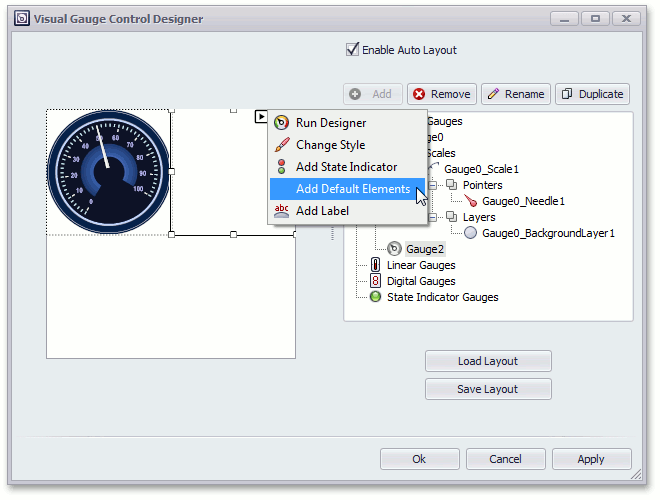
This command adds common elements to a gauge according to the gauge type. For instance, for a circular gauge, the control creates a scale, background layer, needle, and spindle cap.
You can use other commands listed in the gauge’s smart tag menu to manually add a corresponding element to a gauge.
Note
The main element of circular and linear gauges is a scale. Other elements are aligned relative to scales. Note that if there is no scale in a gauge, some commands in the smart tag menu are not accessible.
To remove a gauge element, select it and click Remove in the Visual Gauge Control Designer. You can also use the gauge’s Designer to remove elements.
Resize and Move Gauges
In the Visual Gauge Control Designer, you can drag a gauge’s borders to resize or move the gauge. This allows you to increase the space between gauges, or set custom sizes for them. Note that the auto-layout feature is disabled if you manually resize and move a gauge. In auto-layout mode, gauges are arranged next to each other without overlap, and they are proportionally resized when you resize the gauge control. When the auto-layout feature is disabled, gauges keep their sizes when you resize the control.
See the following topic to learn more about the auto-layout feature: Layout Customization.