Create a Predefined Dashboard and Add it to the Navigation
- 2 minutes to read
This topic describes how to provide a predefined dashboard that is available to users immediately after application deployment.
Create a dashboard at runtime. You can review the following topics to learn how to do it.
Save the dashboard to an XML file.
In a WinForms application, you can use the Save As button in the Dashboard Designer.

In an ASP.NET Core Blazor application, you can click the Export To XML action when viewing the dashboard.

Add the created XML file to the module project as a resource file.

Open the Updater.cs file and add the following code to the ModuleUpdater.UpdateDatabaseAfterUpdateSchema method.
using DevExpress.ExpressApp.Dashboards; using MySolution.Module.Properties; // ... public override void UpdateDatabaseAfterUpdateSchema() { base.UpdateDatabaseAfterUpdateSchema(); DashboardsModule.AddDashboardData<DashboardData>( ObjectSpace, "My Dashboard", Resources.MyDashboard1); // ... ObjectSpace.CommitChanges(); }Note that multi-tenant applications have specific implementation features. Refer to the following help topic for more information: Register Predefined Dashboards in a Multi-Tenant Application.
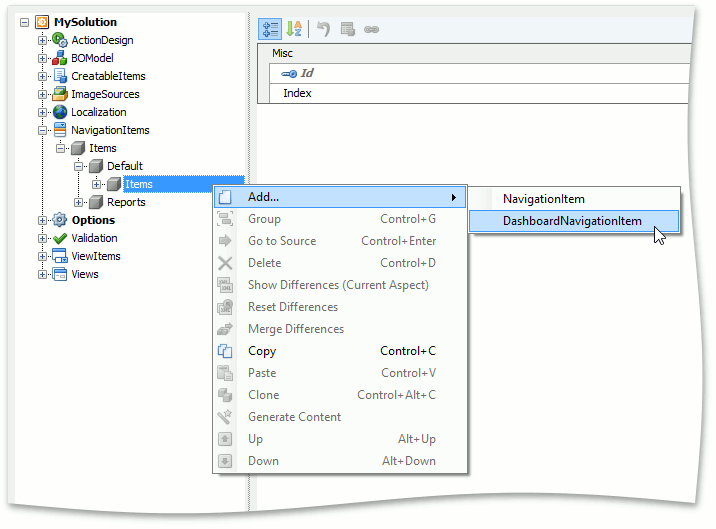
Run the Model Editor. To add the dashboard to a certain navigation group, right-click its Items child node, and choose Add… | DashboardNavigationItem.

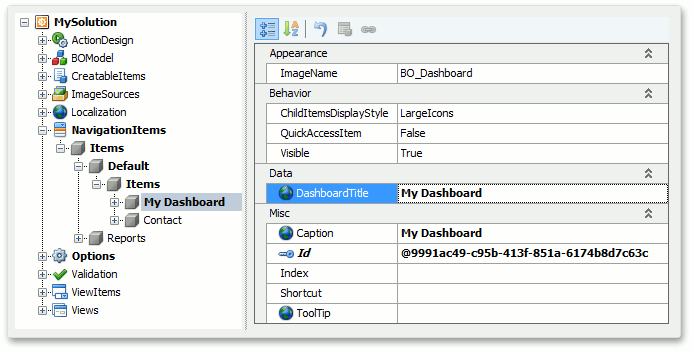
Focus the created node and set the IModelDashboardNavigationItem.DashboardTitle property to the title of the required dashboard.

Important
As the dashboard is identified by its title, do not change the title after the navigation item is added.
Run the application to ensure that the dashboard is added to the navigation.

Tip
If you are going to use predefined dashboards only, you can remove the Dashboards List View from the navigation. Set the DashboardsModule.GenerateNavigationItem property to false for this purpose.