Prompt to Report Behavior in the WPF Report Designer
- 6 minutes to read
This help topic describes how to integrate the AI-powered Prompt-to-Report functionality into the Report Designer. Once integrated, users can create reports with prompts (report description in natural language).
Activate an AI Assistant
Prerequisites
.NET 8+ or .NET Framework v4.7.2+
Install NuGet Packages
DevExpress.AIIntegration.Wpf.Reporting- Microsoft.Extensions.AI (Version=”10.5.1”)
- Azure.AI.OpenAI (Version=”2.3.0-beta.2”)
This help topic uses Azure OpenAI. See the following help topic for information about NuGet packages required for other supported AI services: AI-powered Extensions.
Register an AI Client
The following code snippet registers an Azure OpenAI client at application startup:
using DevExpress.AIIntegration;
using DevExpress.Xpf.Core;
using Azure.AI.OpenAI;
using Microsoft.Extensions.AI;
using System;
using System.ClientModel;
using System.Windows;

namespace DXReportsAILocalization {
    public partial class App : Application {
        static App() {
            CompatibilitySettings.UseLightweightThemes = true;
            var container = AIExtensionsContainerDesktop.Default;

            IChatClient chatClient = new AzureOpenAIClient(AzureOpenAIEndpoint, AzureOpenAIKey)
                .GetChatClient(ModelId).AsIChatClient();

            container.RegisterChatClient(chatClient);
        }

        private static Uri AzureOpenAIEndpoint = new Uri("YOUR_AZURE_OPENAI_END_POINT");
        private static ApiKeyCredential AzureOpenAIKey = new ApiKeyCredential("YOUR_OPENAI_API_KEY");
        static string ModelId = "YOUR_MODEL_NAME"; // For example, "gpt-5.4".
    }
}
Create and Configure an AI Assistant Behavior
Attach the ReportPromptToReportBehavior to the Report Designer to enable AI-powered Prompt-to-Report functionality.
The following properties are available:
- ReportPromptToReportBehavior.FixLayoutErrors
- Specifies whether to automatically resolve overlapping report controls.
- ReportPromptToReportBehavior.PredefinedPrompts
- Specifies predefined prompts that can be used to create a report in the Report Wizard.
- ReportPromptToReportBehavior.RetryAttemptCount
- Specifies the number of attempts to fix report layout errors that may appear in the LLM response.
- ReportDesignerBehaviorBase.Temperature
- Gets or sets the balance between creativity and consistency in AI responses. Higher values increase variation.
- ReportDesignerBehaviorBase.PromptAugmentation
- Specifies additional instructions that modify the prompt before processing.
Markup:
xmlns:dxrud="http://schemas.devexpress.com/winfx/2008/xaml/reports/userdesigner"
xmlns:dxai="http://schemas.devexpress.com/winfx/2008/xaml/ai"
xmlns:dxmvvm="http://schemas.devexpress.com/winfx/2008/xaml/mvvm"
...
<dxrud:ReportDesigner x:Name="designer">
    <dxmvvm:Interaction.Behaviors>
        <dxai:ReportPromptToReportBehavior/>
    </dxmvvm:Interaction.Behaviors>
</dxrud:ReportDesigner>
Code-Behind:
using DevExpress.AIIntegration.Wpf.Reporting;
using DevExpress.Mvvm.UI.Interactivity;
// ...
public partial class MainWindow : Window {
    public MainWindow() {
        InitializeComponent();
        ReportPromptToReportBehavior reportBehavior = new ReportPromptToReportBehavior();
        Interaction.GetBehaviors(designer).Add(reportBehavior);
    }
}
Create Reports
Once the behavior is registered, the Report Wizard interface displays the new AI Prompt-to-Report option. Select this option to create an AI-generated report.

Select Data Source Option
Select a data source option:

- No Data Source
- Creates a complete report structure based only on the user’s natural language description.
- Add Data Source
- Allows users to create a report data source in the first step, displays the data source structure in the Report Wizard interface, and automatically includes this metadata in the LLM prompt. Users can reference available data source fields when they describe data-bound report elements.
Enter Report Prompt
Choose a predefined prompt or enter your own prompt. Click Next.
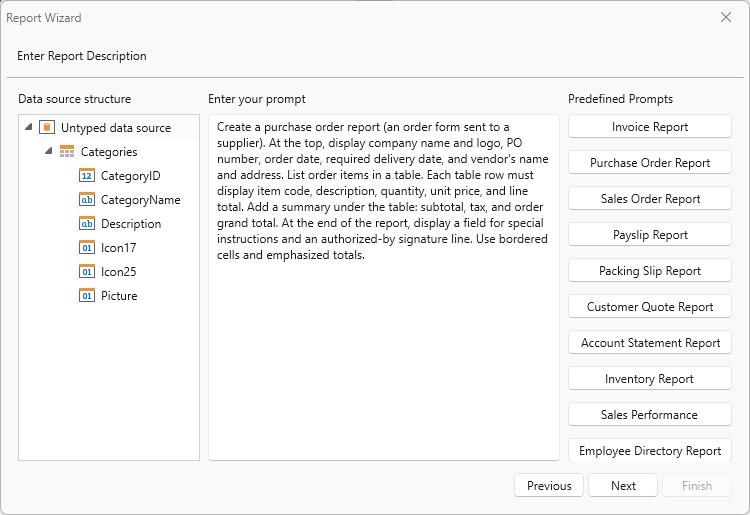
Note
You can either adjust predefined prompts or write a new prompt from scratch. Review the Configure Report Prompt section for more information.
On the next page, the Wizard analyzes the specified prompt and builds the report:
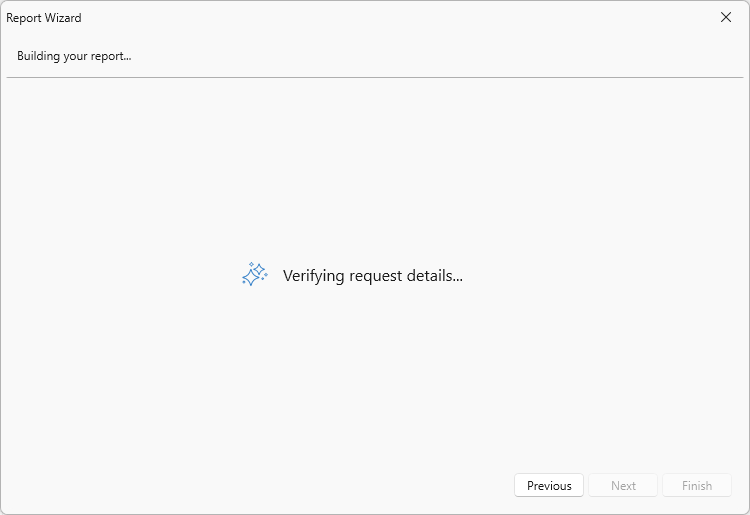
If input is incomplete or ambiguous, the system may request additional information about the report structure, such as:
- “What should the report title be?”
- “Would you like to introduce customer address details in the report: yes/no?”
- “Please specify page size and orientation for this report. For example, A4, portrait, letter landscape, or custom dimensions.”
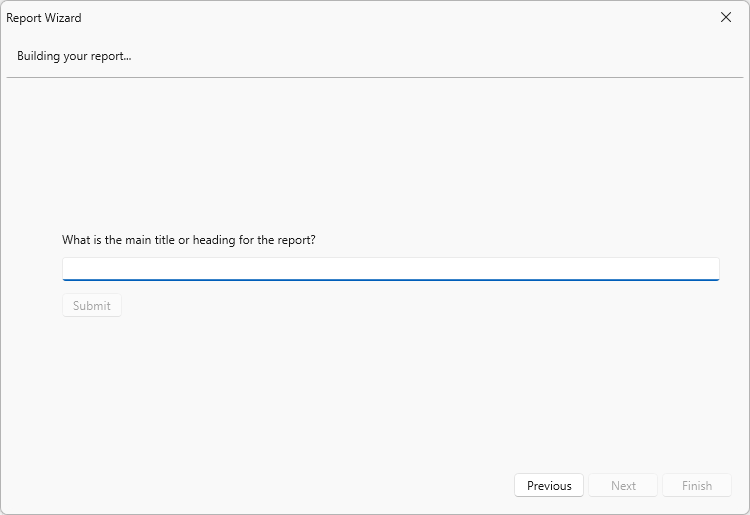
Generation resumes automatically after the user supplies an answer.
Configure Report Prompt
General Tips
Report generation uses a structured agentic workflow composed of specialized agents. Each agent handles a distinct stage of the pipeline, from intent clarification and input validation to layout planning and output verification.
Output accuracy depends on the level of detail in the natural-language description. The more detail the user provides about layout preferences, calculations, grouping requirements, and visualization types, the fewer assumptions the model needs to make.
Users can also describe the report intent in plain language without specifying the exact report structure. In this case, the model may request additional information and adapt the report based on the user’s input to generate a valid layout.
You can specify Temperature to control the output randomness and use RetryAttemptCount to increase the number of attempts to fix report layout errors that may appear in the LLM response.
Configure Predefined Prompts
Built-in prompt suggestions show useful examples. You can review these examples to create your own prompts.

Note that prompt changes made in the Report Wizard do not persist.
To make permanent changes to built-in prompts, access the PredefinedPrompts collection. Modify prompt “Text” and “Title”. You can also add custom prompts to the collection.
The following code snippet changes the title of “Invoice Report” to “My Changed Prompt”:
Code-Behind:
using DevExpress.AIIntegration.Wpf.Reporting;
using DevExpress.Mvvm.UI.Interactivity;

public partial class MainWindow : Window {
    public MainWindow() {
        InitializeComponent();
        ReportPromptToReportBehavior reportBehavior = new ReportPromptToReportBehavior();
        var collection = AIReportPromptCollection.GetDefaultReportPrompts();
        collection[0].Title = "My Changed Prompt";
        reportBehavior.PredefinedPrompts = collection;
        Interaction.GetBehaviors(designer).Add(reportBehavior);
    }
}
The following image displays the result:

Add a New Prompt
The following code snippet obtains built-in DevExpress prompts from AIReportPromptCollection, creates a custom prompt (an AIReportPrompt object), and adds this prompt to the collection. The collection is assigned to the ReportPromptToReportBehavior.PredefinedPrompts property.
Markup:
xmlns:dxrud="http://schemas.devexpress.com/winfx/2008/xaml/reports/userdesigner"
xmlns:dxai="http://schemas.devexpress.com/winfx/2008/xaml/ai"
xmlns:dxmvvm="http://schemas.devexpress.com/winfx/2008/xaml/mvvm"
xmlns:reporting="clr-namespace:DevExpress.AIIntegration.Reporting;assembly=DevExpress.AIIntegration.Reporting.Common.v26.1"
...
<dxrud:ReportDesigner x:Name="designer">
    <dxmvvm:Interaction.Behaviors>
        <dxai:ReportPromptToReportBehavior FixLayoutErrors="true">
        <dxai:ReportPromptToReportBehavior.PredefinedPrompts>
            <reporting:AIReportPrompt Title="Custom Prompt" Text="Custom Prompt Text" />
        </dxai:ReportPromptToReportBehavior.PredefinedPrompts>
        </dxai:ReportPromptToReportBehavior>
    </dxmvvm:Interaction.Behaviors>
</dxrud:ReportDesigner>
Code-Behind:
using DevExpress.AIIntegration.Wpf.Reporting;
using DevExpress.Mvvm.UI.Interactivity;
using DevExpress.AIIntegration.Reporting;

public partial class MainWindow : Window {
    public MainWindow() {
        InitializeComponent();
        ReportPromptToReportBehavior reportBehavior = new ReportPromptToReportBehavior();
        reportBehavior.FixLayoutErrors = true;
        // Obtain built-in DevExpress prompts from the collection.
        var collection = AIReportPromptCollection.GetDefaultReportPrompts();
        // Create a custom prompt.
        AIReportPrompt customPrompt = new AIReportPrompt();
        customPrompt.Title = "Custom Prompt";
        customPrompt.Text = "Custom Prompt Text";
        // Add this prompt to the collection.
        collection.Add(customPrompt);
        // Display Prompts in the Report Wizard.
        reportBehavior.PredefinedPrompts = collection;
        Interaction.GetBehaviors(designer).Add(reportBehavior);
    }

}
After you add a custom prompt to the collection, it appears in the Report Wizard:
