Use Custom HTML Templates
- 4 minutes to read
The user interface of the DevExpress Reporting for Web components is built with Knockout template bindings and DevExtreme component libraries. You can modify Knockout templates to make changes to UI elements for the ASP.NET WebForms, ASP.NET MVC, ASP.NET Core, and all supported JavaScript frameworks.
Select a template that defines the user interface region you want to change, modify this template, and include it in your project. The following sections describe these steps in more detail.
Determine which Template to Change
Right-click the UI element, and select Inspect. The following image shows the Query page in the Data Source Wizard:
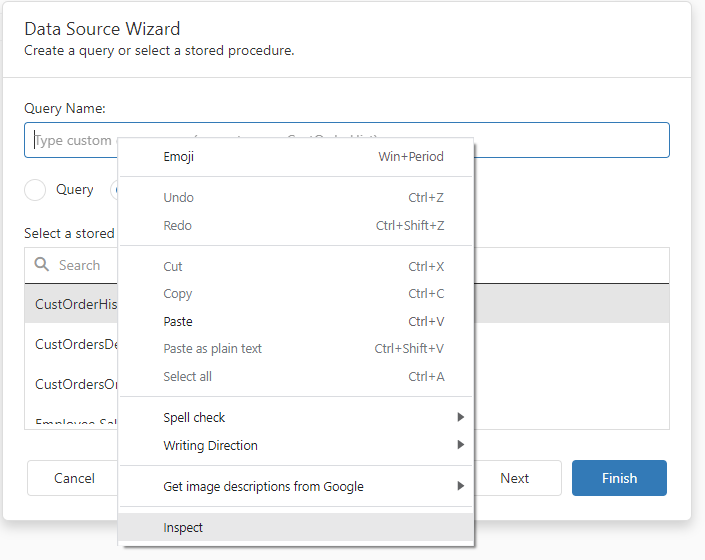
In the Inspector window, under the Elements tab, find the code that uses one of the following patterns:
 ko template:
 // or
 data-bind = "{ template: ...")
Select the code paragraph that contains the pattern, switch to the Console tab, and enter the following expression to get the template name:
ko.dataFor($0).template
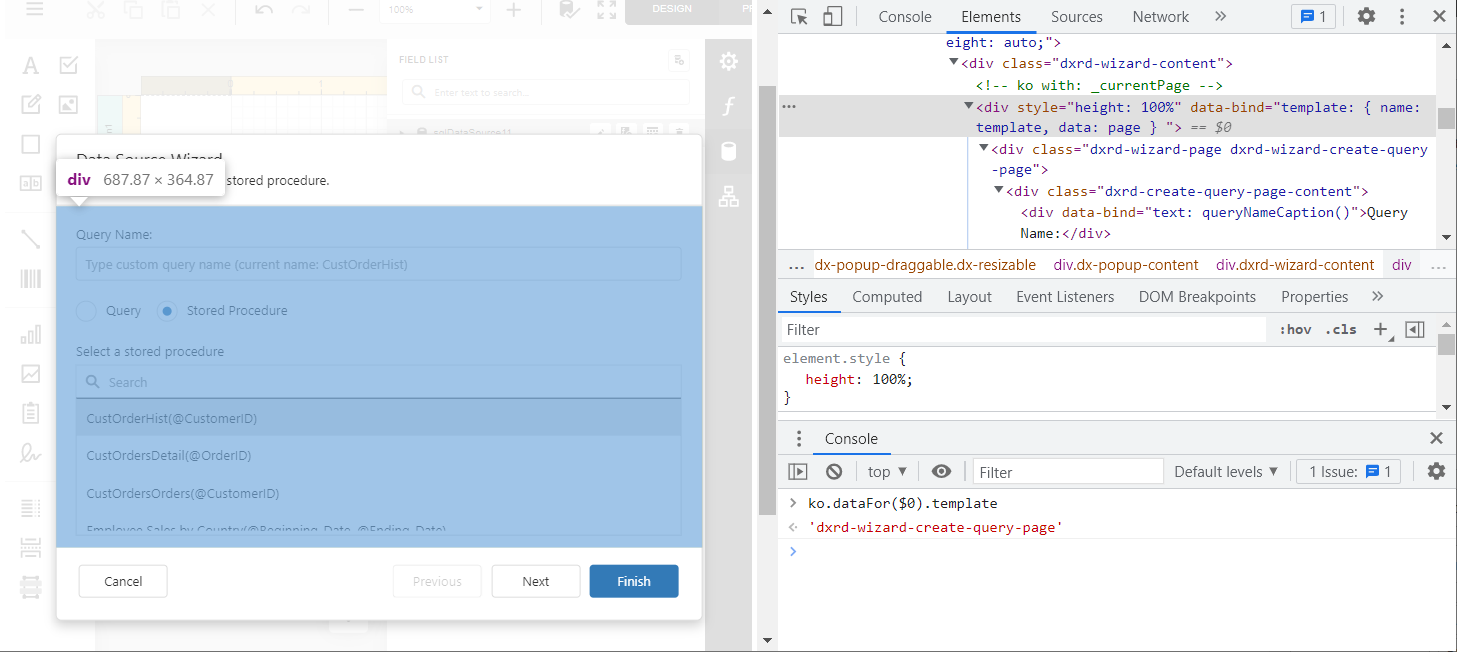
The template name for the Query page in the Data Source Wizard is dxrd-wizard-create-query-page.
Find the Source Template
Install the
devexpress-reportingnpm package. For this, create an empty folder and run the following command in the command prompt:npm i devexpress-reportingUse any text editor to open the node_modules\devexpress-reporting\dist\html\templates.html file.
Find the template with the name you identified earlier. The following code snippet shows the
dxrd-wizard-create-query-pagetemplate found in the templates.html file:<script type="text/html" id="dxrd-wizard-create-query-page"> <div class="dxrd-wizard-page dxrd-wizard-create-query-page"> <div class="dxrd-create-query-page-content"> <div data-bind="text: queryNameCaption()"></div> <div class="dx-editquery-editor" data-bind="dxTextBox: { value: queryName, placeholder: $data.placeholder() }"></div> <div class="dxrd-radio-nowrap-ellipsis" data-bind="dxRadioGroup: { value: selectedQueryType, layout: 'horizontal', items: queryTypeItems }"> <div data-options="dxTemplate : { name: 'item' }"> <div class="dxrd-radio-nowrap-ellipsis-text" data-bind="text: $parent.localizeQueryType($data), attr: { 'title': $parent.localizeQueryType($data) }"></div> </div> </div> <!-- ko template: { name: queryControl().template, data: queryControl() } --> <!-- /ko --> </div> <!-- ko template: { name: 'dxrd-querybuilder-popup', data: popupQueryBuilder } --> <!-- /ko --> </div> </script>
Modify the Template
Copy the template (the code between the <script> and </script> tags) to a new file and make any necessary changes.
This example modifies the template. If a user selects `Stored procedure’ as the query type, the Query name text field is disabled. The name of the resulting query is the same as the name of the selected stored procedure, and the user cannot change it.
From the template code, you can see that the Query name text field is the dxTextBox DevExtreme control. You can find its properties in the corresponding help topic: TextBox UI Component.
If the user selects a query type, the selectedQueryType value of the radio button is changed. You can check that value to decide whether the text editor should be disabled. Use the following expression:
selectedQueryType() === 'Stored Procedure'
The updated template is shown below:
<script type="text/html" id="dxrd-wizard-create-query-page">
    <div class="dxrd-wizard-page dxrd-wizard-create-query-page">
        <div class="dxrd-create-query-page-content">
            <div data-bind="text: queryNameCaption()"></div>
            <div class="dx-editquery-editor"
                 data-bind="dxTextBox: {
                 value: queryName,
                 placeholder: $data.placeholder(),
                 disabled: selectedQueryType() === 'Stored Procedure'
                 }">
            </div>
            <div class="dxrd-radio-nowrap-ellipsis"
                 data-bind="dxRadioGroup: {
                 value: selectedQueryType,
                 layout: 'horizontal',
                 items: queryTypeItems
                 }">
                <div data-options="dxTemplate : { name: 'item' }">
                    <div class="dxrd-radio-nowrap-ellipsis-text"
                         data-bind="text: $parent.localizeQueryType($data),
                         attr: {
                         'title': $parent.localizeQueryType($data)
                         }"></div>
                </div>
            </div>
            <!-- ko template: { name: queryControl().template, data: queryControl() } -->
            <!-- /ko -->
        </div>
        <!-- ko template: { name: 'dxrd-querybuilder-popup', data: popupQueryBuilder } -->
        <!-- /ko -->
    </div>
</script>
Use the Modified Template
Include in a Page
For most applications, you can include the modified template directly in the page that contains the reporting component, or add the file with the template to the project bundle.
Include as a Module
Frameworks that support a modular approach, such as Angular, require a different technique. You should save the modified template to a file, use raw-loader to load the file, and call the addTemplate method to replace the default template with a custom one.
The following code demonstrates how to load a custom template from the querytemplate.html file to an Angular application with the Report Designer component:
declare var require: any;

import { Component, Inject, ViewEncapsulation } from '@angular/core';
import { addTemplate } from '@devexpress/analytics-core/analytics-widgets';
// ...
export class ReportDesignerComponent {
    // ...
    constructor(@Inject('BASE_URL') public hostUrl: string) {
        var createQueryPageCustomization = require('raw-loader!./querytemplate.html').default;
        addTemplate("dxrd-wizard-create-query-page", createQueryPageCustomization);
    }
}
Observe the Result
The following animation shows how the applied template works: