Add the Document Viewer to an ASP.NET Core 2.1 Application
- 4 minutes to read
This tutorial describes how to add the Document Viewer control to an ASP.NET Core 2.1 web application.
Tip
For ASP.NET Core 3.1, review the following topic: Add the Document Viewer to an ASP.NET Core 3.1 Application.
Note
The complete sample project How to Add the Document Viewer to an ASP.NET Core 2.1 Application is available in the DevExpress Examples repository.
YouTube video: ASP.NET Core Reporting: Adding a Viewer.
Prerequisites
- .Net Core 2.1 framework
- Visual Studio 2017 v15.3 or later
Create an ASP.NET Core MVC Web Application
- Create a new project in Visual Studio and select ASP.NET Core Web Application on the start page as a project template.
- Specify the ASP.NET Core 2.1 framework, select Web Application (Model-View-Controller), and click OK.
Review the following article for more information: Get started with ASP.NET Core MVC
Manage Packages and Libraries
Follow the steps below to install the NuGet packages:
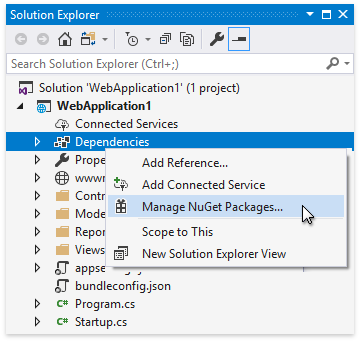
Right-click the Dependencies node in the Solution Explorer and select Manage NuGet Packages in the invoked context menu.
Select All in the Package source drop-down list, go to the Browse page, and install the following packages:
- DevExpress.AspNetCore.Reporting
- BuildBundlerMinifier
- Microsoft.Web.LibraryManager.Build
Open the Add New Item dialog (
Ctrl+Shift+A) and add the npm Configuration File (package.json) to the project. Open the newly created file, overwrite its content with the following code, and save the file:{ "version": "1.0.0", "name": "asp.net", "private": true, "dependencies": { "devextreme": "20.1.*", "@devexpress/analytics-core": "20.1.*", "devexpress-reporting": "20.1.*", "globalize": "^1.3.0", "jquery-ui-dist": "^1.12.1" } }Add a new empty text file (
bundleconfig.json) to the root directory. Open the newly created file, copy and paste the following content, and save the file:[ { "outputFileName": "wwwroot/css/thirdparty.bundle.css", "inputFiles": [ "node_modules/jquery-ui-dist/jquery-ui.min.css", "node_modules/bootstrap/dist/css/bootstrap.min.css", "node_modules/devextreme/dist/css/dx.common.css", "node_modules/devextreme/dist/css/dx.light.css" ], "minify": { "enabled": false, "adjustRelativePaths": false } }, { "outputFileName": "wwwroot/css/viewer.part.bundle.css", "inputFiles": [ "node_modules/@devexpress/analytics-core/dist/css/dx-analytics.common.css", "node_modules/@devexpress/analytics-core/dist/css/dx-analytics.light.css", "node_modules/devexpress-reporting/dist/css/dx-webdocumentviewer.css" ], "minify": { "enabled": false, "adjustRelativePaths": false } }, { "outputFileName": "wwwroot/js/thirdparty.bundle.js", "inputFiles": [ "node_modules/jquery/dist/jquery.min.js", "node_modules/jquery-ui-dist/jquery-ui.min.js", "node_modules/knockout/build/output/knockout-latest.js", "node_modules/bootstrap/dist/js/bootstrap.min.js", "node_modules/cldrjs/dist/cldr.js", "node_modules/cldrjs/dist/cldr/event.js", "node_modules/cldrjs/dist/cldr/supplemental.js", "node_modules/cldrjs/dist/cldr/unresolved.js", "node_modules/globalize/dist/globalize.js", "node_modules/globalize/dist/globalize/message.js", "node_modules/globalize/dist/globalize/number.js", "node_modules/globalize/dist/globalize/currency.js", "node_modules/globalize/dist/globalize/date.js", "node_modules/devextreme/dist/js/dx.all.js", "node_modules/ace-builds/src-min-noconflict/ace.js", "node_modules/ace-builds/src-min-noconflict/ext-language_tools.js", "node_modules/ace-builds/src-min-noconflict/theme-dreamweaver.js", "node_modules/ace-builds/src-min-noconflict/theme-ambiance.js", "node_modules/ace-builds/src-min-noconflict/snippets/text.js" ], "minify": { "enabled": false }, "sourceMap": false }, { "outputFileName": "wwwroot/js/viewer.part.bundle.js", "inputFiles": [ "node_modules/@devexpress/analytics-core/dist/js/dx-analytics-core.min.js", "node_modules/devexpress-reporting/dist/js/dx-webdocumentviewer.min.js" ], "minify": { "enabled": false }, "sourceMap": false } ]Right-click the project in Solution Explorer and select Manage Client-Side Libraries to open the
libman.jsonfile. Copy and paste the following content to the file and save it:{ "version": "1.0", "defaultProvider": "filesystem", "libraries": [ { "library": "node_modules/devextreme/dist/css/icons/", "destination": "wwwroot/css/icons", "files": [ "dxicons.ttf", "dxicons.woff2", "dxicons.woff" ] } ] }For more information on LibMan, review the following article: Use LibMan with ASP.NET Core in Visual Studio.
Right-click the package.json file in Solution Explorer and select Restore Packages.
Configure Application and Services
Open the Startup.cs file and modify the ConfigureServices method of the Startup class as shown in the following code snippet:
using DevExpress.AspNetCore;
using DevExpress.AspNetCore.Reporting;
using Microsoft.AspNetCore.Builder;
using Microsoft.AspNetCore.Hosting;
using Microsoft.Extensions.Configuration;
using Microsoft.Extensions.DependencyInjection;
//...

public class Startup {
//...
    public void ConfigureServices(IServiceCollection services) {
        services.AddDevExpressControls();
        services
            .AddMvc()
            .SetCompatibilityVersion(Microsoft.AspNetCore.Mvc.CompatibilityVersion.Version_2_1);
        services.ConfigureReportingServices(configurator => {
            configurator.ConfigureWebDocumentViewer(viewerConfigurator => {
                viewerConfigurator.UseCachedReportSourceBuilder();
            });
        });
    }
// ...
Modify the Configure method of the Startup class as shown in the following code snippet:
using DevExpress.AspNetCore;
using DevExpress.AspNetCore.Reporting;
using Microsoft.AspNetCore.Builder;
using Microsoft.AspNetCore.Hosting;
using Microsoft.Extensions.Configuration;
using Microsoft.Extensions.DependencyInjection;
//...

public class Startup {
//...
    public void Configure(IApplicationBuilder app, IHostingEnvironment env) {
        app.UseDevExpressControls();
        System.Net.ServicePointManager.SecurityProtocol |= System.Net.SecurityProtocolType.Tls12;
        if(env.IsDevelopment()) {
            app.UseDeveloperExceptionPage();
        }
        app.UseStaticFiles();
        app.UseMvc(routes => {
            routes.MapRoute(
                name: "default",
                template: "{controller=Home}/{action=Index}/{id?}");
        });
    }
// ...
Add a Sample Report
Right-click the project in the Solution Explorer and select Add | New Folder from the context menu. Rename the created folder to Reports.
Right-click the Reports folder and select Add | New Item… in the context menu. In the invoked Add New Item dialog, click the Reporting section in the tree on the left and select the DevExpress v20.1 Report item.
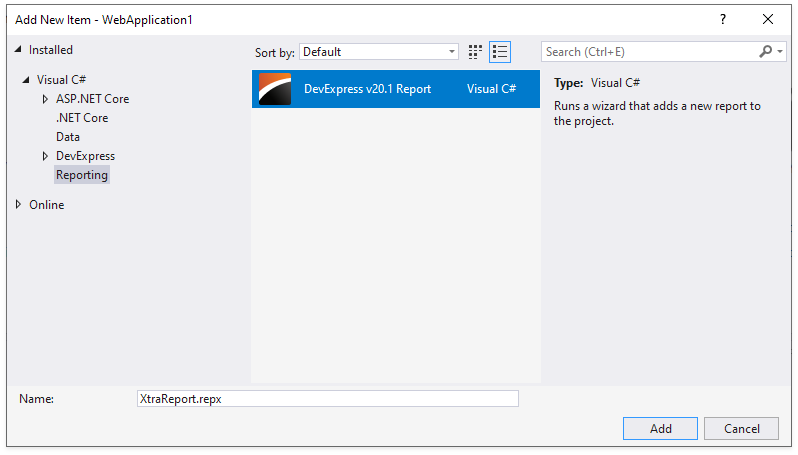
Rename the new report as TestReport and click Add.
Select the Blank report type in the invoked Report Wizard.
- The Report Designer displays the newly created blank report. Save it (
Ctrl+S) and close the designer.
Review the following article for more information: Add a New Report in Visual Studio.
Add the Document Viewer Control
Perform the following steps to add the Document Viewer to the web page:
Add the DevExpress.AspNetCore namespace directive to the _ViewImports.cshtml file. You can also add this namespace to the view that contains the Document Viewer control.
@using DevExpress.AspNetCoreAdd the following links to the head section of the Layout.cshtml page (Views|Shared folder):
<link rel="stylesheet" href="~/css/thirdparty.bundle.css" />
<link rel="stylesheet" href="~/css/site.css" />
<script src="~/js/thirdparty.bundle.js"></script>
<script src="~/js/site.js" asp-append-version="true"></script>
Replace the contents of the Index.cshtml file with the following code that displays the Document Viewer and loads the TestReport:
@using YourApplicationName.Reports

<link rel="stylesheet" href="~/css/viewer.part.bundle.css" />
<script src="~/js/viewer.part.bundle.js"></script>

@Html.DevExpress().WebDocumentViewer("DocumentViewer").Height("1000px").Bind(new TestReport())
Run the Application
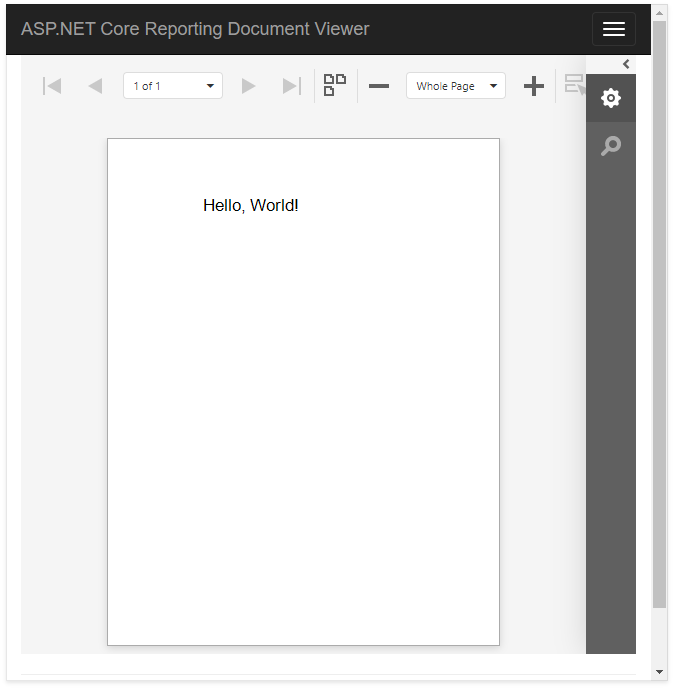
The page displays the Document Viewer control with the TestReport report.
For troubleshooting, review the ASP.NET Core Reporting Limitations section.