Lesson 4 - Provide Navigation to a Report
- 4 minutes to read
This step describes how to improve navigation within the tutorial report:
- show page numbers in the report’s document,
- add a document map,
- display a table of contents.
Note
Watch the Video: Reporting: Navigation (YouTube)
Add Page Numbers and System Information
Add Page Numbers
Do the following to insert page numbers in your report:
Drag the XRPageInfo item from the toolbox DX.18.2: Report Controls tab and drop it onto the Bottom Margin band to display page numbers at the bottom of each page.
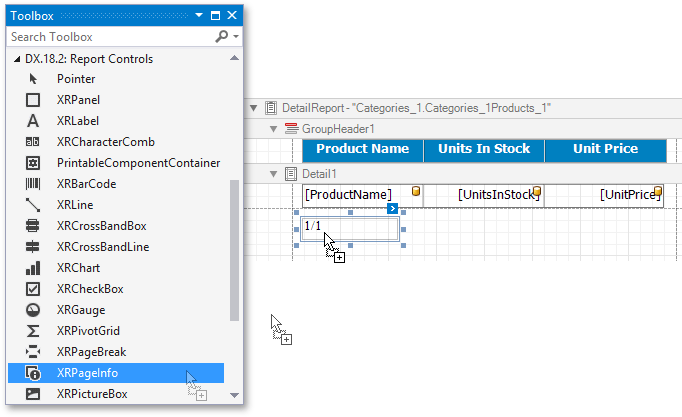
Change page numbers’ display format (for instance, set it to “Page {0} of {1}“).
- Use the XRPageInfo.TextFormatString property if the UserDesignerOptions.DataBindingMode is set to DataBindingMode.Expressions or DataBindingMode.ExpressionsAdvanced.
- Use the XRPageInfo.Format property if the UserDesignerOptions.DataBindingMode is set to DataBindingMode.Bindings.
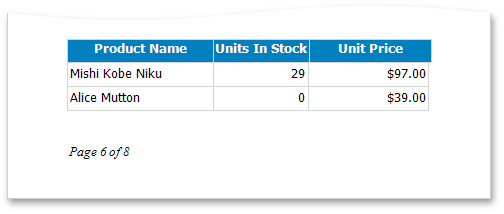
Switch to the Preview tab to see the result.
See Add Page Numbers to learn how to display page numbers for each group in a report.
Display System Date and Time
The Page Info control allows you to display other auxiliary information on report pages, such as the system’s date and time or a username.
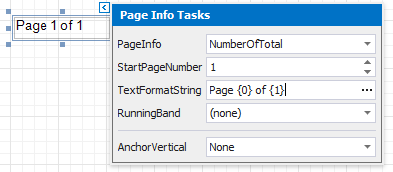
Select the required information type using the XRPageInfo.PageInfo property.
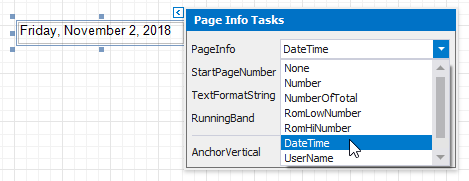
You can format the displayed date-time value using the Format String Editor.
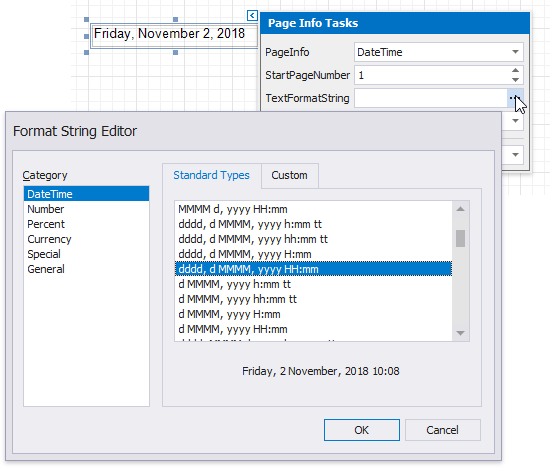
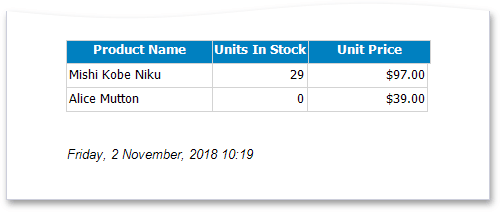
Switch to the Preview tab to see the result.
Note
You can perform various calculations using date-time values and display their results in a report using calculated fields.
Specify Bookmarks
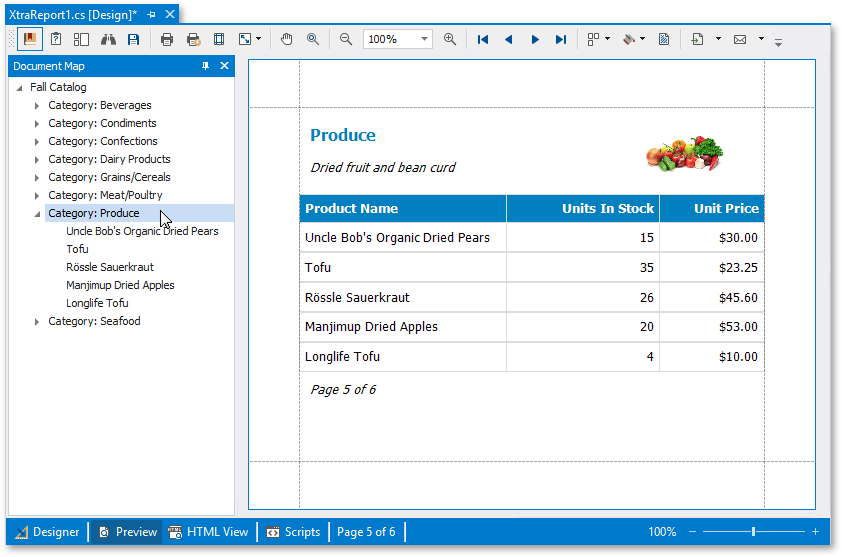
You can assign bookmarks to any report control and the report itself. In Print Preview, these bookmarks are listed in the document map and allow you to navigate to a specific entry in a document.
When creating hierarchical reports, you can use bookmarks to reflect the report’s tree-like structure in the document map.
Bookmarks also participate in generating the Table of Contents, which is described later in this document.
Do the following to provide bookmarks to a master-detail report depending on the binding mode:
Expression Bindings (UserDesignerOptions.DataBindingMode is set to DataBindingMode.Expressions or DataBindingMode.ExpressionsAdvanced)
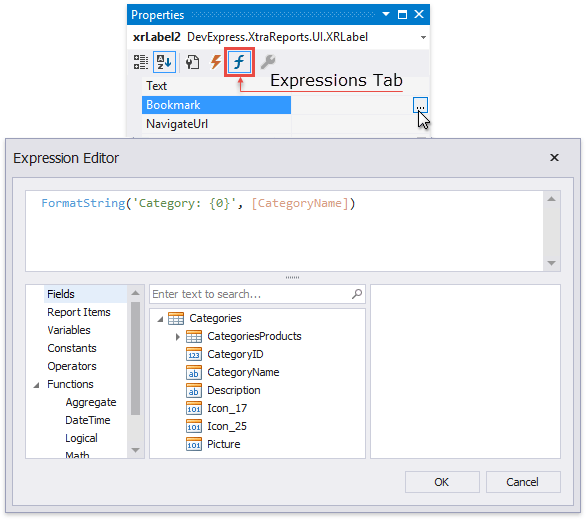
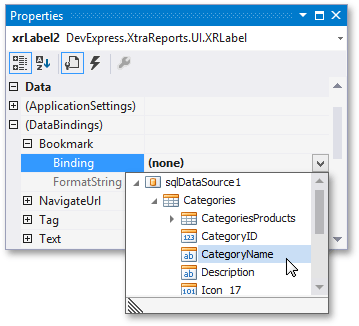
Select the label bound to the CategoryName data field in the master report and switch to the Expressions tab in the Properties window. Click the ellipsis button for the Bookmark property and specify the expressions with the format string as shown below.
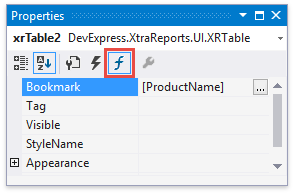
For the table in the detail report’s Detail band, set the Bookmark property on the Expressions tab to the ProductName data field.
Legacy Binding Mode (UserDesignerOptions.DataBindingMode is set to DataBindingMode.Bindings)
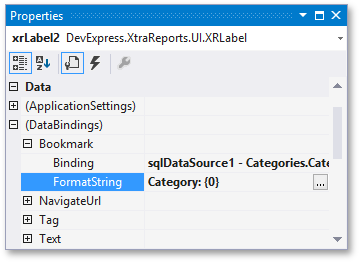
In the master report’s Detail band, select the label bound to the CategoryName data field and expand the DataBindings category in the Properties window. Bind the XRControl.Bookmark property to the CategoryName data field.
As with other properties in this category (such as Text or Tag), you can also specify bookmarks’ FormatString (for instance, “Category: {0}“).
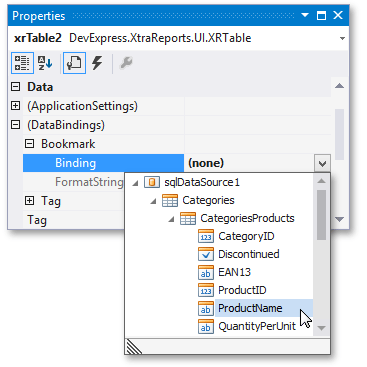
Select the table placed on the detail report’s Detail band and bind its Bookmark property to the ProductName data field.
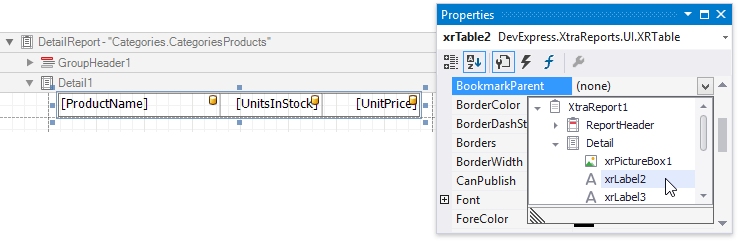
Set the XRControl.BookmarkParent property of the detail report’s table to the label from the master report. This arranges bookmarks into a parent-child structure reflecting the report elements’ hierarchy in the Document Map.
Select the report and set its XtraReport.Bookmark property (for example, to “Fall Catalog“) to specify the root node’s caption in the Document Map.
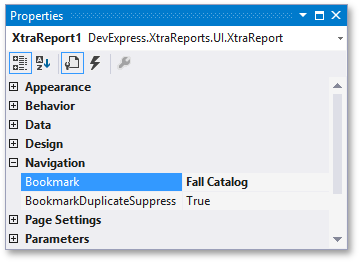
The XtraReport.BookmarkDuplicateSuppress property is enabled by default to avoid duplicate bookmarks (for instance, when assigning them to an element located on a Group Footer that is repeated on every page). As a result, clicking such a bookmark navigates you to the associated element’s first occurrence in the report.
Switch to the Preview tab and view the result. Clicking a bookmark navigates you to the corresponding section in the document.
See this tutorial’s next section to learn how to list bookmarks in a table of contents.
Add a Table of Contents
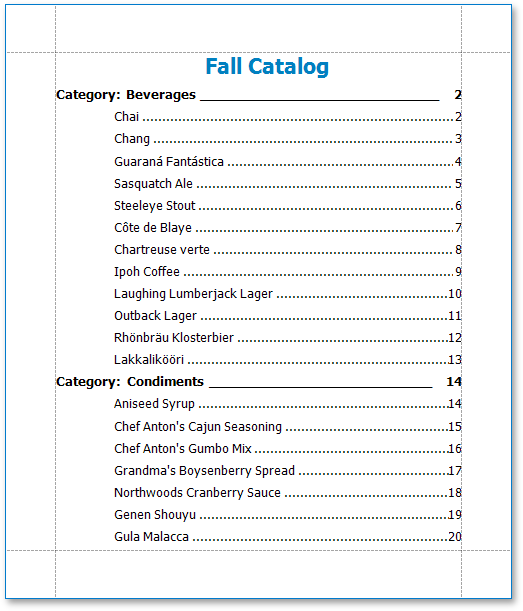
This document section illustrates how to provide a table of contents to a document, listing bookmarks assigned to report elements along with their corresponding page numbers.
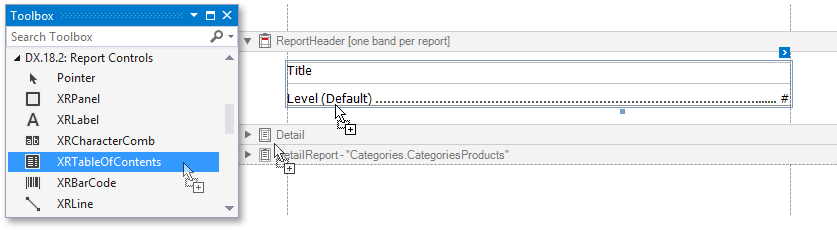
Open the Toolbox pane (by pressing CTRL+ALT+X), select the XRTableOfContents control in the DX.18.2.Report Controls tab and drop it onto the Report Header.
Double-click the table of contents and type the document title there.

Customize the title appearance by switching to the Properties window and using the XRTableOfContents.LevelTitle property.

Use the XRTableOfContents.LevelDefault property to customize all other nesting levels’ appearance.
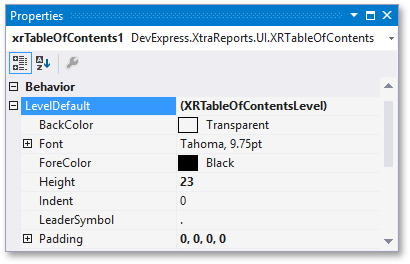
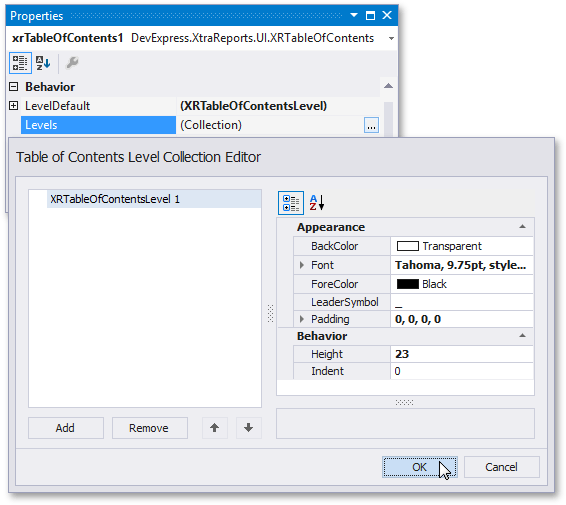
You can customize a specific level individually by adding a corresponding item to the XRTableOfContents.Levels collection and accessing its properties.
You can view the result by switching to the Preview tab. The document displays a table of contents generated based on the bookmarks’ hierarchy at the start.
Next Lesson: Lesson 5 - Provide Interactivity to a Report