Create a Custom Document Preview
- 3 minutes to read
This tutorial illustrates how to add a custom Document Preview to a WPF application:
- In Visual Studio, open an existing application or create a new one from scratch.
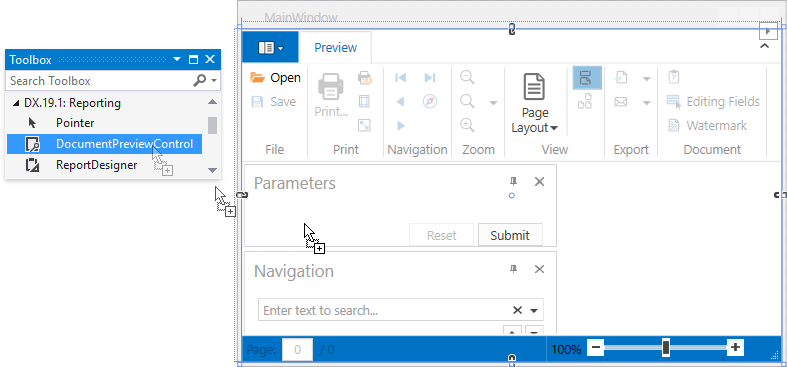
Switch to the MainWindow.xaml file and drop the DocumentPreviewControl control from the DX.19.1: Reporting Toolbox tab onto the window.
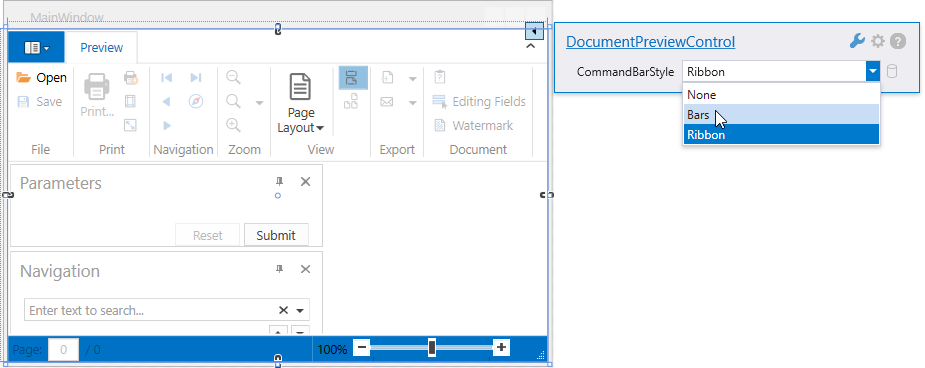
The Document Preview has a Ribbon toolbar by default. You can switch to the Bars toolbar layout or remove the toolbar by clicking the Document Preview’s smart tag and selecting the corresponding option in the DocumentViewerControl.CommandBarStyle drop-down list.
Open the XAML view and set the Document Preview’s Name property (for instance, documentPreview1).
<dxp:DocumentPreviewControl x:Name="documentPreview1"/>Handle the main window’s Loaded event, and in the event handler, create a report instance and assign it to the Document Preview’s DocumentViewerControl.DocumentSource property.
Note
Add the DevExpress.Xpf.DocumentViewer.v19.1.Core assembly to your project’s References list to use this property.
Call the XtraReport.CreateDocument method to generate the final document for the Document Preview.
using DevExpress.Xpf.Printing; // ... private void Window_Loaded(object sender, System.Windows.RoutedEventArgs e) { XtraReport1 report = new XtraReport1(); documentPreview1.DocumentSource = report; report.CreateDocument(); }Tip
The Document Preview can display content provided by the following document sources:
- An object implementing the IReport interface.
- An object implementing the ILink interface.
- A Stream containing report document data.
- A string containing a path to a file that stores report document data (a PRNX file).
If a report is large and previewing it consumes a lot of memory, bind the DocumentPreviewControl control to the CachedReportSource component instead. This component allows you to avoid memory consumption-related issues by storing pages in a file system or database during document generation.
Call the CachedReportSource object’s CreateDocumentAsync() method to generate the final document for the Document Preview.
using DevExpress.Xpf.Printing; using DevExpress.XtraPrinting.Caching; // ... private void Window_Loaded(object sender, System.Windows.RoutedEventArgs e) { var storage = new MemoryDocumentStorage(); var report = new XtraReport1(); var cachedReportSource = new CachedReportSource(report, storage); documentPreview1.DocumentSource = cachedReportSource; cachedReportSource.CreateDocumentAsync(); }The MemoryDocumentStorage object used in this code compactly stores the report document in memory. You can use the FileDocumentStorage, DbDocumentStorage or implement a custom storage instead.
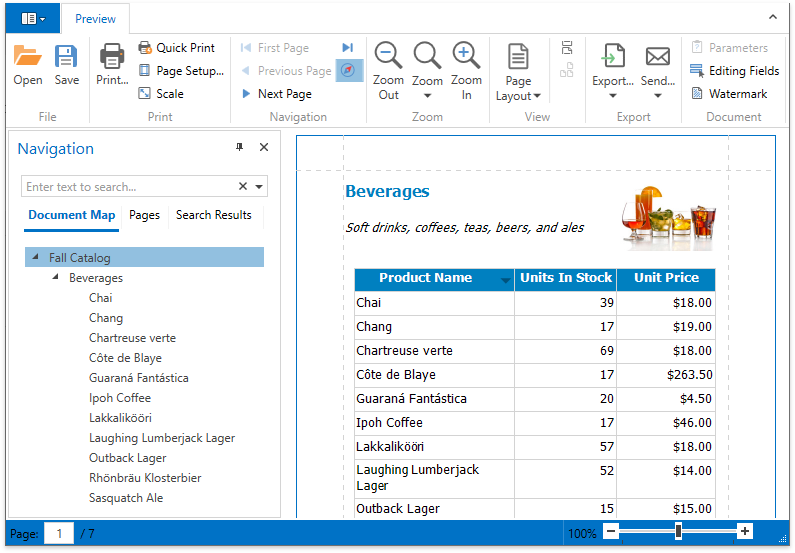
Run the application and view the result.
Tip
See API and Customization to learn about customization options available for the Document Preview.
See Add a New Report to a WPF Application to learn how to add a new XtraReport at design time in Visual Studio.