Tutorial 7 - Add Interactivity to a Report
- 5 minutes to read
In the previous tutorial, we added page numbers, bookmarks, a document map, and a table of contents to our report to enhance navigation between report elements.
This tutorial explains how to create an interactive report document. We can break down this task into the following steps:
Enable content editing in Preview.
Allow data sorting in Preview.

Add the drill-down functionality to allow end users to collapse or expand specific document sections.
Important
The above features are not supported for .NET Core Visual Studio Report Designer. If you want to complete this tutorial, create a project that targets .NET Framework, import the report from the previous tutorial to this project, and follow the instructions below. Refer to the following articles for details on how to save and import reports:
Enable Content Editing in Preview
This section describes how to enable product name and description editing in Preview. Follow the instructions below to complete this task.
Enable Editing for Table Cells
Select the ProductName and Supplier cells in the Detail band and navigate to the Properties panel (to select multiple cells, click them while holding down Ctrl or Shift). Expand the EditOptions property and set the Enabled property to true.
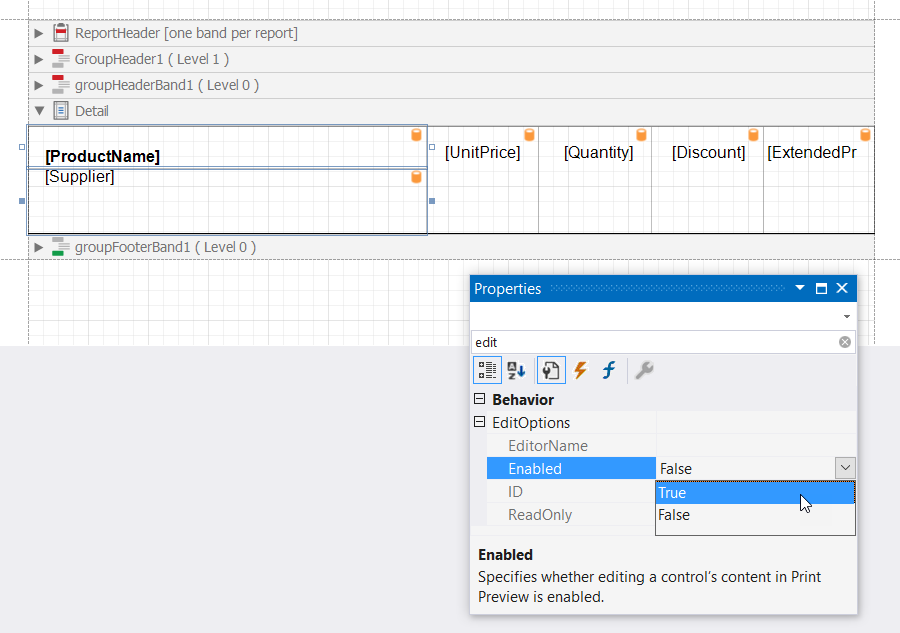
This action allows fields to be edited Preview.
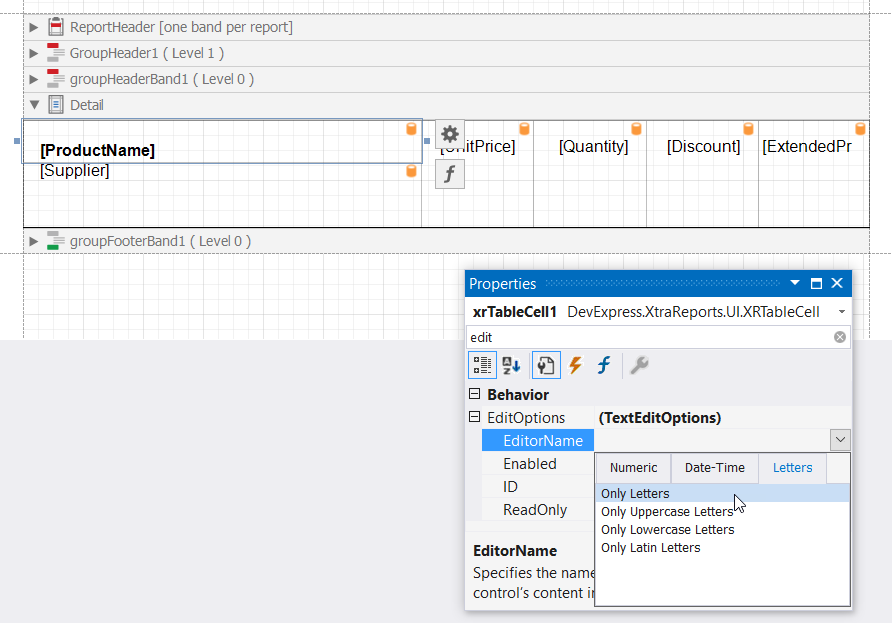
Specify a Mask for Editable Fields
For each editable field, you can specify a mask to limit the set of characters users can enter in this field in Preview. All masks are available in the drop-down list of the EditorName property.
Highlight, Navigate, and Edit Fields in Preview
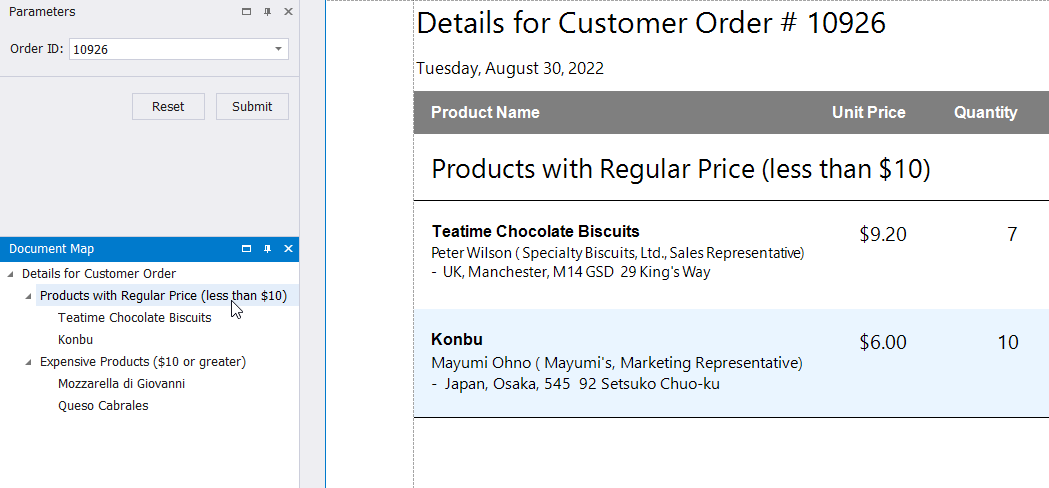
Switch to the Preview tab and specify the Order ID parameter value (for example, set it to 10926). Navigate to the page that contains products with regular prices. Click the Highlight Editing Fields button to highlight all editing fields available in the document.
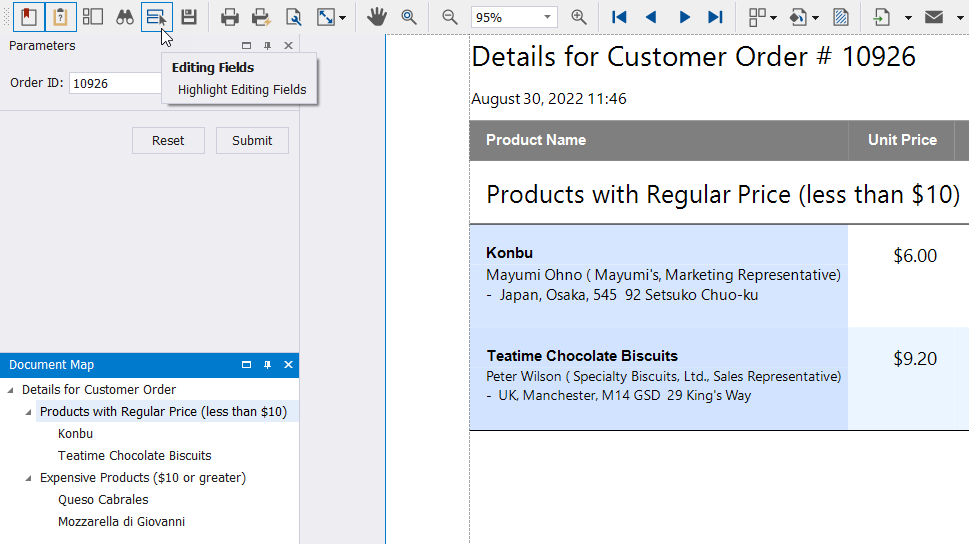
Click on an editing field to invoke an editor. Change field content as required and press Ctrl+Enter to apply these changes. You can also press Tab and Shift+Tab keys to apply these changes and navigate between editing fields.
Note
Changes made to a control’s content in Preview have no effect on other parts of the document. For example, if you change a product name, this name does not change in the Document Map of the table of contents. If you change the value of a numeric field, the related summary results also remain unchanged.
For more information on content editing in Preview, refer to the following topic: Edit Content in Print Preview.
Sort Data in Preview
This section describes how to enable users to sort products in Preview by price. Follow the steps below to complete this task.
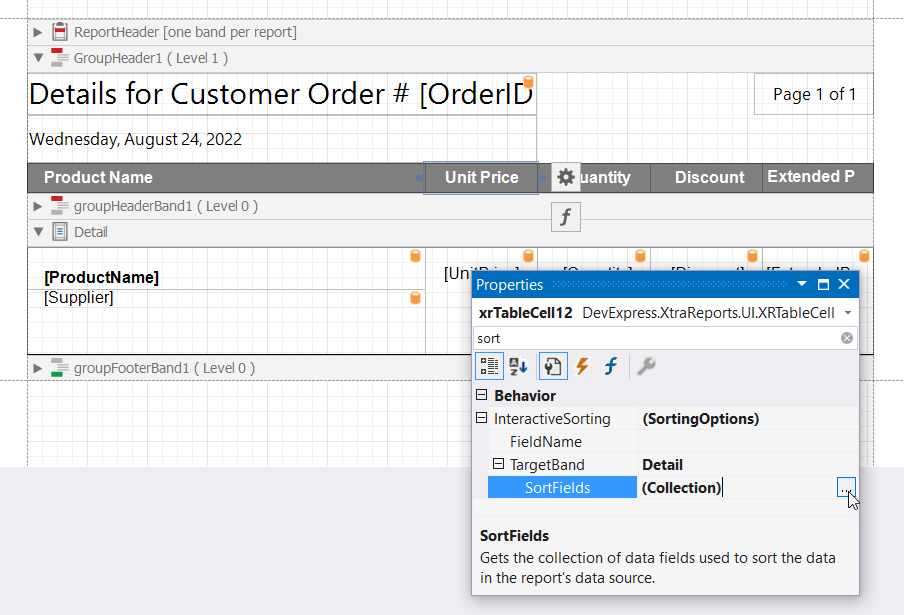
Select the UnitPrice cell of the table header. Switch to the Properties panel and expand the InteractiveSorting property. Set the TargetBand to Detail.
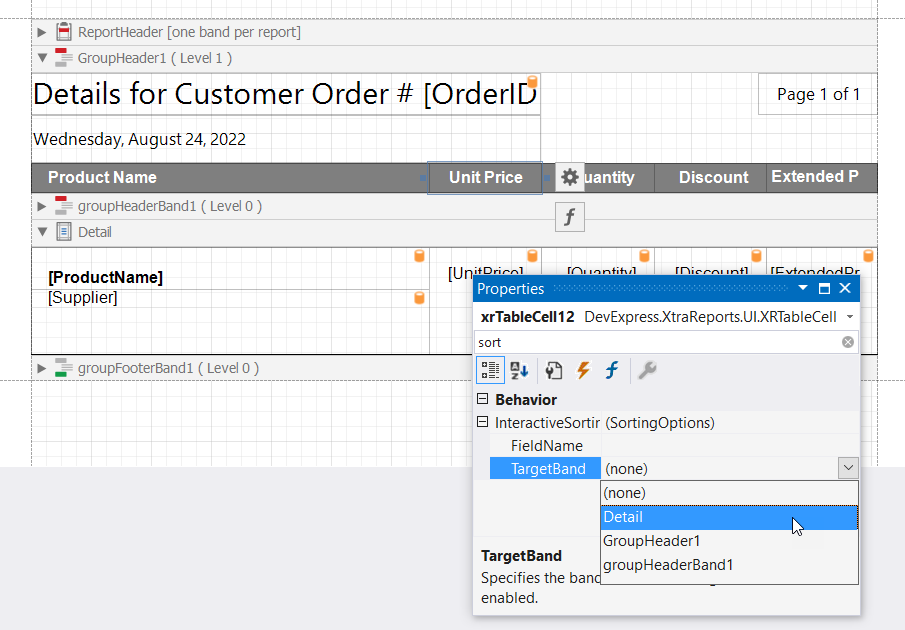
After this action is done, you can use the table header’s UnitPrice cell to sort records displayed in the Detail band.
Specify the field by which you want to sort records in the Detail band. Expand the TargetBand property and click the SortFields property’s ellipsis button.
In the invoked Group Field Collection Editor, add a new group field and set its FieldName property to UnitPrice.
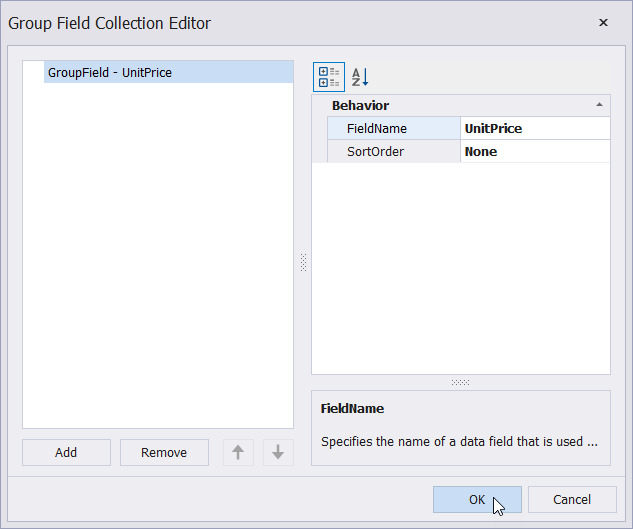
The SortOrder property specifies the default sorting direction in Preview. Set this property to None if default sorting is not required.
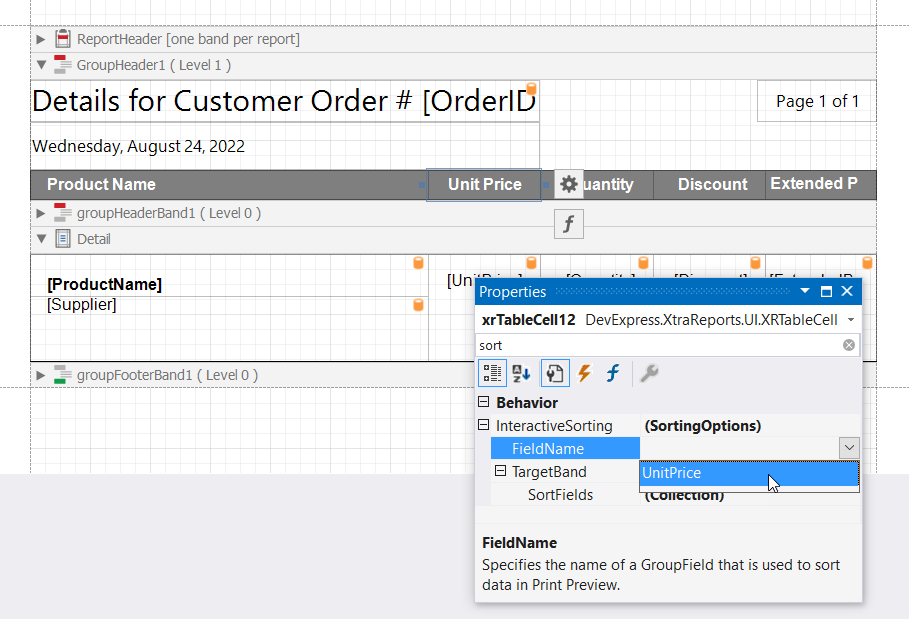
Set the FieldName property to UnitPrice to sort records in the Detail band by that field.
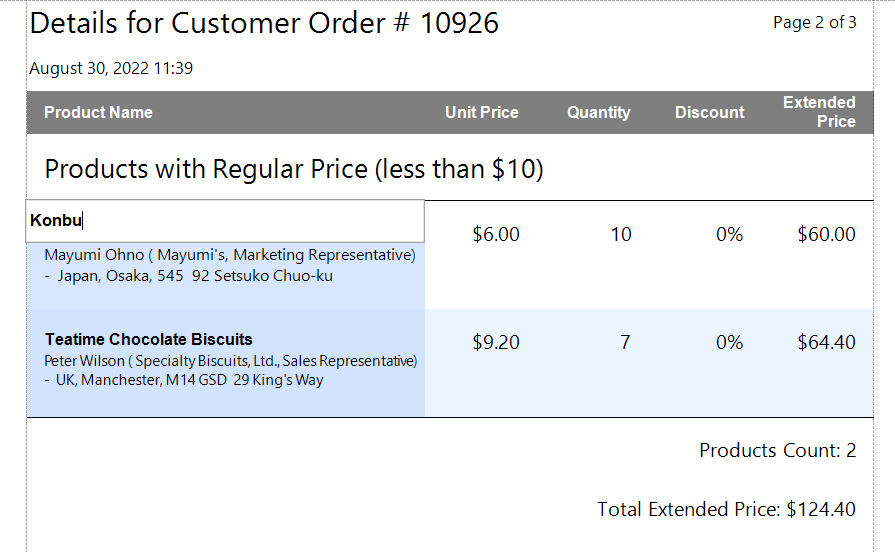
Switch to the Preview tab and specify the Order ID parameter value (for example, set it to 11077). Navigate to the page that contains products with regular prices. Click the UnitPrice cell in the table header to sort group records by their prices.
Tip
You can enable sorting for several data fields. Note that if you apply sorting for one field and then for another field, the sort action does not take results of the first sort operation into account. If you want to sort against multiple fields in Preview, hold the Shift key while you click different fields. To disable data sorting against a specific field, hold the Ctrl key on its caption click.
Add the Drill-Down Functionality
This section describes how to add the drill-down functionality to your report to show/hide products in a group.
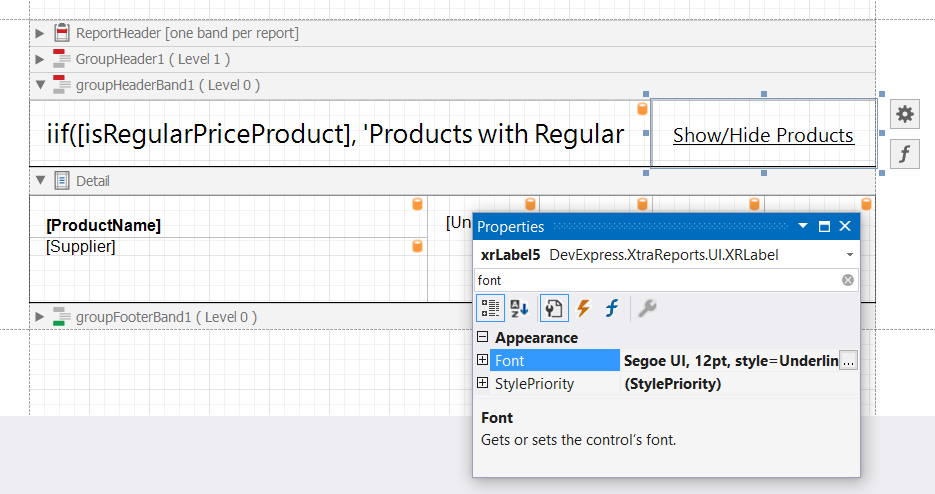
Select the label in the groupHeaderBand1 (Level 0) and change the label width so that it fits the right border of the Quantity cell in the Detail band. Drop another label from the Toolbox onto the band and set the label size so that the label occupies the entire free space of the band.
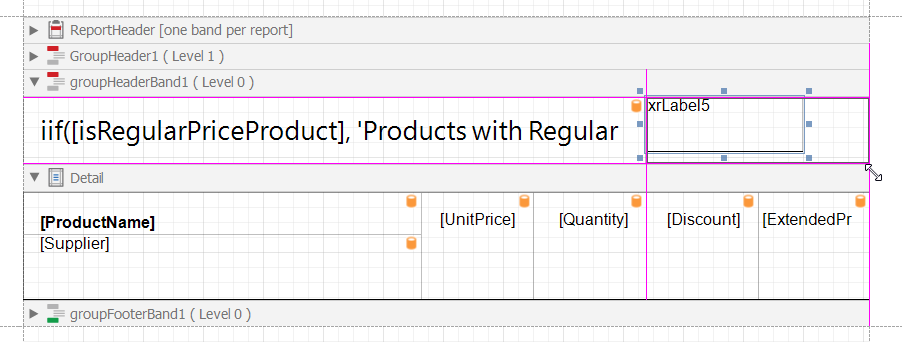
Configure the new label so that you can use it to show or hide products in the Detail band. Double-click the label and type Show/Hide Products. Customize label appearance as required. In this tutorial, we set the label’s Font property to "Segoe UI, 12pt, style=Underline", the TextAlignment property to MiddleCenter, and also enable the label’s bottom border.
Select the Detail band and navigate to the Properties panel. Expand the DrillDownControl property’s drop-down list.
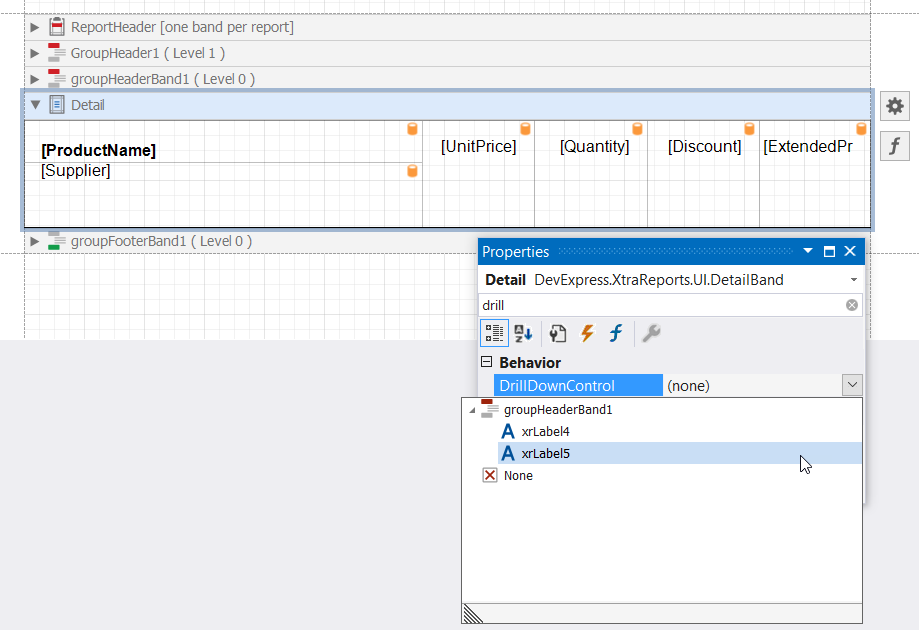
The list displays all report controls available on the report band that is one level above the current band. Select the previously added label. You can now click this label in Preview to expand or collapse the Detail band.
You can set the DrillDownExpanded property to false to initially collapse the band.
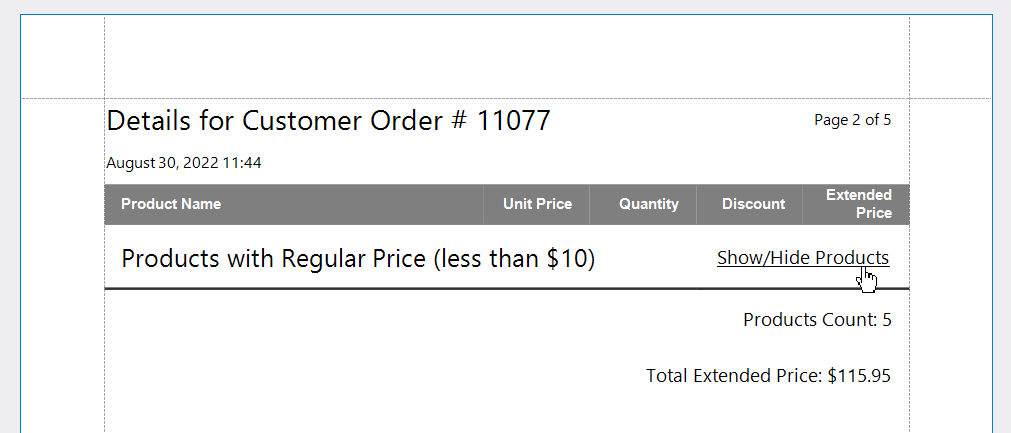
Switch to the Preview tab, set the Order ID parameter value to 11077, and navigate to the group that displays products with regular prices. Click Show/Hide Products to expand or collapse products in the group.
Summary
In this tutorial, we explained how to add interactivity to our report: enable content editing and sorting in Preview and allow users to show or hide products in report groups.
For more information on the above-mentioned subjects, refer to the following documentation section: Provide Interactivity.