Tutorial 6 - Add Navigation to a Report
- 6 minutes to read
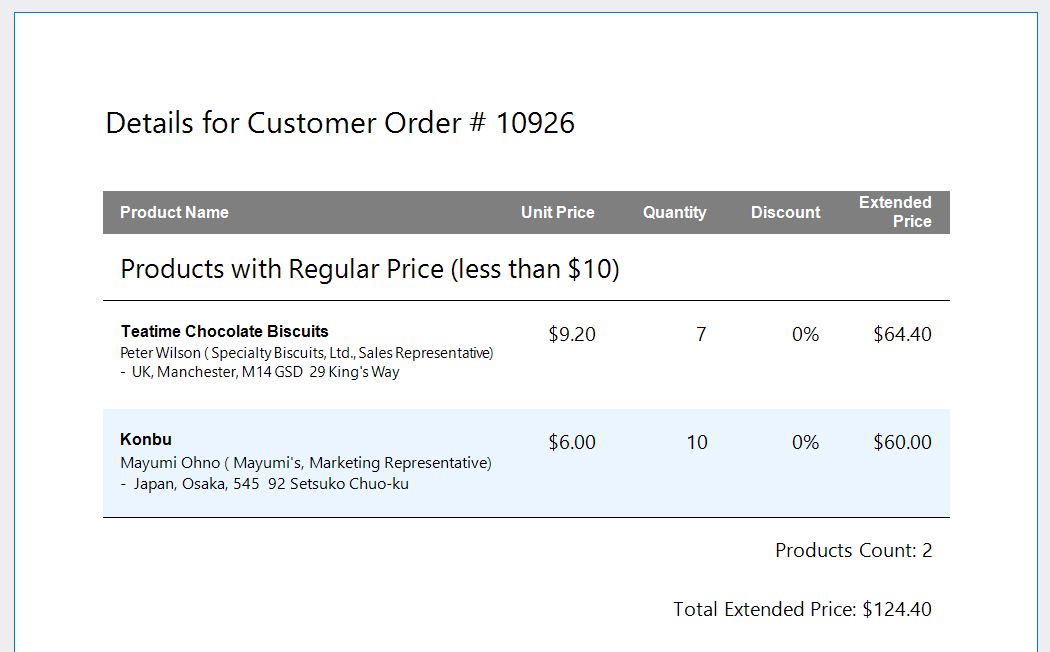
In the previous tutorial, we modified our report so that it displays two groups (products with regular prices and expensive products) and shows summaries for each of these groups (number of products and their total extended price).
In this tutorial, we will explain how to add the following navigation functionality to the report:
- Page numbers and system information.
- Bookmarks and a document map.
- A table of contents.
Add Page Numbers and System Information
Add Page Numbers
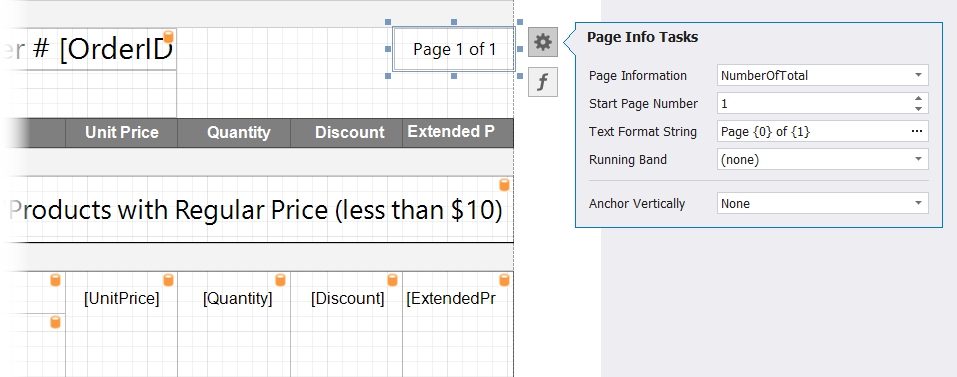
Drag the Page Info control from the Toolbox tab and drop this control onto the upper right corner of the Group Header (Level 1) band to display page numbers at the top of each document page. Customize the control’s appearance as necessary. In this tutorial, we use the following settings:
Property | Value |
|---|---|
| Page {0} of {1} |
| 100, 35 |
| Segoe UI, 10pt |
| MiddleRight |
| 2, 15, 0, 0 |
Add System Information
In addition to page numbers, the Page Info control allows you to display other auxiliary information on report pages, such as the system date and time or a username. This section explains how to use this control to display the report document generation time.
Drop the Page Info control from the Toolbox tab onto the Group Header (Level 1) band and place the control under the label that displays information about the customer order number. Adjust the control width so that it equals the label width, and make the control height occupy the remaining band height.
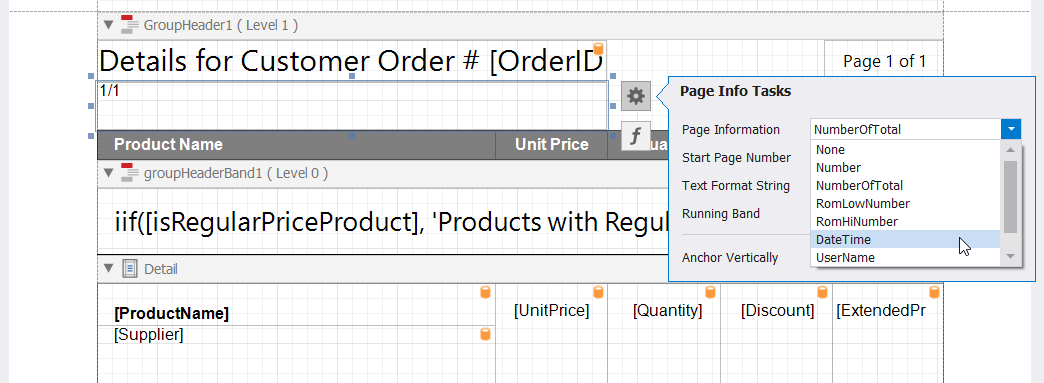
Click the control’s smart tag and set the Page Information property to Date Time.
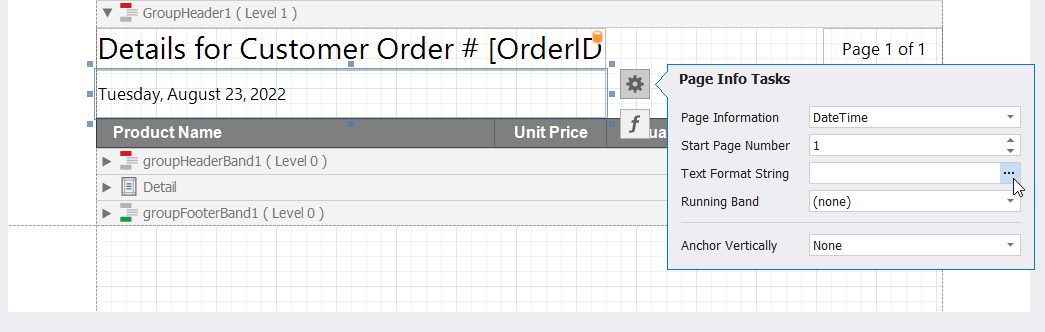
Specify the control’s Text Format String property so that the control displays the exact time when the document was generated. Click the control’s smart tag, then click the Text Format String property’s ellipsis button.
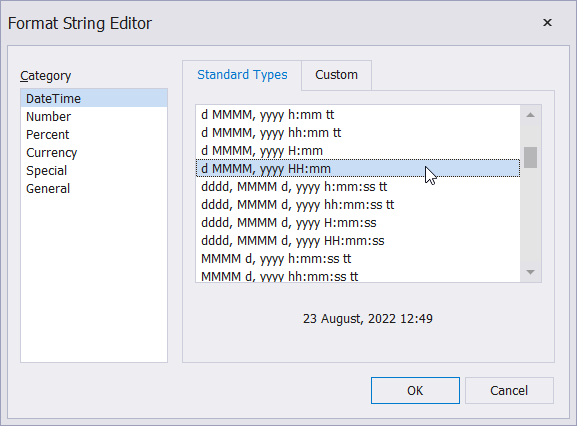
In the invoked Format String Editor, choose a format string for the date time information as shown in the following image:
Customize the control appearance as required. In this tutorial, we set the control’s font and text alignment to "Segoe UI, 10pt" and MiddleLeft respectively.
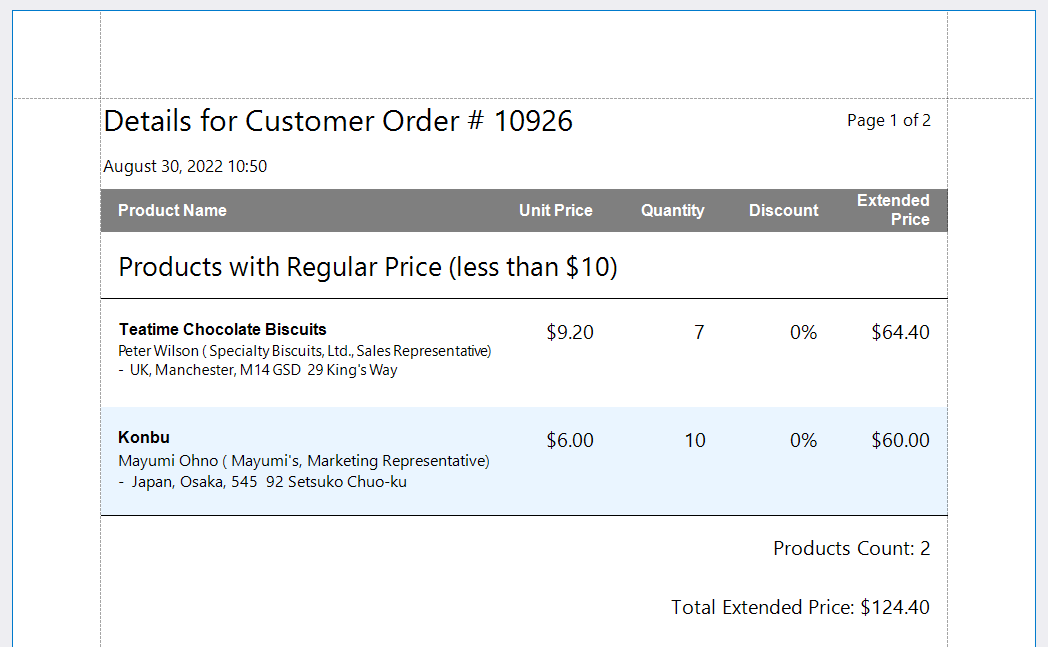
Switch to the Preview tab and set the Order ID parameter value to 10926. You can see that the generated report document now displays a page number and the time when the document was generated on the document header.
Specify Bookmarks
You can assign bookmarks to any report control and the report itself. In Preview, these bookmarks are listed in the document map and allow you to navigate to a specific entry in a document.
If you create hierarchical reports, you can use bookmarks to display a report’s tree-like structure in the document map. Bookmarks are also used to generate a table of contents (described later in this document).
This section explains how to add bookmarks that allow you to navigate to the product groups and between the products within the groups.
Add a Bookmark to Navigate within Report Groups
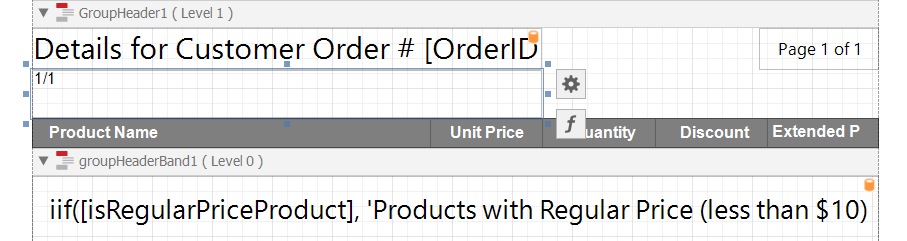
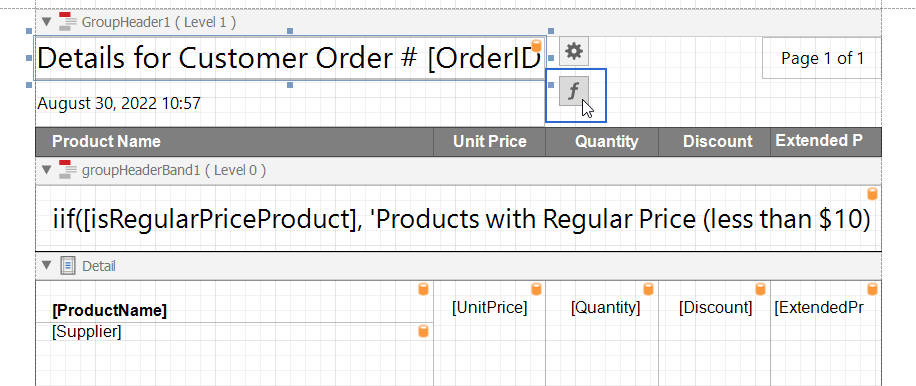
Select the label in the Group Header (Level 1) band and click the label’s f button.
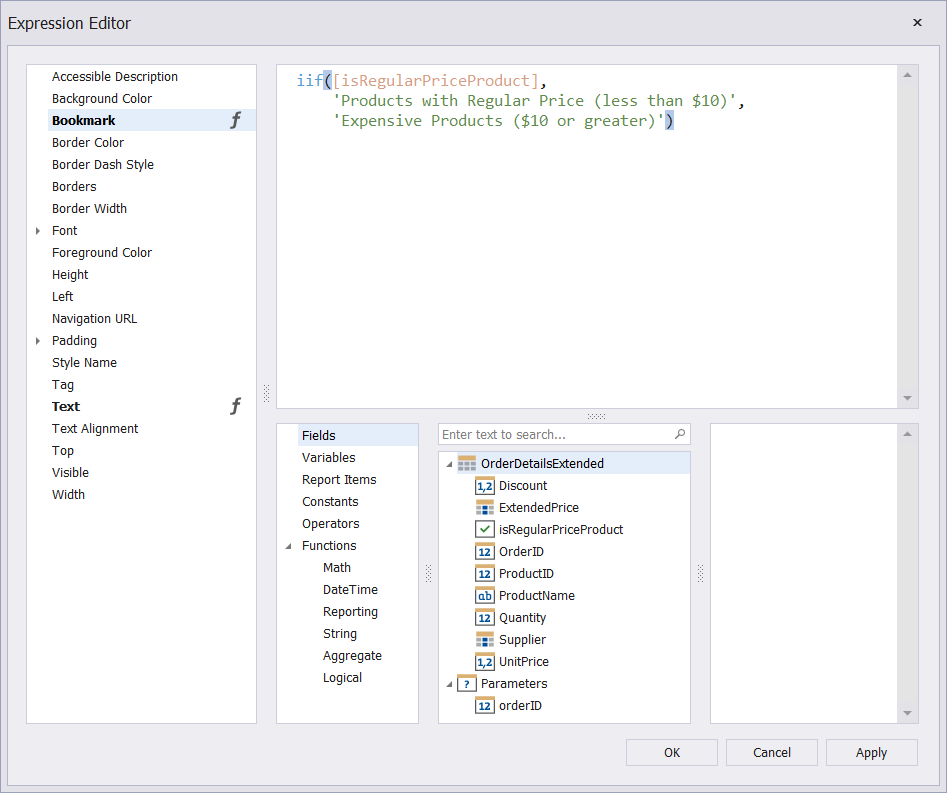
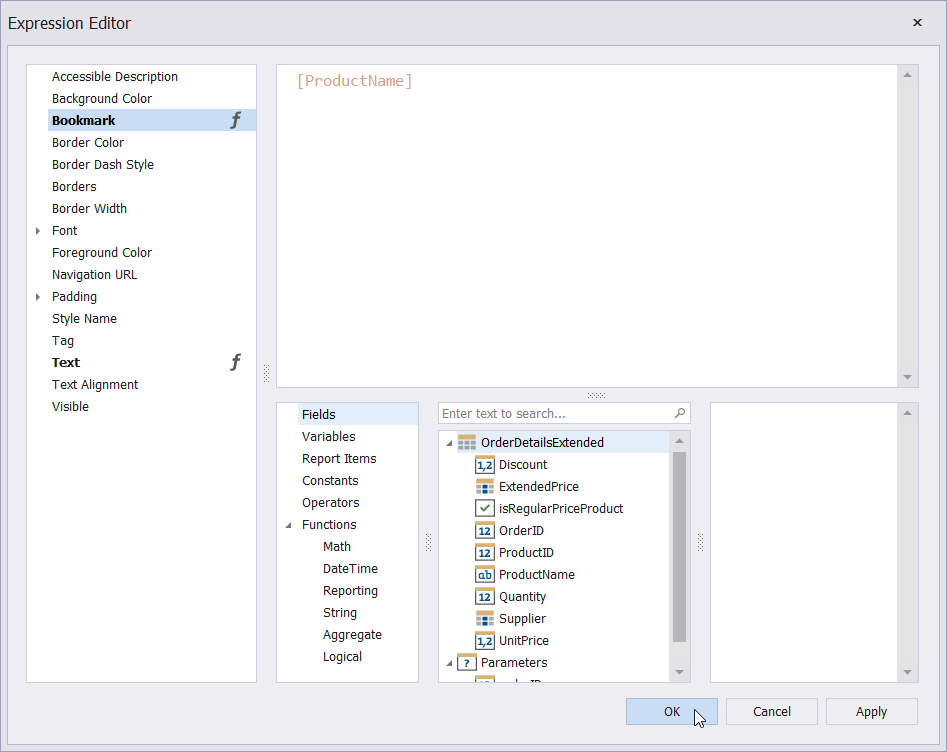
In the invoked Expression Editor, assign the following expression to the Bookmark property:
iif([isRegularPriceProduct],
    'Products with Regular Price (less than $10)',
    'Expensive Products ($10 or greater)')
Click Apply, then OK.
This action creates a bookmark that allows you to navigate to the selected label, and therefore, to the report groups (products with regular prices and expensive products). The expression above also defines the name of the created bookmark (depends on the value of the isRegularPriceProduct calculated field).
Add a Bookmark to Navigate within Group Products
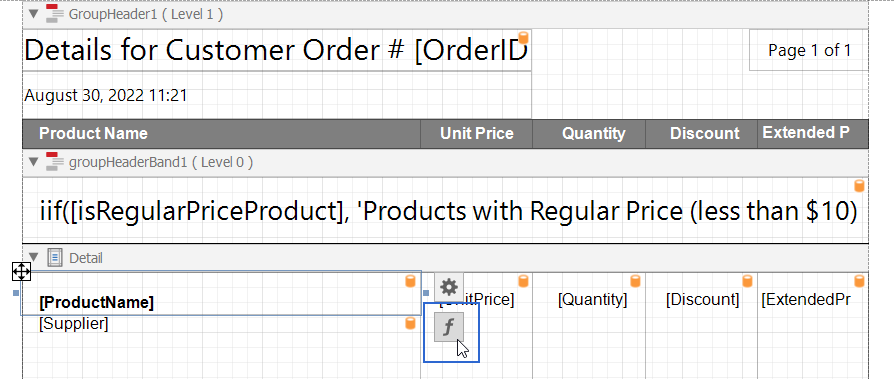
Select the ProductName cell of the table in the Detail band and click the cell’s f button.
In the invoked Expression Editor, assign the [ProductName] expression to the cell’s Bookmark property.
Click Apply, then OK.
This action creates a bookmark that allows you to navigate between products within the report groups.
Arrange the Bookmarks into a Parent-Child Structure
Set the cell’s BookmarkParent property to the label in the Group Header (Level 1) band.
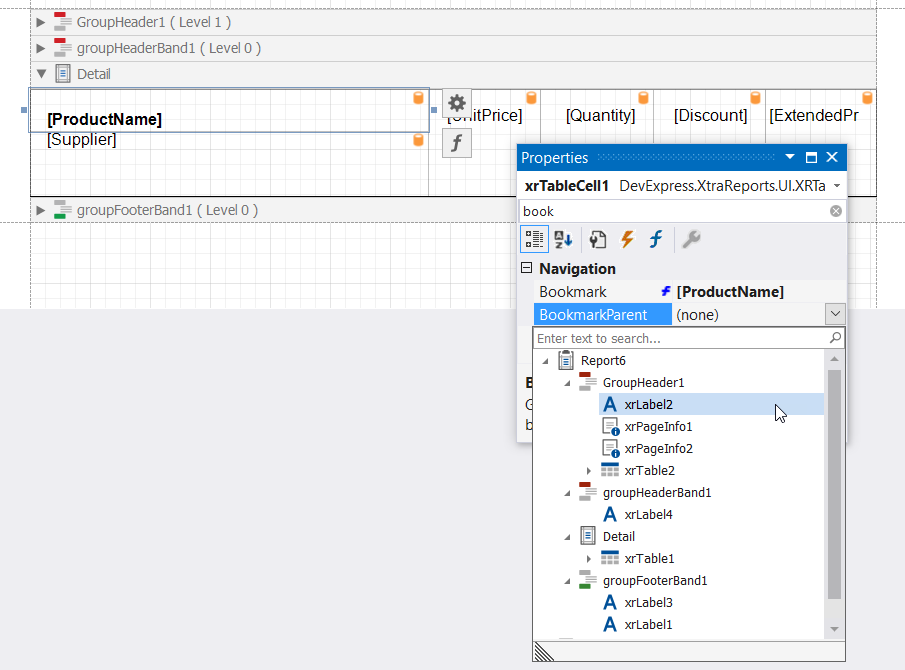
This action arranges bookmarks into a parent-child structure that reflects the hierarchy of report elements in the Document Map.
Specify the Default Name for the Document Map’s Root Node
Select the report and set its Bookmark property to Details for Customer Order.
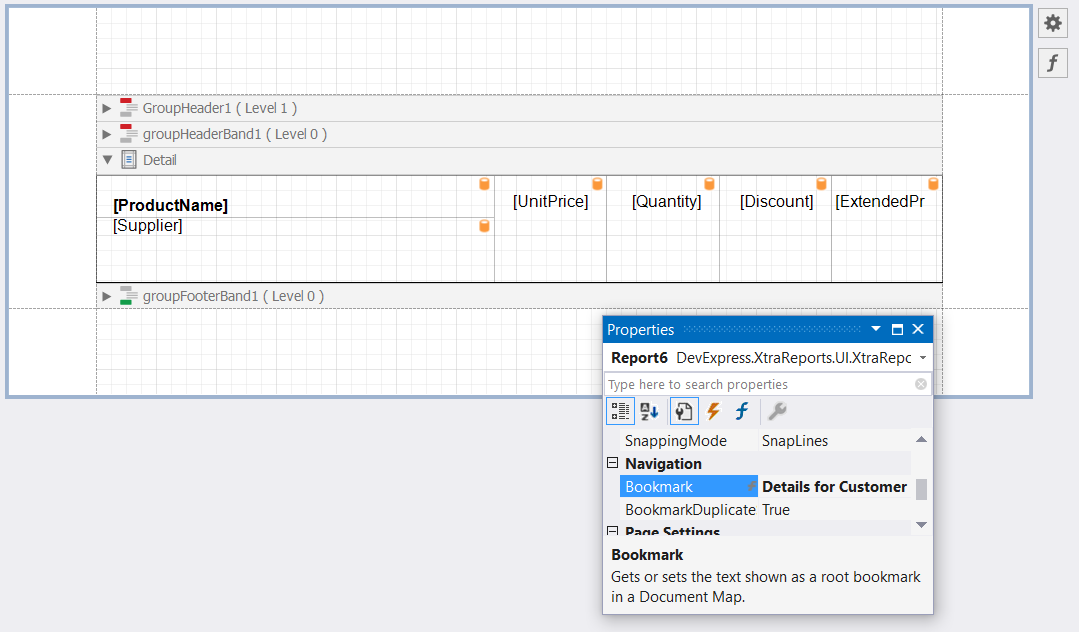
This action changes the default name of the Document Map‘s root node to the specified name.
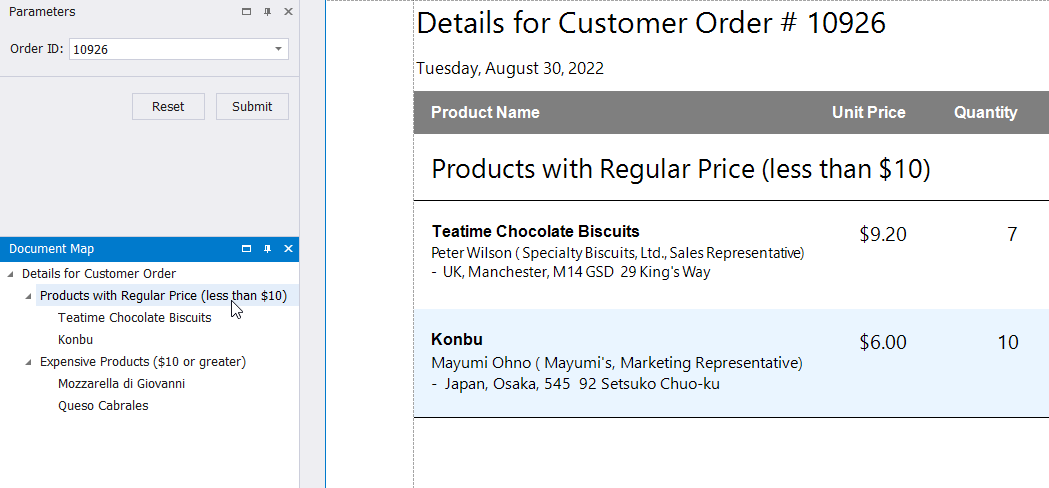
Switch to the Preview tab and set the Order ID parameter value to 10926. The report document along with the Document Map panel appears.
You can use the panel to navigate between the product groups and the products within the groups.
Add a Table of Contents
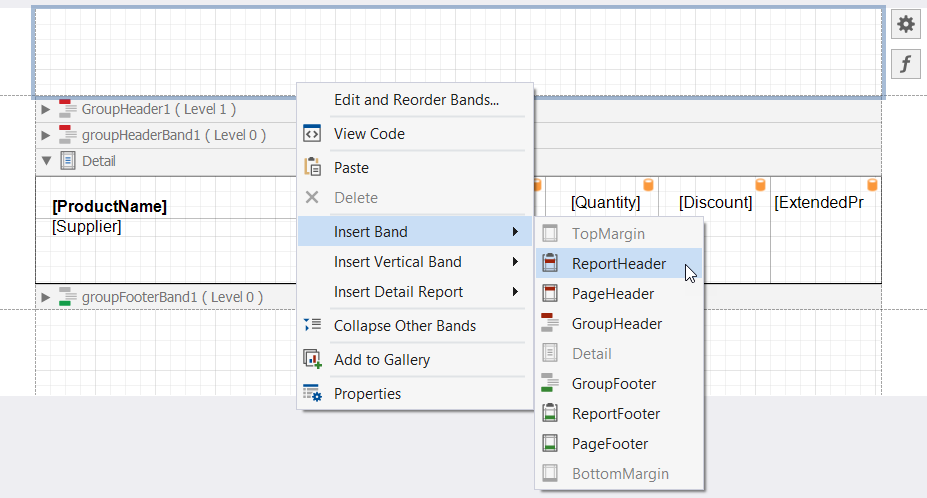
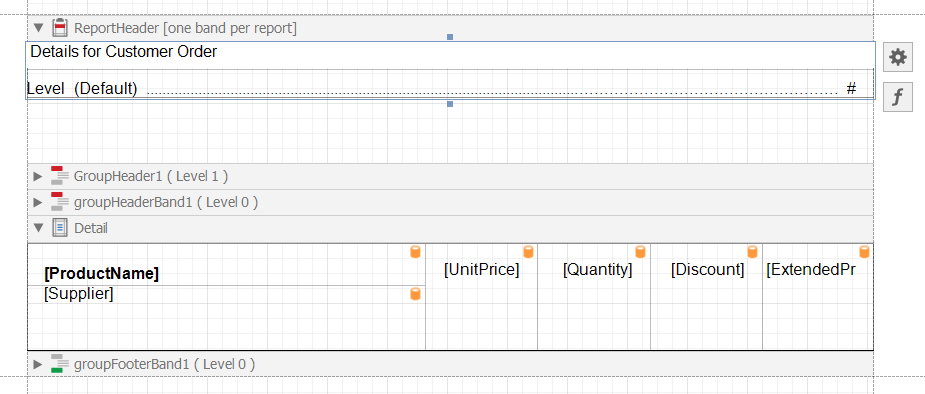
Add the Report Header band to the report to display a table of contents in this band. Right-click the design surface and select Insert Band | ReportHeader.
Drop the Table of Contents control from the Toolbox onto the ReportHeader band. Double-click the control and specify the following title: Details for Customer Order.
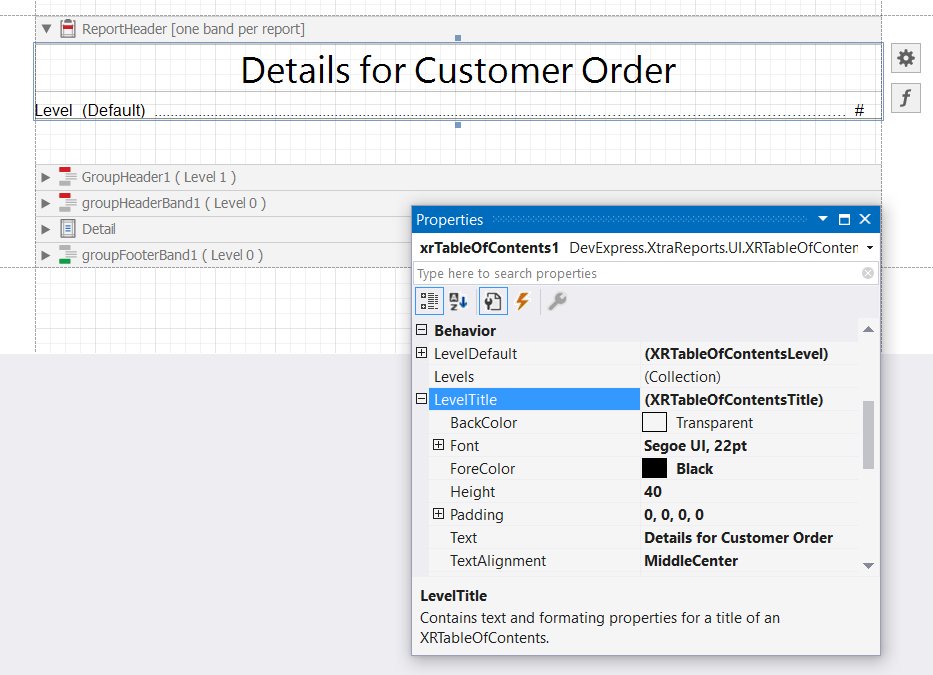
Customize the Table of Content Appearance
Customize the title appearance as necessary. Navigate to the Properties panel and change settings in the LevelTitle group. In this tutorial, we use the following settings:
All nested levels use settings specified in the LevelDefault group. You can customize individual levels. To do this, add an item to the XRTableOfContents.Levels collection and configure the item’s properties. Refer to the description of the XRTableOfContents control for more information.
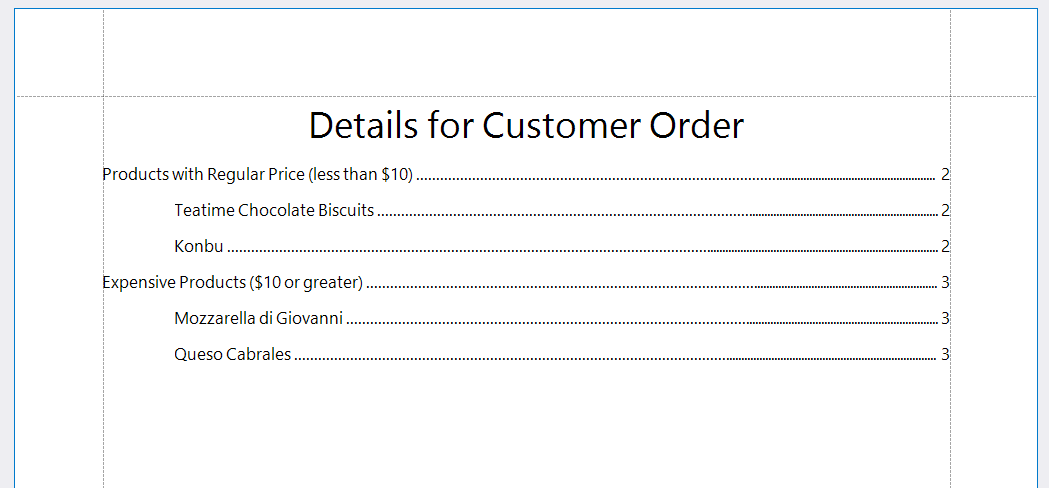
Switch to the Preview tab and set the Order ID parameter value to 10926. The first page of the generated report document now includes a table of contents.
Similarly to the Document Map panel, you can use this table of contents to navigate to the report groups and products.
Summary
In this tutorial, we explained how to add the navigation functionality to a report (page numbers, document map, and table of contents). For more information on these subjects, refer to the following documentation sections: Add Navigation.
In the next tutorial, we will cover the functionality that allows you to edit the report document in Preview. See the following topic for instructions: Tutorial 7 - Add Interactivity to a Report.