Tutorial 1 - Create a Layout
- 2 minutes to read
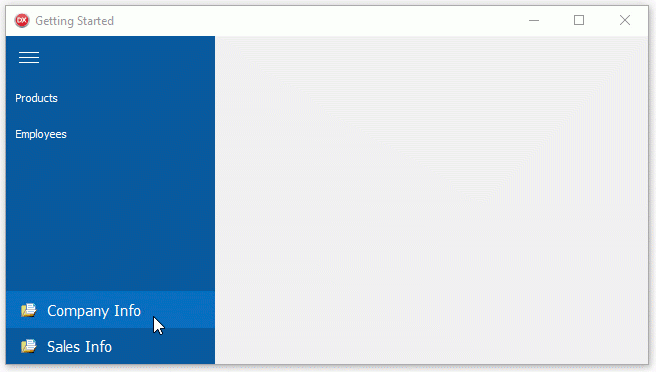
This topic describes how to create a layout for a NavBar-based application.
Create a new application.
Place the TdxNavBar control on a form and align the control to the form’s left border. Double-click the control or right-click it and select “Structure Designer…”
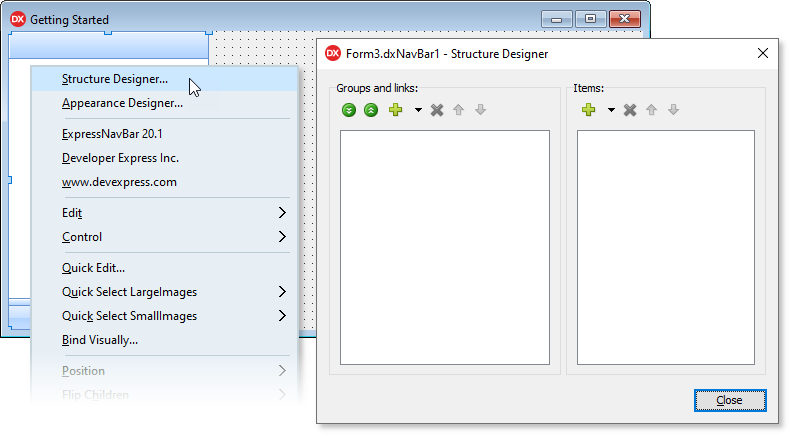
Click the “Add Group” button twice to create two groups.

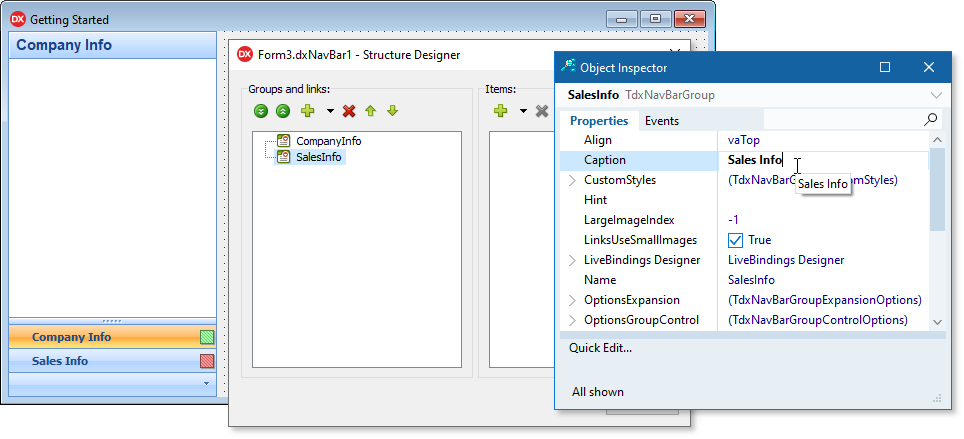
Click a group to select it. The Object Inspector displays the group’s properties and events. Change the Caption property values to “Company Info” and “Sales Info”. You can also change their automatically generated Name property values to identify each group.
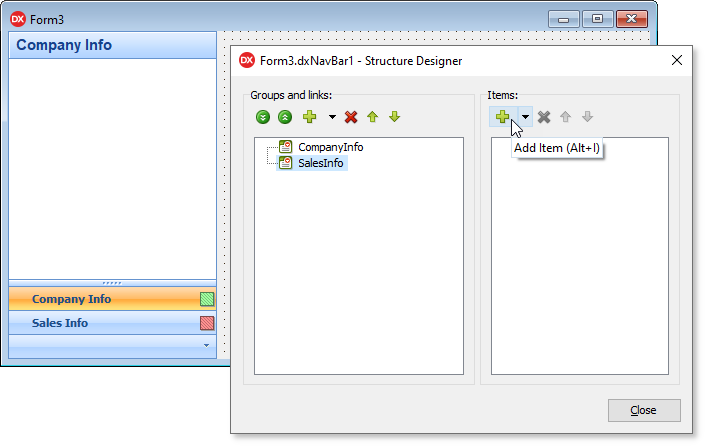
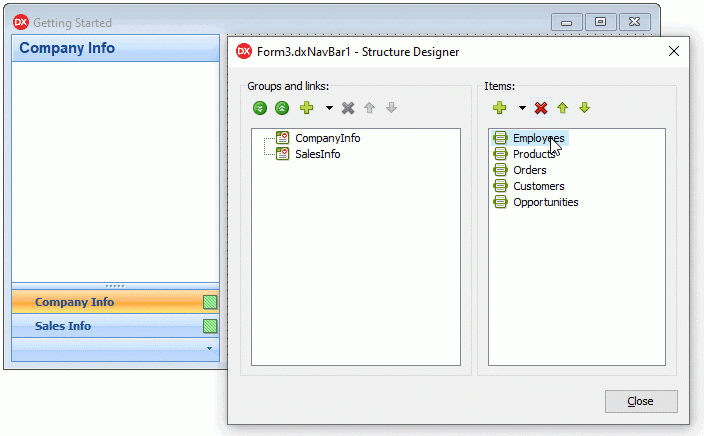
Click the “Add Item” button five times to create five new items.
Change the Name property values to “Products”, “Employees”, “Orders”, “Customers”, and “Opportunities”. The corresponding Caption property values update automatically.
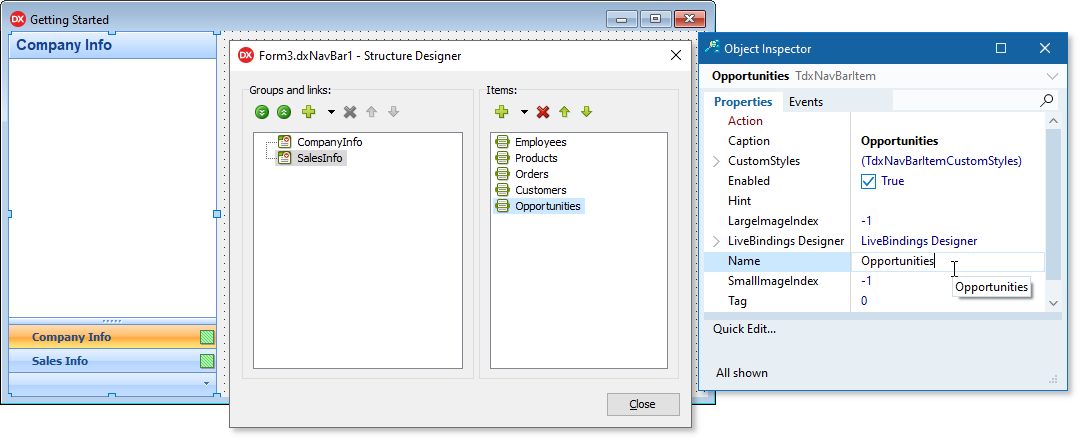
Drag the “Products” and “Employees” items to the “Company Info” group. Drag the “Orders”, “Customers”, and “Opportunities” items to the “Sales Info” group. Note that you can link a single item to multiple groups.
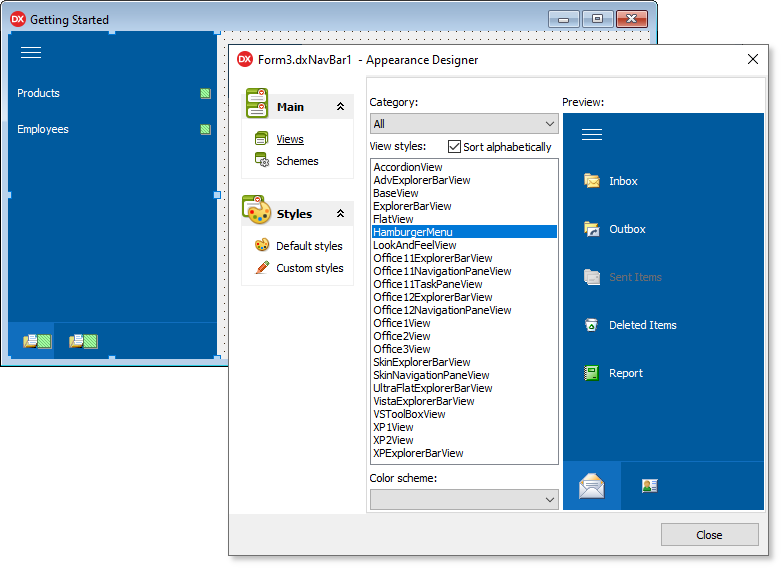
Close the designer. Right-click the NavBar control and click the “Appearance Designer…” item in the pop-up menu. Select the HamburgerMenu style and close the designer.
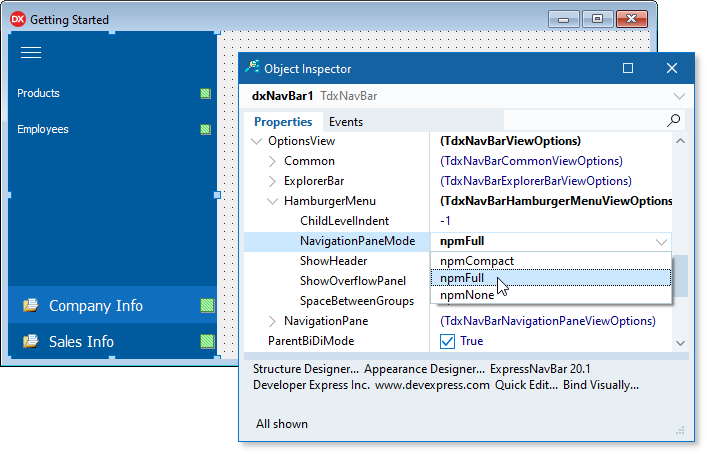
Set the NavBar control’s OptionsView.HamburgerMenu.NavigationPaneMode property to npmFull.
Run the application.
The next tutorial describes how to assign icons to groups and items.