Getting Started
- 4 minutes to read
This tutorial describes how to record a test for the TestCafe Studio sample page, run the test, and then view the results.
NOTE
The Creating Your First Test video also covers this tutorial.
Install TestCafe Studio
You can install TestCafe Studio on MacOS, Windows, and Linux. See the Installation page for more information.
Start Recording a Test
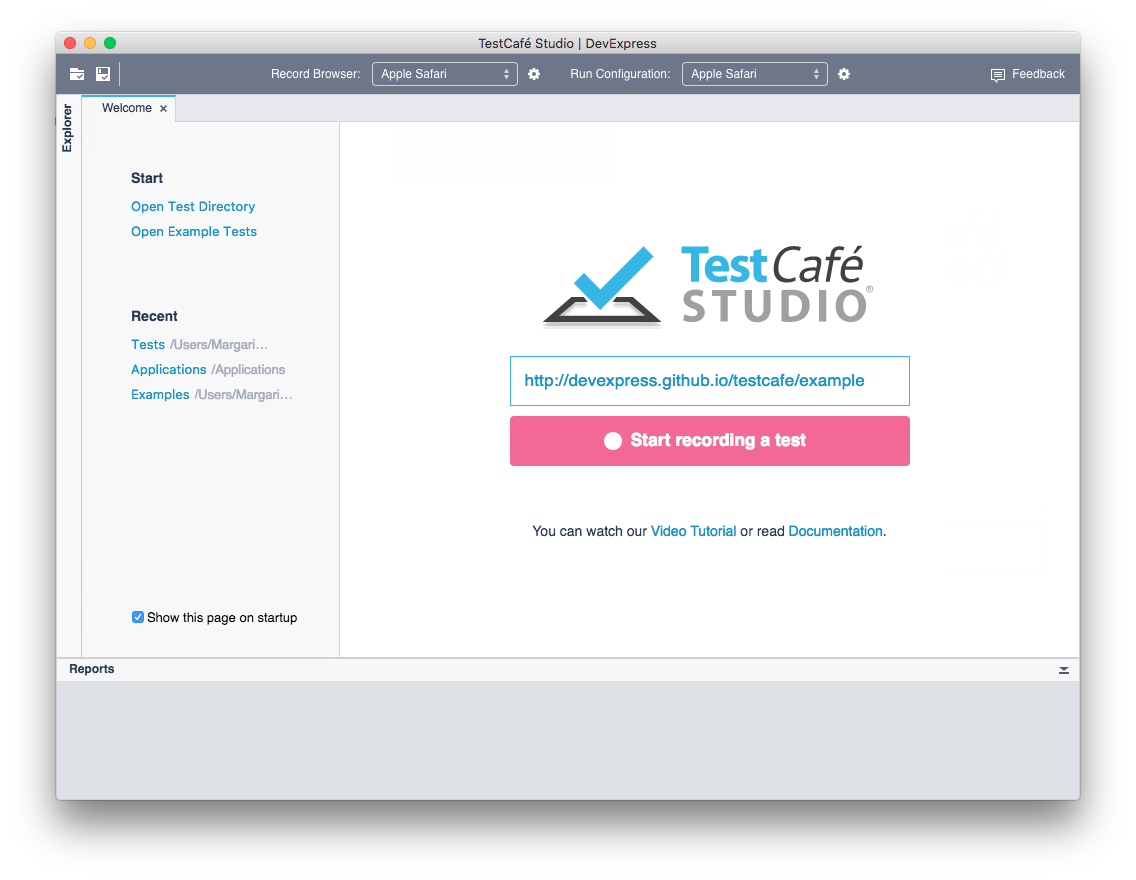
The Welcome page is displayed when you open TestCafe Studio for the first time. You can specify the tested site's URL (http://devexpress.github.io/testcafe/example) and click ![]() Start recording a test on this page to begin recording a test. This creates a test, launches a browser with the tested site, and starts recording your activity on the webpage (see Interact with the Tested Webpage).
Start recording a test on this page to begin recording a test. This creates a test, launches a browser with the tested site, and starts recording your activity on the webpage (see Interact with the Tested Webpage).
NOTE
You can also organize your tests and start the recording from the Explorer panel. See Record Tests for more information.
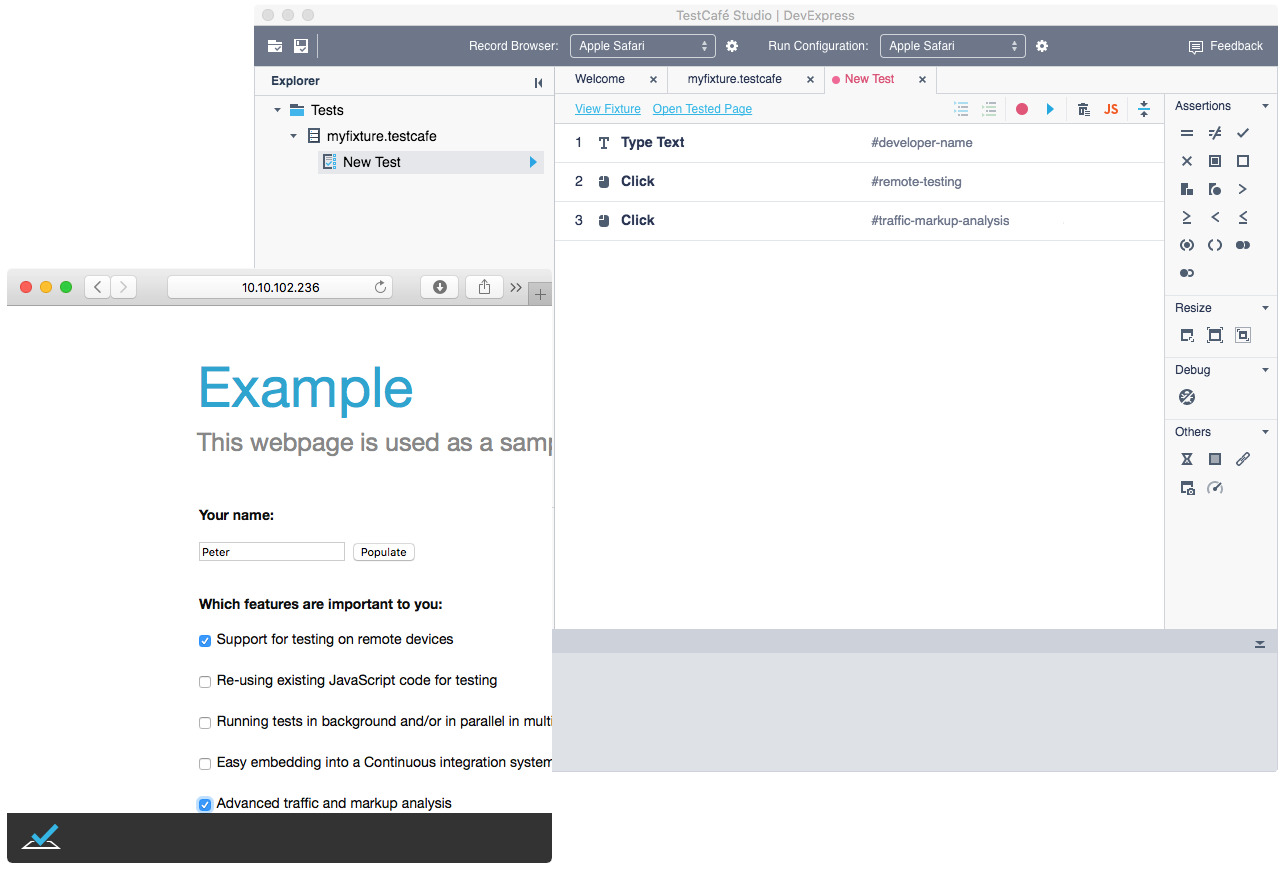
Interact With the Tested Webpage
Perform the following actions on the tested webpage:
- Enter a name in the Your name field.
- Check the Support for testing on remote devices and Advanced traffic and markup analysis checkboxes.
- Click the Submit button.
TestCafe Studio adds your actions to the test. You can view the recorded actions in TestCafe Studio at any time.
To stop the recording, close the browser window or click ![]() on the toolbar.
on the toolbar.
View the Recorded Test
TestCafe Studio displays the recorded test in the Test Editor.
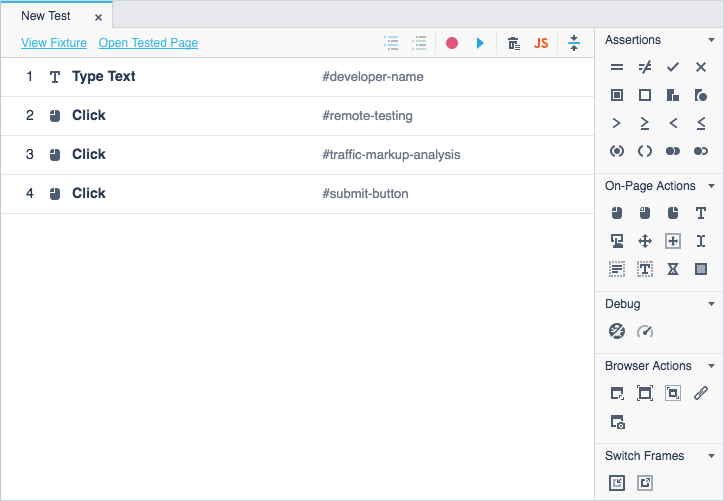
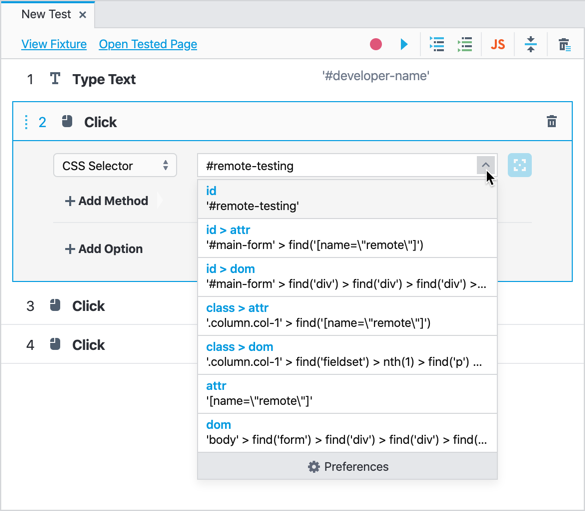
The editor allows you to reorder and delete actions, add new actions, and modify action parameters. For example, you can change the element selector that specifies the action's target element: select an alternative selector from auto-generated selectors or enter your own.
Add an Assertion to the Test
You can use assertions to perform verification actions in tests.
This step adds an Equals assertion to the test. The assertion should check if the Thank you page displays the name you entered as Your name.
Click the
 Record test actions button on the Test Editor's toolbar to continue recording the test. TestCafe Studio replays the previous test actions and waits for new actions.
Click the
 button in the Actions panel's Assertions section to add the assertion to the test. TestCafe Studio adds the assertion to the end of the test and allows you to specify the assertion parameters.
Select an element whose property you are going to check. To do this, click the
 button next to the element selector field. This displays the browser with a tested webpage. Hover the mouse pointer over the 'Thank you, ...' page header. The selector pop-up window displays a selector that identifies the page header.
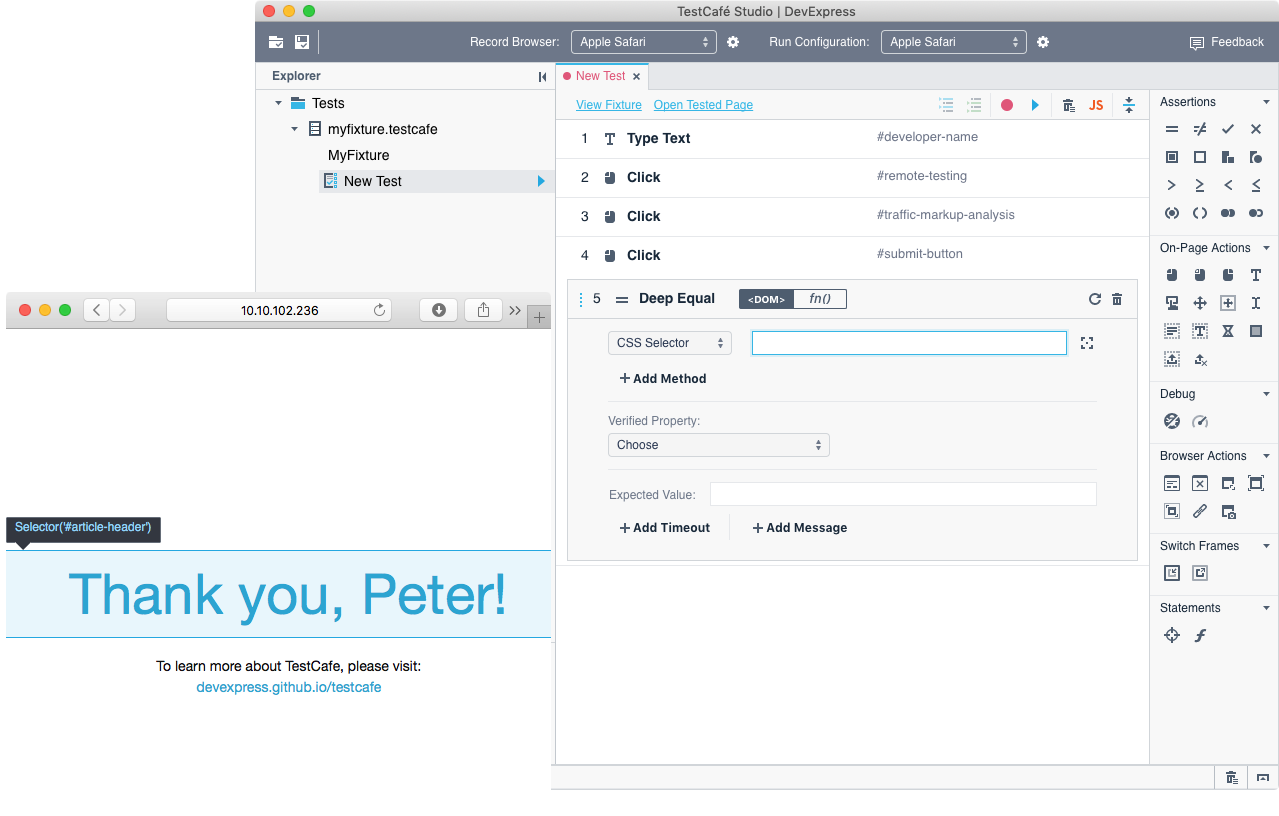
Click the page header to add this selector to the assertion.
Select the element's property you want to verify.
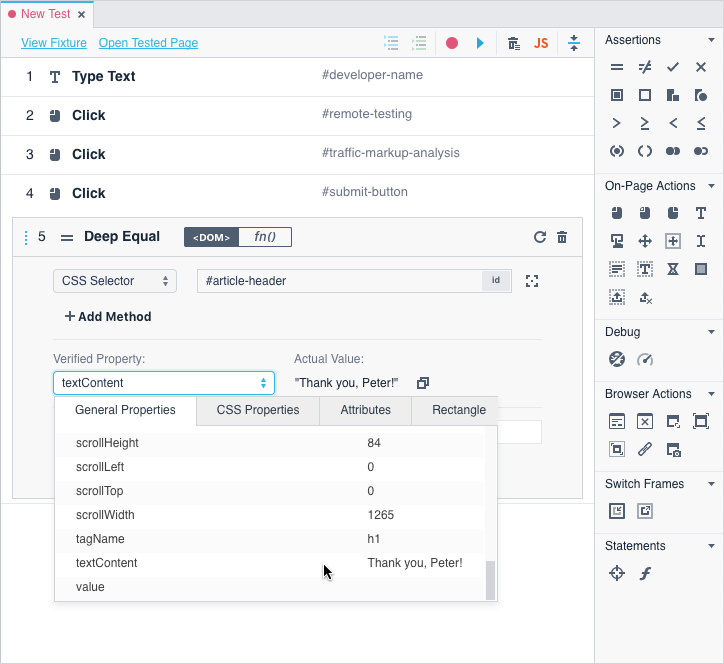
TestCafe Studio displays the selected property in the Verified Property field. It also calculates the property value and displays it in the Actual Value field.
Specify the property's expected value in the Expected Value field. You can click the
 button to add the current property value to the field.
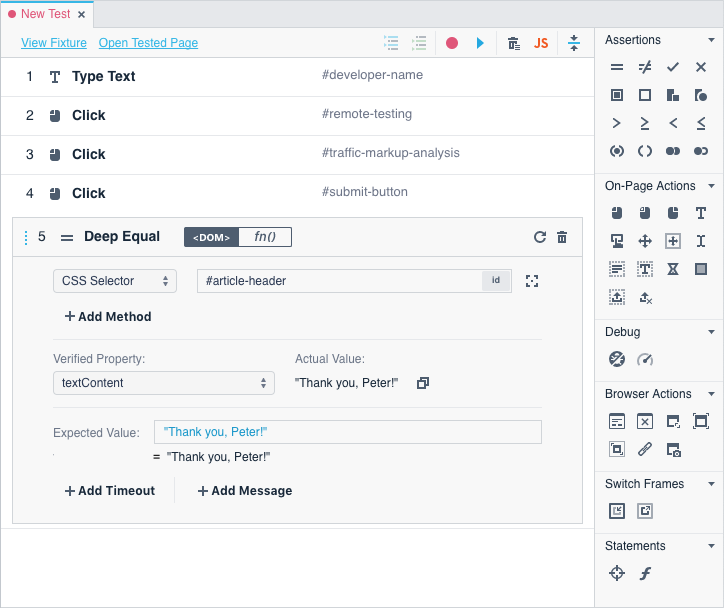
Click the
 button on the Test Editor's toolbar to stop the recording.
NOTE
If you add the assertion when the recording is stopped, then you should enter the assertion's parameters. The element picker and property list are available only during recording.
Run the Test
TestCafe Studio can run tests in desktop, headless and mobile browsers. It automatically detects browsers on the local computer and creates run configurations for them. You can open the Run Configuration drop-down menu on the toolbar and select a configuration.
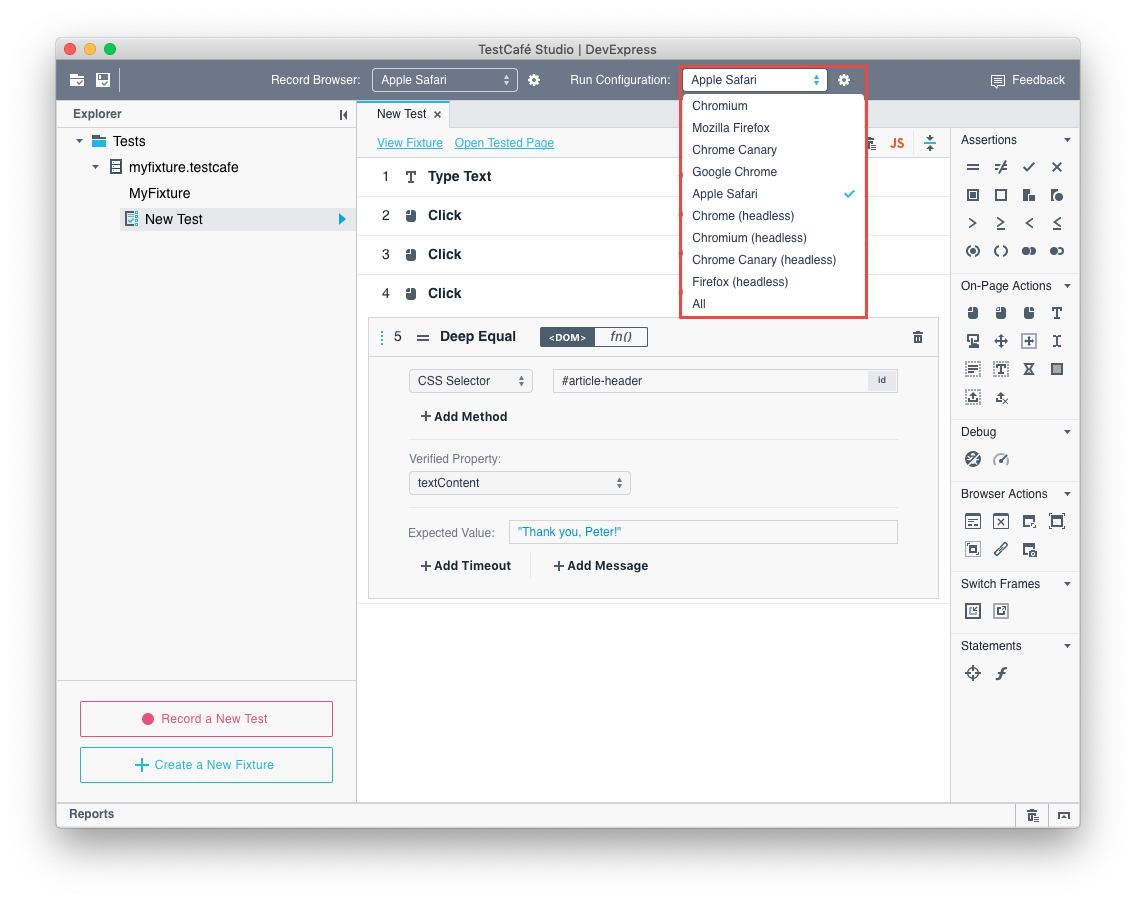
For example, to run the recorded test in all the installed browsers, select the all configuration and click the ![]() Run test button on the Test Editor's toolbar. TestCafe Studio executes the test in several browsers simultaneously, and the Reports panel displays test progress.
Run test button on the Test Editor's toolbar. TestCafe Studio executes the test in several browsers simultaneously, and the Reports panel displays test progress.
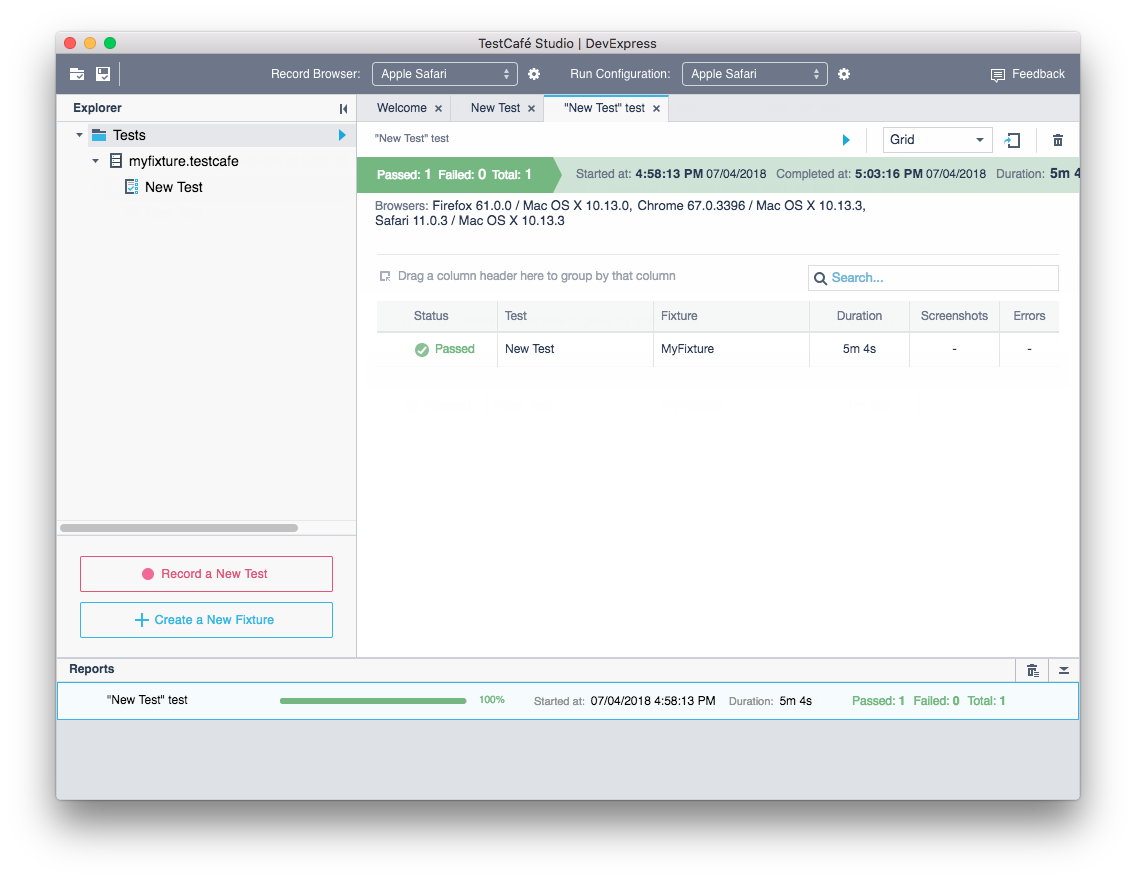
View the Test Results
The Reports panel displays the test result after the test is completed. To see a test report in the Report view, click the corresponding entry in the Reports panel.
Examples
You can find more examples of recorded tests in the Examples test directory. To open this directory, open the Welcome page and click the Open Example Tests button in the Start section.