Use the Word Document API to Generate and Send Business Letters within a Blazor Server App
- 10 minutes to read
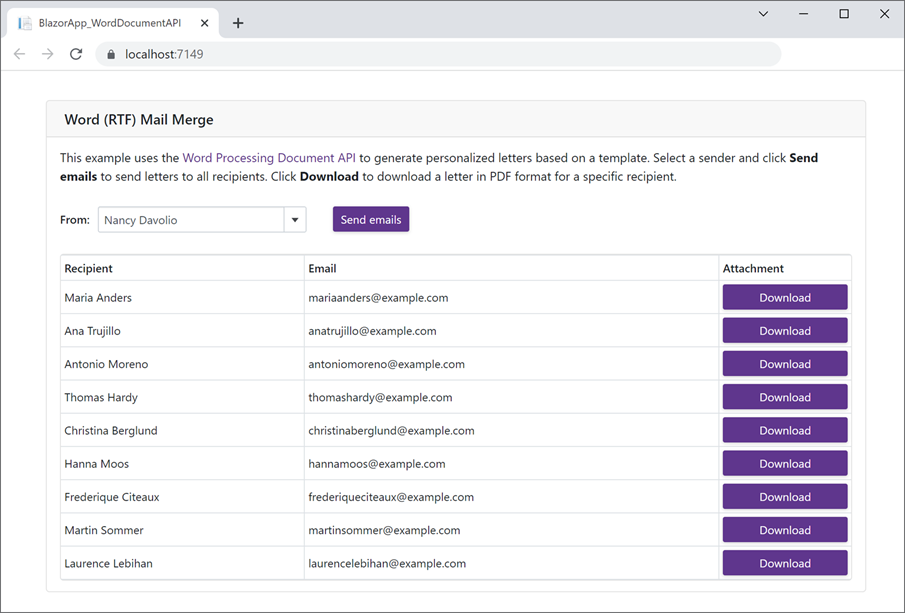
This topic describes how to create a Blazor Server application that uses the Word Processing Document API to generate multiple business letters based on a template. Users can download these letters in PDF format or send them by e-mail.
Prerequisites
- Visual Studio 2022 version 17.0 or higher with the ASP.NET and web development workload
- .NET 8.0 SDK
Create a Blazor Server App
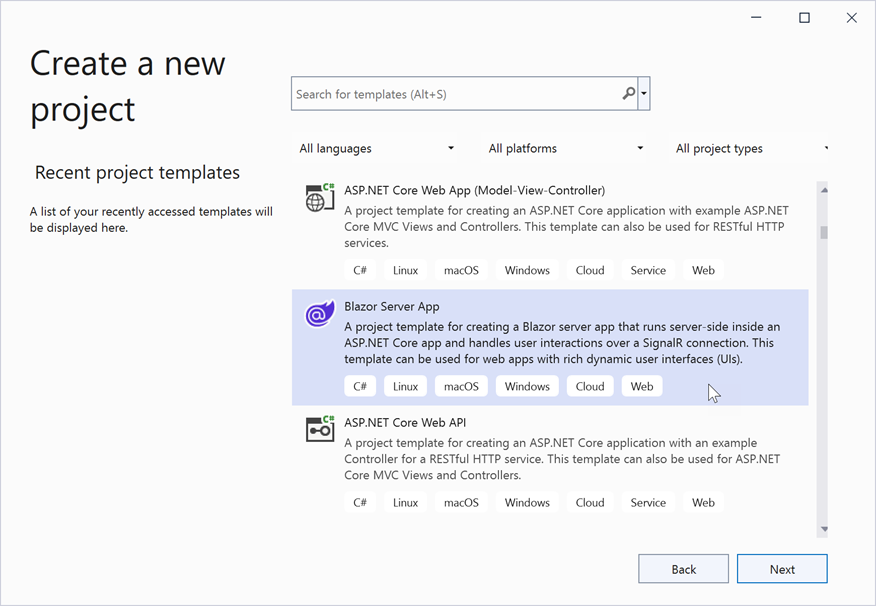
Create a new project in Visual Studio and select the Blazor Server App template. Specify the project name and location in the next window.
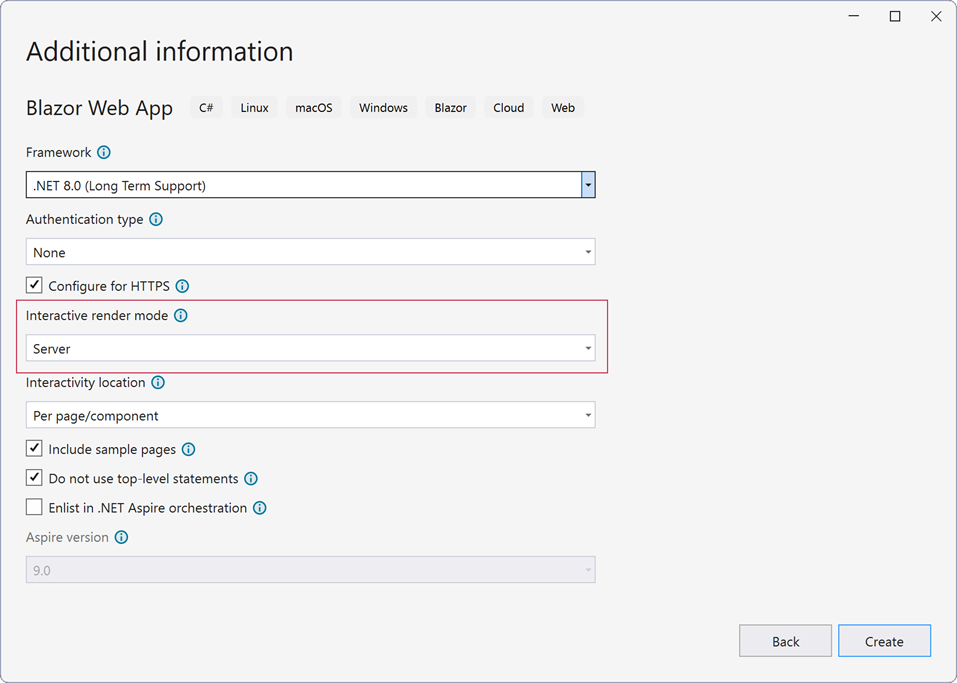
In the Additional information window, set the target framework to .NET 8.0, interactive server mode to Server, and click Create.
Install DevExpress NuGet Packages
Install the following DevExpress packages from the NuGet source:
- DevExpress.Document.Processor
- This package includes the Word Processing Document API and other Office File API libraries. You need a license for the DevExpress Office File API Subscription or DevExpress Universal Subscription to use this package in production code.
- DevExpress.Drawing.Skia
- Contains the cross-platform drawing functionality based on the Skia Graphics Library.
- DevExpress.Blazor
- Contains DevExpress UI Components for Blazor. This product line is available as part of the DevExpress Universal, DXperience, or ASP.NET Subscription.
If you are new to NuGet packages, see the following installation guide for assistance: Install DevExpress Packages Using NuGet Package Manager.
Create a Data Model
Create a new
SampleData.csfile within the Data folder.Define a Recipient class to store information about recipients.
public class Recipient
{
    public Recipient(string companyName, string contactName, string contactTitle,
        string address, string city, string postalCode, string email)
    {
        CompanyName = companyName;
        ContactName = contactName;
        ContactTitle = contactTitle;
        Address = address;
        City = city;
        PostalCode = postalCode;
        Email = email;
    }

    public string CompanyName { get; set; }
    public string ContactName { get; set; }
    public string ContactTitle { get; set; }
    public string Address { get; set; }
    public string City { get; set; }
    public string PostalCode { get; set; }
    public string Email { get; set; }
}
Create a Sender class to store information about senders.
public class Sender
{
    public Sender(string firstName, string lastName, string title)
    {
        FirstName = firstName;
        LastName = lastName;
        Title = title;
    }

    public string FirstName { get; set; }
    public string LastName { get; set; }
    public string Title { get; set; }
    public string FullName => $"{FirstName} {LastName}";
}
Create lists of Recipient and Sender objects with sample data. These lists supply data for the app’s UI components.
class SampleData
{

    public List<Recipient> RecipientList { get; }
    public List<Sender> SenderList { get; }

    public SampleData()
    {
        RecipientList = CreateRecipientList();
        SenderList = CreateSenderList();
    }

    List<Recipient> CreateRecipientList() => new List<Recipient>() {
        new Recipient("Alfreds Futterkiste", "Maria Anders", "Sales Representative",
        "Obere Str. 57", "Berlin", "12209", "mariaanders@example.com"),
        new Recipient("Ana Trujillo Emparedados y helados", "Ana Trujillo", "Owner",
        "Avda. de la Constitucion, 2222", "Mexico D.F.", "5021", "anatrujillo@example.com"),
        new Recipient("Antonio Moreno Taqueria", "Antonio Moreno", "Owner",
        "Mataderos  2312", "Mexico D.F.", "5023", "antoniomoreno@example.com"),
        new Recipient("Around the Horn", "Thomas Hardy", "Sales Representative",
        "120 Hanover Sq.", "London", "WA1 1DP", "thomashardy@example.com"),
        new Recipient("Berglunds snabbkop", "Christina Berglund", "Order Administrator",
        "Berguvsvegen  8", "Lulee", "S-958 22", "christinaberglund@example.com"),
        new Recipient("Blauer See Delikatessen", "Hanna Moos", "Sales Representative",
        "Forsterstr. 57", "Mannheim", "68306", "hannamoos@example.com"),
        new Recipient("Blondel pure et fils", "Frederique Citeaux", "Marketing Manager",
        "24 Place Kleber", "Strasbourg", "67000", "frederiqueciteaux@example.com"),
        new Recipient("Bolido Comidas preparadas", "Martin Sommer", "Owner",
        "C-Araquil, 67", "Madrid", "28023", "martinsommer@example.com"),
        new Recipient("Bon app'", "Laurence Lebihan", "Owner", "12, rue des Bouchers",
        "Marseille", "13008", "laurencelebihan@example.com")
    };

    List<Sender> CreateSenderList() => new List<Sender>() {
        new Sender("Nancy", "Davolio", "Sales Representative"),
        new Sender("Andrew", "Fuller", "Vice President, Sales"),
        new Sender("Janet", "Leverling", "Sales Representative"),
        new Sender("Margaret", "Peacock", "Sales Representative"),
        new Sender("Steven", "Buchanan", "Sales Manager")
    };
}
Add DevExpress Blazor UI Components and Bind Them to Data
Register the DevExpress.Blazor namespace in the
_Imports.razorfile.@using DevExpress.BlazorCall the AddDevExpressBlazor method in the
Program.csfile.builder.Services.AddDevExpressBlazor();Apply the DevExpress Blazing Berry theme to the app as described in this help topic: Apply a DevExpress Bootstrap Theme. Open the
App.razorfile and add the following line to the end of the HEAD section:<head> @* ... *@ <link href="_content/DevExpress.Blazor.Themes/blazing-berry.bs5.css" rel="stylesheet" /> </head>Design the application UI. This app includes the following DevExpress Blazor UI components:
- DxFormLayout
- A Form Layout component that allows you to construct responsive and auto aligned edit forms.
- DxComboBox<TData, TValue>
- A combo box. The Data property specifies the data source for the editor (SenderList in this example). The TextFieldName property allows you to select a data source field. The field values appear in the editor’s drop-down list (the Sender.FullName values in this tutorial). The Value property specifies the selected item.
- DxButton
- A button. Use the Text property to define the button’s text.
- DxGrid
- A Data Grid component. The DxGrid property allows you to bind the grid to a data source (RecipientList in this example). Create three columns (DxGridDataColumn type). Use the FieldName property to bind the first two columns to data source fields (
Recipient.ContactNameandRecipient.Email). The last column contains buttons to generate and download letters in PDF format.
Open the Home.razor file and change its code as follows:
@page "/"

<div class="container">
    <div class="card mt-3">
        <div class="card-header">
            Word (RTF) Mail Merge
        </div>
        <div class="card-body px-0">
            <DxFormLayout>
                <DxFormLayoutItem ColSpanMd="12">
                    <Template>
                        <p>
                            This example uses the Word Processing Document API
                            to generate personalized letters based on a template.
                            Select a sender and click <b>Send emails</b> to send
                            letters to all recipients. Click <b>Download</b> to
                            download a letter in PDF format for a specific recipient.
                        </p>
                    </Template>
                </DxFormLayoutItem>
                <DxFormLayoutItem Caption="From:" ColSpanMd="4">
                    <Template>
                        <DxComboBox Data="@dataSource.SenderList"
                                    TextFieldName="FullName"
                                    @bind-Value="@SelectedSender" CssClass="p-0" />
                    </Template>
                </DxFormLayoutItem>

                <DxFormLayoutItem>
                    <Template>
                        <DxButton Text="Send emails" />
                    </Template>
                </DxFormLayoutItem>
            </DxFormLayout>
            <div class="col">
                <DxGrid Data="@dataSource.RecipientList"
                            CssClass="mt-3" PagerVisible="false">
                <Columns>
                <DxGridDataColumn FieldName="@nameof(Recipient.ContactName)" Caption="Recipient" />
                <DxGridDataColumn FieldName="@nameof(Recipient.Email)" Caption="Email" />
                <DxGridDataColumn Caption="Attachment" Width="150px">
                <CellDisplayTemplate>
                        @{
                            var recipient = context.DataItem as Recipient;
                            @if (recipient != null)
                            {
                                <DxButton Text="Download"
                                CssClass="btn-block"
                                Click="@((MouseEventArgs args) => DownloadPdf(recipient))" />
                            }
                        }
                </CellDisplayTemplate>
                </DxGridDataColumn>
                </Columns>
                </DxGrid>
            </div>
        </div>
    </div>
</div>

@code {
    SampleData dataSource = new();
    Sender? selectedSender;

    Sender? SelectedSender
    {
        get => selectedSender;
        set { selectedSender = value;
            InvokeAsync(StateHasChanged); }
    }

    protected override Task OnInitializedAsync()
    {
        selectedSender = dataSource.SenderList[0];
        return base.OnInitializedAsync();
    }
}
Use Mail Merge to Generate Personalized Letters
The Word Processing Document API fully supports mail merge operations. The API allows you to create multiple documents based on a single template. Execute the following actions to initiate mail merge within your app:
Specify a data source for mail merge. Open the
SampleData.csfile and create a DataTable instance.using System.Data; // ... DataTable dataTable; public SampleData() { // ... dataTable = new DataTable(); CreateDataTableColumns(dataTable); } void CreateDataTableColumns(DataTable dataTable) { dataTable.Columns.Add("FirstName", typeof(string)); dataTable.Columns.Add("LastName", typeof(string)); dataTable.Columns.Add("Title", typeof(string)); dataTable.Columns.Add("CompanyName", typeof(string)); dataTable.Columns.Add("ContactName", typeof(string)); dataTable.Columns.Add("ContactTitle", typeof(string)); dataTable.Columns.Add("Address", typeof(string)); dataTable.Columns.Add("City", typeof(string)); dataTable.Columns.Add("PostalCode", typeof(string)); dataTable.Columns.Add("Email", typeof(string)); }Implement the following method to populate the data table with values based on the selected sender and recipient:
public DataTable GetDataSource(Sender sender, Recipient recipient)
{
    dataTable.Rows.Clear();
    dataTable.Rows.Add(sender.FirstName,
                    sender.LastName,
                    sender.Title,
                    recipient.CompanyName,
                    recipient.ContactName,
                    recipient.ContactTitle,
                    recipient.Address,
                    recipient.City,
                    recipient.PostalCode,
                    recipient.Email);
    return dataTable;
}
Create a mail merge template. The template contains merge fields that are replaced with data source values during mail merge. You can download the following document to proceed: MailMerge.rtf. Add this file to the Data folder of your project.

Open the
Index.razorfile and add the following namespaces:@using System.IO @using DevExpress.XtraRichEditCreate a RichEditDocumentServer instance and load the mail merge template.
@code {
    RichEditDocumentServer documentServer = new();
    // ...

    protected override Task OnInitializedAsync() {
        documentServer.LoadDocument("Data/MailMerge.rtf", DocumentFormat.Rtf);
        // ...
    }
}
Implement the following method to run mail merge. The output document is exported to PDF.
@code {
    // ...
    MemoryStream CreateAttachment(Recipient recipient) {
        ArgumentNullException.ThrowIfNull(SelectedSender);

        using (var resultDocumentServer = new RichEditDocumentServer()) {
            MemoryStream stream = new MemoryStream();
            // Fill the data table with information about the selected sender
            // and recipient. Use the table as a data source for mail merge.
            documentServer.Options.MailMerge.DataSource = dataSource.GetDataSource(SelectedSender,
                recipient);
            documentServer.Options.MailMerge.ViewMergedData = true;
            // Execute mail merge.
            documentServer.MailMerge(resultDocumentServer.Document);
            // Export the result to PDF.
            resultDocumentServer.ExportToPdf(stream);
            stream.Seek(0, SeekOrigin.Begin);
            return stream;
        }
    }
}
Download Letters in PDF Format to the Browser
You can use JavaScript Interop to download generated letters in PDF format on the client side.
Create a
wwwroot/js/exportToPdf.jsfile with the following JavaScript function:function exportToPdf(filename, base64Content) { var link = document.createElement('a'); link.download = filename; link.href = "data:application/pdf;base64," + base64Content; document.body.appendChild(link); link.click(); document.body.removeChild(link); }Embed the script in the
App.razorpage before the closing</body>tag.<script src="js/exportToPdf.js"></script>Inject an instance of the IJSRuntime object into the
Index.razorpage.@page "/" @inject IJSRuntime JSHandle the
Clickevent of the Download button in the Attachment grid column. When a user clicks Download, the mail merge process is executed for the selected sender and recipient. The generated letter is exported to PDF and saved on the client.<DxDataGridColumn Caption="Attachment" Width="150px"> <DisplayTemplate> @{ var recipient = context as Recipient; @if (recipient != null) { <DxButton Text="Download" CssClass="btn-block" Click="@((MouseEventArgs args) => DownloadPdf(recipient))"/> } } </DisplayTemplate> </DxDataGridColumn> @* ... *@ @code { // ... void DownloadPdf(Recipient recipient) { // Execute mail merge. using (MemoryStream stream = CreateAttachment(recipient)) { // Download a letter in PDF format on the client. JS.InvokeVoidAsync("exportToPdf", "output.pdf", Convert.ToBase64String(stream.ToArray())); } } }
Send Letters by E-mail
You can upgrade your application to allow users to send generated letters by e-mail. This example uses the MailKit open source library to send e-mail messages.
Install the MailKit NuGet package.
Add the following namespaces to the
Index.razorfile and inject an ILogger object used to write error log messages:@using MimeKit; @using MailKit.Net.Smtp @using Microsoft.Extensions.Logging @inject ILogger<Index> loggerHandle the
Clickevent of the Send emails button.<DxButton Click="SendEmails" Text="Send emails" />Add the following code to send e-mail messages to all recipients when a user clicks the button. Letters are attached to messages as PDF files.
@code {
    // ...
    void SendEmails(MouseEventArgs mouseEventArgs) {
        // Obtain a list of recipients.
        List<Recipient> recipientList = dataSource.RecipientList;

        for (int i = 0; i < recipientList.Count; i++) {
            // Execute mail merge to generate a letter for each recipient.
            using (MemoryStream attachmentStream = CreateAttachment(recipientList[i])) {
                // Create an e-mail message for each recipient.
                // Attach a letter to the message as a PDF file.
                MimeMessage message = CreateMessage("YOUR_EMAIL_ADDRESS",
                    recipientList[i], attachmentStream);
                // Send the message.
                SendMessage(message);
            }
        }
    }

    MimeMessage CreateMessage(string from, Recipient recipient, MemoryStream attachmentStream) {
        var message = new MimeMessage();
        // Specify the sender's address.
        message.From.Add(new MailboxAddress(SelectedSender?.FullName, from));
        // Specify the recipient's address.
        message.To.Add(new MailboxAddress(recipient.ContactName, recipient.Email));
        message.Subject = "Your message subject";

        // Create the body of your message.
        var body = new TextPart() {
                Text = "Your message text"
        };

        // Create a PDF attachment to send the generated letter.
        var attachment = new MimePart("application", "pdf") {
                Content = new MimeContent(attachmentStream, ContentEncoding.Default),
                ContentDisposition = new ContentDisposition(ContentDisposition.Attachment),
                ContentTransferEncoding = ContentEncoding.Base64,
                FileName = "attachment.pdf"
        };

        var multipart = new Multipart("mixed");
        multipart.Add(body);
        multipart.Add(attachment);

        message.Body = multipart;

        return message;
    }

    void SendMessage(MimeMessage message) {
        using (var client = new SmtpClient()) {
            // Connect to your SMTP server to send the message.
            // Use one of these ports: 25, 465, 587, or 2525.
            client.Connect("MAIL_SERVER", 587, false);

            // Use the code below if your SMTP server requires authentication.
            client.Authenticate("USERNAME", "PASSWORD");

            try {
                // Send the message.
                client.Send(message);
            }
            catch(Exception ex) {
                logger.LogError(ex.Message);
            }
            finally {
                client.Disconnect(true);
            }
        }
    }
}