Getting Started
- 5 minutes to read
The following article describes how to get started with the SnapDocumentServer and create a simple report from scratch.
This tutorial consists of the following sections.
Create an Application
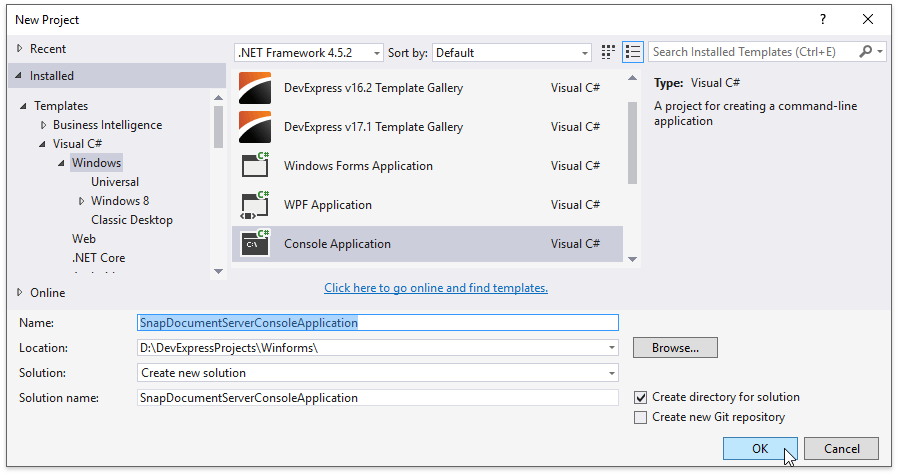
Start Visual Studio and create a new project by selecting FILE | New | Project… in the main menu. In the invoked New Project dialog, select a Console Application, specify the project name and location, and click OK.
In the Solution Explorer, right-click the References node and select Add Reference… in the context menu.
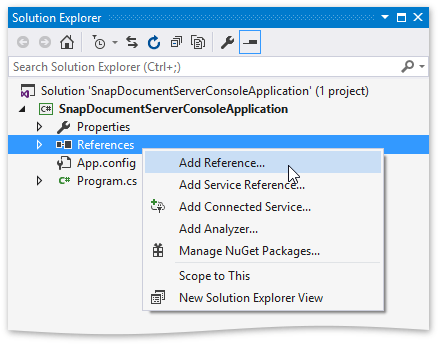
In the invoked Reference Manager dialog, add references to the following libraries.
- DevExpress.Data.v18.2.dll
- DevExpress.Docs.v18.2.dll
- DevExpress.Office.v18.2.Core.dll
- DevExpress.RichEdit.v18.2.Core.dll
- DevExpress.Snap.v18.2.Core.dll
Paste the following code in the Main method of the Program.cs file (Main procedure of the Module1.vb file for Visual Basic). The code snippet creates a new SnapDocumentServer instance, associates it with the data source, generates the tabular report and opens it in the default application registered for this file type.
Note
A complete sample project is available at https://github.com/DevExpress-Examples/snap-document-server-getting-started-t432062
Dim server As New SnapDocumentServer()
Dim document As SnapDocument = server.Document

Dim datasource As Object = GetDataSource()
document.DataSource = datasource

Console.Write("Generating Document... ")
GenerateLayout(document)
Console.WriteLine("Ok!")
Console.Write("Press any key...")
Console.ReadKey()
System.Diagnostics.Process.Start("SnapDocumentServerTest.rtf")
Connect to Data
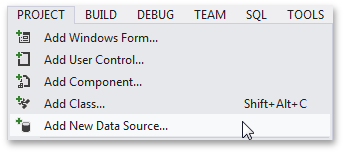
Open the PROJECT menu and click the Add New Data Source… command.
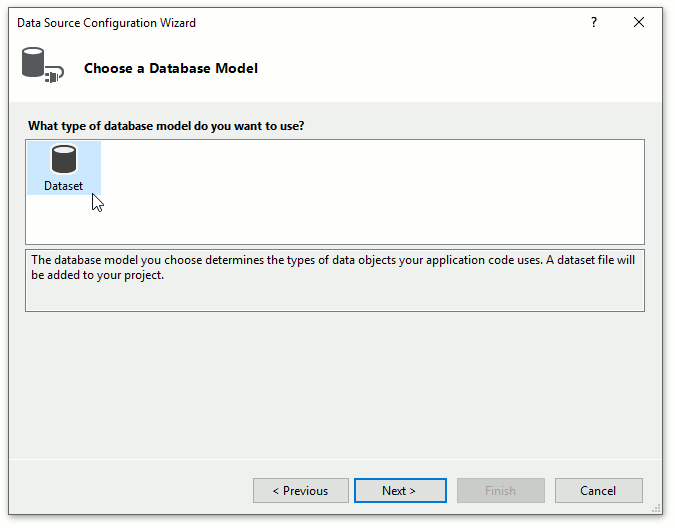
In the invoked Data Source Configuration Wizard, select Database and click Next.

Select Dataset to specify the type of a database model and click Next.
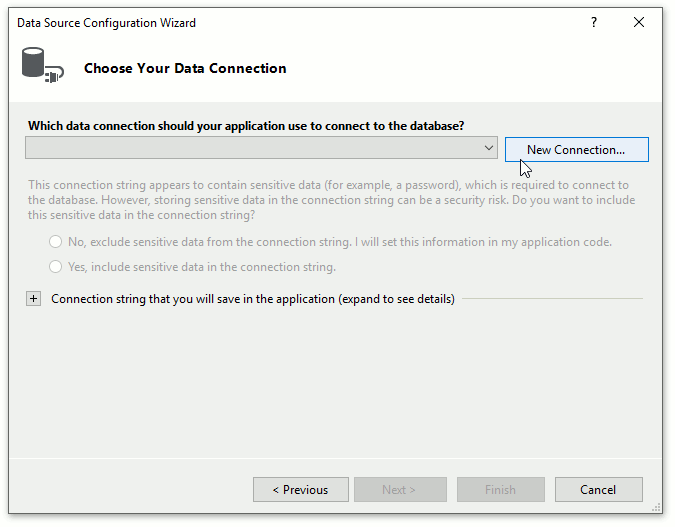
On the next page, click New Connection… to specify which data connection should be used.
In the invoked Add Connection dialog, set your data source to Microsoft SQL Server Database Fie(SqlClient) and specify the database file path. This tutorial uses a connection to the sample Northwind database (the NWind.mdf file is included in the product installation).
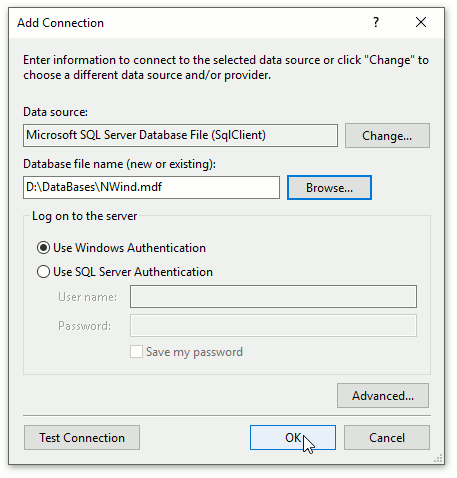
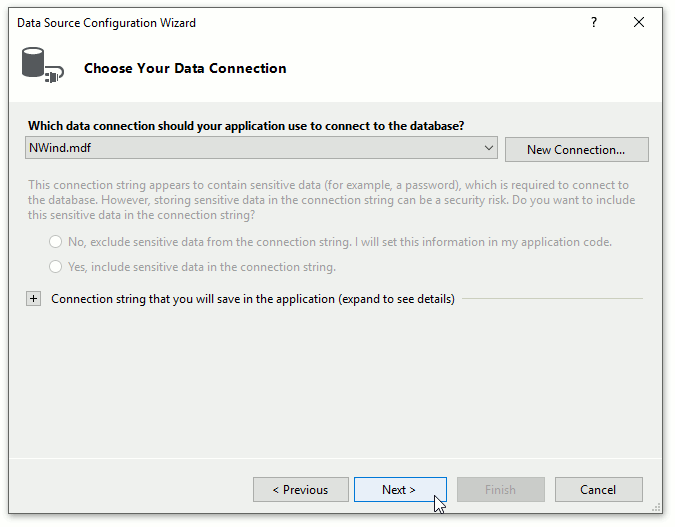
Click OK to apply the changes. In the Data Source Configuration Wizard, click Next.
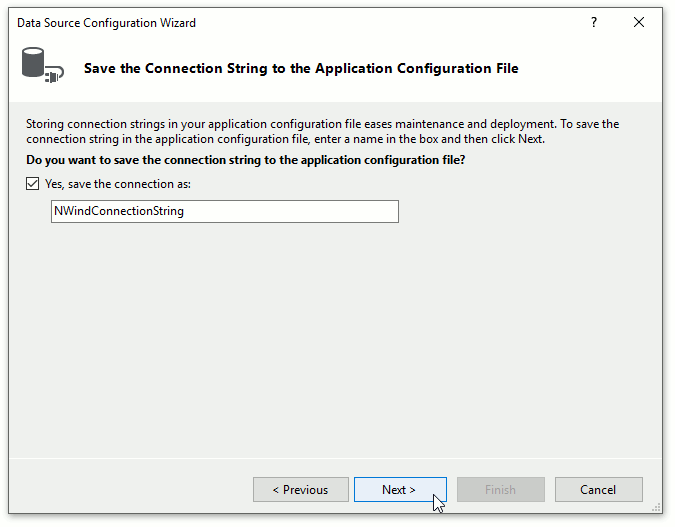
Click Next on the following page to save the newly created connection string to the configuration file.
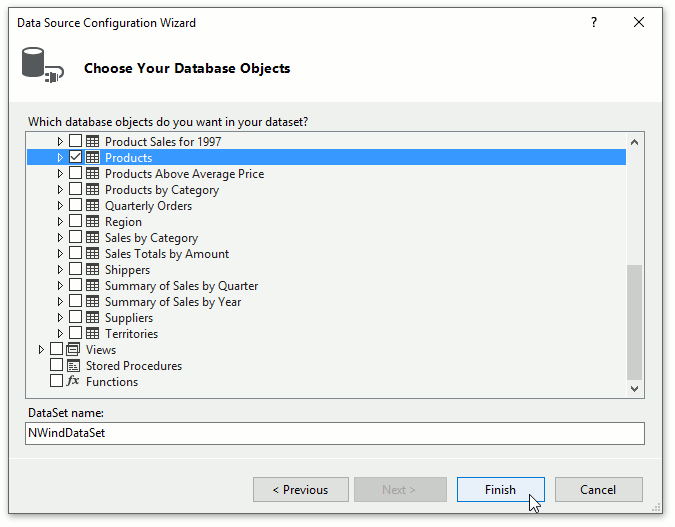
The final wizard page allows you to choose which tables to obtain from the database. After this step, click Finish.
Create a new DataSet object and populate it with data from the database by adding the following code.
Note
A complete sample project is available at https://github.com/DevExpress-Examples/snap-document-server-getting-started-t432062
Private Shared Function GetDataSource() As Object
    Dim dataSource As New NWindDataSet()
    Dim connection = New SqlConnection()
    connection.ConnectionString = My.Settings.Default.NWindConnectionString

    Dim products As New ProductsTableAdapter()
    products.Connection = connection
    products.Fill(dataSource.Products)

    Return dataSource.Products
End Function
Generate a Report Layout
Use the code below to generate a simple template and fill it with data. The code snippet created a snap list with three data entries and a header, and exports the result to the SnapDocumentServerTest.rtf file.
Note
A complete sample project is available at https://github.com/DevExpress-Examples/snap-document-server-getting-started-t432062
Private Shared Sub GenerateLayout(ByVal document As SnapDocument) ' Add a Snap list to the document. Dim list As SnapList = document.CreateSnList(document.Range.End, "List") list.BeginUpdate() list.EditorRowLimit = 100500 ' Add a header to the Snap list. Dim listHeader As SnapDocument = list.ListHeader Dim listHeaderTable As Table = listHeader.Tables.Create(listHeader.Range.End, 1, 3) Dim listHeaderCells As TableCellCollection = listHeaderTable.FirstRow.Cells listHeader.InsertText(listHeaderCells(0).ContentRange.End, "Product Name") listHeader.InsertText(listHeaderCells(1).ContentRange.End, "Units in Stock") listHeader.InsertText(listHeaderCells(2).ContentRange.End, "Unit Price") 'Create the row template and fill it with data Dim listRow As SnapDocument = list.RowTemplate Dim listRowTable As Table = listRow.Tables.Create(listRow.Range.End, 1, 3) Dim listRowCells As TableCellCollection = listRowTable.FirstRow.Cells listRow.CreateSnText(listRowCells(0).ContentRange.End, "ProductName") listRow.CreateSnText(listRowCells(1).ContentRange.End, "UnitsInStock") listRow.CreateSnText(listRowCells(2).ContentRange.End, "UnitPrice \$ $0.00") list.EndUpdate() list.Field.Update() document.ExportDocument("SnapDocumentServerTest.rtf", DocumentFormat.Rtf) End SubTip
This example demonstrates how to generate the template in code. You can also use a document template created in the DevExpress Snap at runtime. To learn how to generate a template using the Snap UI, check the Snap List and Document Template topic.
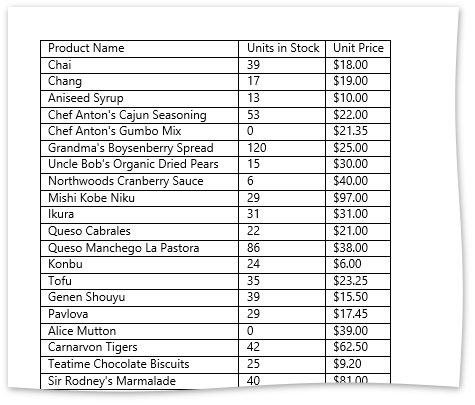
The following image shows the report generated after executing the code above (the document is opened in Microsoft® Word®).
Note
This tutorial concentrates on a very limited set of actions that can be performed with Snap. For more information on the Snap reporting functionality, see the tutorials in the Examples section.