How to: Create a Custom Code Embedding and Assign a Shortcut to it
- 3 minutes to read
The Selection Embedding feature allows you to wrap a selected code block into a boilerplate block (for instance, try..catch).
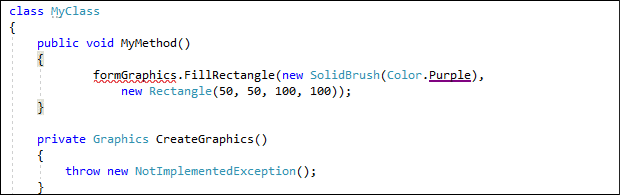
This example shows how to create an embedding that wraps selected text (code, comments) into the following code:
Follow the steps below:
Open the Editor | All Languages | Selection Embeddings options page.
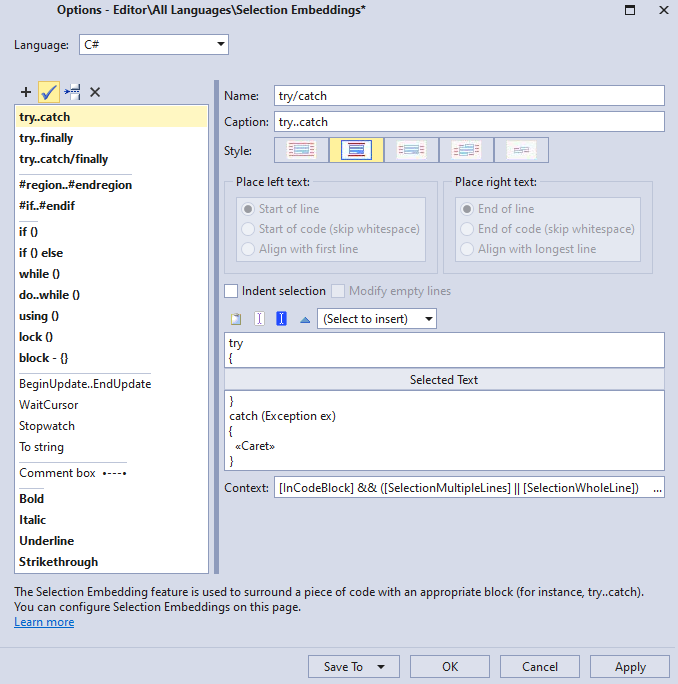
Choose the C# or Visual Basic language in the drop-down list, if it is not active:

To add a new embedding, click the “+” toolbar button.

The new embedding follows the existing selected embedding, as shown in the screenshot below:

Type the Name and Caption for the new embedding in the corresponding text boxes:

The embedding name (for example, region) is used as a parameter for the SelectionEmbed command in the Shortcuts options page, as shows in the screenshot below:

CodeRush shows the embedding caption in the Code Actions menu when you select the Embed Selection code provider.

Leave the style and other options as is, then fill the code embedding in the editor, as shown in the screenshot below:

You can use the context menu to insert text commands and string providers in the embedding code, if required.
Specify the following embedding context in the corresponding text field:

You can choose the embedding context in the “Select Context Provider” dialog. Click the ellipsis button to open this dialog.

Click Apply and OK to save the changes and close the Selection Embeddings options page.
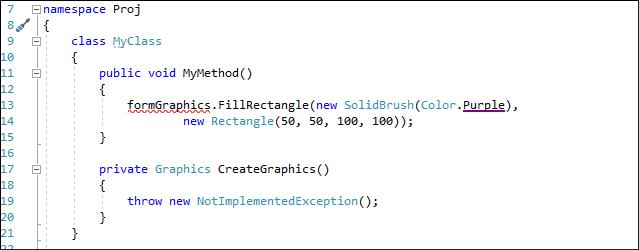
In the code editor, select code you want to embed, run the Embed Selection code provider, and choose the created embedding from the list.
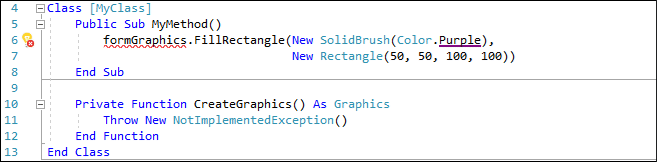
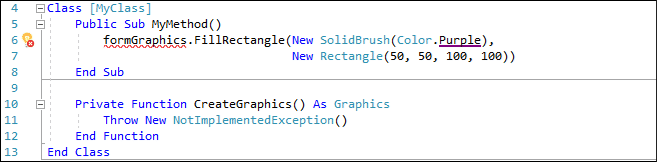
The screencasts below show the “CreateGraphics” selection embedding in action:
To create a shortcut for the created selection embedding:
Choose the CodeRush | Shortcuts… menu item to open the Shortcuts options page.

To add a new shortcut, choose the Selection | Embedding folder in the shortcut list and click the Add a new shortcut toolbar button.

Specify a shortcut in the “First shortcut” text box. In this example, Ctrl+G.
Click the ellipsis button to add special keys (for example, Delete, Tab) or modifiers (Ctrl, Alt, and so on) to your shortcut.

Choose the “SelectionEmbed” command from the list. Specify a parameter for this command that matches the embedding name. In this example, CreateGraphics.

Specify the [CodeEditorHasFocus] context in the “Context” text box. For this, press the ellipsis button in the Context field and select the context provider from the “Select Context Provider” dialog.

Click Apply and OK to apply the changes and close the Shortcuts options page.
Select code you want to embed. You can use the Ctrl+W shortcut to do it. Then, press Ctrl+G to run the “CreateGraphics” code embedding.