Move Type to Namespace
- 2 minutes to read
Purpose
Moves a type to a namespace or file-scoped namespace (for C # 10), and updates all references.
Availability
Available when the caret is in a type declaration and a solution contains two or more namespaces.
How to Use
Place the caret in a type declaration.
Note
The blinking cursor shows the caret’s position at which the Refactoring is available.
- Press the Ctrl + . or Ctrl + ~ shortcut to invoke the Code Actions menu.
- Select Move Type to Namespace from the menu.
Do one of the following actions in the sub menu:
Select a namespace from the list and press Enter to move a type to the existing namespace.

Note
If the target namespace list is too large, CodeRush shows its part. To filter the list, type a namespace name when the menu is open.
Type a namespace name and press Ctrl+Enter or Enter to move a type to a new namespace.

After execution, this refactoring moves the type to the namespace and updates all references.
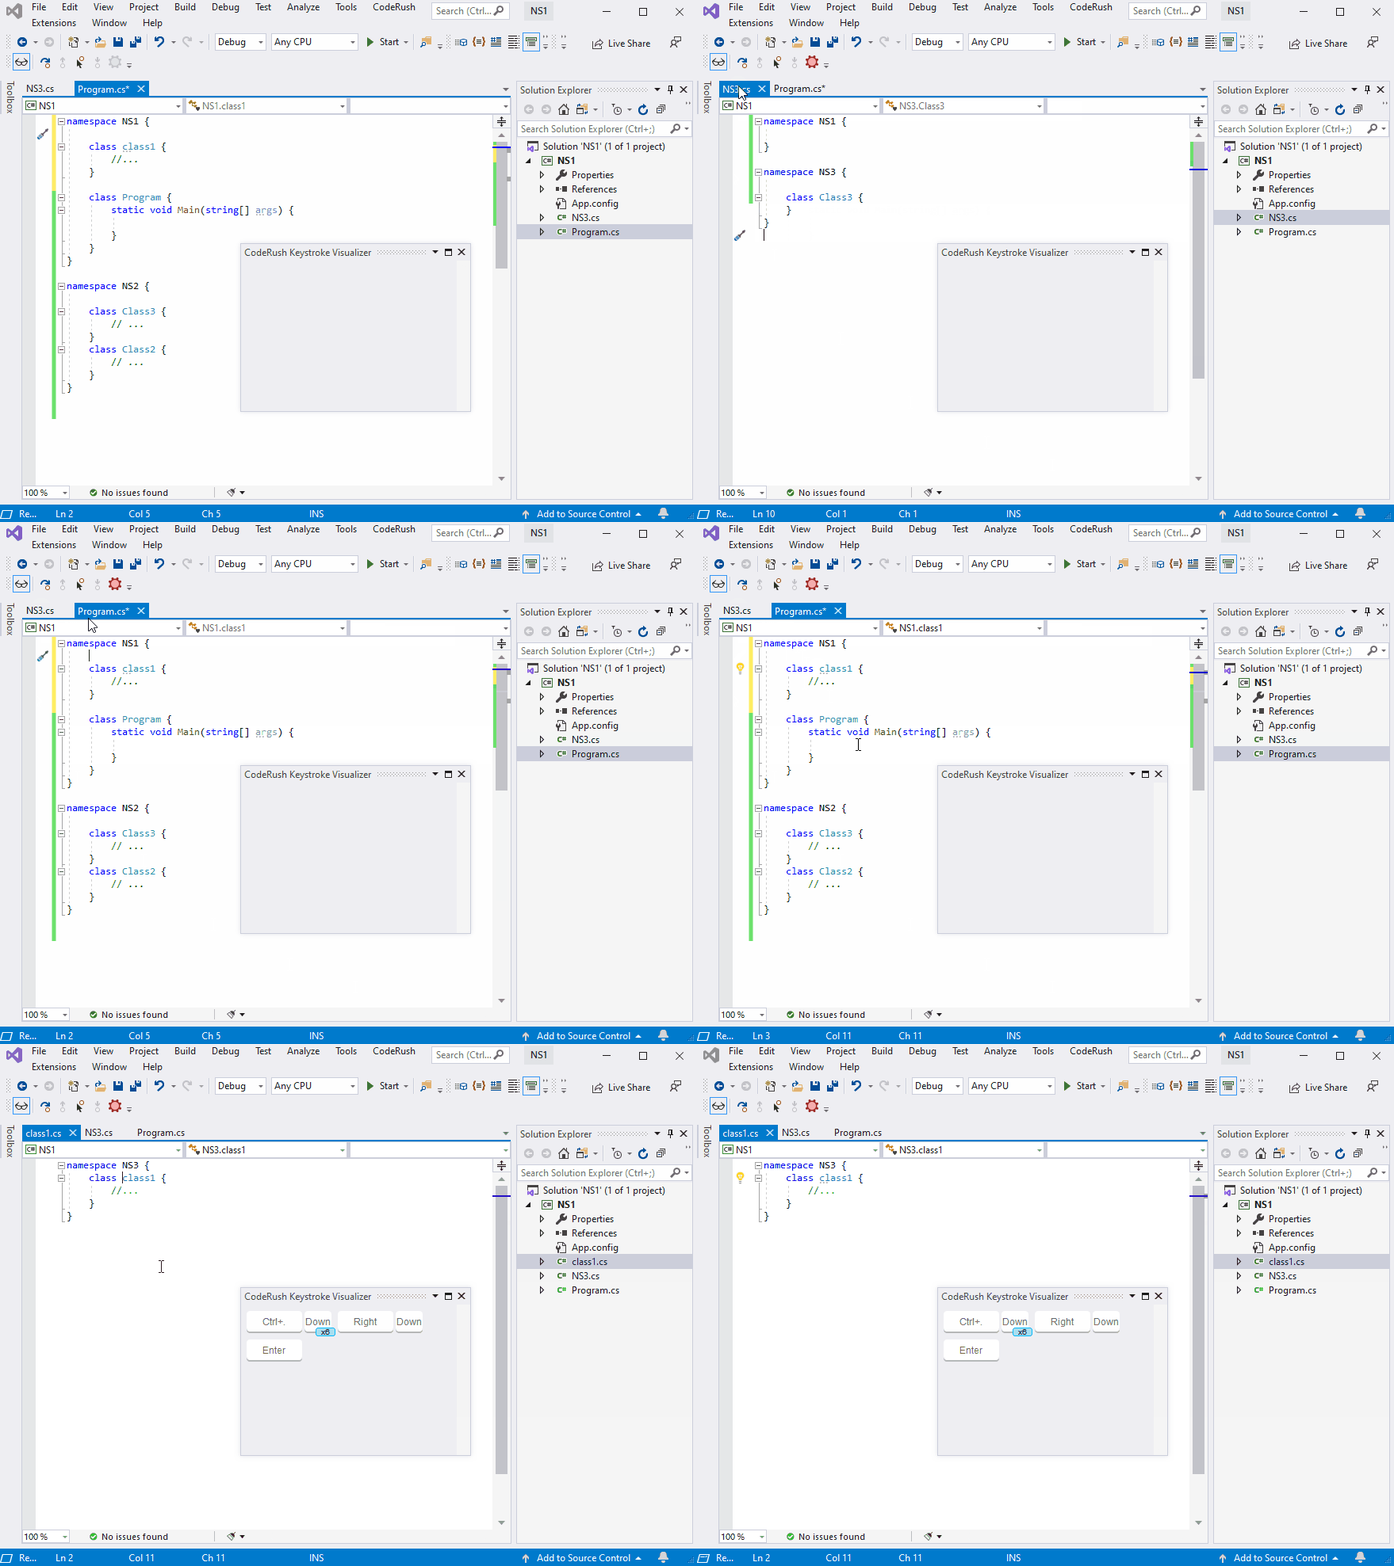
For example, you can run Move Type to Namespace for the code above to move Class2 to the NS2 namespace.
namespace NS1 {
    class Class1 {
        // ...
    }
}

namespace NS2 {
    class Class3 {
        // ...
    }
    class Class2 {
        // ...
    }
}
If a file contains namespaces and the target namespace is not in this file, CodeRush moves the type to a separate file.

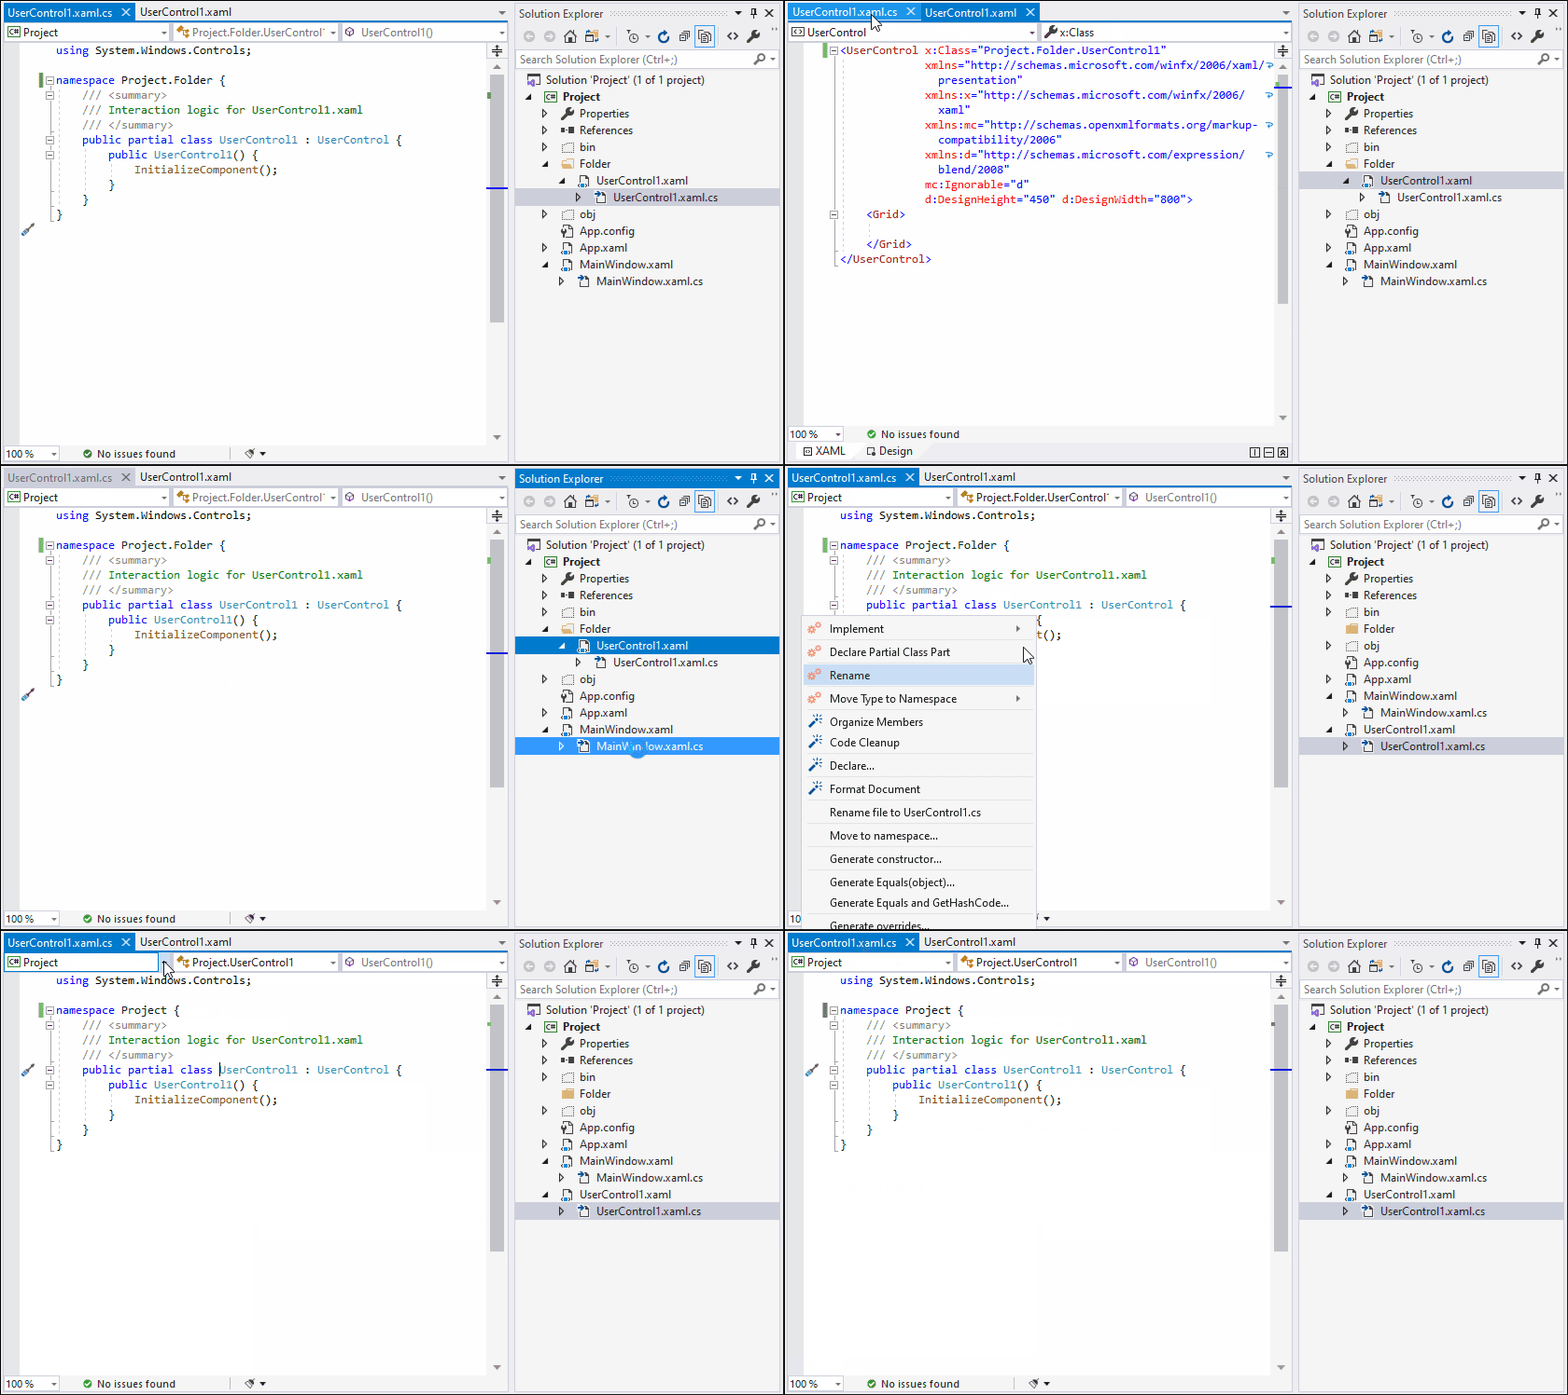
Move Type to Namespace changes the namespace if a file contains one namespace (see examples in the XAML Support section).
XAML Support
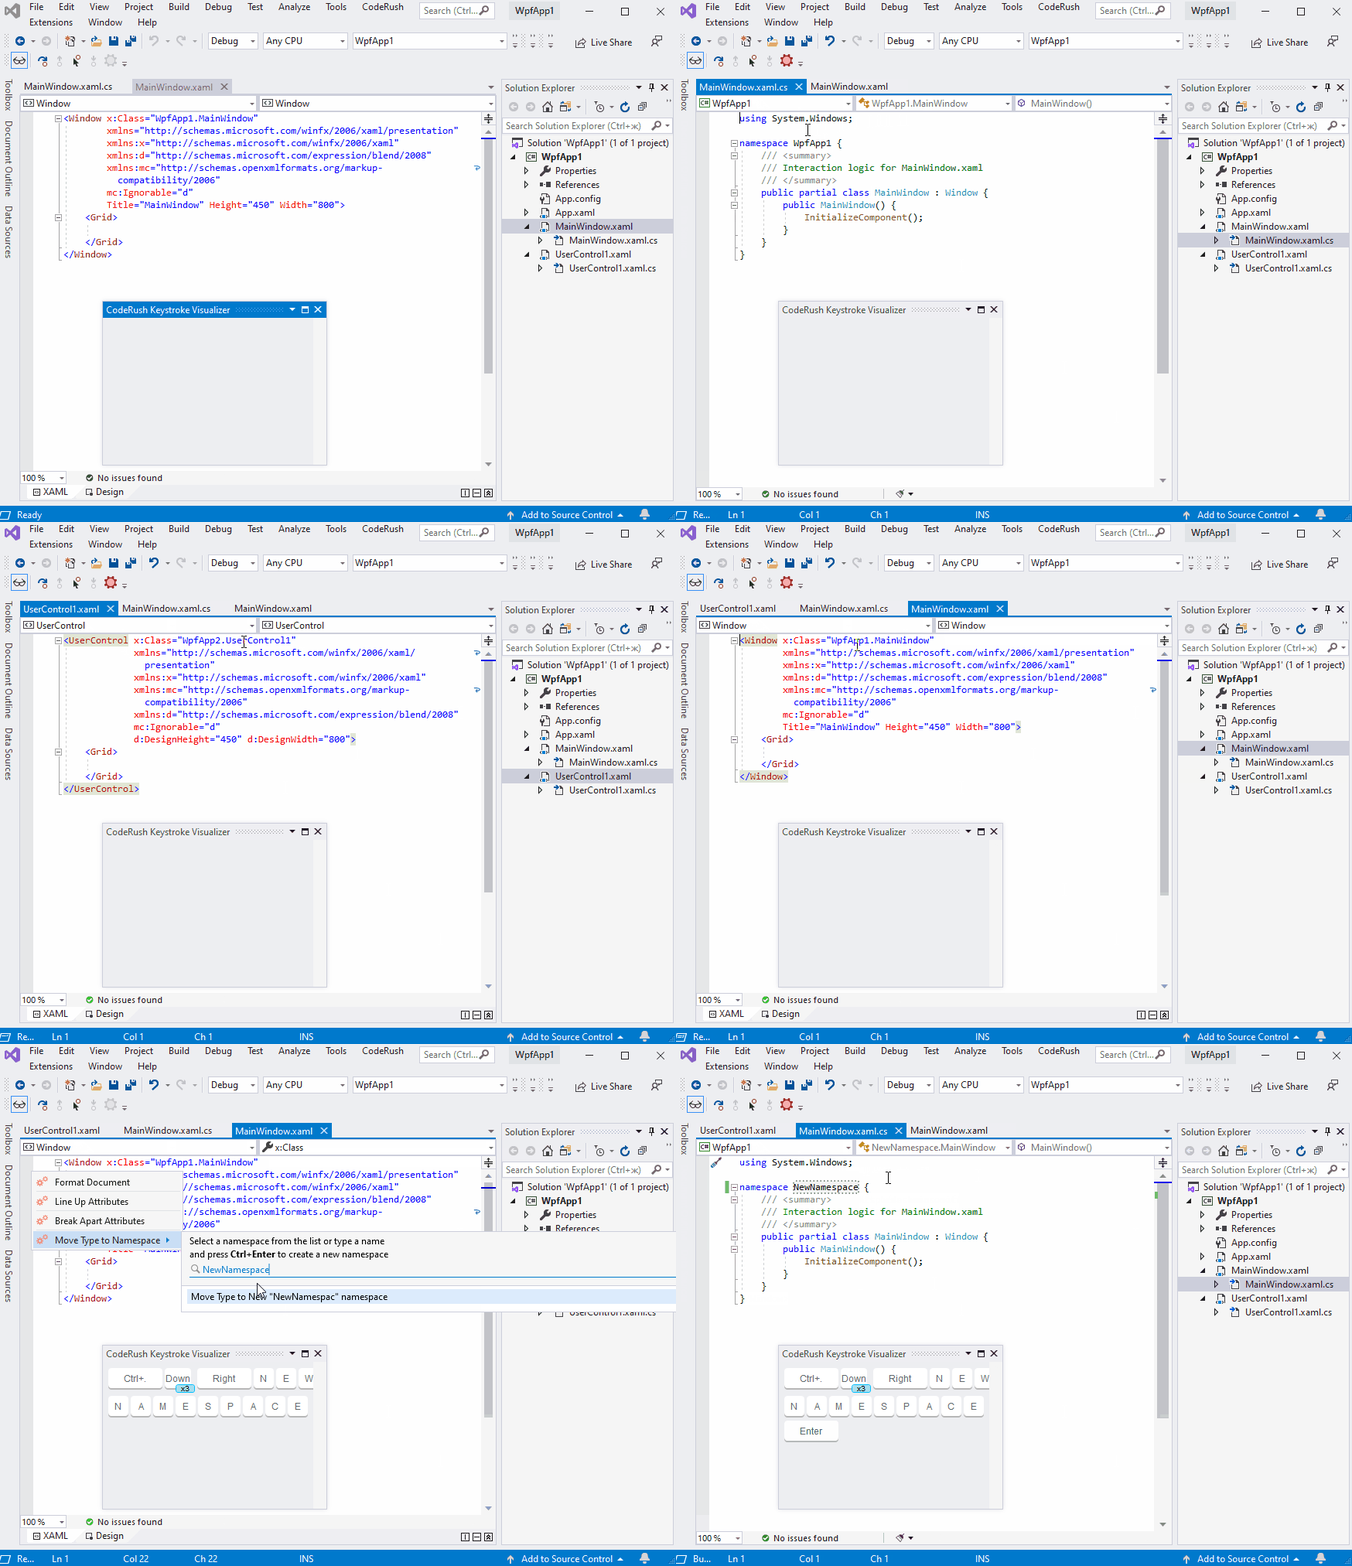
You can run the Move Type to Namespace refactoring in the following file types:
XAML code behind files

XAML files
