Get Started with Grid
- 7 minutes to read
This tutorial describes how to build a simple Blazor application. The application uses a DevExpress Grid component to display and edit a weather forecast.
Create an Application
Refer to the following section for instructions: Create an application. Make sure that resources and themes are linked correctly.
Prepare a Data Source
Make sure your project includes the following classes:
- Data/WeatherForecast.cs
- Data/WeatherForecastService.cs
If you use Microsoft or DevExpress project templates to create a project, these classes are already included. Otherwise, you should add the classes.
Use the following code for the classes:
using System; public class WeatherForecast { public DateTime Date { get; set; } public int TemperatureC { get; set; } public string Forecast { get; set; } public string CloudCover { get; set; } }Make sure that the WeatherForecastService service is registered in the Program.cs file.
// ...
builder.Services.AddSingleton<WeatherForecastService>();
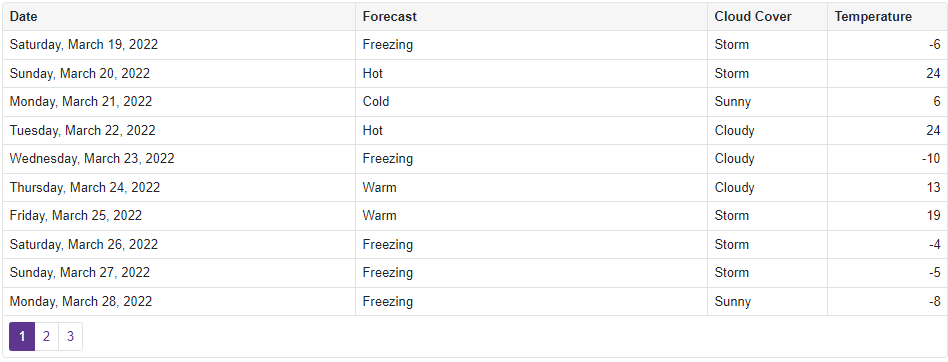
Add a Grid and Bind It to Data
Add
<DxGrid></DxGrid>tags to the Pages/Index.razor page.@page "/index" <DxGrid> </DxGrid>Inject the
WeatherForecastServiceto the page.@page "/index" @inject WeatherForecastService ForecastService <DxGrid> </DxGrid>In the
@codeblock, declare a list ofWeatherForecastobjects –Data. Populate this list in the OnInitialized lifecycle method.@code { List<WeatherForecast> Data { get; set; } protected override void OnInitialized() { Data = ForecastService.GetForecast(); } }Use the Data property to bind the Grid to the
Datalist.<DxGrid Data="@Data"> </DxGrid>
Add Columns
- Add
<Columns></Columns>to the component’s markup to define the Columns collection. Add DxGridDataColumn objects to the
Columnscollection. Use the FieldName property to bind columns to data source fields (Date,Forecast,CloudCover,TemperatureC).You can also set up the following properties to customize the columns:
- Caption - Specifies the column’s caption.
- DisplayFormat - Specifies the format string for column values.
- Width - Specifies the column’s width.
<DxGrid Data="@Data">
    <Columns>
        <DxGridDataColumn FieldName="Date"
                          DisplayFormat="D" />
        <DxGridDataColumn FieldName="Forecast" />
        <DxGridDataColumn FieldName="CloudCover"
                          Width="120px" />
        <DxGridDataColumn FieldName="TemperatureC"
                          Caption="Temperature"
                          Width="120px" />
    </Columns>
</DxGrid>
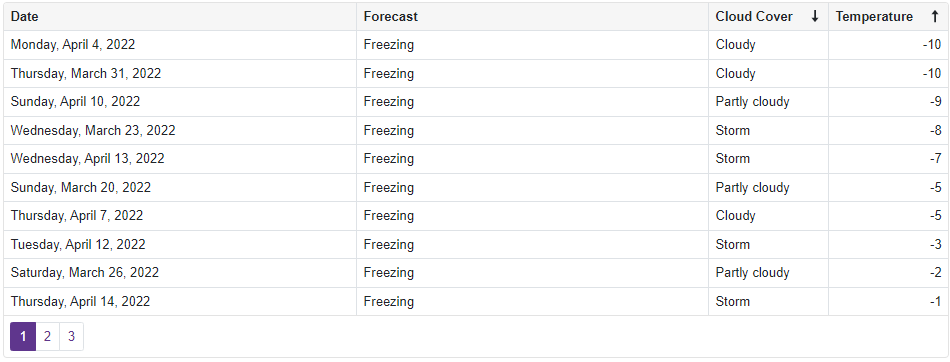
Sort Data
You can use the following operations to sort data in the grid:
- Click the Temperature column header to sort data against this column.
- Hold the Shift key and click the Temperature and Cloud Cover column headers to sort data against these columns.
- Hold the Ctrl key and click column headers to clear sorting.
You can use the SortOrder and SortIndex properties to specify initial sort settings.
<DxGridDataColumn FieldName="CloudCover"
                  SortOrder="GridColumnSortOrder.Descending"
                  SortIndex="1" />
<DxGridDataColumn FieldName="TemperatureC"
                  Caption="Temperature"
                  Width="120px"
                  SortOrder="GridColumnSortOrder.Ascending"
                  SortIndex="0" />
Group Data
Set the ShowGroupPanel property to true to enable users to group data.
<DxGrid Data="@Data"
        ...
        ShowGroupPanel="true">
</DxGrid>
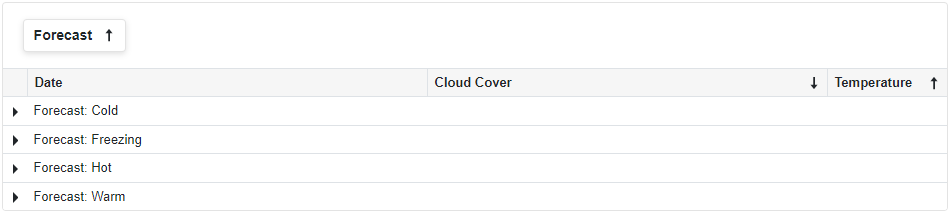
To group data by a column, a user should drag and drop a column header onto the Group Panel.
You can also use the GroupIndex property to specify initial group settings.
<DxGridDataColumn FieldName="Forecast"
                  GroupIndex="0" />
Filter Data
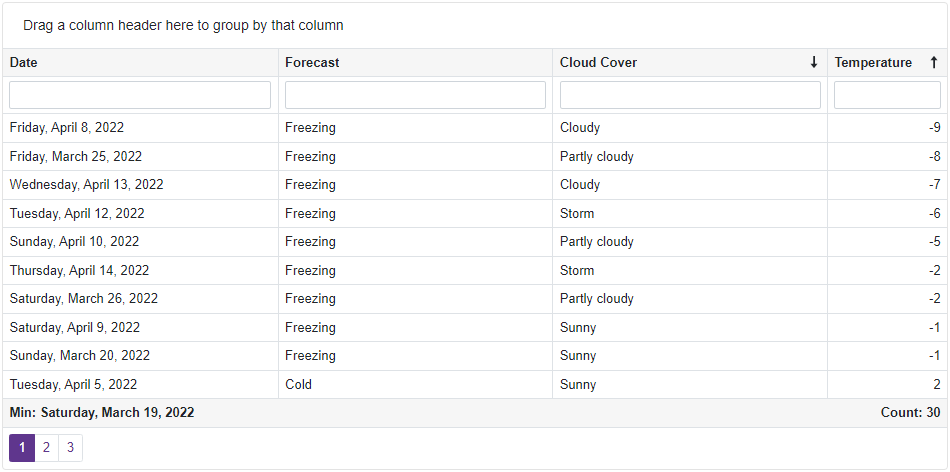
Set the ShowFilterRow property to true to enable users to filter data.
<DxGrid Data="@Data"
        ...
        ShowFilterRow="true">
</DxGrid>
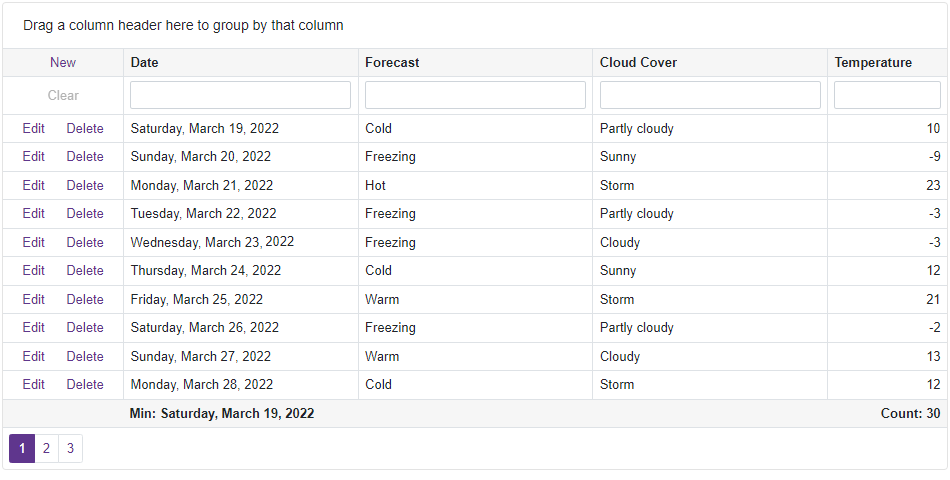
Add Total Summary
Blazor Grid allows you to add total and group summaries. For example, follow the steps below to create the total summary.
- Add
<TotalSummary></TotalSummary>to the component’s markup to define the TotalSummary collection. - Add DxGridSummaryItem objects to the
TotalSummarycollection and specify their properties (SummaryType, FieldName, and so on).
<DxGrid Data="@Data"
        ... >
    ...
    <TotalSummary>
        <DxGridSummaryItem FieldName="Date"
                           SummaryType=GridSummaryItemType.Min
                           ValueDisplayFormat="D" />
        <DxGridSummaryItem FooterColumnName="TemperatureC"
                           SummaryType=GridSummaryItemType.Count />
    </TotalSummary>
</DxGrid>
Edit Data
Follow the steps below to allow users to edit data:
Declare a DxGridCommandColumn object in the
Columnscollection. The command column contains buttons that allow users to edit and delete rows.<DxGrid Data="@Data"> <Columns> <DxGridCommandColumn Width="120px"/> @* declare other columns *@ </Columns> </DxGrid>Add the
<EditFormTemplate></EditFormTemplate>to the component’s markup to define the edit form’s content. Use the template’scontextparameter to access the EditModel and DataItem. In the template, add data editors and implement two-way binding between editor values and edit model fields.The code below uses the DxFormLayout component to display editors for all visible data columns.
<DxGrid Data="@Data">
    <Columns>
        @* declare columns *@
    <Columns>
    <TotalSummary>
        @* add summary items *@
    </TotalSummary>
    <EditFormTemplate Context="EditFormContext">
        @{
            var forecast = (WeatherForecast)EditFormContext.EditModel;
        }
        <DxFormLayout>
            <DxFormLayoutItem Caption="Date">
                <DxDateEdit @bind-Date="@forecast.Date" />
            </DxFormLayoutItem>
            <DxFormLayoutItem Caption="Forecast">
                <DxTextBox @bind-Text="@forecast.Forecast" />
            </DxFormLayoutItem>
            <DxFormLayoutItem Caption="Cloud Cover">
                <DxTextBox @bind-Text="@forecast.CloudCover" />
            </DxFormLayoutItem>
            <DxFormLayoutItem Caption="Temperature">
                <DxSpinEdit @bind-Value="@forecast.TemperatureC" />
            </DxFormLayoutItem>
        </DxFormLayout>
    </EditFormTemplate>
</DxGrid>
Implement handlers for the following events to post the changes to the data source:
- EditModelSaving - Fires when a user adds a new row or edits an existing row.
- DataItemDeleting - Fires when a user deletes a data row.
<DxGrid Data="@Data"
        EditModelSaving="OnEditModelSaving"
        DataItemDeleting="OnDataItemDeleting">
    <Columns>
        @* declare columns *@
    <Columns>
    <TotalSummary>
        @* add summary items *@
    </TotalSummary>
    <EditFormTemplate Context="EditFormContext">
        @* define the edit form content *@
    </EditFormTemplate>
</DxGrid>

@code {
    // ...

    void OnDataItemDeleting(GridDataItemDeletingEventArgs e) {
        Data.Remove(e.DataItem as WeatherForecast);
    }

    void OnEditModelSaving(GridEditModelSavingEventArgs e) {
        var editModel = (WeatherForecast)e.EditModel;
        var dataItem = e.IsNew ? new WeatherForecast() : (WeatherForecast)e.DataItem;

        dataItem.Date = editModel.Date;
        dataItem.TemperatureC = editModel.TemperatureC;
        dataItem.CloudCover = editModel.CloudCover;

        if (e.IsNew)
            Data.Add(dataItem as WeatherForecast);
    }
}
Tip
For detailed information on how to enable data editing and use edit-related options, refer to the following topic: Edit Data and Validate Input.
Complete Code
@page "/index"
@inject WeatherForecastService ForecastService

<DxGrid Data="@Data"
       ShowGroupPanel="true"
       ShowFilterRow="true"
       DataItemDeleting="OnDataItemDeleting"
       EditModelSaving="OnEditModelSaving">
   <Columns>
       <DxGridCommandColumn Width="120px"/>
       <DxGridDataColumn FieldName="Date"
                         DisplayFormat="D" />
       <DxGridDataColumn FieldName="Forecast"/>
       <DxGridDataColumn FieldName="CloudCover"
                         SortOrder="GridColumnSortOrder.Descending"
                         SortIndex="1" />
       <DxGridDataColumn FieldName="TemperatureC"
                         Caption="Temperature"
                         Width="120px"
                         SortOrder="GridColumnSortOrder.Ascending"
                         SortIndex="0" />
   </Columns>
   <TotalSummary>
       <DxGridSummaryItem FieldName="Date"
                          SummaryType=GridSummaryItemType.Min
                          ValueDisplayFormat="D" />
       <DxGridSummaryItem FooterColumnName="TemperatureC"
                          SummaryType=GridSummaryItemType.Count />
   </TotalSummary>
   <EditFormTemplate Context="EditFormContext">
       @{
           var forecast = (WeatherForecast)EditFormContext.EditModel;
       }
       <DxFormLayout>
           <DxFormLayoutItem Caption="Date">
               <DxDateEdit @bind-Date="@forecast.Date" />
           </DxFormLayoutItem>
           <DxFormLayoutItem Caption="Forecast">
               <DxTextBox @bind-Text="@forecast.Forecast" />
           </DxFormLayoutItem>
           <DxFormLayoutItem Caption="Cloud Cover">
               <DxTextBox @bind-Text="@forecast.CloudCover" />
           </DxFormLayoutItem>
           <DxFormLayoutItem Caption="Temperature">
               <DxSpinEdit @bind-Value="@forecast.TemperatureC" />
           </DxFormLayoutItem>
       </DxFormLayout>
   </EditFormTemplate>
</DxGrid>

@code {
   List<WeatherForecast> Data { get; set; }

   protected override void OnInitialized() {
       Data = ForecastService.GetForecast();
   }

   void OnDataItemDeleting(GridDataItemDeletingEventArgs e) {
       Data.Remove(e.DataItem as WeatherForecast);
   }

   void OnEditModelSaving(GridEditModelSavingEventArgs e) {
       var editModel = (WeatherForecast)e.EditModel;
       var dataItem = e.IsNew ? new WeatherForecast() : (WeatherForecast)e.DataItem;

       dataItem.Date = editModel.Date;
       dataItem.TemperatureC = editModel.TemperatureC;
       dataItem.CloudCover = editModel.CloudCover;

       if (e.IsNew)
           Data.Add(dataItem as WeatherForecast);
   }
}
More Features
For more information about Grid features, refer to the root topic.