How to: Add a Grid Column with an Action (ASP.NET Core Blazor and ASP.NET Web Forms)
- 4 minutes to read
This topic explains how to add an inline Action to a List View’s grid in an XAF ASP.NET Core Blazor or ASP.NET Web Forms application.
This functionality has the following limitations:
- XAF supports it only for SimpleAction or PopupWindowShowAction.
- The Action must mapped to one of the following Action Container categories:
Edit,RecordEdit, orListView.
Note
For the purposes of this topic, you can use the MainDemo.NET (ASP.NET Core Blazor) and MainDemo.NETFramework (ASP.NET Web Forms) applications installed as a part of the XAF package. The default location of the applications is %PUBLIC%\Documents\DevExpress Demos 24.1\Components\XAF.
Use a View Controller to Add a PopupWindowShowAction to a List View Grid
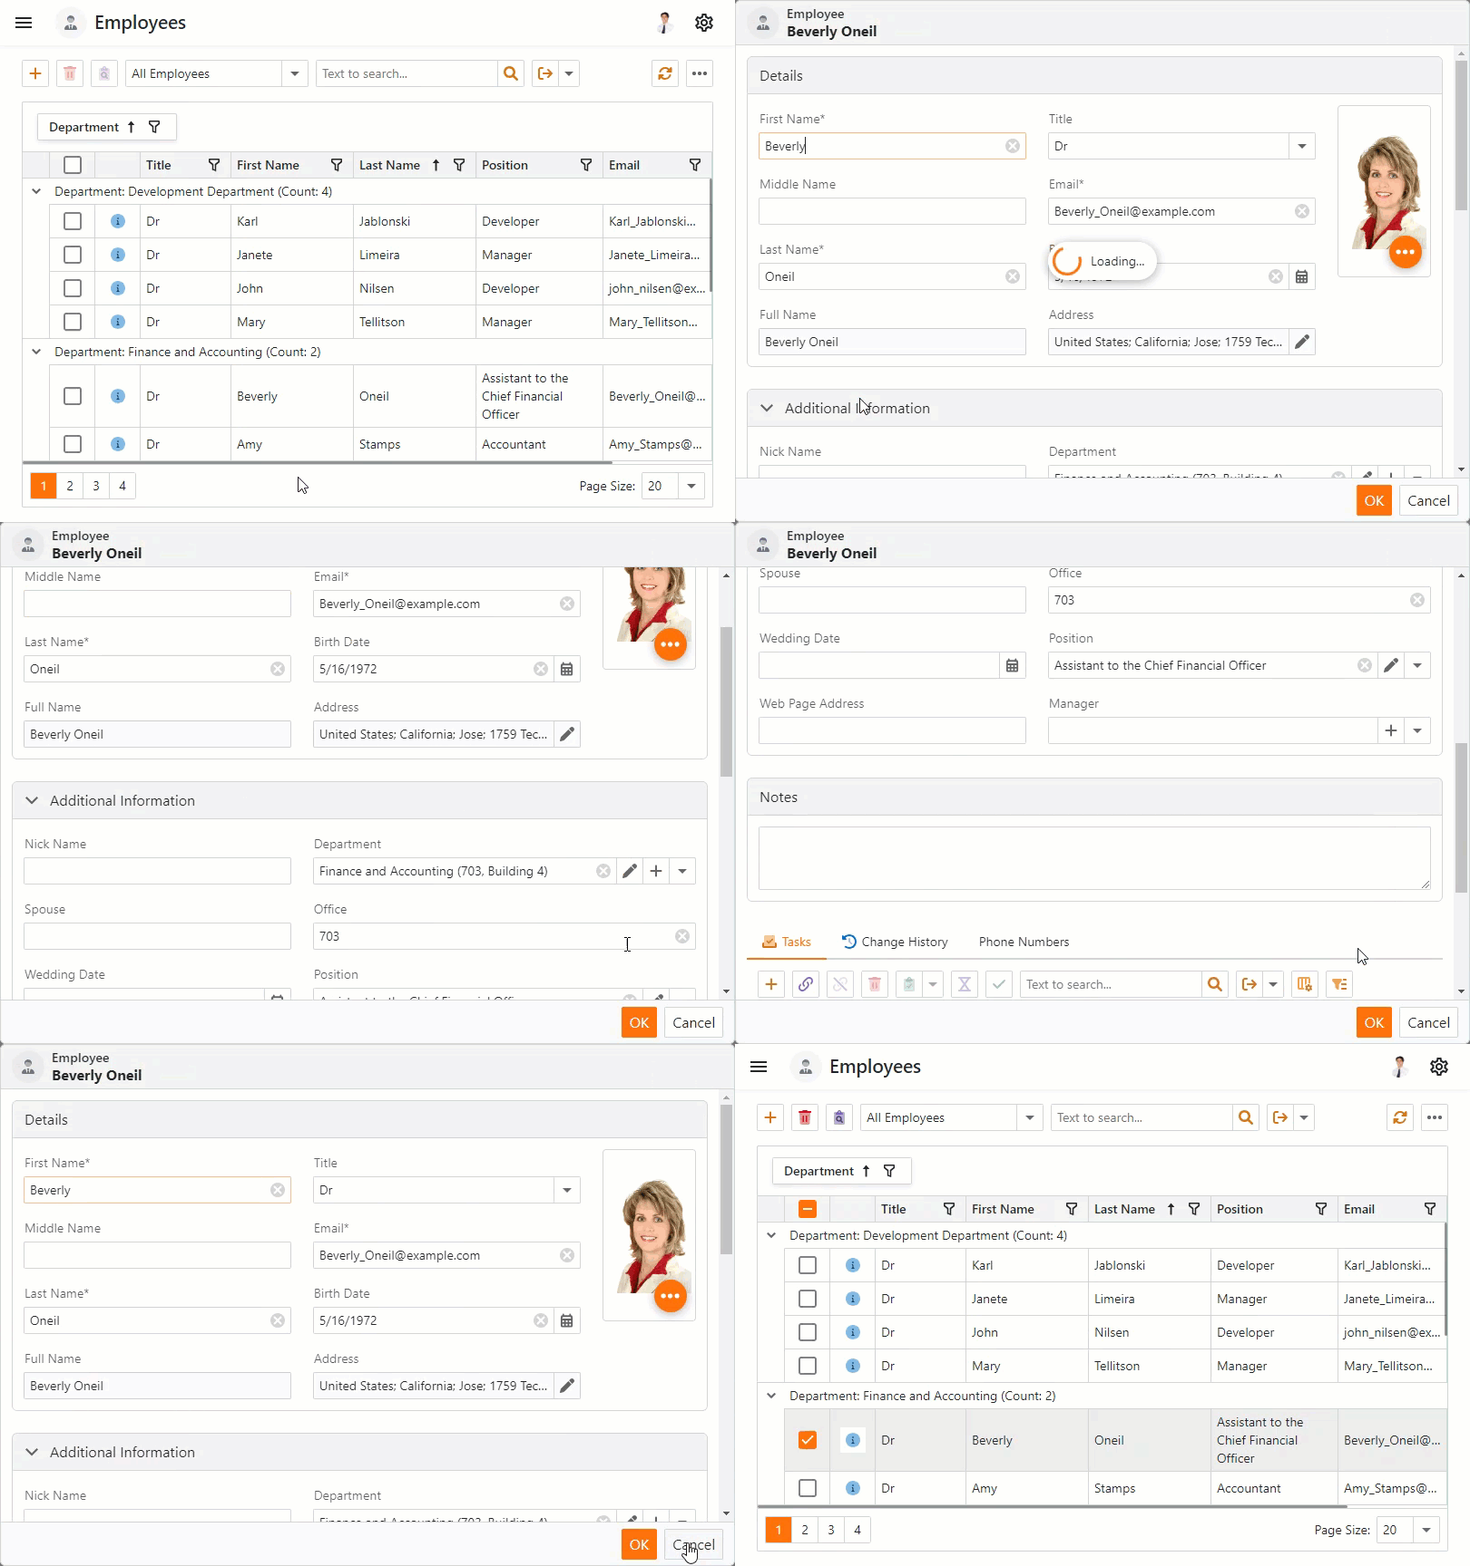
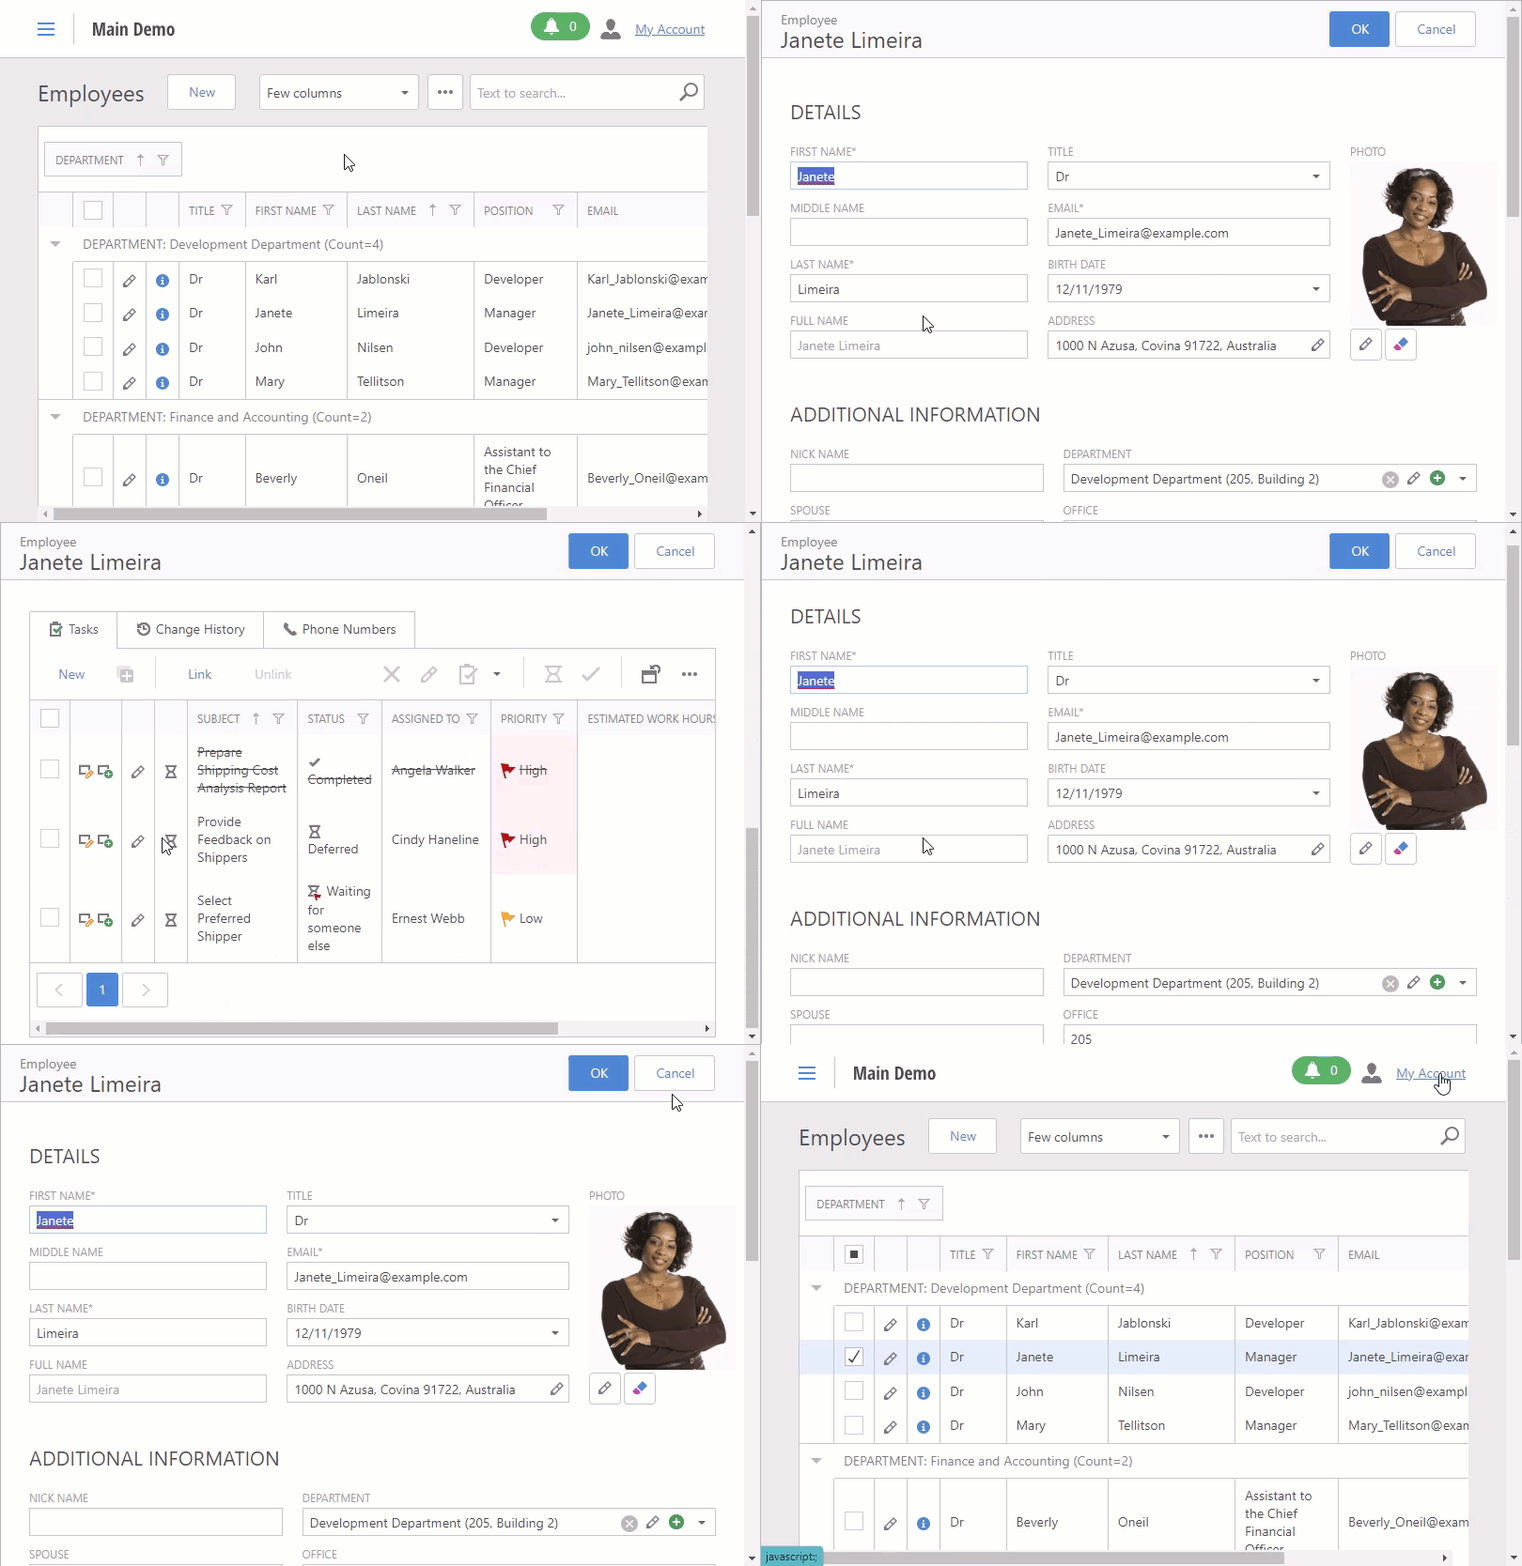
The instructions below explain how to add an Action to the Employee List View grid. The Action opens the selected Employee object’s Detail View in a pop-up window.
Navigate to the MainDemo.Module\Controllers folder. Create a new View Controller and name it ShowPopupViewController.
Replace the auto-generated code with the following code snippet:
using DevExpress.ExpressApp.Actions;
using DevExpress.ExpressApp.Editors;
using DevExpress.ExpressApp;
using DevExpress.Persistent.Base;
using MainDemo.Module.BusinessObjects;

namespace MainDemo.Module.Controllers {
    public partial class ShowPopupViewController : ObjectViewController<ListView, Employee> {
        private PopupWindowShowAction popupAction;
        public ShowPopupViewController() : base() {
            popupAction = new PopupWindowShowAction(this, "ShowPopup", PredefinedCategory.ListView) {
                SelectionDependencyType = SelectionDependencyType.RequireSingleObject,
                ImageName = "State_Validation_Information"
            };
            popupAction.CustomizePopupWindowParams += PopupAction_CustomizePopupWindowParams;
        }
        private void PopupAction_CustomizePopupWindowParams(object sender, CustomizePopupWindowParamsEventArgs e) {
            IObjectSpace objectSpace = e.Application.CreateObjectSpace(typeof(Employee));
            Employee currentObject = objectSpace.GetObject(ViewCurrentObject);
            DetailView detailView = e.Application.CreateDetailView(objectSpace, currentObject);
            detailView.ViewEditMode = ViewEditMode.Edit;
            e.View = detailView;
            e.Maximized = true;
        }
    }
}
Rebuild the project and run the application. Navigate to the
EmployeeList View. Click the Action’s icon in a grid row.
- ASP.NET Core Blazor

- ASP.NET Web Forms

Use ActionAttribute to Add an Inline Action to a List View Grid
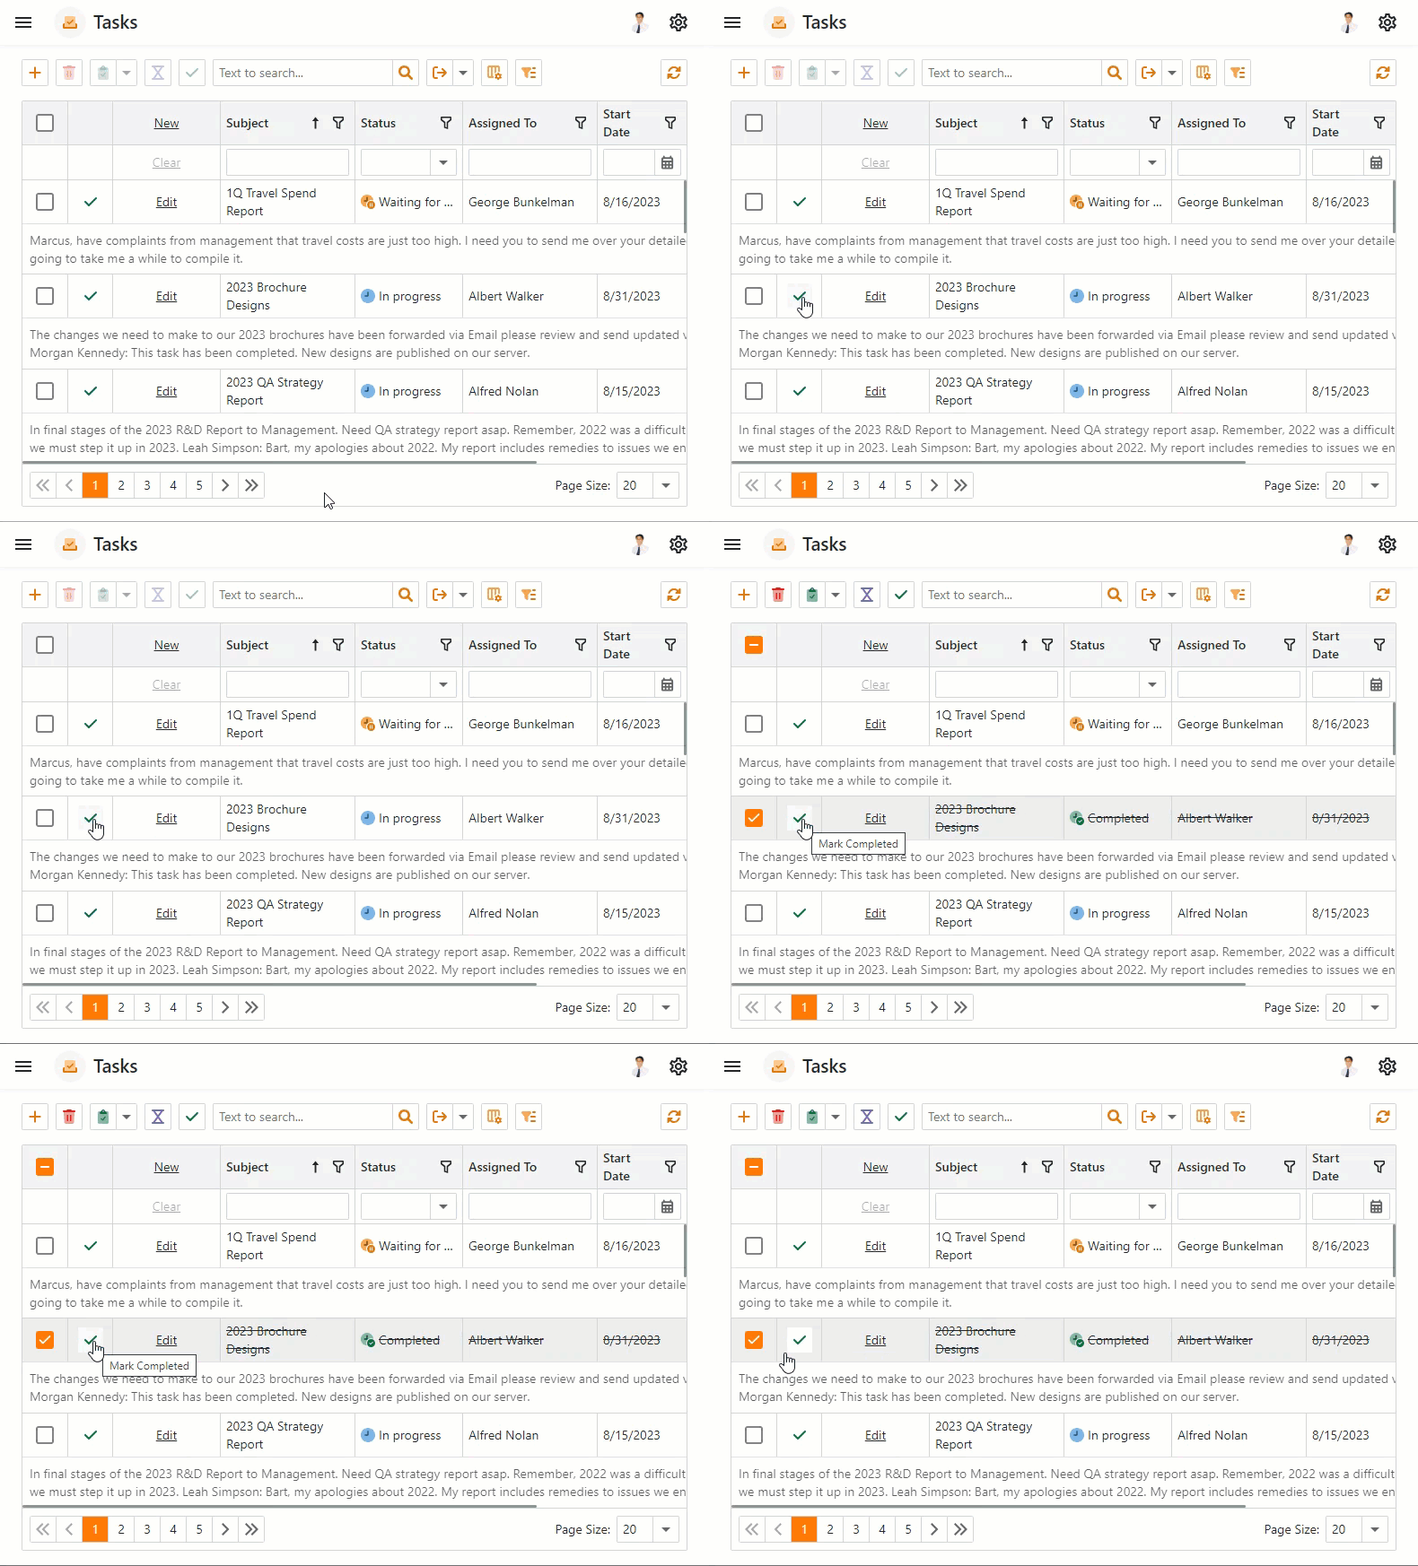
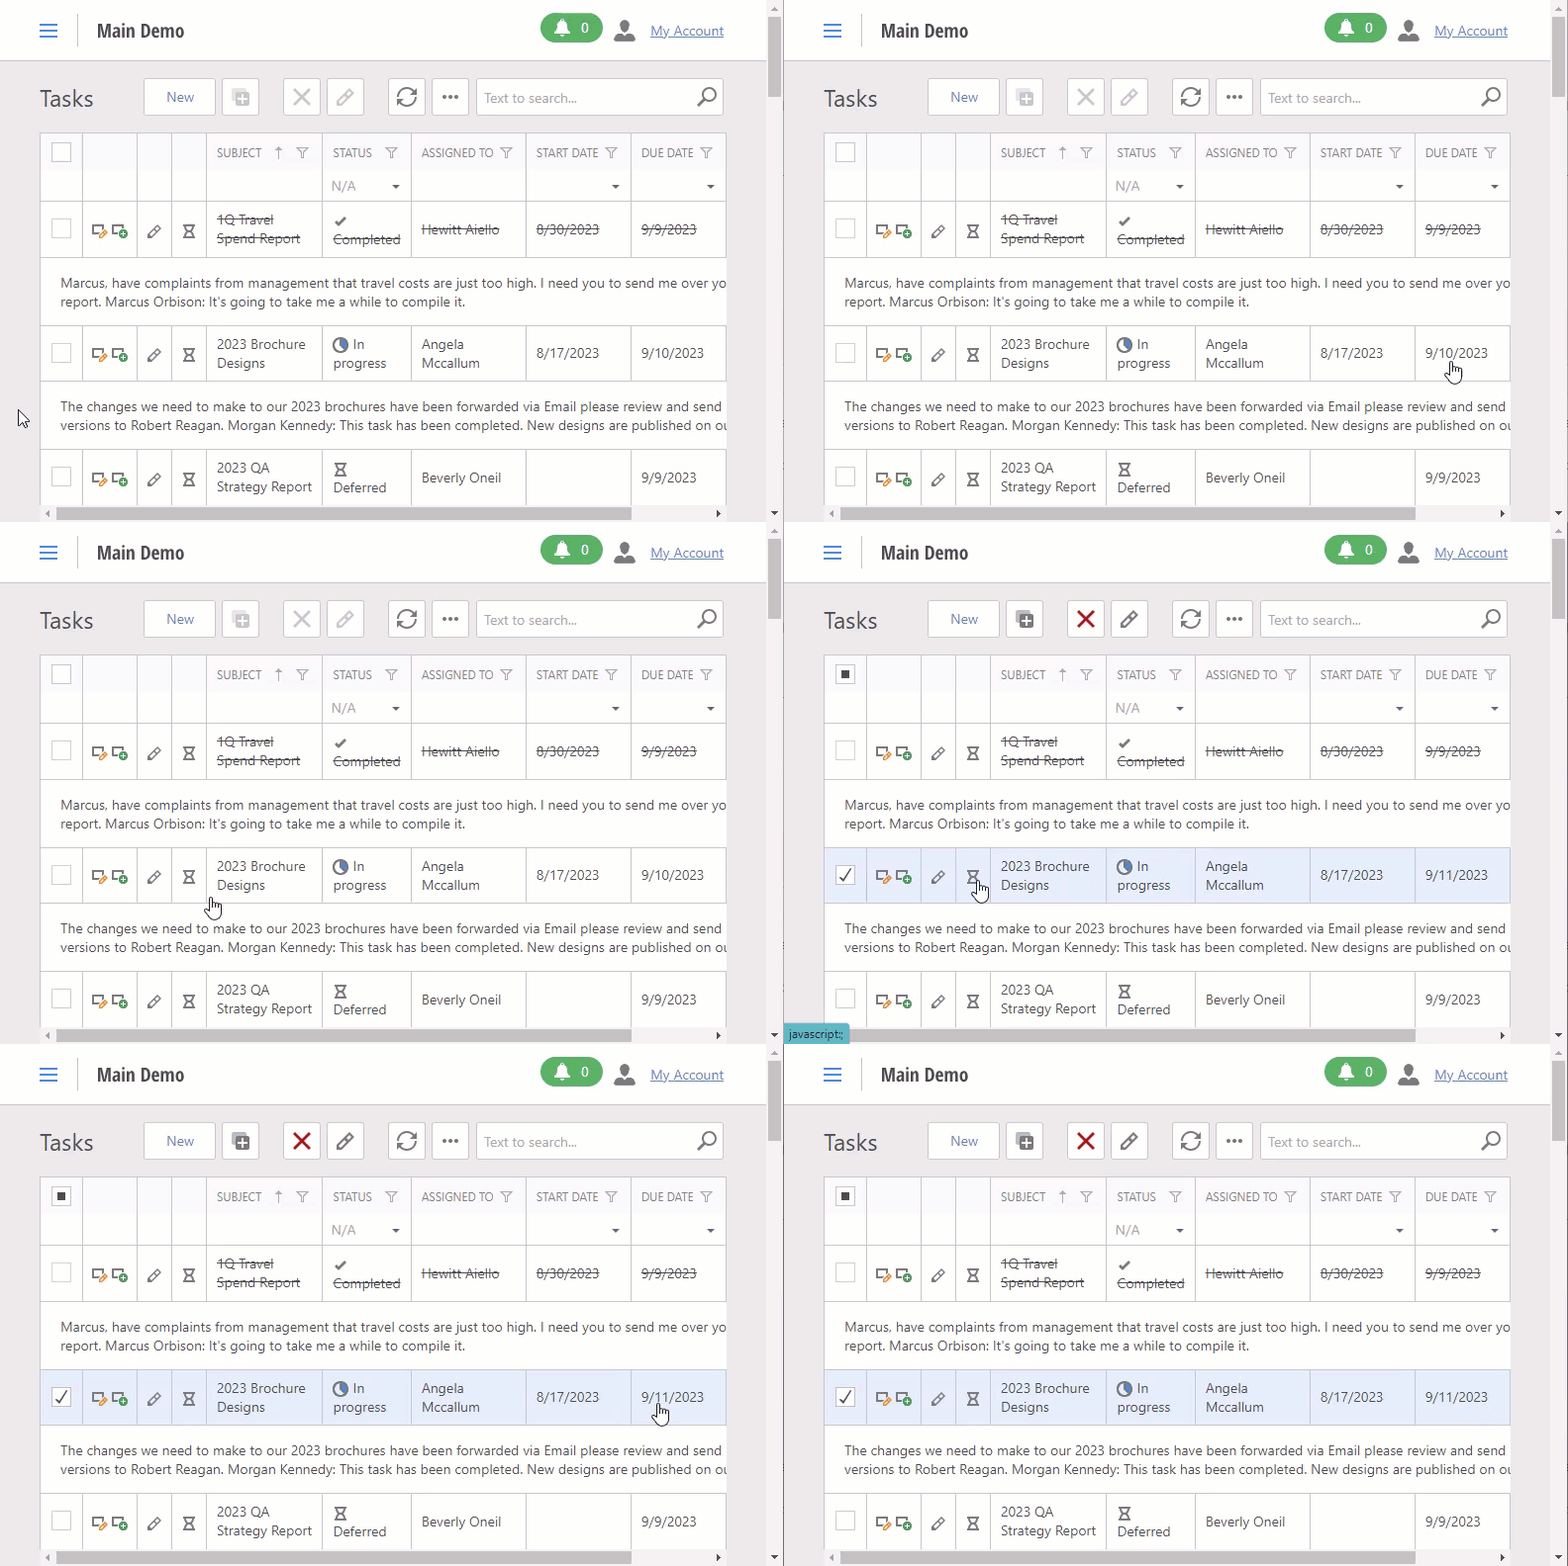
The instructions below explain how use a method of an entity class and ActionAttribute to add an Action to the Task List View grid.
In ASP.NET Core Blazor application, when a user clicks the Action, the status of the selected Task object changes to Completed.
In ASP.NET Web Forms application, when a user clicks the Action, the due date of the selected DemoTask object shifts forward by one day.
Navigate to the MainDemo.Module\BusinessObjects folder and open the Task.cs file.
Add the
MarkCompletedmethod to the class:// ... using System.ComponentModel; using DevExpress.Persistent.Base; using DevExpress.Persistent.BaseImpl.EF; using System.Text.Json.Serialization; namespace MainDemo.Module.BusinessObjects; [DefaultProperty(nameof(Subject))] public class Task : BaseObject { // ... [Action(ImageName = "State_Task_Completed", SelectionDependencyType = MethodActionSelectionDependencyType.RequireSingleObject)] public void MarkCompleted() { Status = TaskStatus.Completed; } // ... } //...ActionAttribute maps the Action to the
RecordEditAction Container category.Rebuild the project and run the application. Navigate to the
TaskList View and click the Action’s icon in a grid row.
- ASP.NET Core Blazor

- ASP.NET Web Forms

Customize Inline Action Control (ASP.NET Core Blazor)
The code sample below demonstrates how to change the tooltip message of inline Actions. Actions are embedded in a List View (grid control) that displays Task objects.
Cast the CustomizeControlEventsArgs.Control object to ListEditorInlineActionControl and handle its CustomizeInlineActionButton event:
using DevExpress.ExpressApp;
using DevExpress.ExpressApp.Blazor.Editors.ActionControls;
using DevExpress.ExpressApp.SystemModule;
using MainDemo.Module.BusinessObjects;

namespace MainDemo.Blazor.Server.Controllers {
    public class CustomizeInlineActionController : ObjectViewController<ListView, DemoTask> {
        private void Action_CustomizeControl(object sender, DevExpress.ExpressApp.Actions.CustomizeControlEventArgs e) {
            if (e.Control is ListEditorInlineActionControl control) {
                control.CustomizeInlineActionButton += Control_CustomizeInlineActionButton;
            }
        }
        private void Control_CustomizeInlineActionButton(object sender, DevExpress.ExpressApp.Blazor.Components.CustomizeInlineActionButtonEventArgs e) {
            if (e.DataItem is DemoTask task) {
                e.Tooltip = $"Change the status '{task.Status}' to 'Completed'";
            }
        }
        protected override void OnFrameAssigned() {
            base.OnFrameAssigned();
            var objectMethodController = Frame.GetController<ObjectMethodActionsViewController>();
            if (objectMethodController != null) {
                var action = objectMethodController.Actions.FirstOrDefault(s => s.Id == "Task.MarkCompleted");
                if (action != null) {
                    action.CustomizeControl += Action_CustomizeControl;
                }
            }
        }
    }
}