Add the Middle Tier Server (ASP.NET Core Web API) to an existing WinForms Application (.NET 6)
- 3 minutes to read
This topic contains step-by-step instructions on how to add a Web API project to a WinForms application and use it as the Middle Tier Server.
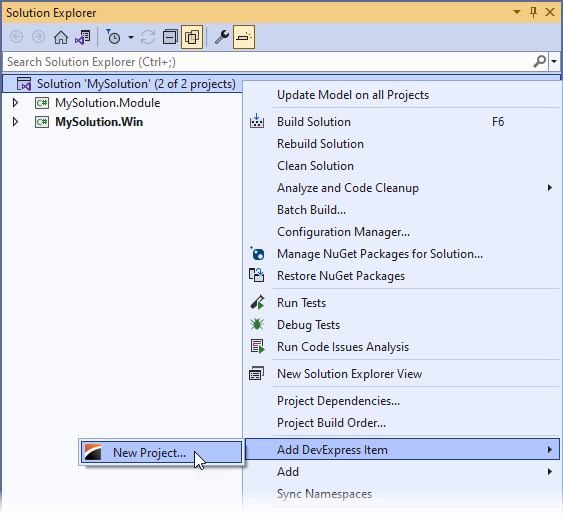
Use the Solution Wizard to add a Web API project to your application. Right-click the solution in the Solution Explorer and choose Add DevExpress Item | New Project….
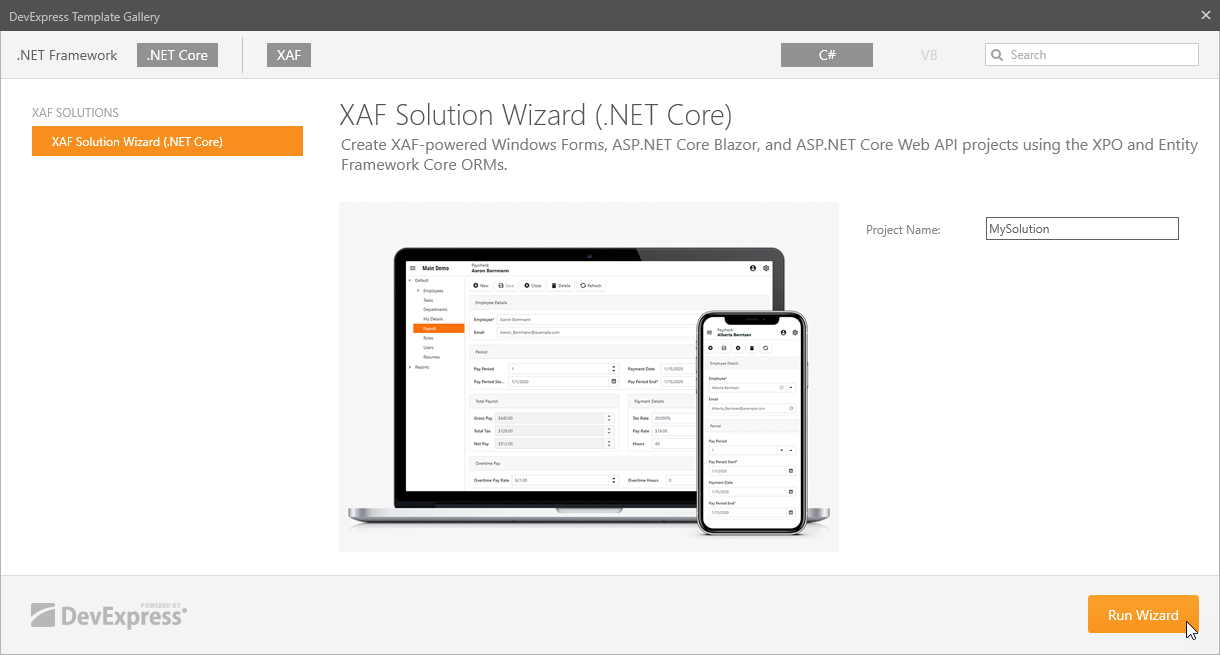
Select the .NET Core platform and run the XAF Solution Wizard.
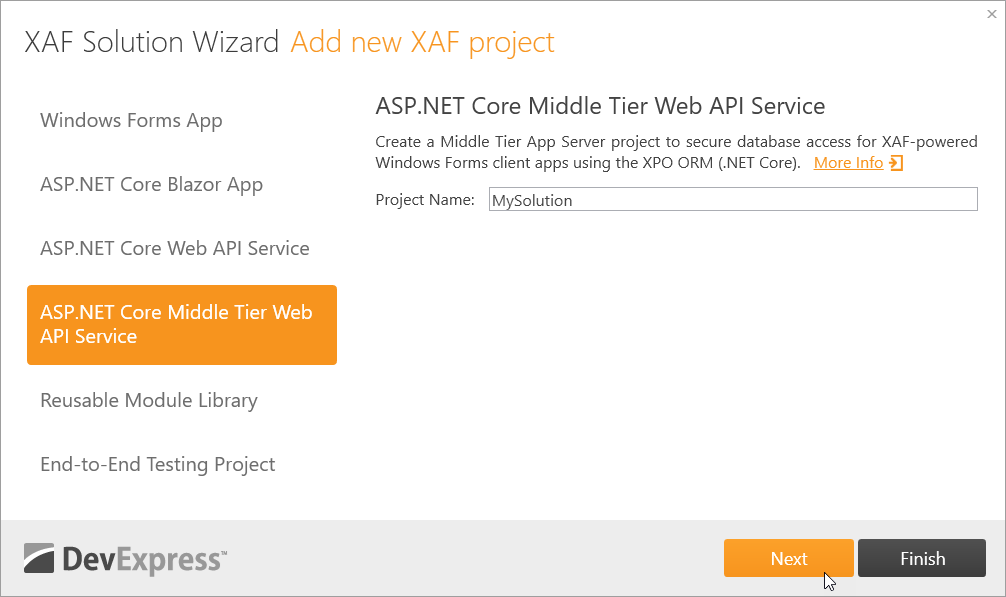
Choose the ASP.NET Core Middle Tier Web API Service option and specify the project name.
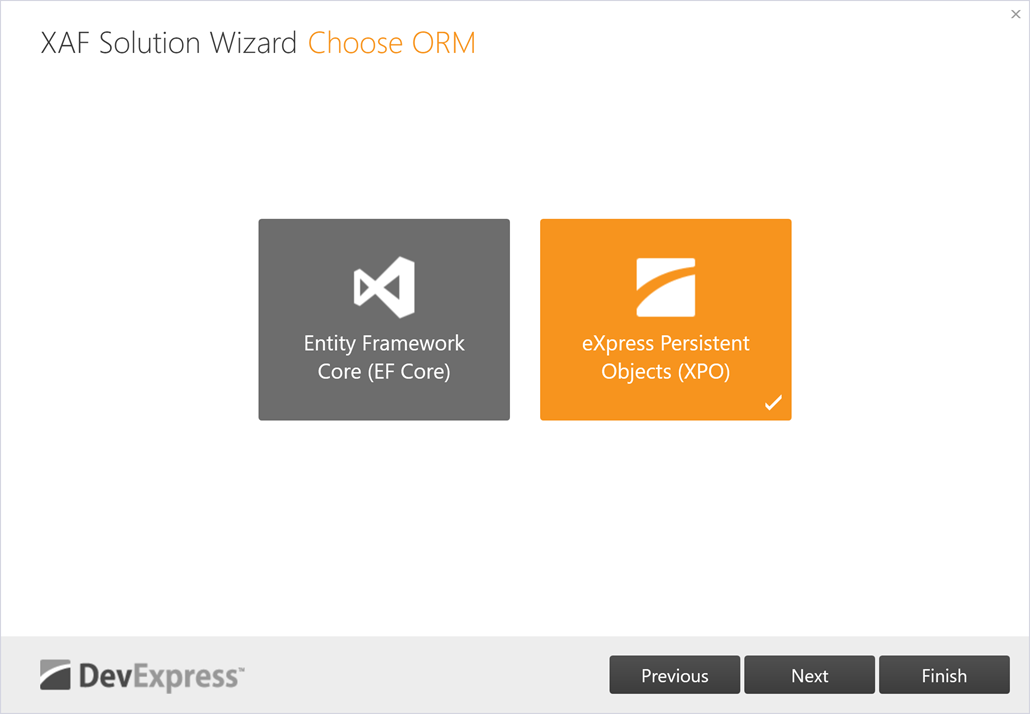
Select the eXpress Persistent Objects ORM for your application.
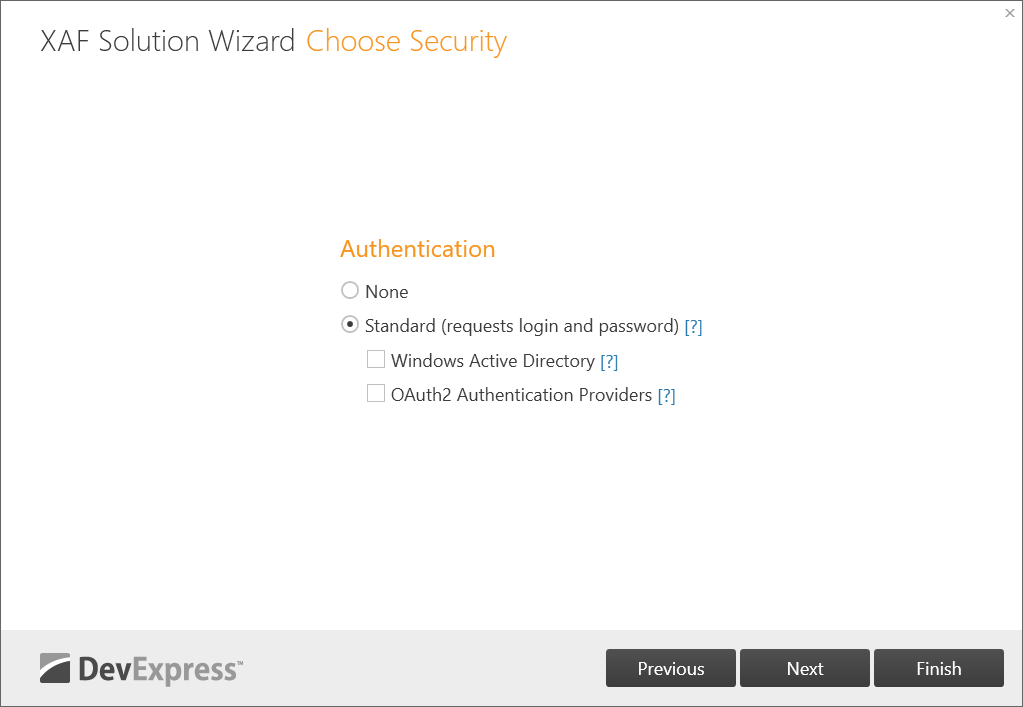
Choose Standard authentication on the Choose Security page. The wizard generates JWT authentication scaffolding code.
The wizard adds the MySolution.MiddleTierWebApi project to the solution.
Install the DevExpress.ExpressApp.Security.Xpo.Extensions.Win NuGet package to the MySolution.Win project.
The Security System requires the
ApplicationUserandApplicationUserLoginInfobusiness objects to store user information. If the MySolution.Module project does not contain these objects, add theApplicationUserandApplicationUserLoginInfoobjects to the MySolution.Module project as described in Step 1 of the following section: Use Active Directory and OAuth2 Authentication Providers in ASP.NET Core Blazor Applications: Common Steps.If your application is created with DevExpress v21.2 and below, add the following code to the MySolution.Win\Program.cs file:
File: MySolution.Win\Program.cs
using System.Net;
using System.Net.Http.Headers;
using System.Net.Http;
using System.Net.Http.Json;
using DevExpress.ExpressApp.Security.ClientServer;
// ...
namespace MySolution.Win {
    static class Program {
        static void Main() {
            // ...
            Tracing.Initialize();
            MySolutionWindowsFormsApplication winApplication = new MySolutionWindowsFormsApplication();
            var httpClient = new HttpClient();
            httpClient.BaseAddress = new Uri("https://localhost:44318/");
            var webApiSecuredClient = new WebApiSecuredDataServerClient(httpClient, winApplication.TypesInfo);
            var security = new WebApiMiddleTierClientSecurity(webApiSecuredClient) { IsSupportChangePassword = true };
            winApplication.Security = security;
            winApplication.CreateCustomObjectSpaceProvider += (s, e) => {
                e.ObjectSpaceProviders.Add(new MiddleTierServerObjectSpaceProvider(webApiSecuredClient));
            };
            //...
        }
    }
}
If the MySolution.Win\Program.cs file contains the following autogenerated code, comment it out:
File: MySolution.Win\Program.cs
namespace MySolution.Win {
    static class Program {
        [STAThread]
        static void Main() {
            //...
            //winApplication.GetSecurityStrategy().RegisterXPOAdapterProviders();
            //...
//#if DEBUG
//              if(System.Diagnostics.Debugger.IsAttached && winApplication.CheckCompatibilityType == CheckCompatibilityType.DatabaseSchema) {
//                  winApplication.DatabaseUpdateMode = DatabaseUpdateMode.UpdateDatabaseAlways;
//              }
//#endif
If your application’s ApplicationBuilder.cs file has a code that adds an XPO ObjectSpace provider to the application builder and adds integrated security, remove this code and add the code that initializes the Middle Tier security mode:
// Remove or comment out this code:
//builder.ObjectSpaceProviders
//    .AddSecuredXpo((application, options) => {
//        options.ConnectionString = connectionString;
//    })
//    .AddNonPersistent();
//builder.Security
//    .UseIntegratedMode(options => {
//        options.RoleType = typeof(PermissionPolicyRole);
//        options.UserType = typeof(DXApplication7.Module.BusinessObjects.ApplicationUser);
//        options.UserLoginInfoType = typeof(DXApplication7.Module.BusinessObjects.ApplicationUserLoginInfo);
//        options.UseXpoPermissionsCaching();
//    })
//    .UsePasswordAuthentication();

// Add this code:
builder.Security
.UseMiddleTierMode(options => {
    options.BaseAddress = new Uri("https://localhost:5001/");
}, securityModuleOptions => {
    securityModuleOptions.NonSecureActionsInitializing += (s, e) =>
        e.NonSecureActions.Add("Demo About Info");
})
.UsePasswordAuthentication();
You do not need to enable the Security Adapter and set the database update mode for the Middle Tier Server.
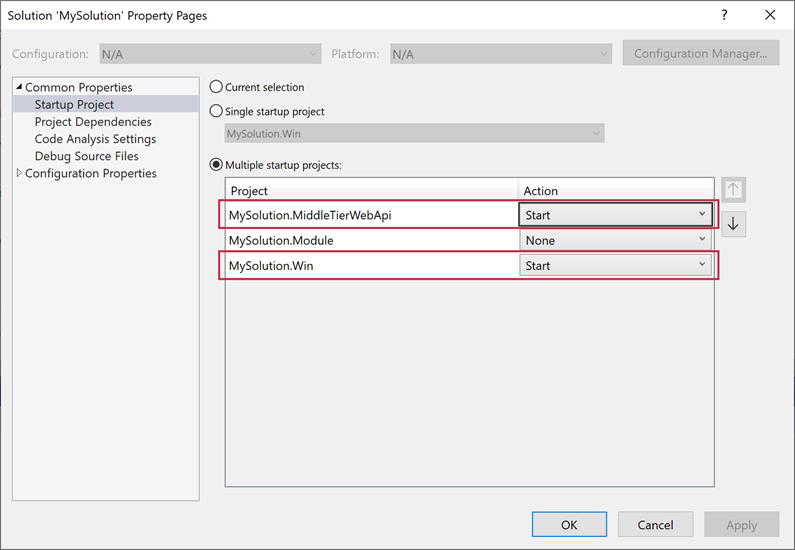
Right-click the Solution node in the Solution Explorer and choose Properties. In the Solution Property Pages dialog, expand the Common Properties node and select Startup Project. Choose the Multiple Startup Projects option and select the Start action for the Web API and MySolution.Win projects.
Run the application.