Add an Action that Displays a Pop-Up Window
- 4 minutes to read
This lesson explains how to create an Action that shows a pop-up window. This type of Action is useful when users want to input multiple parameters in a pop-up dialog before they execute an Action.
Note
Before you proceed, take a moment to review the previous lessons:
In this tutorial, you will implement the ability to add notes from a predefined list to task descriptions.
Implement a New Entity
Expand the MySolution.Module project and right-click the Business Objects folder. Choose Add | Class…. Specify Note.cs as the new class name and click Add.
Replace the generated class declaration with the following code snippet:
using DevExpress.ExpressApp.DC;
using DevExpress.Persistent.Base;
using System.ComponentModel;
using System.ComponentModel.DataAnnotations;

namespace MySolution.Module.BusinessObjects;

[DefaultProperty(nameof(Text))]
[ImageName("BO_Note")]
public class Note {

    [Key, Browsable(false)]
    [DevExpress.ExpressApp.Data.Key]
    [HideInUI(HideInUI.All)]
    public virtual Guid ID { get; set; }
    public virtual String Author { get; set; }
    public virtual DateTime? DateTime { get; set; }

    [FieldSize(FieldSizeAttribute.Unlimited)]
    public virtual String Text { get; set; }
}
Register the
Notetype inDbContext. Edit the BusinessObjects\MySolutionDbContext.cs file as shown below:public class MySolutionEFCoreDbContext : DbContext { // ... public DbSet<Note> Notes { get; set; } }
Create a View Controller
- Add a new View Controller to the MySolution.Module project. Name it PopupNotesController.
In the PopupNotesController.cs file, specify the controller properties:
using DevExpress.ExpressApp;
using MySolution.Module.BusinessObjects;
// ...
public partial class PopupNotesController : ViewController {
    // ...
    public PopupNotesController() {
        InitializeComponent();
        //Target the required Views and create their Actions
        TargetObjectType = typeof(DemoTask);
        TargetViewType = ViewType.DetailView;
    }
    // ...
}
Add the
ShowNotesActionaction and handle itsCustomizePopupWindowParamsevent:public partial class PopupNotesController : ViewController { public PopupNotesController() { InitializeComponent(); TargetObjectType = typeof(DemoTask); TargetViewType = ViewType.DetailView; /*Invoke a pop-up window with a specified View and execute custom code when a user clicks the OK or Cancel button.*/ PopupWindowShowAction showNotesAction = new PopupWindowShowAction(this, "ShowNotesAction", PredefinedCategory.Edit) { Caption = "Show Notes" }; showNotesAction.CustomizePopupWindowParams += ShowNotesAction_CustomizePopupWindowParams; } private void ShowNotesAction_CustomizePopupWindowParams(object sender, CustomizePopupWindowParamsEventArgs e) { //Create a List View for Note objects in the pop-up window. e.View = Application.CreateListView(typeof(Note), true); } // ... }Add and handle the
ShowNotesAction‘sExecuteevent. It occurs when a user clicks OK in the pop-up window. The event handler code appends theNote.Textproperty value to theTask.Descriptionproperty value.// ... public PopupNotesController() { // ... showNotesAction.Execute += ShowNotesAction_Execute; } private void ShowNotesAction_Execute(object sender, PopupWindowShowActionExecuteEventArgs e) { DemoTask task = (DemoTask)View.CurrentObject; foreach(Note note in e.PopupWindowViewSelectedObjects) { if(!string.IsNullOrEmpty(task.Description)) { task.Description += Environment.NewLine; } // Add selected note texts to a Task's description task.Description += note.Text; } View.ObjectSpace.CommitChanges(); }The event handler’s e.PopupWindowViewSelectedObjects parameter provides an object that a user selects in the pop-up window.
Run the application.
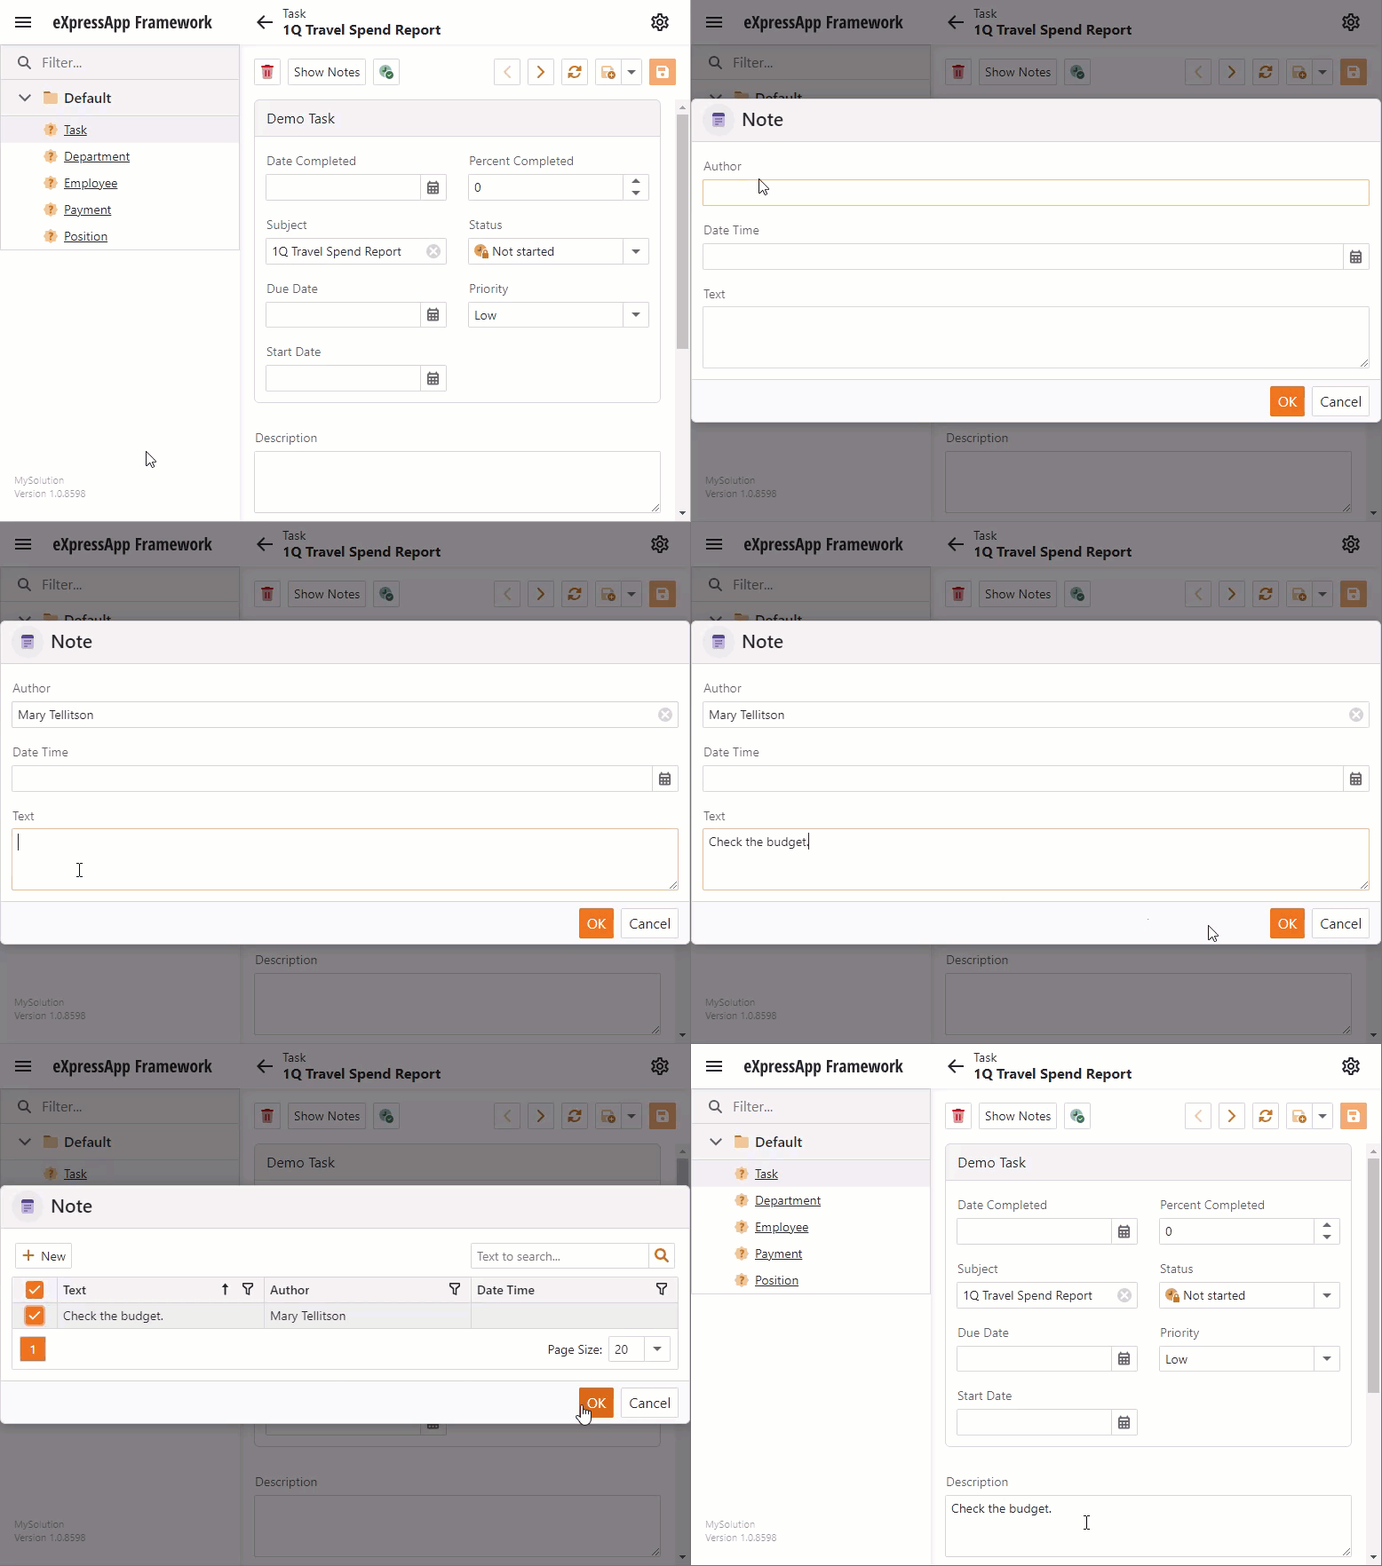
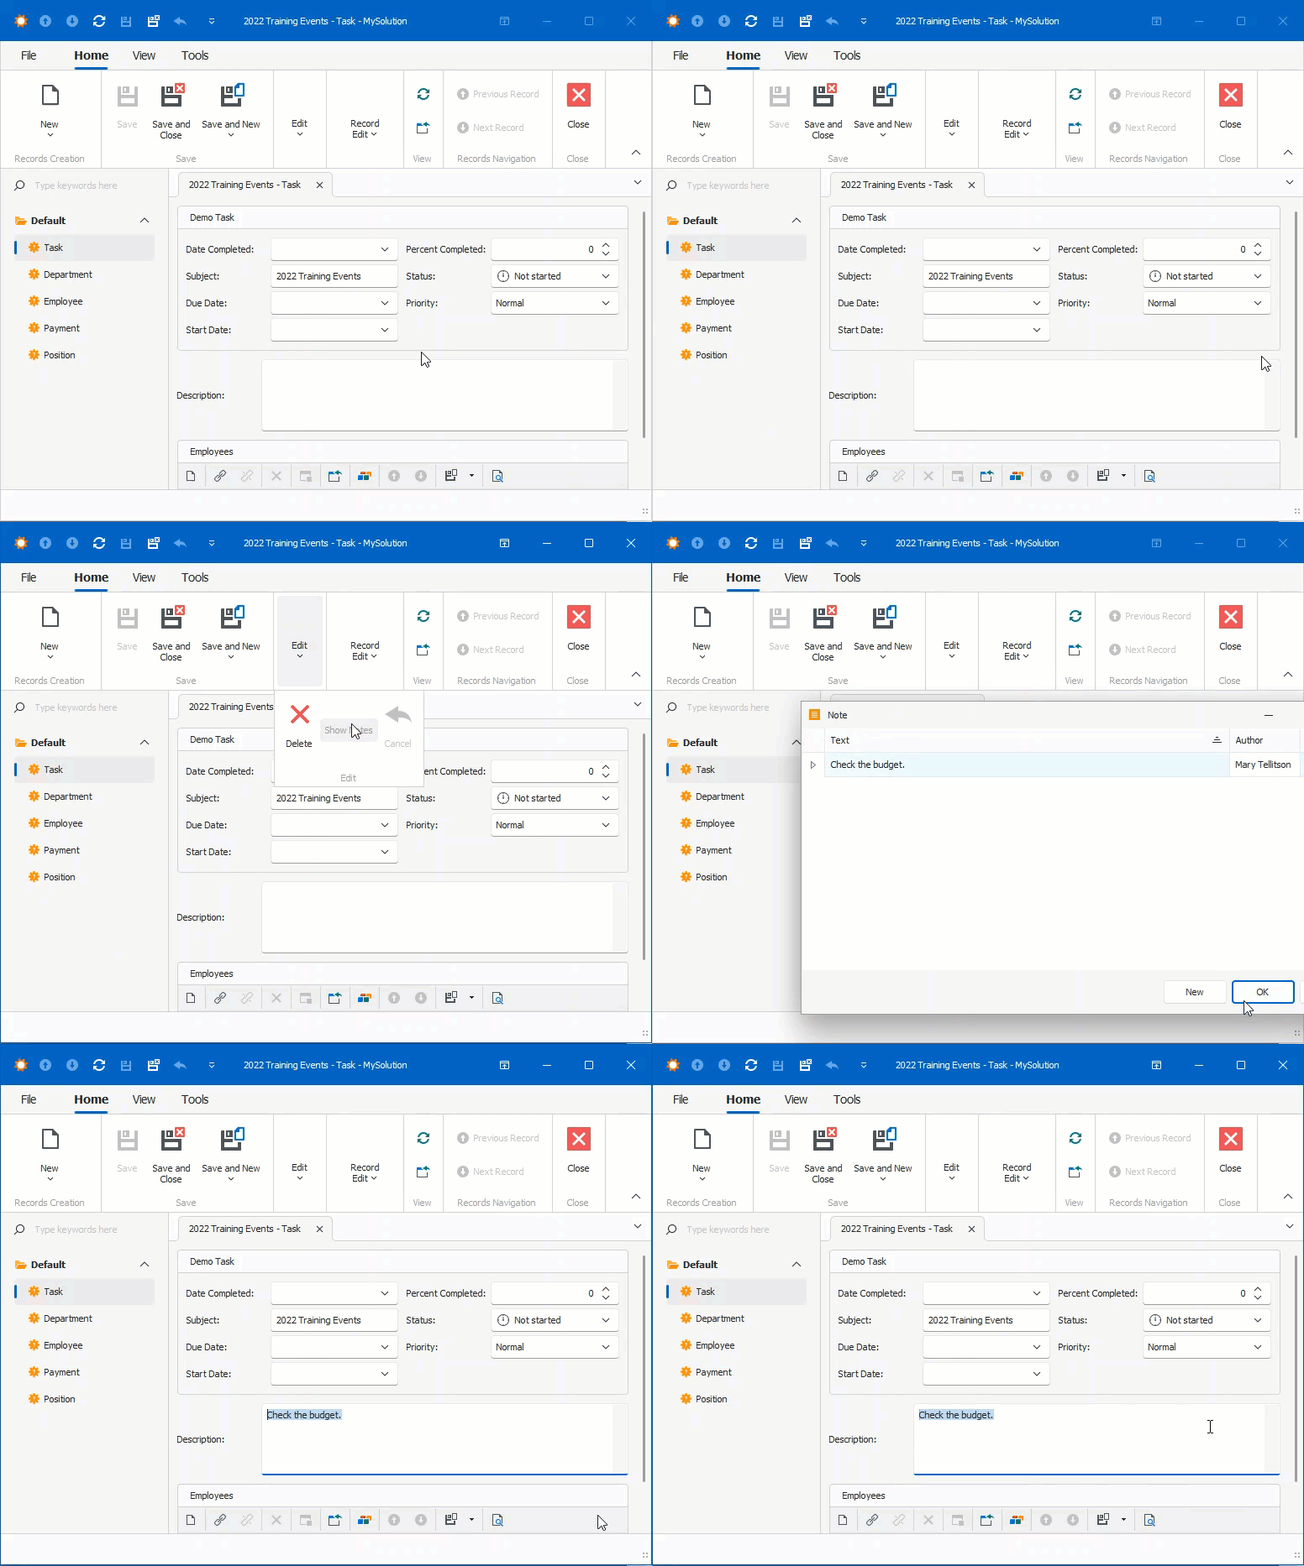
Open a Task item’s Detail View. The Detail View toolbar displays the Show Notes button. This is the action implemented in this lesson.
Click the button to open the pop-up window. The pop-up window displays a list view for the Note objects. Create a Note object.
Click this Note object in the list. The
Task.Descriptionproperty value should change.- ASP.NET Core Blazor

- Windows Forms

For an example of how to create and show a Detail View, refer to the following topic: How to: Create and Show a Detail View of the Selected Object in a Popup Window.
Note
CodeRush allows you to add Actions and Controllers with a few keystrokes. To learn about the Code Templates for XAF, refer to the following help topic: XAF Templates.
Next Lesson
Add an Action with Option Selection