Change an Application Logo and About Information
- 3 minutes to read
This topic describes how to change an application logo and description text. The following list details where these elements appear depending on the application platform.
ASP.NET Core Blazor: the top-left corner of the application’s main page.

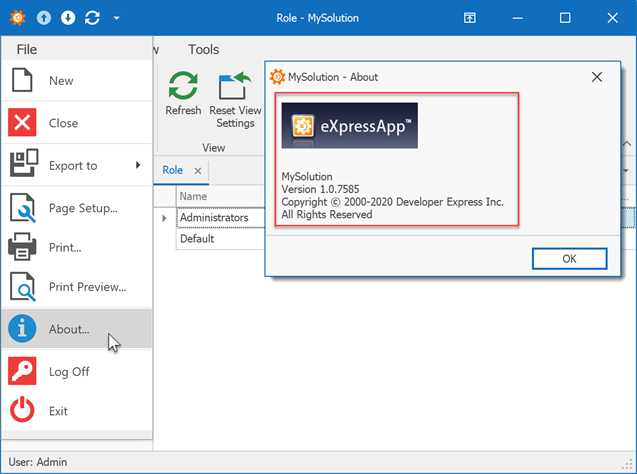
Windows Forms: the application’s About window.
In Windows Forms applications, you can use an embedded resource image as a logo.
Note
In Windows Forms applications, you can use the AboutInfoController.AboutInfoAction Action to invoke the About window. It contains the AboutInfo object’s Detail View (AboutInfo_DetailView).
ASP.NET Core Blazor applications display the AboutInfoString property value on the Template.
Specify Application Information
In the Model Editor, you can use the following properties or the root Application node to specify application name, description, vendor, copyright, and version:

Use a Custom Logo Image
In ASP.NET Core Blazor Applications
XAF adjusts the specified logo image according to the current theme and renders it as monochromatic (black and white) by default.
Depending on your application behavior or corporate style, you can use one of the following techniques:
Colorful Logo
To preserve the colors of your custom logo, specify the background-image attribute.
- Add the image you want to use to the MySolution.Blazor.Server\wwwroot\images folder.
Navigate to the YourSolutionName.Blazor.Server\wwwroot\css\site.css file and specify the image’s name in the
header-logoCSS class..header-logo { background-image: url(../images/CustomLogo.svg); width: 180px; height: 24px; /* ... */ background-position: center; background-size: contain; background-repeat: no-repeat; }
Black and White Logo
If you do not want a colored custom logo and prefer that your current theme makes the logo image monochromatic (black and white), use the mask attribute.
Set the background-color property to currentColor to use the current color style. This applies to SVG images only.
- Add the image you want to use to the MySolution.Blazor.Server\wwwroot\images folder.
Navigate to the YourSolutionName.Blazor.Server\wwwroot\css\site.css file and specify the image’s name in the
header-logoCSS class..header-logo { -webkit-mask: url('../images/CustomLogo.svg'); mask: url('../images/CustomLogo.svg'); width: 180px; height: 24px; /* ... */ background-color: currentColor; -webkit-mask-position: center; mask-position: center; -webkit-mask-repeat: no-repeat; mask-repeat: no-repeat; }
In Windows Forms Applications
To use a custom logo, follow the steps below:
Save your custom logo to the Images folder in the module project (for example, MySolution.Module\Images\CustomLogo.png).
In Solution Explorer, click the Show All Files toolbar button. In the Images sub-folder, right-click the image you added and choose Include In Project.
- Switch to the Properties window. Set the Build Action option to Embedded Resource.
Rebuild the solution and invoke the Model Editor. Focus the root Application node and click the IModelApplication.Logo property’s ellipsis button. In the invoked Image Picker dialog, choose your logo.

If you enter the image name manually, omit the file extension.
Note
In Windows Forms applications, the default logo is specified in the user differences layer (individual user settings). To use the logo specified in the user differences, open the Model.xafml file from the application project, navigate to the Application node, and delete the Logo property value.
To ensure changes to the logo in a Windows Forms application, run the application and invoke the About window.

Refer to the Application Personalization topic for more information on the About window.