Date Range Report Parameters
- 6 minutes to read
This topic describes how to create a date range parameter and filter report data by the specified dates.
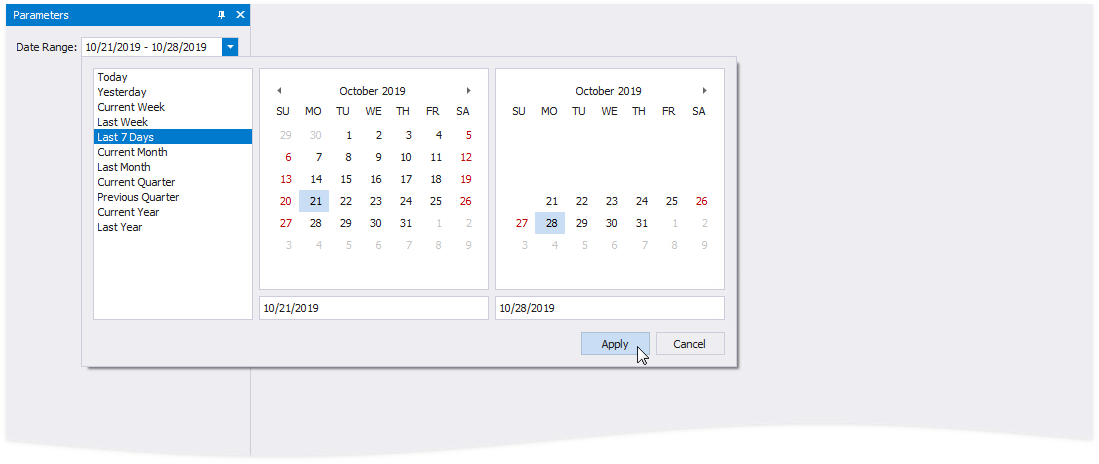
A date range parameter’s editor in Preview
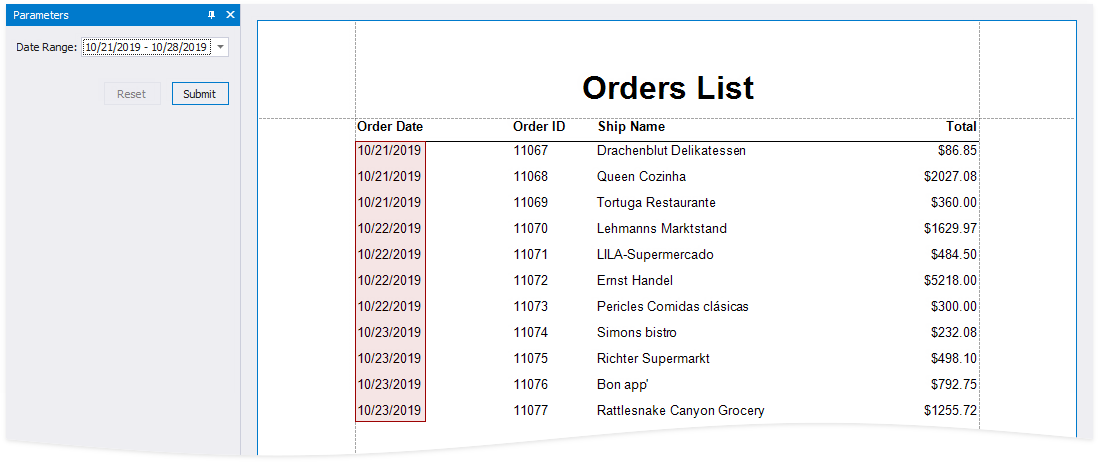
The report data is filtered by the date range.
Design Time
Perform the steps below to add a date range parameter to a report in a Report Designer.
Switch to the Field List and right-click Parameters. Select Add Parameter from the context menu.

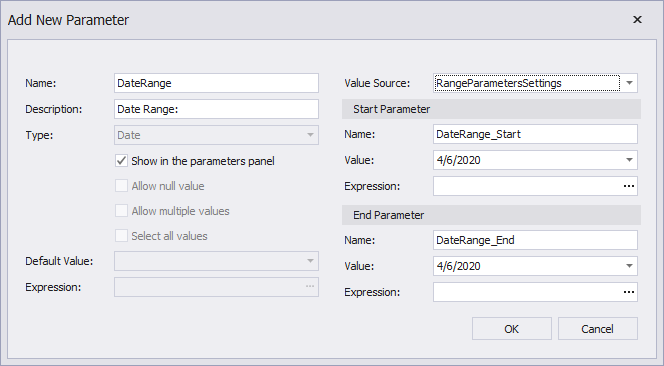
In the invoked Add New Parameter dialog, specify the options below and click OK.
-
The parameter’s name.
-
The parameter’s description displayed to users.
-
The parameter’s data type. Set it to Date to create a date range.
Show in the parameters panel (corresponds to the parameter’s Visible property)
This option shows the parameter editor in the Document Viewer’s Parameters panel. For more information, see the following help topic section: Create a Report Parameter.
Value Source (corresponds to the parameter’s ValueSourceSettings property)
Settings that are used to generate the parameter’s predefined values. Set this property to RangeParametersSettings. The Start Parameter and End Parameter sections appear, and you can configure parameters which comprise the date range.
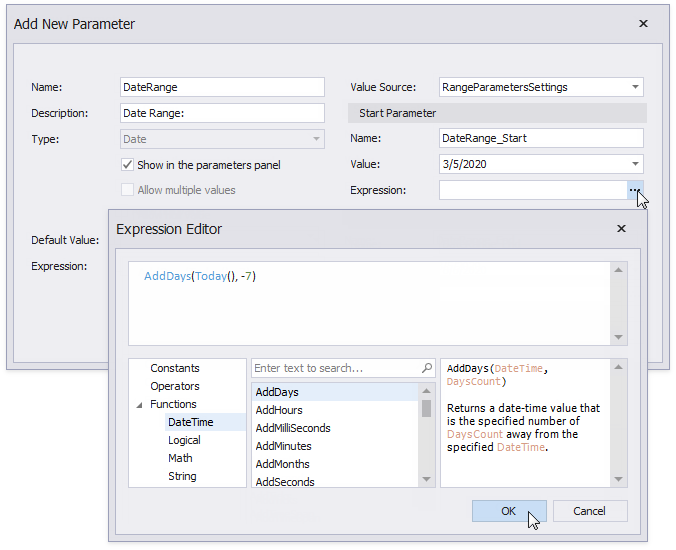
Use the Start Parameter and End Parameter Value properties to specify the initial values. To conditionally specify parameter values or to bind them to fields or other parameters, use the Expression properties. Click the Expression property’s ellipsis button and specify the expression in the invoked Expression Editor.
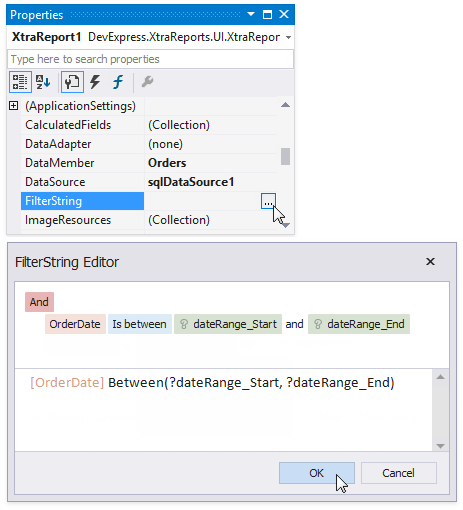
Use the start and end parameter names in the report’s FilterString to filter data by the newly created date range. Select the report, click the FilterString‘s ellipsis button in the Property Grid and construct the filter string in the invoked FilterString Editor.
Note
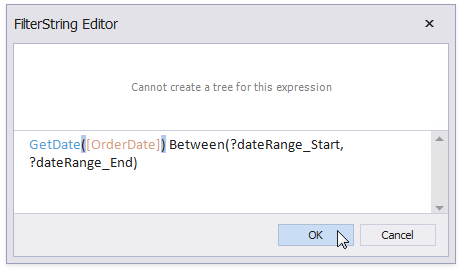
The start and end parameter values store the selected day’s midnight time. For instance, if a user chooses 10/15/2019, the DateTime value is 10/15/2019 12:00:00 AM. If your date fields include non-midnight times, records for the end date 10/15/2019 are excluded from the report. To include data for the 10/15/2019 date, use the GetDate() function in the FilterString Editor.
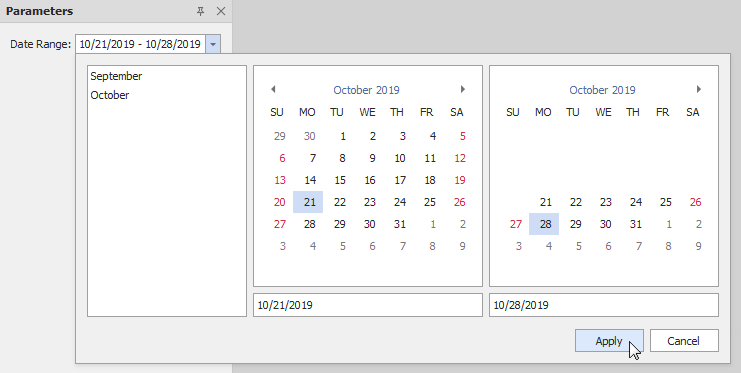
When users switch to the Preview tab, the Parameters panel displays the date range parameter. After a user submits a start and end date, the report document shows filtered data.
A date range parameter’s editor in Preview
The report data is filtered by the date range.
Runtime
The code sample below illustrates how to create a date range parameter in a report, and to filter report data by the specified date range.
using DevExpress.XtraReports.Parameters;
using DevExpress.XtraReports.Expressions;
// ...
XtraReport1 report = new XtraReport1();

// Create a date range parameter.
Parameter myDateRange = new Parameter();
myDateRange.Name = "myDateRange";
myDateRange.Description = "Date Range:";
myDateRange.Type = typeof(System.DateTime);
RangeParametersSettings myDateRangeSettings = new RangeParametersSettings();

// Specify the start date and end date's default values.
myDateRangeSettings.StartParameter.Name = "MyDateRangeStart";
myDateRangeSettings.StartParameter.ExpressionBindings.Add(new BasicExpressionBinding("Value", "AddDays(Today(), -7)"));
myDateRangeSettings.EndParameter.Name = "MyDateRangeEnd";
myDateRangeSettings.EndParameter.ExpressionBindings.Add(new BasicExpressionBinding("Value", "Today()"));
myDateRange.ValueSourceSettings = myDateRangeSettings;
report.Parameters.Add(myDateRange);

// Filter report data by the specified date range.
report.FilterString = "GetDate([OrderDate]) Between(?MyDateRangeStart,?MyDateRangeEnd)";
Related API |
|---|
Customize Predefined Ranges
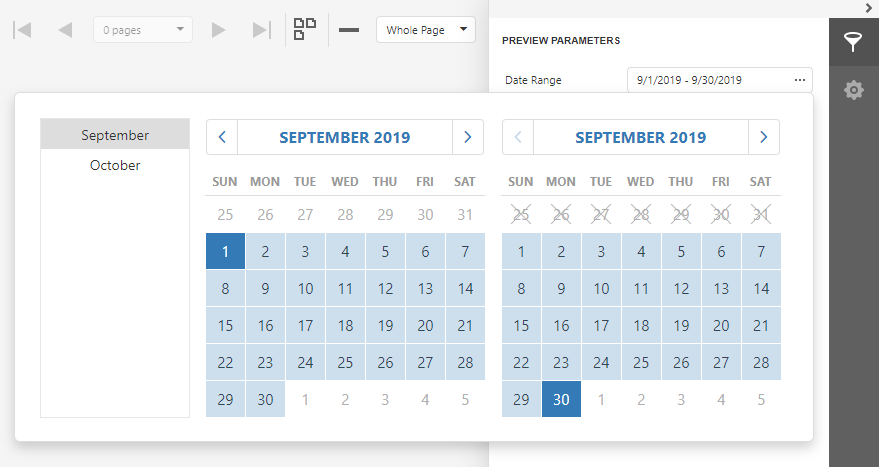
The date range parameter editor allows the user to select a range from a list of predefined ranges. You can remove items from the list, or create a custom predefined range and add it to the list.
WinForms and WPF Reporting
The set of predefined date ranges is stored in the RangeParameterEditorOptions static class and is available in all date range parameter editors when they are displayed in the Preview tab.
Use the following code:
using DevExpress.XtraReports.Parameters;
using DevExpress.XtraReports.Expressions;
// ...
// Remove all predefined ranges and add two new date ranges.
RangeParameterEditorOptions.PredefinedDateRanges.Clear();
RangeParameterEditorOptions.RegisterDateRange("September", () => new DateTime(2019,9,1), () => new DateTime(2019,9,30));
RangeParameterEditorOptions.RegisterDateRange("October", () => new DateTime(2019,10,1), () => new DateTime(2019,10,31));
Web Reporting
Predefined date ranges are stored in the client-side collection of Document Viewer widgets. The set of predefined date ranges is available in all date range parameter editors when they are displayed in the Preview tab.
The following code removes built-in predefined ranges and adds two custom predefined ranges. The code works in our latest releases (v20.1.8 and later).
<script type="text/javascript" id="script">
    function CustomizePredefinedRanges(s, e) {
        DevExpress.Reporting.Viewer.Widgets.predefinedDateRanges.splice(0,
            DevExpress.Reporting.Viewer.Widgets.predefinedDateRanges.length);

        DevExpress.Reporting.Viewer.Widgets.predefinedDateRanges.push({
            displayName: 'September',
            range: () => [
                new Date(2019, 8, 1),
                new Date(2019, 8, 30)
            ]
        })
        DevExpress.Reporting.Viewer.Widgets.predefinedDateRanges.push({
            displayName: 'October',
            range: () => [
                new Date(2019, 9, 1),
                new Date(2019, 9, 31)
            ]
        })
    }
</script>

<dx:ASPxWebDocumentViewer ClientInstanceName="WebDocumentViewer1" ID="ASPxWebDocumentViewer1" runat="server">
    <ClientSideEvents BeforeRender ="CustomizePredefinedRanges" />
</dx:ASPxWebDocumentViewer>